Daydream Medallions & Tool Tip

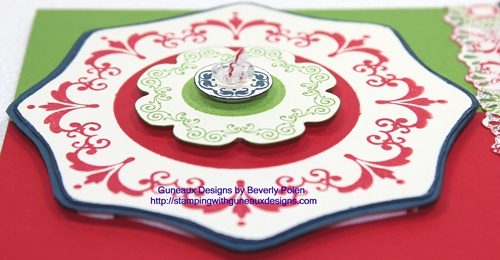
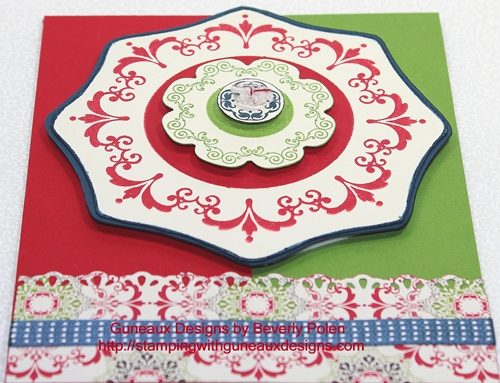
Today I am sharing a card that features the item I discussed in my last post — the stamp image from the Daydream Medallions (126467) stamp set.  Daydream Medallions is a stamp set intended to be used with the Floral Frames Framelits (127012); however, I did not use them for this card, as you can see.
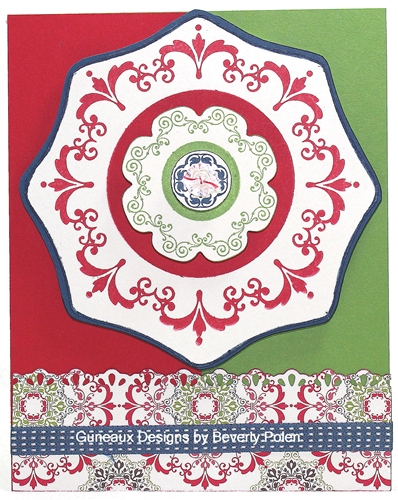
 

For my previous post, no one attempted a guess on how I created the frame around the Daydream Medallions stamp image shown on the card.  Thus, let me reveal to you how to create this frame.  As stated in my last post, if you closely examine the stamp set, you will see the frame.  However, the following provides the tip.

TOOL TIP FOR DAYDREAM MEDALLIONS

For background purposes, let me share first that I keep the foam-backed rubber pieces that are left after removing Stampin’ Up! die-cut stamps.  I remove the paper from the back of the rubber pieces, place them back inside the stamp set cases, and insert the stamps back into the appropriate pieces after using them.  With the paper removed from the rubber, the pieces will stick to the plastic cases, as well as the clear blocks for clear-mounted stamps.  I refer to the left-over rubber pieces as the outlines of the die-cut stamps.

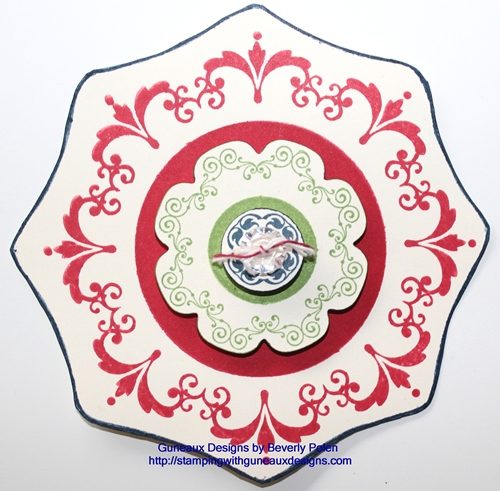
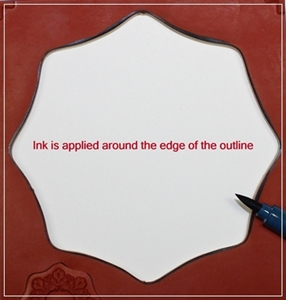
Some of the outline rubber pieces can be used as actual stamps when the design of the outline affords that opportunity!  That is how I created the frame around the large, stamped medallion from the Daydream Medallions stamp set.  I positioned the large medallion outline onto the Stampin Up Clear Block F (118483), used a Stampin’ Write Marker to apply ink around the outline of the medallion, and stamped the outline onto a piece of Very Vanilla card stock.  I then stamped the medallion within the frame.  That’s it!!  Try it; you’ll like it!
Stampin Up Products:

Stamp Set:  Daydream Medallions (c – 126467)

Paper:  Very Vanilla Card Stock, Gumball Green Card Stock, Real Red Card Stock, Midnight Muse Card Stock, and Candlelight Christmas Specialty Designer Series Paper (126901)

Ink:  Midnight Muse Stampin Write Marker, Real Red Classic, Gumball Green Classic, and Midnight Muse Classic

Accessories: Finishing Touches Edgelits Die (127010), Midnight Muse 3/8″ Stitched Satin Ribbon, and Vintage Faceted Designer Button

God’s Blessings!

Stamping With Guneaux Designs

Daydream Medallions

It is intended that the gorgeous Stampin Up Daydream Medallions Stamp Set (126467) be used with the wonderful Floral Frames Framelits (127012), right?  Being a person who tends to “think outside of the box”, I did not use the Floral Frames Framelits to frame the Daydream Medallions image in the picture below.  The picture is of an element that I am using to make a greeting card.

Looking closely, can you tell me how I made the frame around the Daydream Medallion stamp image?  If you have the Daydream Medallions stamp set, get it out and examine it closely and take a guess at how I framed the stamp image.  Leave your “guess” in the comments, and come back tomorrow to see the answer and the card that I made.

If I receive no guesses, I’ll assume there is no interest in learning a new method for framing the Daydream Medallions.

If you don’t have the Daydream Medallions stamp set, you can purchase it at my on-line shop.

Have a blessed day! Buy Stampin Up Products

God’s Blessings!
Stamping With Guneaux Designs
by
Beverly Polen

Think outside of the box when creating your artwork, especially when using the Daydream Medallions stamp set. 

Stampin Up Paper Flowers – Thinking of You

Recall recently that I shared a post on how to make Stampin Up Paper Flowers?  Well, today I am sharing a card I made with the paper flowers that I featured in that post.  

Stampin Up Paper Flowers Card

Stampin Up Paper Flowers

Stampin Up Paper Flowers

(I’m not sure, but I’m thinking that this card featuring Stampin Up Paper Flowers is too busy.  What do you think?) 


STAMPIN UP PRODUCTS (see previous post for products used for making the Stampin Up Paper Flowers):

Stamps Sets:  Four Frames (123442) and Silhouette Sentiments (retired)
Paper (card stock):  Midnight Muse (126843), Summer Starfruit (126839), Whisper White (100730), Raspberry Ripple (126842), and Gumball Green (126840)
Ink:  Midnight Muse Classic Pad (126860), Raspberry Ripple Classic Pad (126859), and Blue Permanent Marker
Accessories:  Fancy Fan Embossing Folder (127751), Flourish Designer Frames (127835), Finishing Touches Edgelits (127010), Big Shot Die-Cutting Machine, Raspberry Ripple 3/8″ Stitched Satin Ribbon, and Bird W/Leaves & Flower Bigz Die (retired)


INSTRUCTIONS:  (The instructions do not include how to make the Stampin Up Paper Flowers.  Refer to this post for that information.)

1.  Cut an 8-1/2″ x 5-1/2″ piece of Midnight Muse card stock and fold in half to create card base.

2.  Cut a 4″ x 5-1/4″ piece of Summer Starfruit card stock, place it inside the Fancy Fan Embossing Folder, and run through the Big Shot.

3.  Finish the right side of the Fancy Fun embossed Summer Starfruit card stock with the Finishing Touches Edgelit (see picture).

 4.  Cut out stems and leaves with a Stampin Up die or punch.  I used the retired Bird W/Leaves and Flowers Bigz Die.

 5.  Stamp the image from the Four Frames Stamp Set onto Whisper White card stock using Raspberry Ripple ink.

6.  Stamp a sentiment in the center of the Frame.

7.  Color a Flourish Designer Frame blue (or shade thereof) with a permanent marker.

8.  Tie a piece of Raspberry Ripple Stitched Satin Ribbon into a bow.

9.  Assemble the card according to the picture.

10.  Enjoy your masterpiece!

 Buy Stampin Up Products

God’s Blessings!
Stamping With Guneaux Designs
by
Beverly Polen 


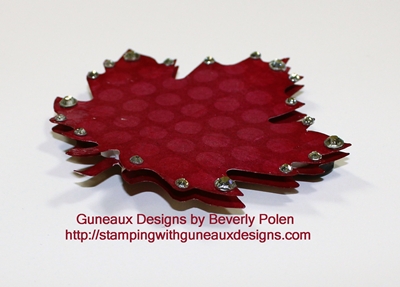
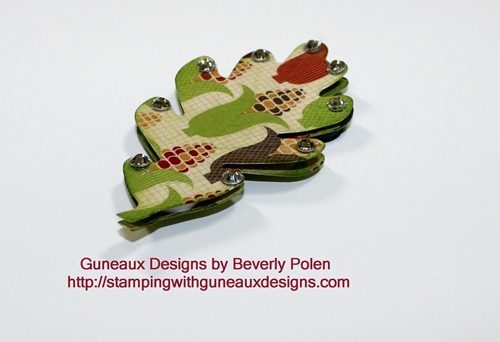
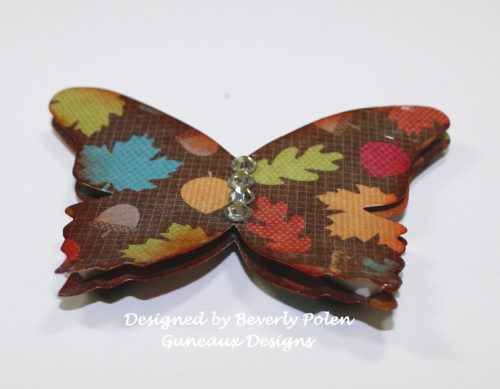
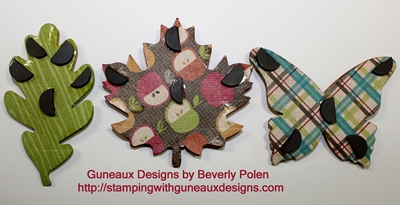
Stampin Up Fridge Magnets

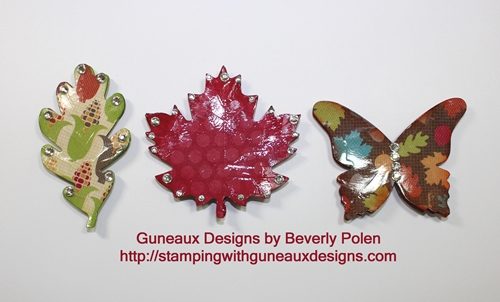
Aren’t these Stampin Up Fridge Magnets sooooo cute.  Image the different kinds you can make!  And with the holidays coming up, what perfect gifts these would be.

Here are more pictures of the Stampin Up Fridge Magnets:


Again, the Stampin Up Fridge Magnets are so very easy and quick to make.  I can’t wait to make more with a Christmas theme!

STAMPIN UP SUPPLIES:

Paper:  Your Choice – I chose the Stampin Up Orchard Harvest Designer Series Paper (126895)

Accessories:  Bigz Autumn Accents Die (127812), Bigz Beautiful Butterflies Die (114507), Big Shot Die Cutting Machine (113439), Crystal Effects (101055), Basic Rhinestones (119246), Stampin’ Dimensionals (104430), and Magnets (from local craft store)

INSTRUCTIONS FOR MAKING STAMPIN UP FRIDGE MAGNETS:

1. Select Stampin Up Original or Bigz Dies that would produce appropriately sized magnets.  I chose the dies mentioned in the above supply list.

2. Select a Stampin Up Designer Series Paper (I used the Orchard Harvest Designer Series Paper (126895).

3. Prepare your Big Shot “sandwich” and run it through the machine. Cut out two of each design.

4. Apply a very thin coat of Crystal Effects over each design and allow to dry.

5. After drying, adhere the two cutouts of each design together using Stampin’  Dimensionals.

6. Decorate with Basic Rhinestones or other accessories as desired.

7.  Using Crystal Effects, adhere magnets to the back side of each design.

Now, how easy is that? Enjoy your fridge magnets!!

God’s Blessings!
Stamping With Guneaux Designs
by
Beverly Polen

Make Christmas-related Stampin Up Fridge Magnets!

Stampin Up Postage Due

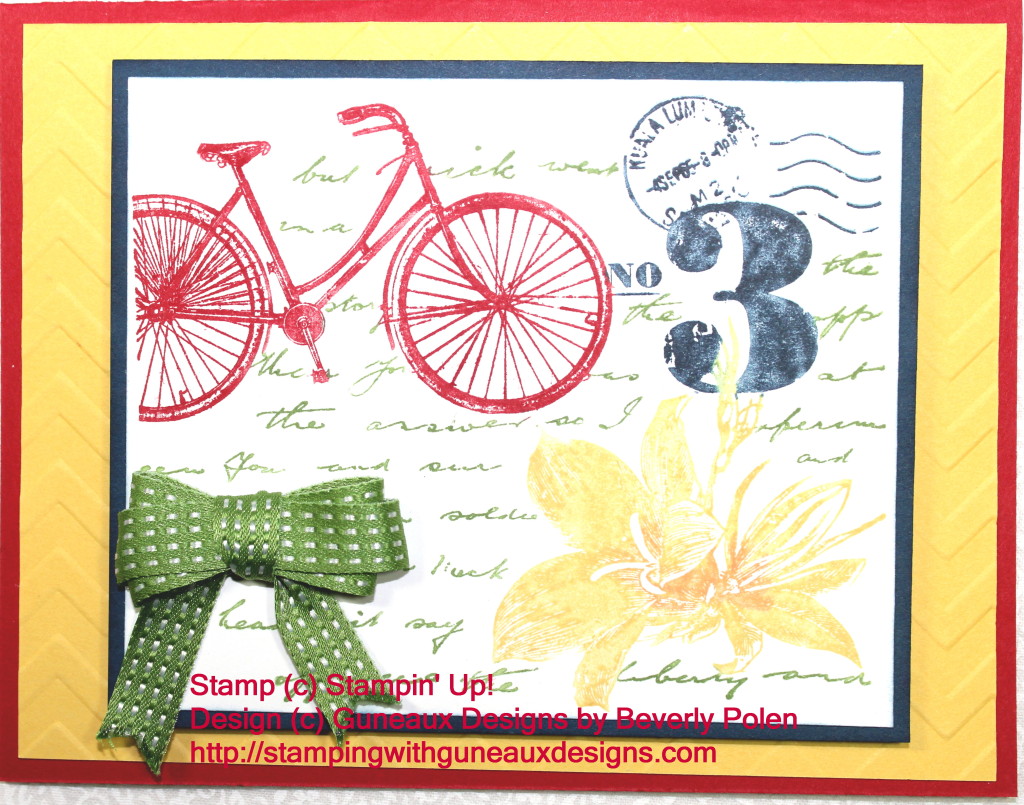
Are you enjoying my posts featuring the Stampin Up Postage Due Stamp Set (126397)?  I hope so as I am enjoying using the stamp set.

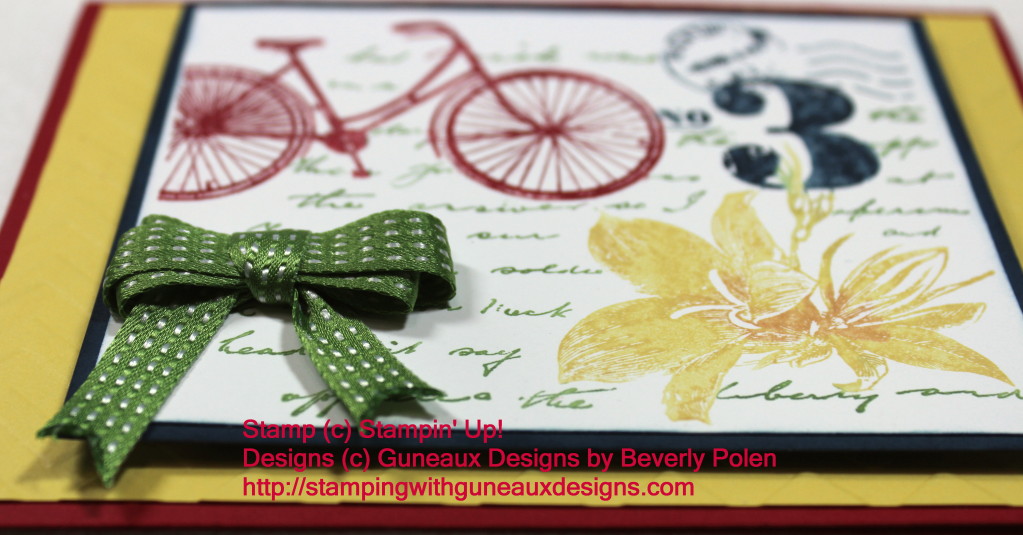
As a youngster (oh, how long ago), my first bicycle was red.  Reflecting on that, I decided to make the bicycle on the Stampin Up Postage Due stamp image red.  And, this card is different than the previous two as the stamped image is made with multiple colors.

STAMPIN UP PRODUCTS USED (includes Catalog item numbers):

Stamp Set:  Stampin Up Postage Due (126397)
Paper (Card Stock):  Real Red (102482), Daffodil Delight (119683), Midnight Muse (126843), and Whisper White (100730)
Ink (Stampin’ Write Markers):  Real Red (100052), Midnight Muse (126856), Daffodil Delight (119677), and Gumball Green (126856)
Accessories:  Big Shot Die-Cutting Machine (113439), Chevron Textured Impressions Embossing Folder (127749), Gumball Green 3/8″ Stitched Satin Ribbon (126848), and Stampin’ Dimensionals (104430)

INSTRUCTIONS:

1.  Cut card stock according to the following:

  • 8-1/2″ x 5-1/2″ piece of Real Red, folded in half to form card base,
  • 4″ x 5-1/4″ piece of Daffodil Delight,
  • 4-1/4″ x 3-9/16″ piece of Midnight Muse (this size can vary, depending on whether you want to cut the Whisper White card stock smaller or larger), and
  • 3-3/8″ x 4-1/16″ piece of Whisper White (this size can vary, depending on whether you want more white space around the stamped image).

2.  Place the Daffodil Delight Card Stock into the Chevron Textured Impression Embossing Folder, and run through the Big Shot Die-Cutting Machine.

3.  Apply ink onto the stamp using Stampin’ Write Markers — color the bicycle Real Red, postage Midnight Muse, flower Daffodil Delight, and text Gumball Green.

4.  Stamp inked image onto the Whisper White card stock.

5.  Adhere the textured Daffodil Delight card stock to the Real Read card front.

6.  Adhere the stamped Whisper White card stock to the Midnight Muse card stock.

7. Place dimensionals on the back side of the Midnight Muse Card Stock (I double them to get more height).

8.  Cut a piece of Gumball Green ribbon, tie it into a bow, and attach to the bottom-left of the Whisper White card stock.

9.  Attached the Midnight Muse and Whisper White card stock onto the Daffodil Delight card stock.

10.  Sit back and enjoy your beauty!     

God’s Blessings!
Stamping With Guneaux Designs
by
Beverly Polen

Buy the Stampin Up Postage Due stamp set.  You’ll enjoy it!

Blending Inks Technique – Stampin Up

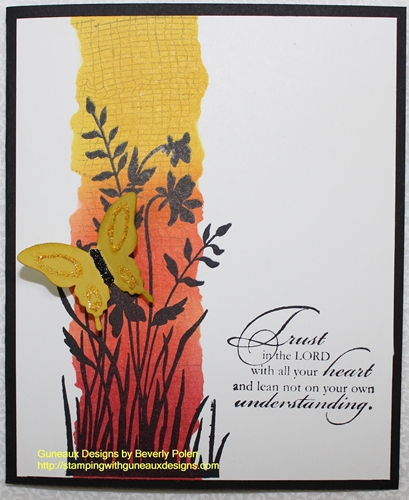
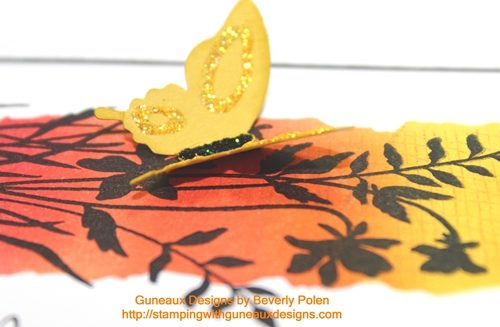
Today’s post is about blending inks to create beautiful artwork.  This technique is very easy and you can quickly create very attractive cards using the technique, such as the following  three cards.

What is blending inks?   Looking at the cards below, it seems obvious, right?  Regardless, let me share that it is selecting and blending two or more inks to create subtle shades and colors to your paper crafting artwork.

Blending Inks

I have selected one of the three cards to provide you with instructions on the blending inks technique.


 STAMPIN’ UP! SUPPLIES:

Stamp Sets:  Just Believe (120453), Trust God (126702)  [love this stamp set], and a Background Stamp of your choice (I used a retired Stampin’ Up stamp)

Paper:  Basic Black Card Stock (121045) and Whisper White Card Stock (100730)

Ink (Classic):  Summer Starfruit (126991), Calypso Carol (126983), Primrose Petals (126858), Crumb Cake (126975), and Jet Black StazOn (101406)

Accessories:  Stamping Sponge wedges (101610), Elegant Butterfly Punch (127526), and Post-It Notes or scrap card stock


 Instructions for the blending inks technique are below the two following pictures.

INSTRUCTIONS:

  • Cut a piece (the size depends on the stamp image used) of Whisper White Card Stock (mine is 4″ x 4-7/8″)
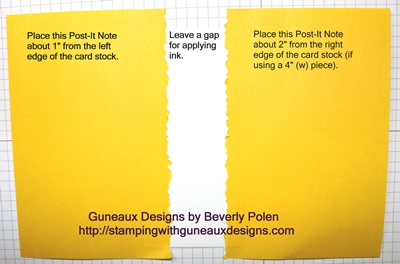
  • Tear the edges of the sticky side of two Post-It Notes, being careful to leave some of the sticky edge available
  • Place the torn Post-It Notes onto the Whisper White Card Stock as shown in the below picture with the opening between the Notes closer to the left side of the card stock

Now you are ready to start blending inks according to the following:

  • Cover a sponge wedge (or blending tool) with Summer Starfruit ink and apply in a circular motion to the upper 1/3 of the opening in the card stock, being careful to avoid lifting the edges of the Post-It Notes
  • Cover a sponge wedge with Calypso Carol ink and apply in a circular motion to the middle 1/3 of the card stock below the Summer Starfruit ink
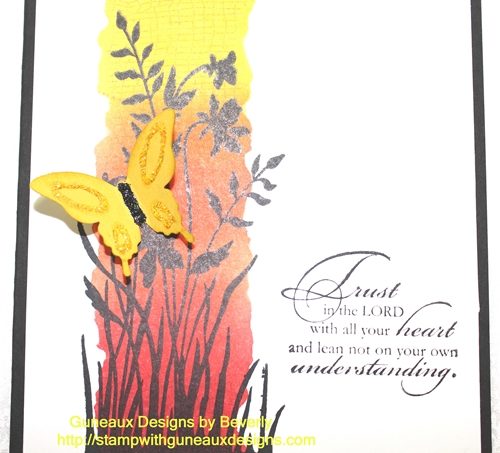
  • Blend the edges of the two inks (see picture of card), producing a different shade of color
  • Cover a sponge wedge with Primrose Petals ink and apply to the bottom 1/3 of the card stock, blending it with the Calypso Carol ink to create a different shade of color
  • Cover a background stamp with Crumb Cake ink and stamp over the three colors you’ve just blended
  • Remove the Post-It Notes

At this point, you’ll decorate the card stock according to the following:

  • Cover the largest stamp image from the Just Believe Stamp Set  (a floral silhouette) with Jet Black StazOn ink and stamp the image over the blended inks
  • Cover a sentiment from the Trust God Stamp Set with Jet Black StazOn ink and stamp the sentiment on the lower-right side of the card stock
  • Cut an 8-1/2″ x 5-1/4″ piece of Basic Black Card Stock and fold in the middle for a card base
  • Attach the decorated piece of Whisper White Card Stock to the Basic Black card base
  • Using the Elegant Butterfly Punch, cut out a butterfly, decorate it as desired, and attach to the card

You have just learned the Blending Inks Technique!

God’s Blessings!
Stamping With Guneaux Designs
Beverly Polen

Use the blending inks technique to create quick and easy cards!