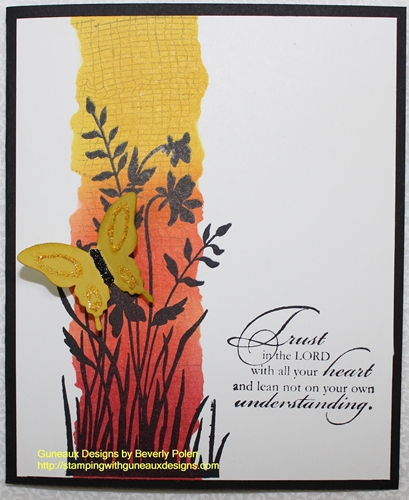
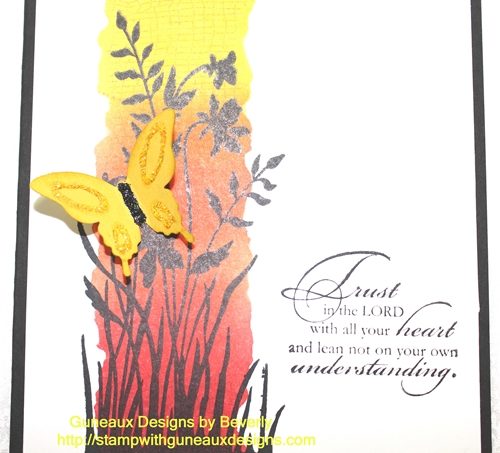
Today’s post is about blending inks to create beautiful artwork. This technique is very easy and you can quickly create very attractive cards using the technique, such as the following three cards.
What is blending inks? Looking at the cards below, it seems obvious, right? Regardless, let me share that it is selecting and blending two or more inks to create subtle shades and colors to your paper crafting artwork.

I have selected one of the three cards to provide you with instructions on the blending inks technique.

STAMPIN’ UP! SUPPLIES:
Stamp Sets: Just Believe (120453), Trust God (126702) [love this stamp set], and a Background Stamp of your choice (I used a retired Stampin’ Up stamp)
Paper: Basic Black Card Stock (121045) and Whisper White Card Stock (100730)
Ink (Classic): Summer Starfruit (126991), Calypso Carol (126983), Primrose Petals (126858), Crumb Cake (126975), and Jet Black StazOn (101406)
Accessories: Stamping Sponge wedges (101610), Elegant Butterfly Punch (127526), and Post-It Notes or scrap card stock
Instructions for the blending inks technique are below the two following pictures.

INSTRUCTIONS:
- Cut a piece (the size depends on the stamp image used) of Whisper White Card Stock (mine is 4″ x 4-7/8″)
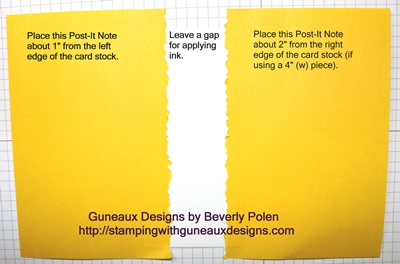
- Tear the edges of the sticky side of two Post-It Notes, being careful to leave some of the sticky edge available
- Place the torn Post-It Notes onto the Whisper White Card Stock as shown in the below picture with the opening between the Notes closer to the left side of the card stock

Now you are ready to start blending inks according to the following:
- Cover a sponge wedge (or blending tool) with Summer Starfruit ink and apply in a circular motion to the upper 1/3 of the opening in the card stock, being careful to avoid lifting the edges of the Post-It Notes
- Cover a sponge wedge with Calypso Carol ink and apply in a circular motion to the middle 1/3 of the card stock below the Summer Starfruit ink
- Blend the edges of the two inks (see picture of card), producing a different shade of color
- Cover a sponge wedge with Primrose Petals ink and apply to the bottom 1/3 of the card stock, blending it with the Calypso Carol ink to create a different shade of color
- Cover a background stamp with Crumb Cake ink and stamp over the three colors you’ve just blended
- Remove the Post-It Notes
At this point, you’ll decorate the card stock according to the following:
- Cover the largest stamp image from the Just Believe Stamp Set (a floral silhouette) with Jet Black StazOn ink and stamp the image over the blended inks
- Cover a sentiment from the Trust God Stamp Set with Jet Black StazOn ink and stamp the sentiment on the lower-right side of the card stock
- Cut an 8-1/2″ x 5-1/4″ piece of Basic Black Card Stock and fold in the middle for a card base
- Attach the decorated piece of Whisper White Card Stock to the Basic Black card base
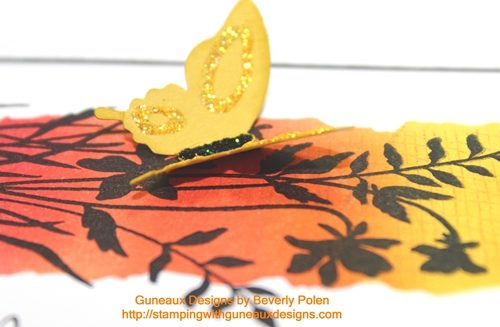
- Using the Elegant Butterfly Punch, cut out a butterfly, decorate it as desired, and attach to the card
You have just learned the Blending Inks Technique!
God’s Blessings!
Stamping With Guneaux Designs
Beverly Polen
Use the blending inks technique to create quick and easy cards!

