Venetian Romance DSP – Let It Be Verve Stamps

The Stampin’ Up! Venetian Romance DSP’s coordinating colors are Crisp Cantaloupe, Island Indigo, Pistachio Pudding, Soft Suede, Tangerine Tango, and Very Vanilla.  I chose to use Pistachio Pudding and Crisp Cantaloupe Card Stock to highlight the Venetian Romance DSP design that I used on the left side of my inspirational card below.

Venetiam Romance DSP - Let It Be Verve Stamps

This is my first time using Verve Stamps, and I especially like the inspirational Let It Be stamp set. The verse (the sentiment) for my card is from that stamp set.  I wish Stampin’ Up!’s inventory of stamp sets includes ones with Biblical verses.  

Venetian Romance DSP  - Let It Be Verve Stamps

I used the Stampin’ Up! Apothecary Accents Framelits, the medium rectangle accent, for cutting the Very Vanilla Card Stock on which the sentiment rests.  I traced around the same framelit onto Crisp Cantaloupe Card Stock and fussy cut it to create the sentiment’s mat.  I punched holes in the top left and right corners of the mat to insert ribbon through.  The ribbon used is the Everyday Enchantment Organdy Ribbon from this year’s Sale-a-Bration.  I colored with a permanent marker a Very Vintage Designer Button to top the ribbon and to give the appearance that the sentiment is hanging from the ribbon and button.

 Venetian Romance DSP - Let it Be Verve Stamps

I embossed the front of the Pistachio Pudding card base with the Stampin’ Up Beautifully Baroque Embossing Folder.  This embossing folder is one of Stampin’ Up!’s best embossing folders.

BESIDES THE VENETIAN ROMANCE DSP (130144), OTHER SUPPLIES USED ARE:

Paper:  Pistachio Pudding Card Stock (131294), Crisp Cantaloupe Card Stock (131298), Very Vanilla Card Stock (101650), and Baked Brown Sugar Card Stock (131296)

Stamps:  Let It Be (Verve Stamps – vs-0191)

Ink:  Baked Brown Sugar Classic Ink (131174)

Accessories:  Stampin’ Up! Apothecary Accents Framelits (127003),  Sale-A-Bration’s Everyday Enchantment Organdy Ribbon, Beautifully Baroque Embossing Folder (130917)and Very Vintage Designer Button (129327) 

Venetian Romance DSP - Let It Be Verve Stamps


 God’s Blessings!
Stamping With Guneaux Designs
By
Beverly Polen 

Venetian Romance DSP - Let It Be Verve Stamps

VENETIAN ROMANCE DSP – LET IT BE VERVE STAMPS

Stampin Up Butterfly Bundle

Are you like me and love butterflies?  Butterflies that are real or are in a stamp form make me happy.  As a paper crafter, we have an opportunity to have more butterflies!  The Stampin Up Butterfly Bundle was announced today by Stampin Up.  The best part about the bundle is that it is 15% off from today until September 30, 2013!

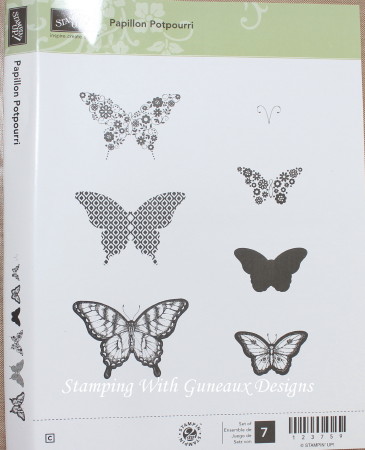
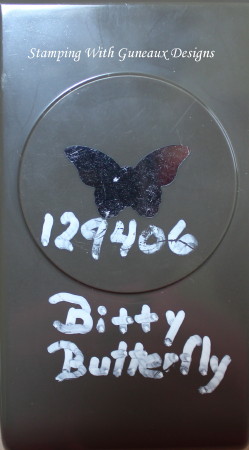
What is included in the Stampin Up Butterfly Bundle, you ask?  Well, it is the wonderful Papillion Potpourri Stamp Set and the Bitty Butterfly Punch.

Bundle Item Description Retail Price 15% Savings Price Amount Saved!
135311 Butterfly Bundle (Clear-Mount)Papillion Potpourri Clear-Mount Stamp SetBitty Butterfly Punch $30.90 USD$39.90 CAD $26.27 USD$33.92 CAD $4.63 USD$5.98 CAD
135312 Butterfly Bundle (Wood-Mount)Papillion Potpourri Wood-Mount Stamp SetBitty Butterfly Punch $34.90 USD$44.90 CAD $29.67 USD$38.17 CAD $5.23 USD$6.73 CAD

Butterfly shapes are great on projects for any occasion.  The greeting card below is one I made with the Papillion Potpourri Stamp Set:

Stampin Up Butterfly Bundle

So make sure to get in on the offer and save 15 percent on the butterfly stamp set and punch between August 29-September 30, 2013!

COME BACK TOMORROW FOR A REAL CUTIE! 

 God’s Blessings!
Stamping With Guneaux Designs
By
Beverly Polen

STAMPIN UP BUTTERFLY BUNDLE

Flower Shop Stamp Set – MOJO Monday MOJO308

Today’s 5″ x 5″ card was created for a special sister whom I think of often and love very much.  The card features the Stampin’ Up! Flower Shop Stamp Set.  The design of the card was inspired by MOJO Monday Sketch Challenges, namely number 308 or MOJO308.   Also featured on this card is the beautiful Gingham Garden Designer Series Paper.

Flower Shop Stamp Set

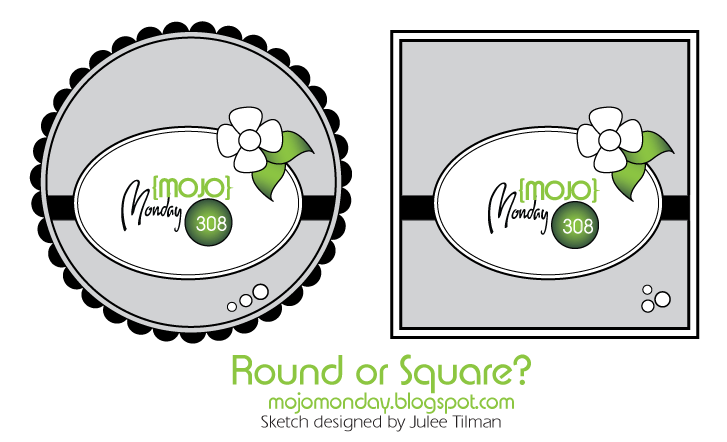
The round and square sketches below are for this week’s MOJO Monday.  Isn’t it nice to have a sketch to follow when creating a card?  I started participating last week in the MOJO Monday challenges, and I’m finding I enjoy it. 

I love the color combination of pink and yellow, which are the colors for one of the designs of the Stampin’ Up! Gingham Garden Designer Series Paper.  I also love bold colors, as you may have noticed, which are spotlighted on the Flower Shop Stamp Set greeting card.

Notice in the square design at the bottom right there is a spot for three elements.  I chose three Stampin’ Up! Basic Pearls and colored them with permanent markers.  Also the sketch requires a flower at the top left.  I used the Flower Shop Stamp Set and the Stampin’ Up! Pansy Punch to create the required flower.  The flower actually is two-dimensional.  I like the leaves that I made; what do you think?  I tried to replicate pansy flower leaves.

Flower Shop Stamp Set - MOJO308 Flower Shop Stamp Set - MOJO 308

Flower Shop Stamp Set - MOJO308

I really like the embossing folder I used on the Daffodil Delight Card Stock.  It is an Anna Griffin embossing folder called Wildflower Gate.  The embossing shows better in the first picture above and the last picture at the bottom.

Flower Shop Stamp Set - MOJO308

SUPPLIES USED TO CREATE THE FLOWER SHOP STAMP SET THOUGHTS OF YOU CARD (with catalog numbers):

Paper:   Gingham Garden Designer Series Paper (129310), Strawberry Slush Card Stock (131295 – card base), Daffodil Delight Card Stock (119683), Island Indigo Card Stock (122923), and Whisper White Card Stock (100730)

Stamps:  Flower Shop Stamp Set (130942), Loving Thoughts Stamp Set (125845), and Field Flowers Stamp Set (122762)

InkIsland Indigo Classic Ink (126986)

Accessories:  Stampin’ Up! Ovals Collection Framelits (129381), Stampin’ Up! Pansy Punch (130698), Basic Pearl Jewels and Large Basic Pearl Jewels (119247 and 125577, respectively), and an Anna Griffin Embossing Folder


God’s Blessings!
Stamping With Guneaux Designs
By
Beverly Polen 


Flower Shop Stamp Set

 FLOWER SHOP STAMP SET

Stampin Up Deco Labels Framelits and Morning Meadow Card

I love the new Stampin Up Deco Labels Framelits, don’t you? I keep thinking of things to make with them as I did with this Stampin Up Deco Labels Framelits and Morning Meadow Card.  The framelits, Stampin Up Morning Meadow Stamp SetStampin Up Label Love Stamp Set, and Stampin Up Serene Silhouettes Stamp Set are highlighted on the card.  A tutorial for making the card can be found below.
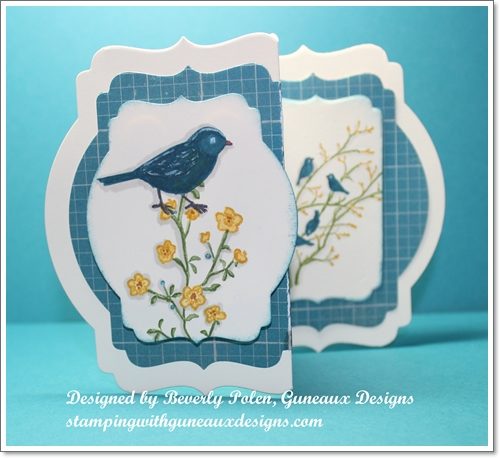
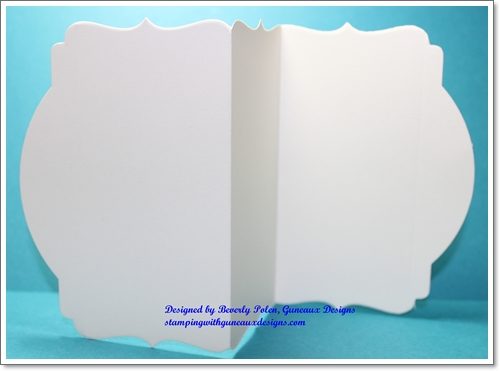
This picture shows the closed card.  If anyone has a trick to prevent Designer Series Paper from “cracking” when folded, please leave me a comment to share your trick.  Thank You!
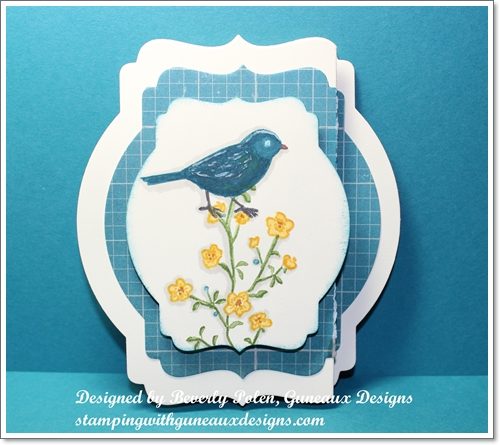
This picture is of the card completely open.
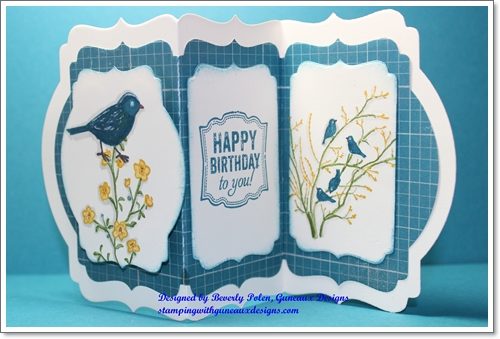
I love using the Stampin Up Framelits to create unique cards.  If you haven’t seen my previous posts of cards made with other framelits, you can see one HERE and another one HERE.

SUPPLIES USED FOR THE STAMPIN UP DECO LABELS FRAMELITS CARD:

Paper: Soho Subway Designer Series Paper (130140), Very Vanilla Card Stock (101650)

Stamps: Morning Meadow Hostess Stamp Set (129678), Stampin Up Label Love Stamp Set (130622), and Serene Silhouettes Stamp Set (127324)

Ink: Island Indigo Classic Ink (126986), Crushed Curry Stampin’ Write Marker (131901), Gumball Green Stampin’ Write Marker (126856 – package), White Pigment Ink (105021 -Gel Pen), Basic Gray Stampin’ Write Marker (131261 – package)

(NOTE: These are the inks I used. The stamp image(s) you select obviously will dictate the inks you use.)

Accessories: Big Shot Die Cutting Machine (113439), Deco Labels Framelits (130102), Stampin’ Dimensionals (104430), and Adhesive

TUTORIAL TO MAKE THE STAMPIN UP DECO LABELS FRAMELITS BIRTHDAY CARD:

Step 1. Cut an 11″ x 4-1/2″ piece of Very Vanilla Card Stock.

Step 2. Score at the 4-1/2″ and 6-1.2″ marks.

Step 3. Make a mountain fold at the 4-1/2″ score line and a valley fold at the 6-1/2″ score line.

Step 4. Lay the folded card stock on top of a Big Shot Cutting Board and center the largest framelit from the Deco Labels Framelits over the folds. You’ll need to slightly lift the left side of the card stock to see the 6-1/2″ fold in order to center the framelit.
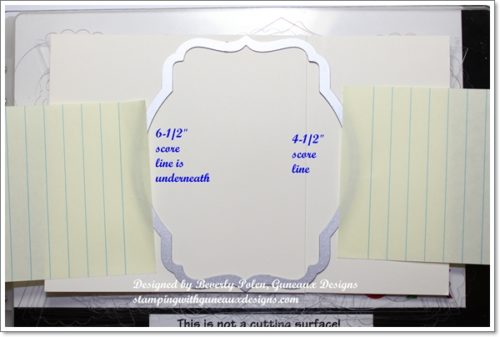
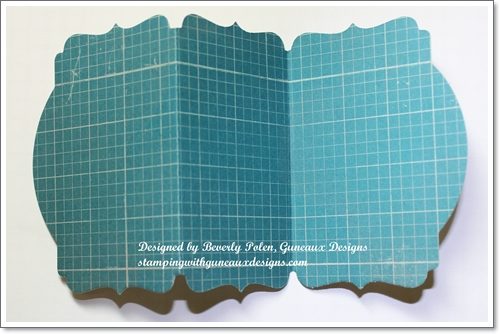
Step 5. Finish building the Big Shot sandwich and run it through your Big Shot Die Cutting Machine.  The following pictures show the results. 
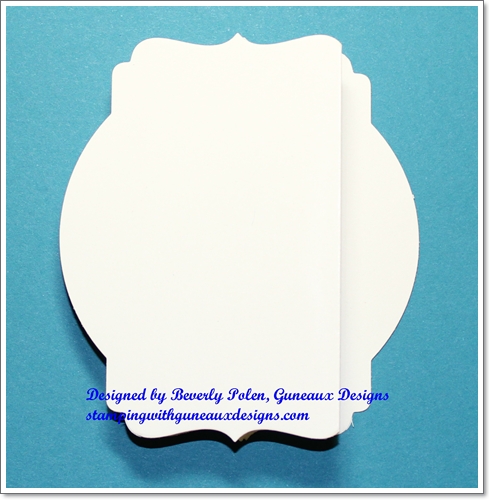
Step 6. Repeat Steps 1 – 5, using the Island Indigo and Very Vanilla design from the Soho Subway Designer Series Paper and the next to the largest framelit from the Stampin Up Deco Labels Framelits.
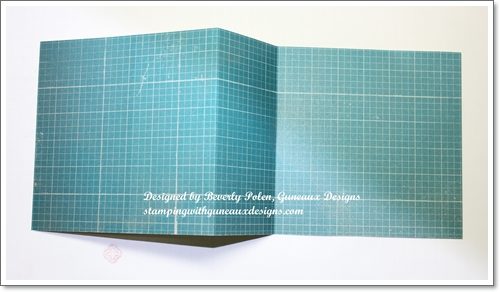
Step 7. Using adhesive, attach the Island Indigo piece to the Very Vanilla Card Stock. If you use liquid glue, allow the piece to dry while lying flat and then crease the folds.
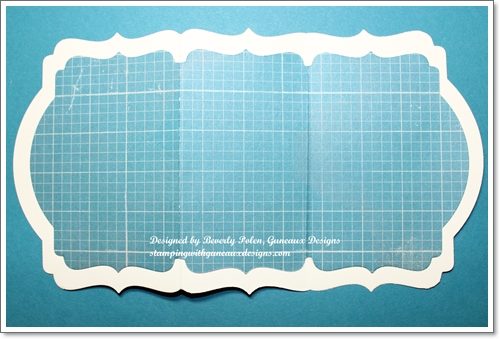
Step 8. Ink and stamp on Very Vanilla Card Stock the floral and bird stamps images from the Morning Meadow Hostess Stamp Set (or use another stamp set for your images).
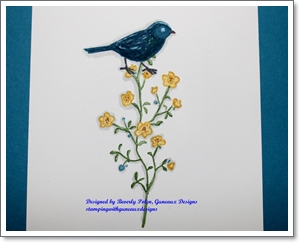
Step 9. Place the next to the largest Stampin Up Deco Labels Framelit over your image(s) that you stamped in Step 8 and run it through the Big Shot Die Cutting Machine.

Step 10. Sponge Island Indigo Classic Ink around the stamped label and adhere it to the left side of the card.  When attaching this label, it will hang over the crease slightly.  Not to worry!
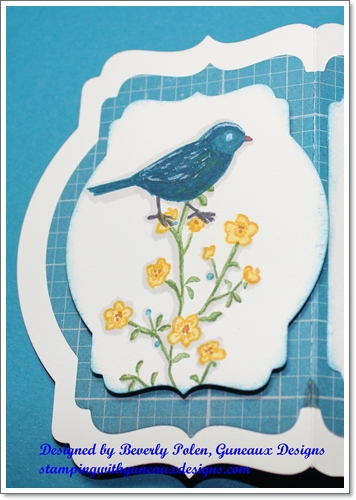
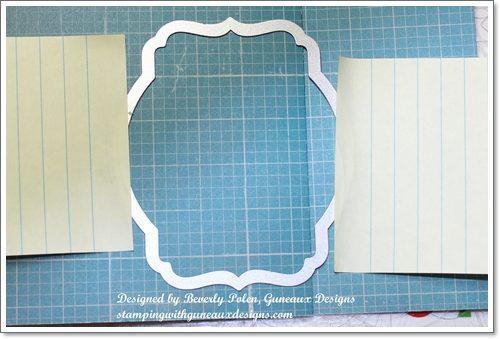
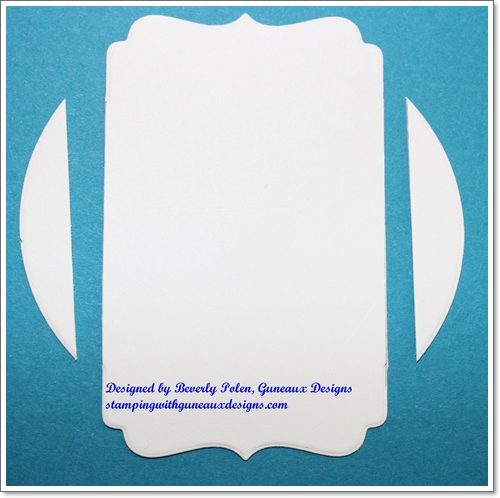
Step 11. Using the same framelit, cut another label from Very Vanilla Card Stock. This label is too large to fit onto the center. Therefore, you’ll need to cut the sides off as is shown in the below picture.  This piece is for the sentiment or a personal note.  Attach it onto the center of the card.  I stamped onto this piece the “Happy Birthday to you!” image from the Stampin’ Up! Label Love Stamp Set.
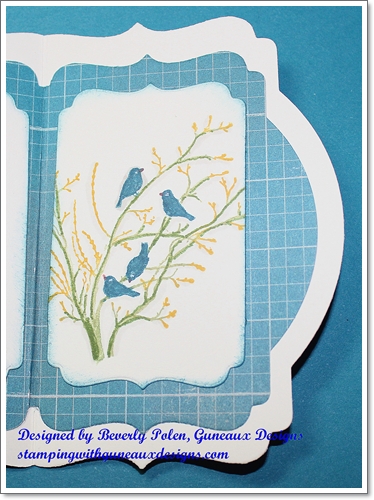
Step 12. Ink and stamp onto Very Vanilla Card Stock the image of birds in a tree from the Serene Silhouettes Stamp Set.  Use the same framelit and cut out this label.  It too is too large for the right side of the card, so bear that in mind when cutting the label.  Cut off the sides as done in Step 11.  If you don’t cut off the right side of the label, the card will not look correct when closed.

Step 13. Attach the stamped and modified Very Vanilla label to the right side of the card.
Step 14.  Finished!  Enjoy the Stampin Up Deco Labels Framelits Card!

God’s Blessings!
Stamping With Guneaux Designs
by
Beverly Polen

STAMPIN UP DECO LABELS FRAMELITS AND MORNING MEADOW CARD

Stampin Up Trust God and Mosaic Madness Stamp Sets

It’s the beginning of a weekend and I am ready for it!  I hope everyone has a blessed one!  My card share today features two stamp sets, the Stampin Up Trust God and Mosaic Madness sets.  Also featured on the card is the Quatrefancy Specialty Designer Series Paper.  Stampin Up Trust God

The base for this card is made with Pool Party Card Stock.  The first layer on the card is a design from the Quatrefancy Specialty Designer Series Paper.  Although I like the design, I think it is a bit “loud”.  Therefore, I tried to tone it down by covering it with solid colors that are within the design.  The colors used are Pool Party, Strawberry Slush, Daffodil Delight, and Island Indigo.  I think I was successful in muting the design.

  Stampin Up Trust God

SUPPLIES USED:

Paper:  Quatrefancy Specialty Designer Series Paper (130141), Pool Party Card Stock, Strawberry Slush Card StockWhisper White Card Stock, and Island Indigo Card Stock

Stamps:  Stampin Up Trust God  (126702 – c) and Mosaic Madness (130249 – c) stamp sets [Mosaic Madness images are on the inside of the card – see picture below.]

Ink: Island Indigo Classic Ink (126986) and Strawberry Slush Classic Ink (131178)

Accessories: In Color Dahlia (127556) [in Island Indigo], Island Indigo Ruffled Ribbon (retired), and a Martha Steward Border Punch 

 Stampin Up Trust God

STAMPIN’ UP! NEWS – Magnetic Platform Update

Have you been waiting on Stampin’ Up! to fill your order for the Big Shot Magnetic Platform (130658)?  Well, today Stampin’ Up! announced that it has received a shipment of the product and is currently filling backorders.  However, it does not have sufficient inventory to fill new orders.  Stampin’ Up! will let us know when all backorders have been filled and it is able to turn the item back on for ordering.

 God’s Blessings!
Stamping With Guneaux Designs
by
Beverly Polen Stampin Up Trust God

STAMPIN UP TRUST GOD, MOSAIC MADNESS, AND QUARTREFANCY SPECIALTY DESIGNER SERIES PAPER
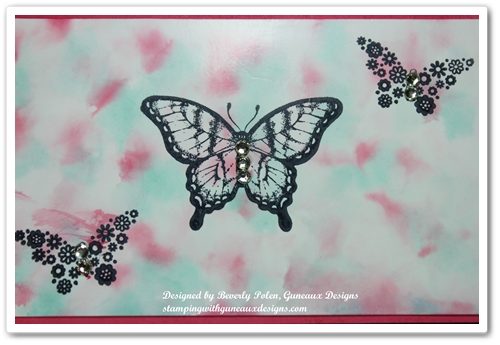
Polished Stone Technique

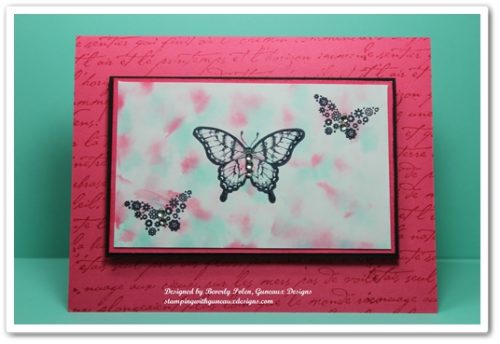
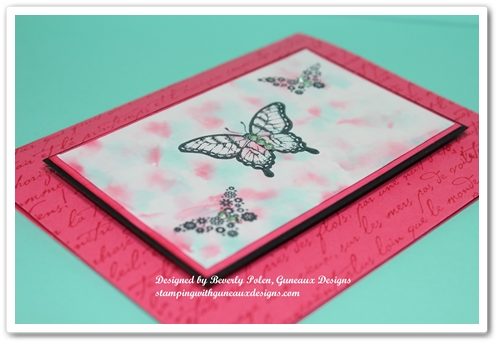
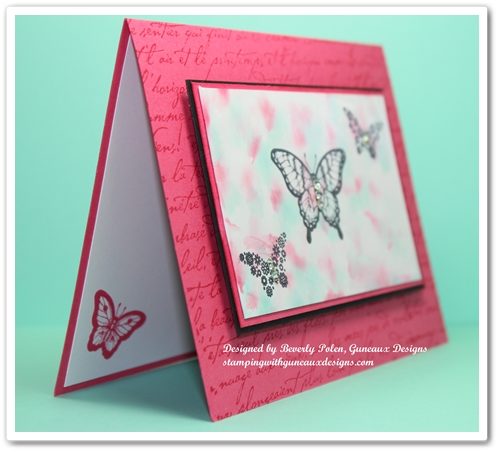
I suspect most crafters have tried the Polished Stone Technique.  However, this is my first time although the technique has been around for some time.  Polished Stone is a rich background technique that looks like rich marble.  It is an excellent background for both feminine and masculine cards.

After looking closely at the above picture, can you tell that I left out one key product that most, but not all, crafters use for the Polished Stone Technique?   It is the metallic ink.  I have seen examples of this technique where the metallic ink was used and examples where it was not used.  Well, I left it out because I did not have any metallic ink.  However, I’ll provide you with the instructions that include the ink.


SUPPLIES USED FOR THE POLISHED STONE TECHNIQUE:

Paper:  Glossy White Card Stock (I used Stampin’ Up!’s), Strawberry Slush Card Stock (131295), and Basic Black Card Stock (121045)

Stamps:  Papillon Potpourri Stamp Set (123759) and Stampin’ Up!’s old French Script Background Stamp

Ink:  Coastal Cabana Classic Ink Re-Inker (131164), Strawberry Slush Classic Ink Re-Inker (131167), and Stazon Ink

Accessories:  Cotton Ball, Rubbing Alcohol, and Basic Rhinestones (119246)


INSTRUCTIONS FOR THE POLISHED STONE TECHNIQUE:

  • Add a few drops of metallic re-inker randomly onto glossy card stock.
  • Add rubbing alcohol onto a cotton ball.
  • Add two or three drops of each classic re-inker color onto the cotton ball.
  • Dab the cotton ball over the glossy card stock, continuing until you achieve the desired look.  The rubbing alcohol will cause the re-inker colors to blend together, and the metallic re-inker will sit on top of the re-inker colors to give a marble look.
  • Allow the card stock to dry, and if desired, seal it with an acrylic sealer.
  • Stamp the desired image onto the “marbled” card stock with Stazon Ink.
  • Create your card!

This card can be a Happy Birthday, Happy Anniversary, Thinking of You, Thank You, or any type of card.


 God’s Blessings!
Stamping With Guneaux Designs
by
Beverly Polen

POLISHED STONE TECHNIQUE