Blending Inks Technique – Stampin Up

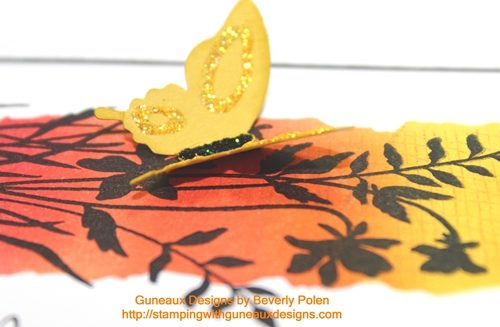
Today’s post is about blending inks to create beautiful artwork.  This technique is very easy and you can quickly create very attractive cards using the technique, such as the following  three cards.

What is blending inks?   Looking at the cards below, it seems obvious, right?  Regardless, let me share that it is selecting and blending two or more inks to create subtle shades and colors to your paper crafting artwork.

Blending Inks

I have selected one of the three cards to provide you with instructions on the blending inks technique.
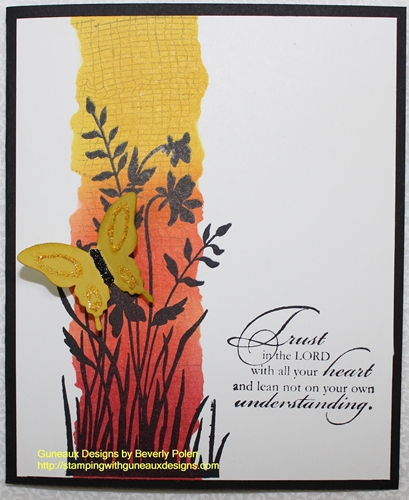

 STAMPIN’ UP! SUPPLIES:

Stamp Sets:  Just Believe (120453), Trust God (126702)  [love this stamp set], and a Background Stamp of your choice (I used a retired Stampin’ Up stamp)

Paper:  Basic Black Card Stock (121045) and Whisper White Card Stock (100730)

Ink (Classic):  Summer Starfruit (126991), Calypso Carol (126983), Primrose Petals (126858), Crumb Cake (126975), and Jet Black StazOn (101406)

Accessories:  Stamping Sponge wedges (101610), Elegant Butterfly Punch (127526), and Post-It Notes or scrap card stock


 Instructions for the blending inks technique are below the two following pictures.
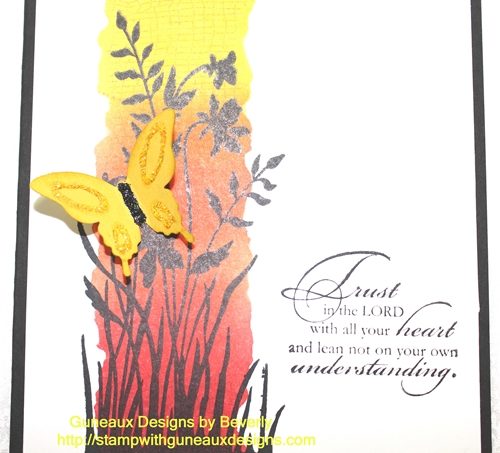
INSTRUCTIONS:

  • Cut a piece (the size depends on the stamp image used) of Whisper White Card Stock (mine is 4″ x 4-7/8″)
  • Tear the edges of the sticky side of two Post-It Notes, being careful to leave some of the sticky edge available
  • Place the torn Post-It Notes onto the Whisper White Card Stock as shown in the below picture with the opening between the Notes closer to the left side of the card stock
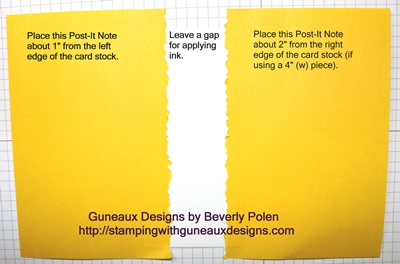
Now you are ready to start blending inks according to the following:

  • Cover a sponge wedge (or blending tool) with Summer Starfruit ink and apply in a circular motion to the upper 1/3 of the opening in the card stock, being careful to avoid lifting the edges of the Post-It Notes
  • Cover a sponge wedge with Calypso Carol ink and apply in a circular motion to the middle 1/3 of the card stock below the Summer Starfruit ink
  • Blend the edges of the two inks (see picture of card), producing a different shade of color
  • Cover a sponge wedge with Primrose Petals ink and apply to the bottom 1/3 of the card stock, blending it with the Calypso Carol ink to create a different shade of color
  • Cover a background stamp with Crumb Cake ink and stamp over the three colors you’ve just blended
  • Remove the Post-It Notes

At this point, you’ll decorate the card stock according to the following:

  • Cover the largest stamp image from the Just Believe Stamp Set  (a floral silhouette) with Jet Black StazOn ink and stamp the image over the blended inks
  • Cover a sentiment from the Trust God Stamp Set with Jet Black StazOn ink and stamp the sentiment on the lower-right side of the card stock
  • Cut an 8-1/2″ x 5-1/4″ piece of Basic Black Card Stock and fold in the middle for a card base
  • Attach the decorated piece of Whisper White Card Stock to the Basic Black card base
  • Using the Elegant Butterfly Punch, cut out a butterfly, decorate it as desired, and attach to the card

You have just learned the Blending Inks Technique!

God’s Blessings!
Stamping With Guneaux Designs
Beverly Polen

Use the blending inks technique to create quick and easy cards!

Greeting Card – Simply Scored Diagonal Plate

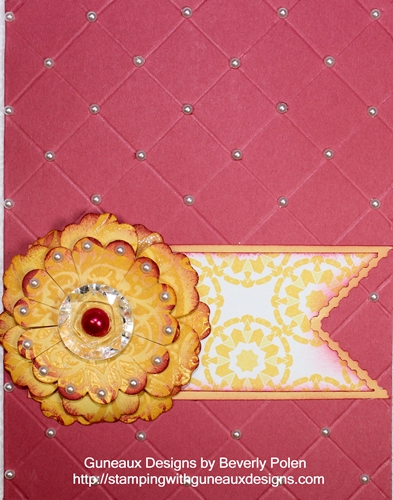
The Stampin’ Up! Simply Scored Diagonal Plate was the tool of the day for making my greeting card.  Adding the Blossom Punch makes this beautiful card.  I hope you CAS it as it’s simple, or at least to me!

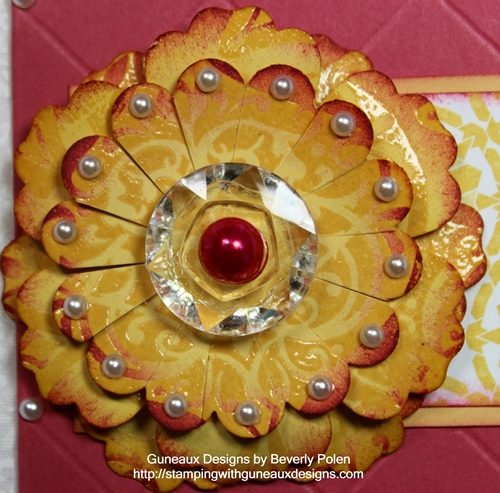
 Here’s a closeup of the blossom: 

STAMPIN’ UP! PRODUCTS:

Stamp: Your Choice (see instructions below)*

Ink:  Primrose Petals Classic Ink (126858)

Paper:  Primrose Petals Card Stock (126841), Daffodil Delight Card Stock (119683), and International Bazaar Designer Series Paper (DSP – 126920)

Accessories:  Simply Scored Diagonal Plate (125586), Simply Scored Scoring Tool (122334), Basic Pearls (119247), Large Basic Pearls (125577), Blossom Punch (125603), Scallop Punch (119854), Postage Stamp Punch (122344), VersaMark Ink (102283), Crystal Effects (101055), Clear Embossing Powder (109130), Vintage Faceted Designer Buttons (127555), Stampin’ Sponges (101610), Stampin’ Dimensionals (104430)

INSTRUCTIONS:

  • Cut an 8-1/2” x 5-1/2” piece of Primrose Petals Card Stock
  • Fold in the center to create a card base
  • Place the Simply Scored Diagonal Plate into the Simply Scored Scoring Tool
  • Open the card base, place it face up onto the Simply Scored Diagonal Plate with the 5-1/2” side at the top, and score at every 1”
  • Turn the card base so that the 8-1/2” side is at the top and score at every 1”
  • Place a Basic Pearl (119247) at each point where the lines cross on the top 2” of card front
  • Punch out two flowers with the Blossom Punch from Daffodil Delight Card Stock
  • Punch out a scallop with the 1-3/4” Scallop Punch from Daffodil Delight Card Stock
  • *Stamp an image (your choice) covered with VersaMark Ink onto the two blossom flowers and the scallop, cover with Clear Embossing Powder, and heat set
  • Sponge the edges of all three cut outs with Primrose Petals Ink
  • Cut each valley of the scallop to near the center
  • Add a Basic Pearl to each petal of the scallop
  • Place a few Stampin’ Dimensionals onto the center of the back of one blossom and attach it to the other
  • Place two Stampin’ Dimensionals, one on top of the other, onto the center of the back of the scallop and attach it to the top of the blossom flowers
  • Place some Crystal Effects {love this stuff} onto the center of the scallop and attach a large button from the gorgeous Vintage Faceted Designer Buttons
  • Cover a Large Basic Pearl with a permanent marker of a pink-like color
  • Attach the pearl into the center of the large button
  • Allow the Crystal Effects to dry
  • Cut a 3-1/2” x 1-1/2” piece of the Daffodil Delight and Whisper White design from the International Bazaar DSP
  • Cut one end of the paper using the Postage Stamp Punch
  • Sponge the edges with Primrose Rose ink
  • Cut a 4” x 1-3/4” piece of Daffodil Delight Card Stock, cut one end with the Postage Stamp Punch, and sponge the edges with Primrose Rose ink
  • Attach the DSP to the Daffodil Delight Card Stock (the mat)
  • Adhere this to the card front with the “<” at the edge of the card front (there will be a space on the right side not covered (placement for the flower)
  • Attach the flower to the left side of the card
  • Add more Basic Pearls at the bottom of the card front

SHARE YOUR THOUGHTS ON THIS CARD.  COMMENTS ARE GREATLY APPRECIATED.


 God’s Blessings!

Stamping With Guneaux Designs

Beverly Polen

Purchase the Simply Scored Diagonal Plate, I strongly recommend it!

Labels Collection Framelits

Labels Collection Framelits are one of Stampin Up Framelits sets that you can use for various rubber stamping techniques.  Today, I have for you a “thinking of you card” made with the Labels Collection Framelits and the card features stamping multiple card stock layersStampin Up Framelits

Before discussing the Labels Collection Framelits, let me share information about the  first layer for the card.  It reflects the hot waxing technique, which I’ve not used before but really enjoyed it.  I heated gold, silver, and red wax, one at a time, and spread it across the cardstock to create the background.   I used one of the Adorning Accents Edgelits (125595) to shape the top of the card stock. 

Now, on to the Labels Collections Framelits cut outs that make up the center piece of the card.  I used three of the Labels Collections Framelits.  Counting from the largest to the smallest with the largest numbered 5, I used the 4th, 3rd, and 2nd frames from the Labels Collections Framelits.   To begin the layering of the frames on which to stamp, I used a temporary adhesive on the back side of the frames and glued the 2nd frame to the 3rd and the 3rd to the 4th, as shown below.

Labels Collection Framelits

To decorate the Labels Collection Framelits cut outs and create the card, follow these steps:

1. Using the flower image from the Papaya Collage Stamp Set (126612), cover the stamp with Pretty In Pink Ink (126955) and randomly stamp the image.

Labels Collection Framelits

2.  Using the multiple floral stamp from the Betsy’s Blossoms Stamp Set (126006), cover the largest flower with VersaMark Ink and randomly stamp around the Labels Collection Framelits cut outs.

3.  Cover the VersaMark images with Gold Emboss Powder (109129) and set with heat. Labels Collection Framelits

 4.  Cover the leaf on the flower stamp from the Papaya Collage Stamp Set with the Gumball Green Stampin’ Write Marker and stamp the image in the spots shown in the below image.

Stampin Up Framelits

5.  Cut an 8-1/2″ x 5-1/2″ piece of Pretty in Pink Card Stock (100459) and fold in the center to create the card base.

6.  Emboss the top front of the card base with one of the Adorning Accents Folders (125601).

7.  Adhere your first layer (mine is the waxed background) to the card base.

8.  Adhere the decorated Labels Collection Framelits cut outs onto the first layer.

9. Stamp the sentiment, “thinking of you” onto a piece of Pretty in Pink Card Stock with VersaMark ink.  Cover with Gold Emboss Powder and heat set it.  Attach to the card.

Buy Stampin Up Products

God’s Blessings!

Stamping With Guneaux Designs

by

Beverly Polen

Enjoy your Labels Collection Framelits!

Rubber Stamping Technique – Sliced Rock – Guneaux Designs

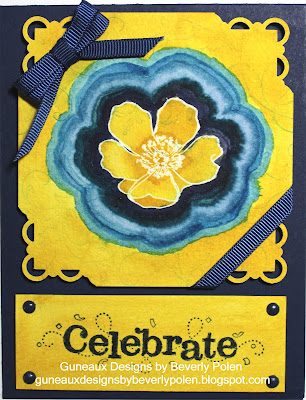
I was playing around with my Stampin’ Up! rubber stamp supplies recently and developed a rubber stamping technique that I call the Sliced Rock Technique.  The rubber stamping technique is demonstrated in the video below.

I’m sure you’ve seen how beautiful sliced rock can be with various patterns and colors.  I think the most beautiful ones have a center pattern that is repeated in the outer layers in varying colors.  You can find images of sliced rock here, if interested.

Rubber Stamping Technique – Guneaux Designs Sliced Rock Technique

I call this rubber stamping technique , Unpolished Sliced Rock Technique.  I used one of the floral stamps from the Stampin’ Up! Fabulous Florets Stamp Set for my center image.  I covered the stamp with VersaMark and stamped it in the center of my piece of Watercolor Paper.  I then used White Embossing Powder over the image and set it with a heat gun.  Using my Aqua Painter and several blue inks, I water colored the floral pattern in layers around the center piece, the flower.  Here is the card I made with a similar image.
Rubber Stamping Technique - Guneaux Designs Sliced Rock Technique
The video (link) below demonstrates this rubber stamping technique, Guneaux Designs Unpolished Sliced Rock Technique.

COME BACK TO SEE THE SECOND VERSION OF THIS RUBBER STAMPING TECHNIQUE, THE POLISHED SLICED ROCK TECHNIQUE.
God’s Blessings!

Stamping With Guneaux Designs

by

Beverly Polen

I hope you try this rubber stamping technique!

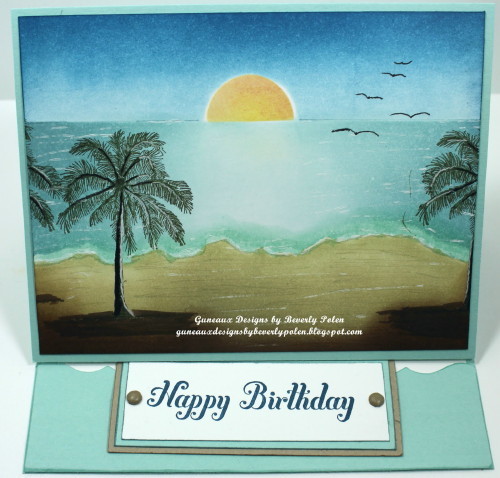
Happy Birthday Easel Card, Brayer Beach Scene

Happy Birthday Easel Card – Brayer Beach Scene

Happy Birthday Easel Card, Brayer Beach Scene

Having spent the holidays on a Caribbean cruise with special friends, I decided to create a beach scene with the color of the Caribbean Sea for a Happy Birthday Easel Card.  Today is the birthday of one of the special friends, and I made this card for him.  I hope his day includes many blessings and plenty of cake and ice cream!

The beach scene was created by using a Brayer Art Tool and various Stampin’ Up! inks.  The Stampin’ Up! ink colors I used are:

The palm trees were made with a stamp image from Plant Hope.  The sentiment, Happy Birthday, is from the Bring on the Cake stamp set.  Enjoy!


God’s Blessings!
Stamping With Guneaux Designs By Beverly Polen

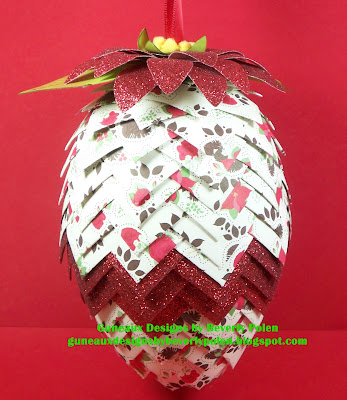
Pine Cone Christmas Ornament

I have for you today a beautiful Pine Cone Christmas Ornament that I made.

Pine Cone Christmas Ornament

I recall being on vacation in South Carolina around 2001 and seeing some very LARGE pine cones. I had never seen such large cones before. I bagged up a bunch and took them home (Northern Virginia) to decorate for Christmas.

This Stampin’ Up! Pine Cone Christmas Ornament reminds me of those large pine cones.  The Pine Cone Christmas Ornament is my significant Stampin’ Up! 3-D item for Christmas 2011.  It is 7″ in length and 4-1/2″ in width. I am so pleased with the way it turned out.

Once again, I used the Holly Berry Bouquet Specialty Designer Series Paper (DSP), my favorite Stampin’ Up! DSP for the holidays.  It took hours for me to make the pine cone, and it required MANY 1″ x 2″ pieces of the DSP and MANY straight pens. But it is so worth it!

Pine Cone Christmas Ornament

I used the Stampin’ Up! Red Glimmer Paper for three rows around the cone, and for the poinsettia that rests on top of the cone.

God’s Blessings!

Stamping With Guneaux Designs
by
Beverly Polen

I hope you have enjoyed my Pine Cone Chistmas Ornament!