Stampin Up Framelits – Use Differently – Part 2

Yesterday, I shared an alternative method for using Stampin Up Framelits to create a debossed frame from a negative cutout.  Today, I am sharing another alternative method for using the Stampin Up Framelits.  This method provides a framelit size that is different from the usual.

If you have used any of the Stampin Up Framelits that are of the same design (i.e., Hearts Collection, Floral Frames, Window Frame Collection, and Labels Collection),  I’m sure you’ve noticed the size between each framelit is no less than 1/4″. 
 
 Hearts Collection Framelits DiesFloral Frames Framelits DiesWindow Frames Collection Framelits DiesLabels Collection Framelits Dies
 

Personally, I prefer the size between the Stampin Up Framelits to be smaller (i.e., 1/8″).  To that end, here is an alternative for you to acquire a smaller size.


ALTERNATIVE 2:  CREATE A STAMPIN UP FRAMELIT CUTOUT THAT IS ONLY 1/8″ LARGER THAN THE NEXT SMALLEST FRAMELIT (NOT THE USUAL 1/4″)

STEP 1. Select one framelit and desired card stock and cut out two framelits using the Big Shot. (Refer to yesterday’s post for the Big Shot sandwich.)

Stampin Up Framelits

STEP 2.  Lay the next smallest framelit onto one of the cutouts with the cutting edge facing upward.

STEP 3.  With a pencil, trace around the framelit.

Stampin Up Framelits

STEP 4. Using paper snips, cut along your tracing.

Stampin Up FramelitsStampin Up Framelits


Now you have a cutout that is 1/8″ smaller, except at the very top. I like the look better, don’t you?

Stampin Up Framelits


 Using this tool tip, your top framelit will provide more room on which to stamp.

 Stamping With Guneaux Designs

God’s Blessings!
Stamping With Guneaux Designs
by
Beverly Polen


STAMPIN UP FRAMELITS – HOW TO USE THEM DIFFERENTLY – PART 2

Stampin Up Framelits – Use Differently – Part 1

Would you like to know how to use your Stampin Up Framelits in a manner that is different from the standard method?   Would you like to create a FRAME around the negatives resulting from using the Stampin Up Framelits?

Today I will share one alternative, and tomorrow I will share another one.  For this demonstration, I am using the Hearts Collection Framlits; however, this applies to any of the Stampin Up Framelits. 

ALTERNATIVE 1:   HOW TO USE YOUR STAMPIN UP FRAMELITS TO CREATE A FRAME AROUND THE NEGATIVE CARD STOCK PIECES

STEP 1. Cut a piece of card stock to the size you need as is determined by the size of the Stampin Up Framelit you plan to use for your project.

STEP 2. Place your selected framelit onto the center of this piece of card stock ( from step 1) for cutting out the framelit using the Big Shot. 

STEP 3. Prepare a Big Shot sandwich with the card stock and framelit in the following order, and run the sandwich through the Big Shot:

  • Multipurpose Platform, Tab 2
  • Standard Cutting Plate (Acrylic)
  • Piece of Card Stock
  • Framelit
  • Standard Cutting Plate (Acrylic)

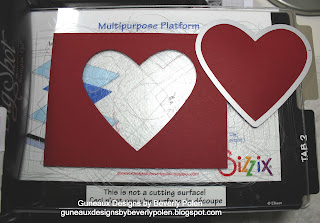
STEP 4. Remove the cutout from the framelit and stash it away, keeping the negative piece of card stock.

Stampin Up Framelits

STEP 5. Place the framelit into the back side of the negative with the framelit cutting side facing up.

Stampin Up Framelits

(You can see the metal cutting part of the framelit sticking through the cardstock.)

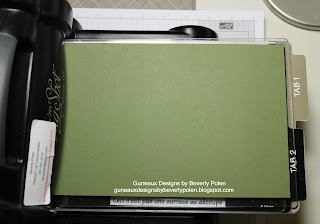
STEP 6. Create another Big Shot sandwich according to the following:

  • Multipurpose Platform, Tab 2
  • Standard Cutting Plate (Acrylic)
  • Framelit (according to step 5)
  • Negative Piece of Card Stock (framelit inserted inside according to step 5)
  • Standard Cutting Plate (Acrylic)
  • Paper Shim
Stampin Up Framelits

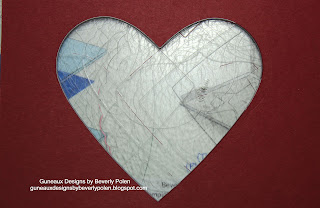
STEP 7.  Run the sandwich through the Big Shot two or three times. This is the result:

Stampin Up Framelits

Can you see the 1/8″ frame that has been created around the heart?

STEP 8. You can insert into the negative another framelit cutout (in this case, a heart shape from the Stampin’ Up! Twitterpated DSP). Now you have a heart cutout from a framelit with a heart-shaped frame created around the inserted heart.

Stampin Up FramelitsHow cool is that?

STEP 9:  You may choose to accentuate the frame around the heart by adding Crystal Effects as I did on a previous card share. Here’s the card.

 Stamping With Guneaux Designs

God’s Blessings!
Stamping With Guneaux Designs
by
Beverly Polen


COME BACK TOMORROW FOR THE SECOND ALTERNATIVE FOR USING STAMPIN UP FRAMELITS !

Labels Collection Framelits

Labels Collection Framelits are one of Stampin Up Framelits sets that you can use for various rubber stamping techniques.  Today, I have for you a “thinking of you card” made with the Labels Collection Framelits and the card features stamping multiple card stock layersStampin Up Framelits

Before discussing the Labels Collection Framelits, let me share information about the  first layer for the card.  It reflects the hot waxing technique, which I’ve not used before but really enjoyed it.  I heated gold, silver, and red wax, one at a time, and spread it across the cardstock to create the background.   I used one of the Adorning Accents Edgelits (125595) to shape the top of the card stock. 

Now, on to the Labels Collections Framelits cut outs that make up the center piece of the card.  I used three of the Labels Collections Framelits.  Counting from the largest to the smallest with the largest numbered 5, I used the 4th, 3rd, and 2nd frames from the Labels Collections Framelits.   To begin the layering of the frames on which to stamp, I used a temporary adhesive on the back side of the frames and glued the 2nd frame to the 3rd and the 3rd to the 4th, as shown below.

Labels Collection Framelits

To decorate the Labels Collection Framelits cut outs and create the card, follow these steps:

1. Using the flower image from the Papaya Collage Stamp Set (126612), cover the stamp with Pretty In Pink Ink (126955) and randomly stamp the image.

Labels Collection Framelits

2.  Using the multiple floral stamp from the Betsy’s Blossoms Stamp Set (126006), cover the largest flower with VersaMark Ink and randomly stamp around the Labels Collection Framelits cut outs.

3.  Cover the VersaMark images with Gold Emboss Powder (109129) and set with heat. Labels Collection Framelits

 4.  Cover the leaf on the flower stamp from the Papaya Collage Stamp Set with the Gumball Green Stampin’ Write Marker and stamp the image in the spots shown in the below image.

Stampin Up Framelits

5.  Cut an 8-1/2″ x 5-1/2″ piece of Pretty in Pink Card Stock (100459) and fold in the center to create the card base.

6.  Emboss the top front of the card base with one of the Adorning Accents Folders (125601).

7.  Adhere your first layer (mine is the waxed background) to the card base.

8.  Adhere the decorated Labels Collection Framelits cut outs onto the first layer.

9. Stamp the sentiment, “thinking of you” onto a piece of Pretty in Pink Card Stock with VersaMark ink.  Cover with Gold Emboss Powder and heat set it.  Attach to the card.

Buy Stampin Up Products

God’s Blessings!

Stamping With Guneaux Designs

by

Beverly Polen

Enjoy your Labels Collection Framelits!