
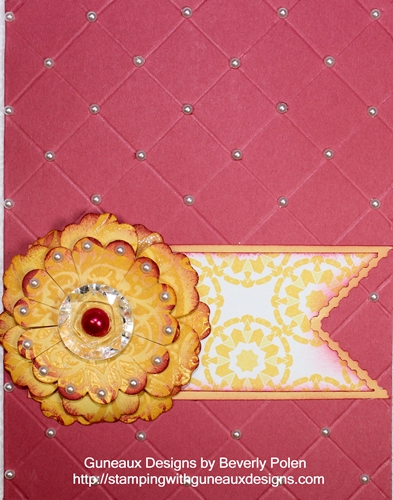
The Stampin’ Up! Simply Scored Diagonal Plate was the tool of the day for making my greeting card. Adding the Blossom Punch makes this beautiful card. I hope you CAS it as it’s simple, or at least to me!
Here’s a closeup of the blossom: 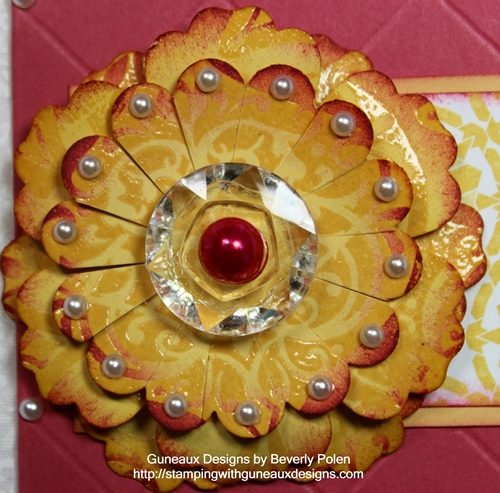
STAMPIN’ UP! PRODUCTS:
Stamp: Your Choice (see instructions below)*
Ink: Primrose Petals Classic Ink (126858)
Paper: Primrose Petals Card Stock (126841), Daffodil Delight Card Stock (119683), and International Bazaar Designer Series Paper (DSP – 126920)
Accessories: Simply Scored Diagonal Plate (125586), Simply Scored Scoring Tool (122334), Basic Pearls (119247), Large Basic Pearls (125577), Blossom Punch (125603), Scallop Punch (119854), Postage Stamp Punch (122344), VersaMark Ink (102283), Crystal Effects (101055), Clear Embossing Powder (109130), Vintage Faceted Designer Buttons (127555), Stampin’ Sponges (101610), Stampin’ Dimensionals (104430)
INSTRUCTIONS:
- Cut an 8-1/2” x 5-1/2” piece of Primrose Petals Card Stock
- Fold in the center to create a card base
- Place the Simply Scored Diagonal Plate into the Simply Scored Scoring Tool
- Open the card base, place it face up onto the Simply Scored Diagonal Plate with the 5-1/2” side at the top, and score at every 1”
- Turn the card base so that the 8-1/2” side is at the top and score at every 1”
- Place a Basic Pearl (119247) at each point where the lines cross on the top 2” of card front
- Punch out two flowers with the Blossom Punch from Daffodil Delight Card Stock
- Punch out a scallop with the 1-3/4” Scallop Punch from Daffodil Delight Card Stock
- *Stamp an image (your choice) covered with VersaMark Ink onto the two blossom flowers and the scallop, cover with Clear Embossing Powder, and heat set
- Sponge the edges of all three cut outs with Primrose Petals Ink
- Cut each valley of the scallop to near the center
- Add a Basic Pearl to each petal of the scallop
- Place a few Stampin’ Dimensionals onto the center of the back of one blossom and attach it to the other
- Place two Stampin’ Dimensionals, one on top of the other, onto the center of the back of the scallop and attach it to the top of the blossom flowers
- Place some Crystal Effects {love this stuff} onto the center of the scallop and attach a large button from the gorgeous Vintage Faceted Designer Buttons
- Cover a Large Basic Pearl with a permanent marker of a pink-like color
- Attach the pearl into the center of the large button
- Allow the Crystal Effects to dry
- Cut a 3-1/2” x 1-1/2” piece of the Daffodil Delight and Whisper White design from the International Bazaar DSP
- Cut one end of the paper using the Postage Stamp Punch
- Sponge the edges with Primrose Rose ink
- Cut a 4” x 1-3/4” piece of Daffodil Delight Card Stock, cut one end with the Postage Stamp Punch, and sponge the edges with Primrose Rose ink
- Attach the DSP to the Daffodil Delight Card Stock (the mat)
- Adhere this to the card front with the “<” at the edge of the card front (there will be a space on the right side not covered (placement for the flower)
- Attach the flower to the left side of the card
- Add more Basic Pearls at the bottom of the card front
SHARE YOUR THOUGHTS ON THIS CARD. COMMENTS ARE GREATLY APPRECIATED.
God’s Blessings!
Stamping With Guneaux Designs
Beverly Polen
Purchase the Simply Scored Diagonal Plate, I strongly recommend it!