Gate Fold Card Using A Framelit Tutorial

In August 2013, I posted two tutorials on how to make a Gate Fold Card using a framelit to form the shape of a card.  One Tutorial was for using the Stampin’ Up!  Window Frames Framelits, and the Second Tutorial was for using the Stampin’ Up! Deco Frames Framelits.   

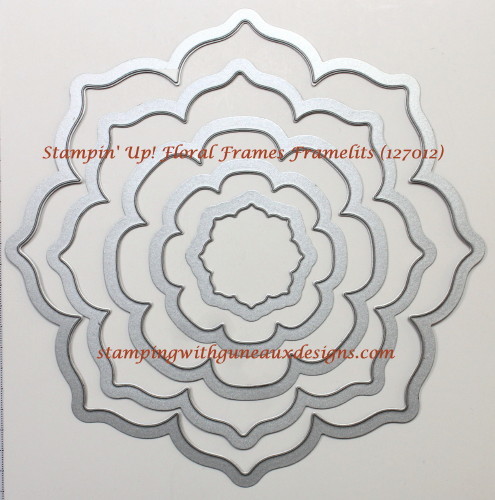
Recently, I was asked by a viewer, Eileen, to provide another tutorial for making a Gate-Fold Card Using a Framelit from the Stampin’ Up! Floral Frames Framelits.  This post provides the requested tutorial. (Sorry, Eileen that it has taken some time!)

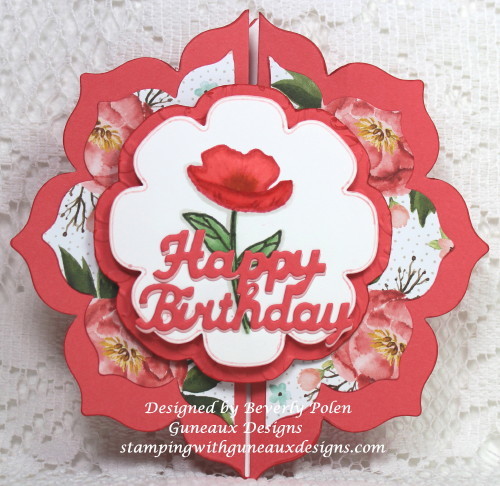
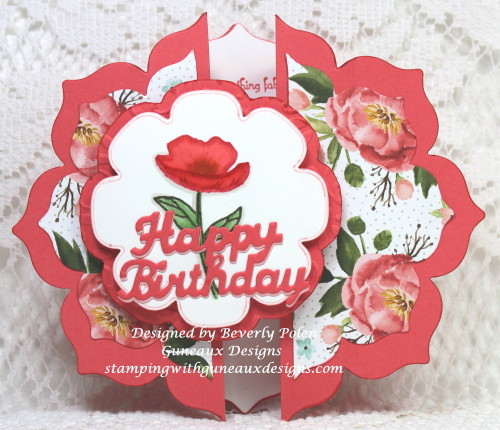
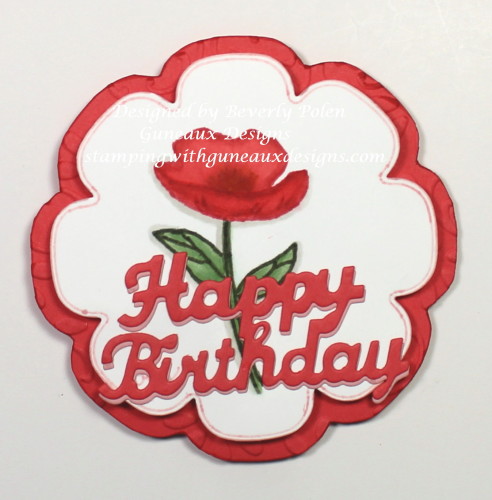
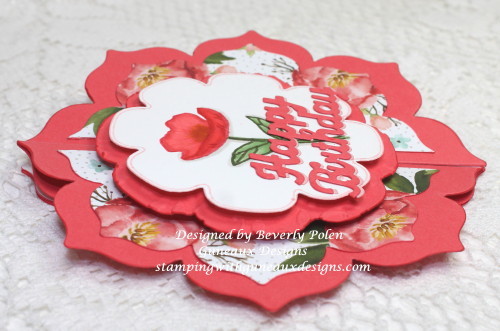
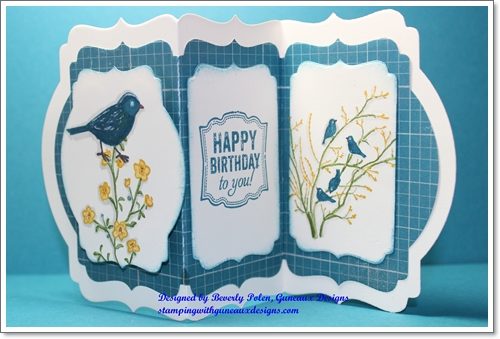
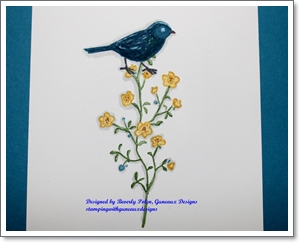
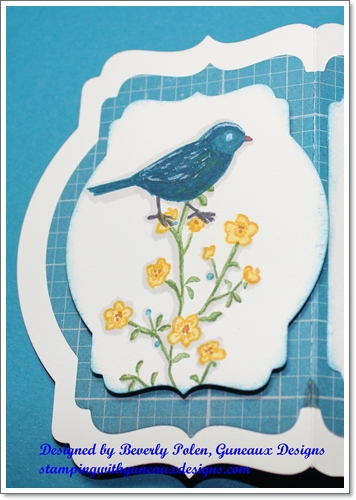
But first, let me show you photos of the Happy Birthday card I created using the featured framelits:

Gate Fold Card Using A Framelit

Gate Fold Card Using A Framelit

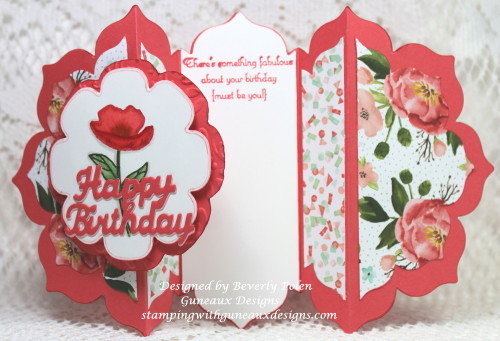
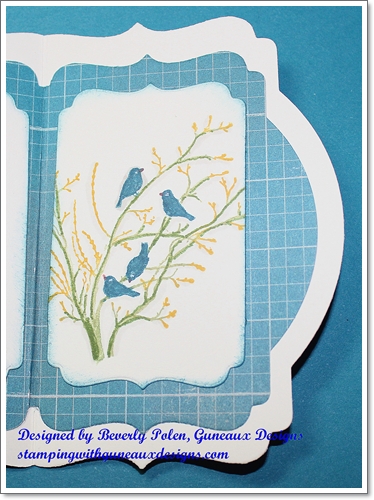
Gate Fold Card Using A Framelit

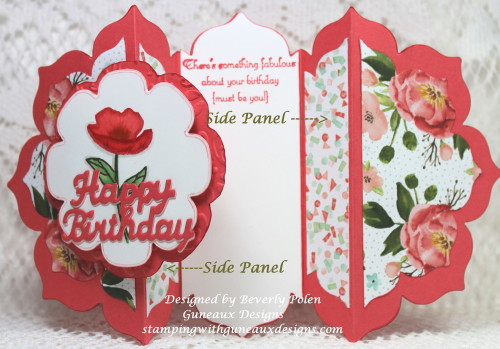
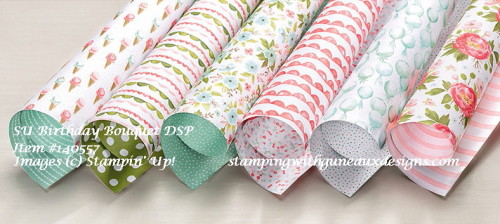
You can see in the above picture that I used another design from the Stampin’ Up! Birthday Bouquet DSP to cover both side panels on the inside of the card.  Now, on to the tutorial.

BlogDivider_zpsed339ea1

UPDATE:  This card was selected as a favorite on Splitcoaststampers for the week ending January 24, 2016.

BlogDivider_zpsed339ea1

TUTORIAL FOR MAKING A GATE FOLD CARD USING A FRAMELIT

Step 1.  Select a framelit that you want to use to form the shape of your card.

(NOTE:  I recommend selecting one that is no wider than 5″ and longer than 7″, otherwise, you’ll need 12″ card stock).

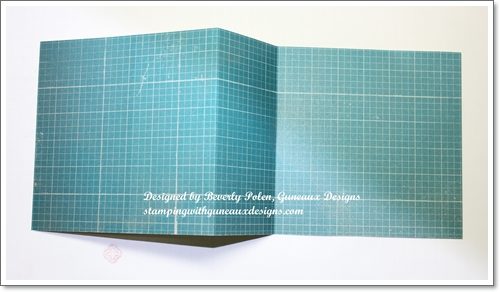
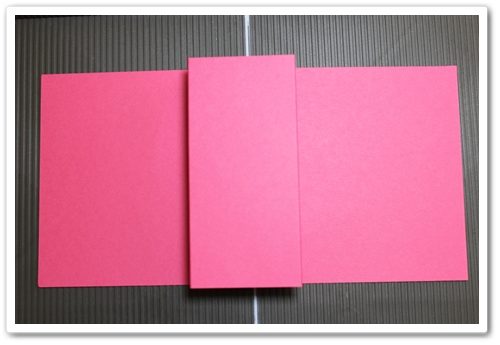
Step 2.  Score an 8-1/2″ x 11″ piece of card stock on the 11″ side at the 3-1/2″, 4-1/2″, 6-1/2″, and 7-1/2″ measurements.

Step 3.  Fold the 3-1/2″ score line into a mountain fold, 4-1/2″ into a valley fold, 6-1/2″ into a valley fold, and 7-1/2″ into a mountain fold.

Step 4.  Crease the score lines well using a bone folder.  

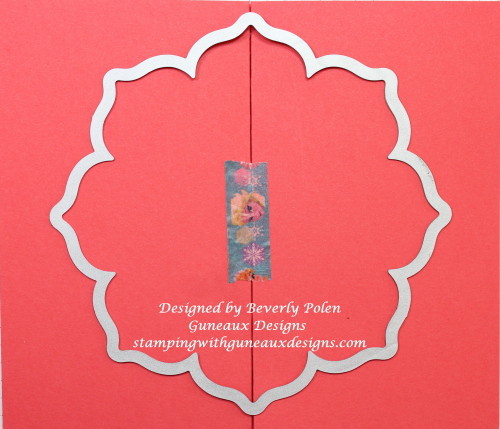
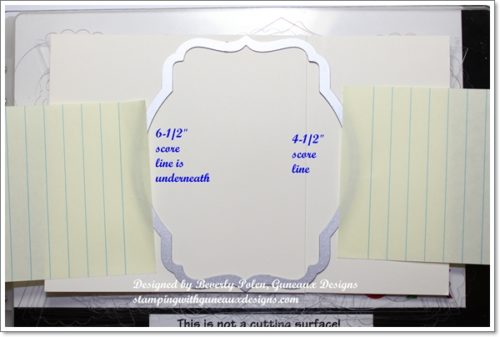
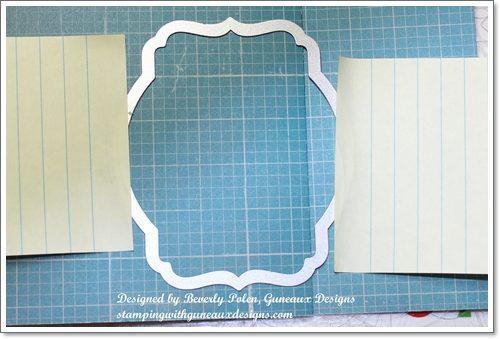
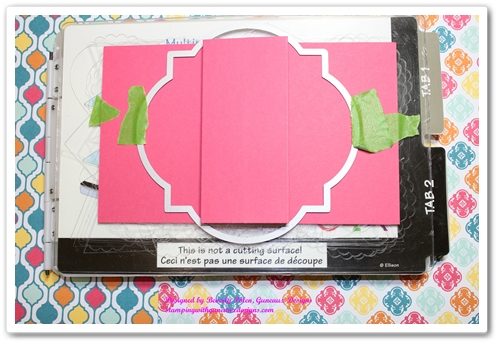
Step 5.  Lay your selected framelit onto the front of the folded card stock, centering the framelit.  Use temporary tape to hold the folds and framelit in place. (I used the largest framelit from the Floral Frames Framelits.)

Gate-Fold Card Using Framelits

Step 6.  Using your die-cutting machine’s recommendation for the correct die-cutting sandwich, run the card stock and framelit through the machine.

(NOTE:  If using a Stampin’ Up! framelit, run the sandwich through your machine at least two times to get all layers cut.)

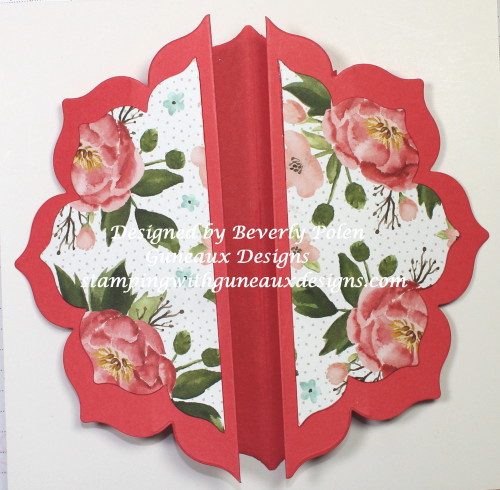
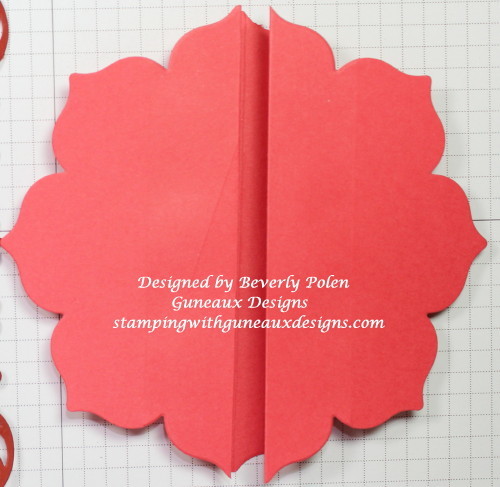
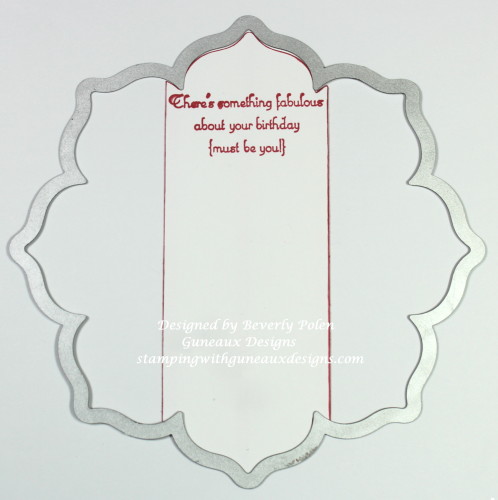
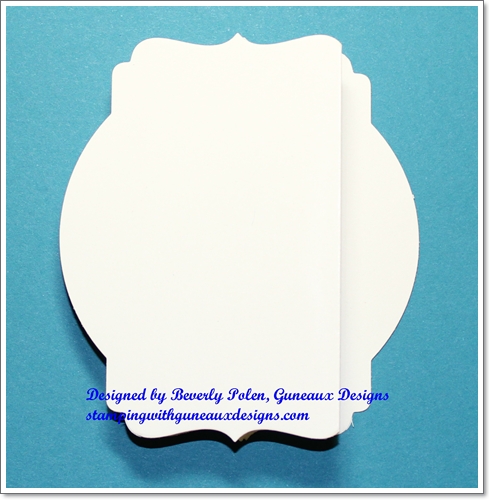
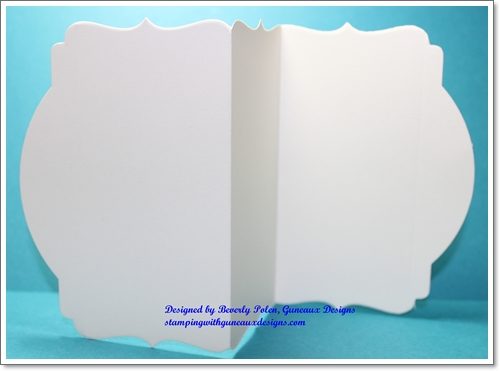
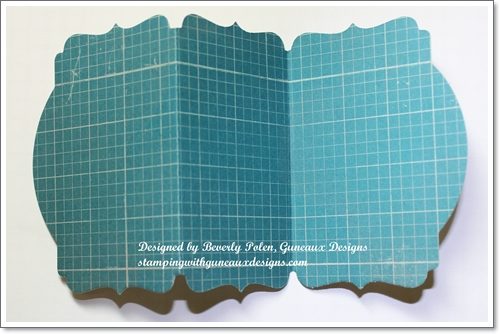
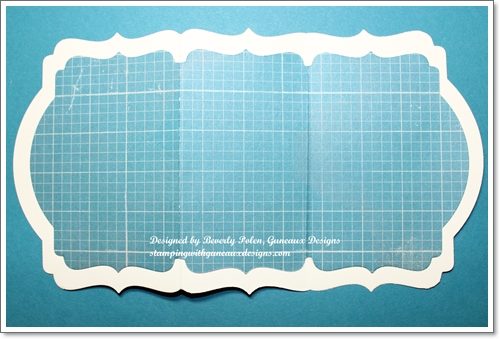
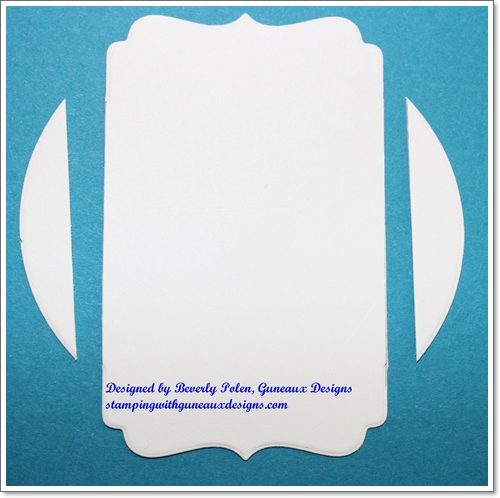
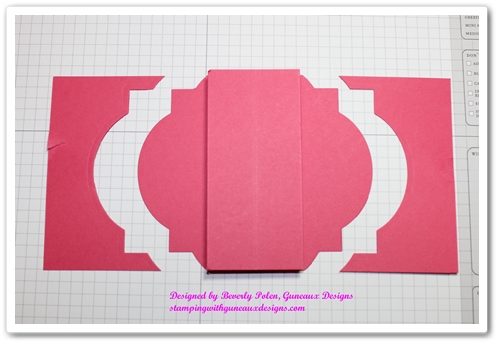
Your cutout will look like the one in this photo if you use the featured framelits.

Gate Fold Card Using A Framelit Tutorial

Step 7.  Using the remaining framelits of your selected set to cut designer series paper to decorate your card.

STOP AT THIS STEP OF THE TUTORIAL UNLESS:

Step 8.  IF you are using the Stampin’ Up! Floral Frames Framelits, follow the remaining steps.

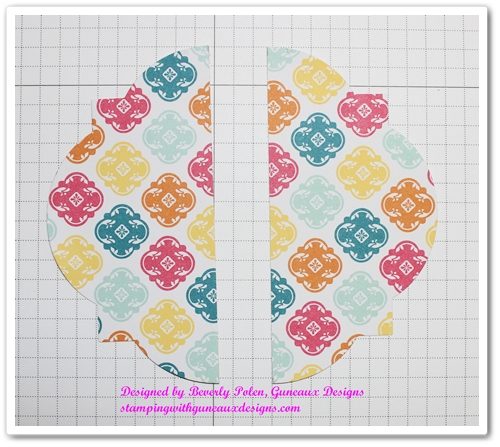
  • a.  If you decide to use designer series paper as I did, use the next to the largest framelit from the Stampin’ Up! Floral Frames Framelits to cut out a framelit design.
  • b.  Cut the design piece in half from the top to the bottom.
  • c.  Attach the pieces onto the left and right sides of the card.Gate Fold Card Using a Framelit Tutorial
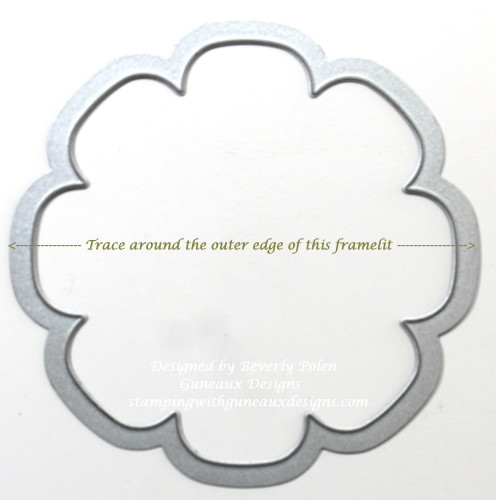
  • d.  Cut a piece of card stock that matches the base card color.  Lay the third largest framelit onto the card stock and trace around the outer edge of the framelit.  Fussy cut the design (i.e., use scissors).

Gate Fold Card Using A Framelit Tutorial

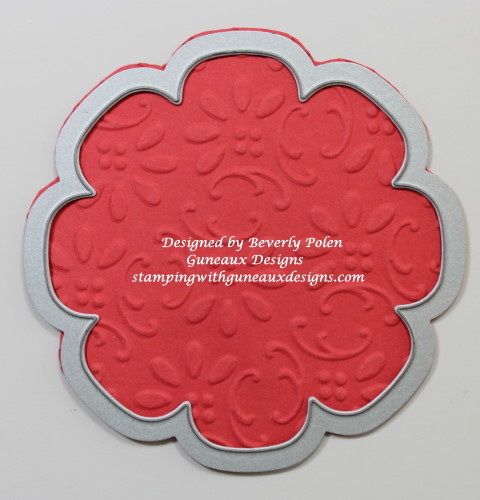
  • e.  Using an embossing folder, emboss this piece of card stock to achieve texture.

Gate Fold Card Using A Framelit Tutorial

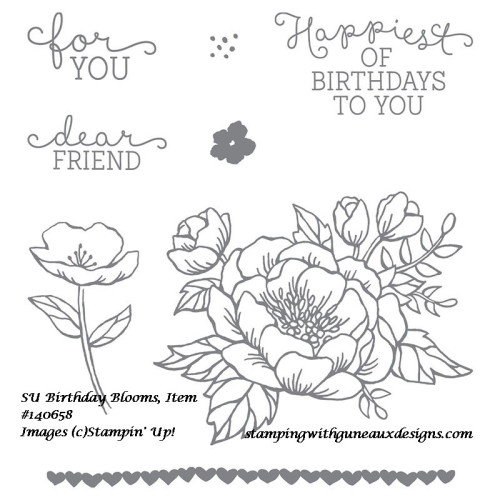
  • f.  Select a design for the top layer of your card with the same framelit, but cutting it with your die-cutting machine (no need to fussy cut).  I used Whisper White Card Stock on which I cut the framelit and stamped a floral image from the Stampin’ Up! Birthday Blooms Stamp Set.  I used copic markers to color the image.  I used foam dots to attach it to the embossed piece of card stock.  Lastly, I added a Happy Birthday sentiment.

Gate Fold Card Using A Framelit-5

  • g.  Place foam dots onto the left side of the embossed card stock (right side when turned over),
  • h.  Adhere this piece to the left side of the card, allowing it to overlap, but not adhere, to the right side of the card.
  • i.  For the inside of the card, cut a 1-15/16″ x 5-1/2″ piece of Whisper White Card Stock.
  • j.  Center the largest framelit onto the card stock and run it through your die-cutting machine.

Gate Fold Card Using A Framelit-6

  • k.  If desired, stamp a sentiment onto the card stock.  Adhere it to the inside center of the card.
  • l.  Use the same framelit (i.e., largest one) to cut another piece of DSP.
  • J. Measure the left and right inside panels of the card base (i.e. those on each side of the center piece).  Use the measurements to cut the sides of the DSP from top to bottom and adhere them to the panels.

Gate Fold Card Using A Framelit

Enjoy your beautiful gate fold card in the shape of your selected framelit!

BlogDivider_zpsed339ea1

SUPPLIES USED

Stamps:  Stampin’ Up! Birthday Blooms Stamp Set and Retired Stampin’ Up! Create a Cupcake Stamp Set (inside sentiment)

Paper:  Stampin’ Up! Birthday Bouquet Designer Series Paper, Watermelon Wonder, and Whisper White Card Stock

Ink:  Stampin’ Up! Watermelon Wonder and Mossy Meadow Classic Ink, Copic Markers

Accessories: Stampin’ Up! Floral Frames Framelits, North Coast Creations Happy Birthday Die, Retired Stampin’ Up! Finial Press Embossing Folder

Gate Fold Card Using a Framelit Tutorial

Gate Fold Card Using A Framelit Tutorial

Gate-Fold Card Using A Framelit Tutorial

If you have questions or comments, please feel free to leave them in the comment section of this post.


Swallowtail Butterfly

God’s Blessings!

Stamping With Guneaux Designs By Beverly Polen

Gate Fold Card Using A Framelit

GATE FOLD CARD USING A FRAMELIT

How to Make a Center Step Card – Happy Birthday

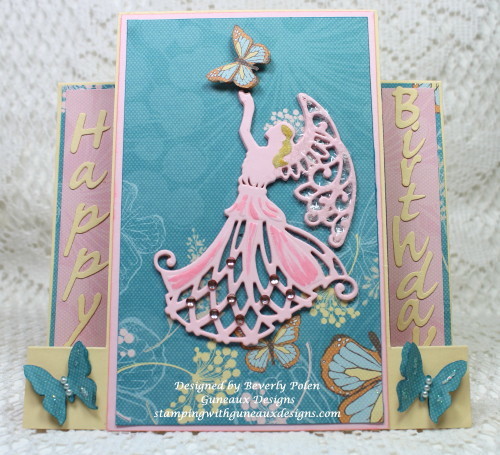
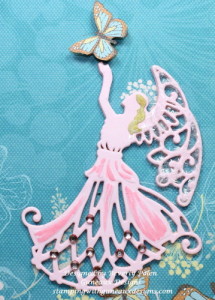
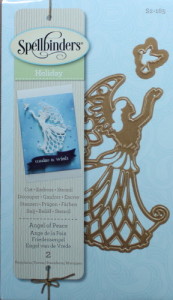
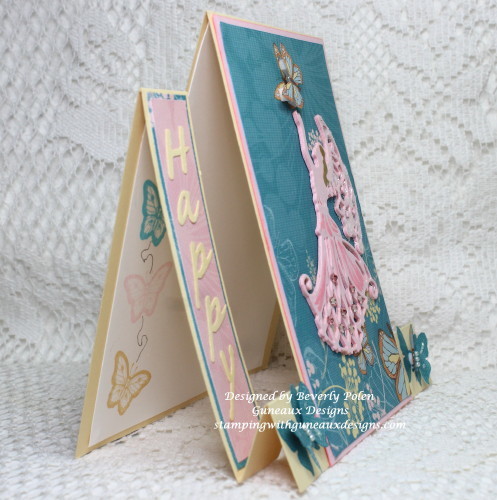
The purpose of this post is to provide a tutorial on how to make a center step card. The card shown in the post is a Happy Birthday card that I made for my little angel granddaughter.  I refer to her as my angel, thus I thought the Spellbinders Holiday Angel of Peace Dies would work perfectly for my center step card.

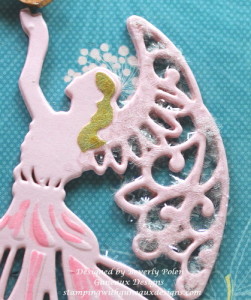
How to make a Center Step CardThe following pictures are closeups of card sections.  You will note that the angel’s wings are covered with a tinsel glitter, which is Martha Stewart’s Crystal Tinsel Glitter (discontinued).

How to make a Center Step CardHow to make a Center Step Card

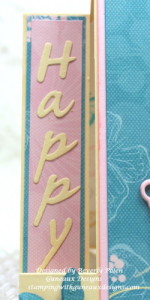
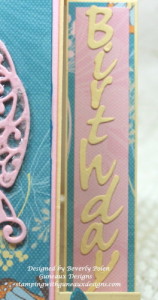
These pictures are closeups of the Happy Birthday sentiment on the left and right sides of the card and the Spellbinders Angel of Peace Dies.

How to make a Center Step CardHow to make a Center Step CardSpellbinders Holiday Angel of Peace


TUTORIAL ON HOW TO MAKE A CENTER STEP CARD

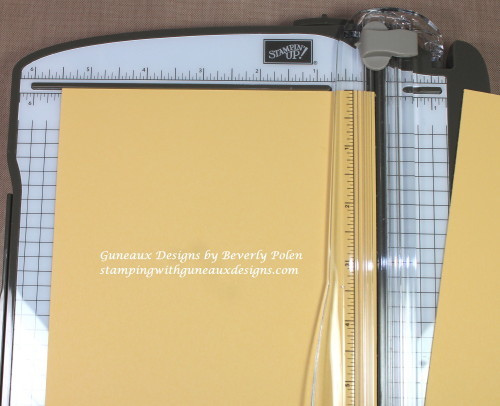
STEP 1: Using a paper trimmer/cutter, cut an 11″ x 5-1/2″ piece of card stock.

How to Make a Center Step Card

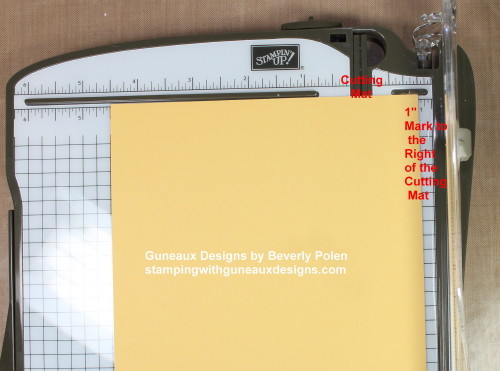
STEP 2:  Leave the 11″ x 5-1/2″ cut piece of card stock on the trimmer, moving the right side to the 1″ mark on the right side of the cutting mat (i.e., the rubber channel that the blade slides through when cutting).

NOTE:  The terms used for a trimmer depends on the type of trimmer used (e.g., Guillotine cutter, Bypass trimmer, etc.).  Thus, in this tutorial,  I have used terms that are applicable to my paper trimmer. Follow the directions for use of your type of trimmer.

How to Make a Center Cut Card

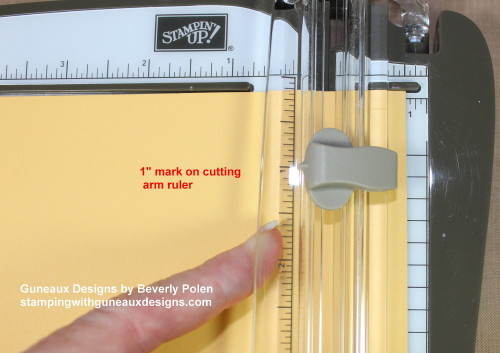
STEP 3:  Using the ruler on the cutting arm, move the cutting blade down to the 1″ mark. Lay the cutting arm down on the paper.

How to Make a Center Step Card Happy Birthday

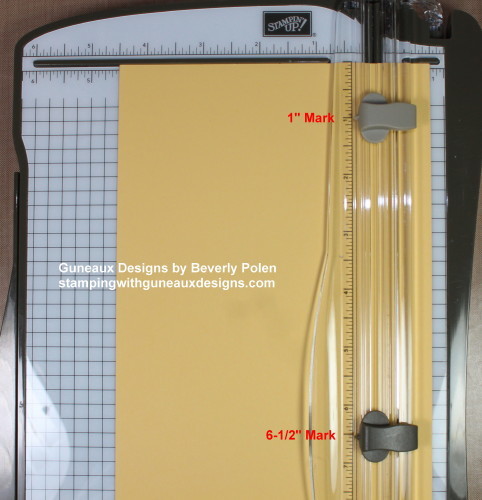
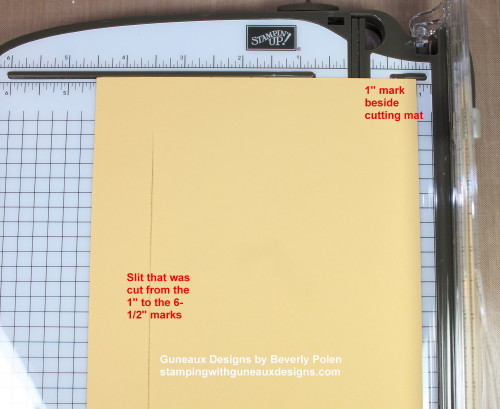
STEP 4:  Cut from the 1″ mark on the cutting arm ruler down to the 6-1/2″ mark.  This provides a 5-1/2″ slit on the card stock.

how-to-make-a-center-step-card-happy-birthday/

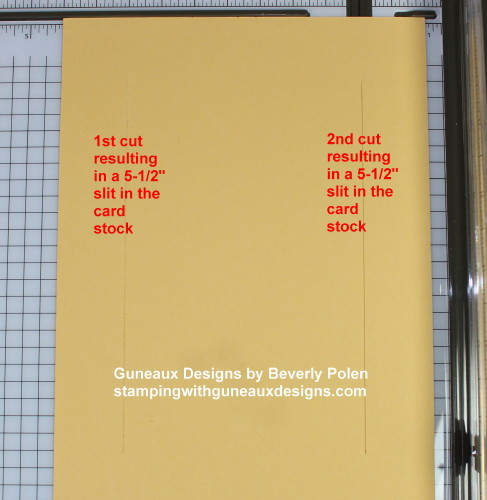
STEP 5:  Turn the card stock over with the 5-1/2″ slit on the left side.  Place the card stock at the 1″ mark that is to the right of the cutting mat.

http://stampingwithguneauxdesigns.com/how-to-make-a-center-step-card-happy-birthday/

STEP 6:  Before cutting, move the cutting blade on the cutting arm down to the 1″ mark (same as STEP 3).

STEP 7:  Cut from the 1″ mark down to the 6-1/2″ mark.  This provides a second 5-1/2″ slit on the card stock.

http://stampingwithguneauxdesigns.com/how-to-make-a-center-step-card-happy-birthday/

STEP 8:  Put the trimmer away and get out your paper scoring tool to score the piece of card stock.

STEP 9:  Place the card stock onto the scoring tool with the 5-1/2″ side and slits to the far left on the tool.

http://stampingwithguneauxdesigns.com/how-to-make-a-center-step-card-happy-birthday/

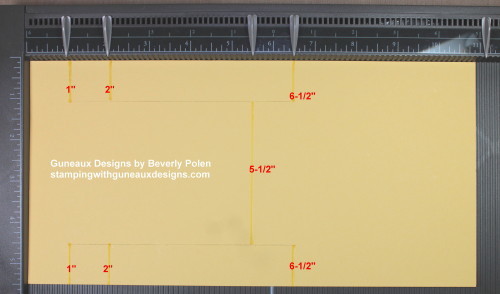
STEP 10:  Score at the 1″, 2″, and 6-1/2″ marks, but ONLY from the top of the card stock down to the slit at the top, and from the slit at the bottom to the edge of the card stock. Your score lines will be 1″ long at the top and bottom, avoiding the area where the two slits are located (see picture below STEP 11).

STEP 11.  Score at the 5-1/2″ mark beginning at the first slit down to the second slit.

http://stampingwithguneauxdesigns.com/how-to-make-a-center-step-card-happy-birthday/

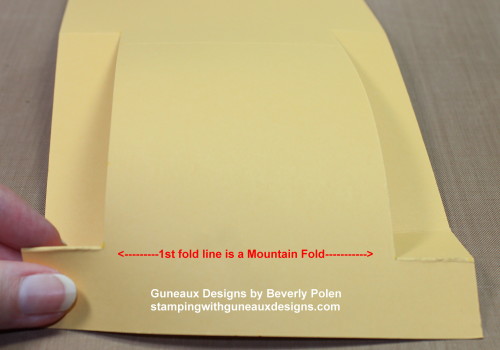
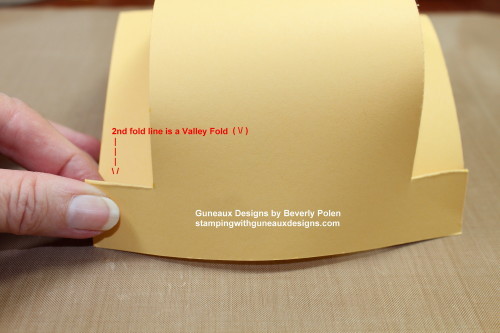
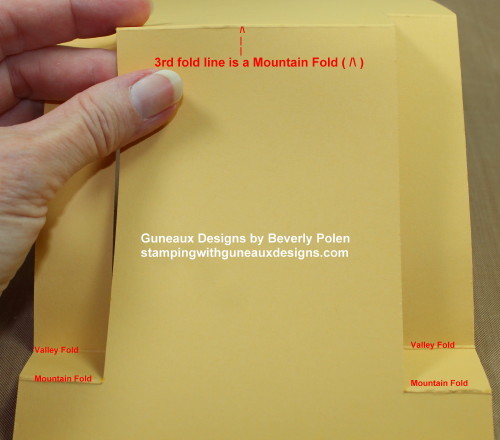
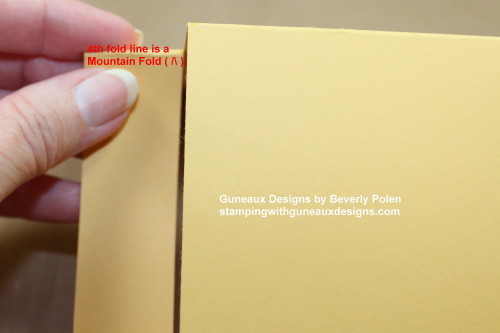
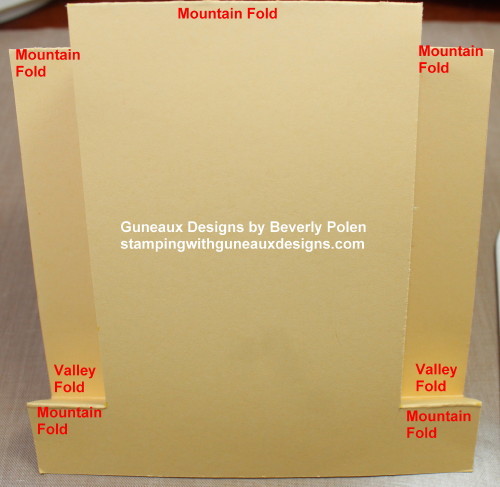
STEP 13:  Remove your card stock from the scoring tool and fold it according to the following:

  • Fold at the first score marks (i.e., the 1″ score line on both sides) into a mountain fold (i.e. the folded crease is facing up).

How to Make a Center Step Card

  • Fold at the second score line (i.e., the 2″ score line on both sides) into a valley fold (i.e., the folded crease is facing down).

How to Make a Center Step Card

  • Fold  the 5-1/2″ score line into a mountain fold.

How to Make a Center Step Card

  • Fold the 6″ score line into a mountain fold.

How to Make a Center Step Card

How to Make a Center Step Card

STEP 14:  Now you can create a center step card base and decorate it according to your desires.

Hopefully my tutorial is easy to follow.  If you have any questions or comments, please feel free to leave them in the comment area (i.e., either at the end of this post or at the conversation bubble to the right of this post title).


Swallowtail Butterfly

God’s Blessings!

Stamping With Guneaux Designs by Beverly Polen
How to make a Center Step Card

HOW TO MAKE A CENTER STEP CARD

Stampin Up Deco Labels Framelits and Morning Meadow Card

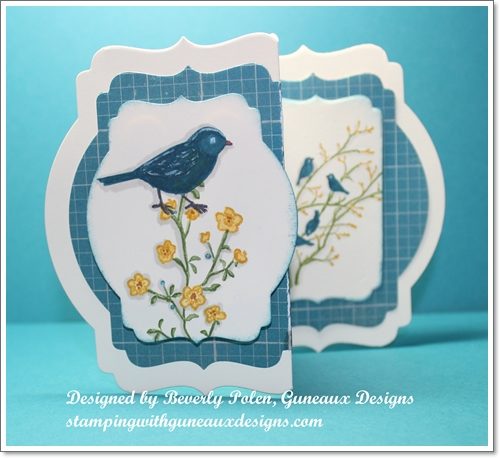
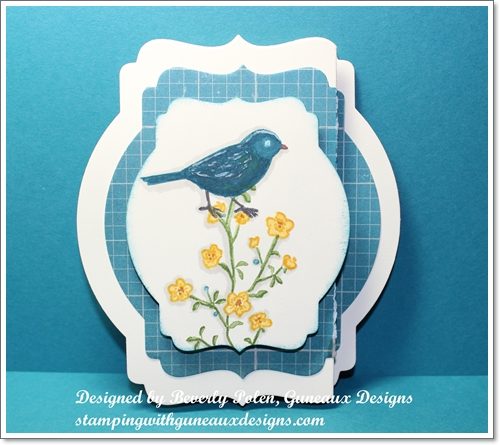
I love the new Stampin Up Deco Labels Framelits, don’t you? I keep thinking of things to make with them as I did with this Stampin Up Deco Labels Framelits and Morning Meadow Card.  The framelits, Stampin Up Morning Meadow Stamp SetStampin Up Label Love Stamp Set, and Stampin Up Serene Silhouettes Stamp Set are highlighted on the card.  A tutorial for making the card can be found below.

This picture shows the closed card.  If anyone has a trick to prevent Designer Series Paper from “cracking” when folded, please leave me a comment to share your trick.  Thank You!

This picture is of the card completely open.

I love using the Stampin Up Framelits to create unique cards.  If you haven’t seen my previous posts of cards made with other framelits, you can see one HERE and another one HERE.

SUPPLIES USED FOR THE STAMPIN UP DECO LABELS FRAMELITS CARD:

Paper: Soho Subway Designer Series Paper (130140), Very Vanilla Card Stock (101650)

Stamps: Morning Meadow Hostess Stamp Set (129678), Stampin Up Label Love Stamp Set (130622), and Serene Silhouettes Stamp Set (127324)

Ink: Island Indigo Classic Ink (126986), Crushed Curry Stampin’ Write Marker (131901), Gumball Green Stampin’ Write Marker (126856 – package), White Pigment Ink (105021 -Gel Pen), Basic Gray Stampin’ Write Marker (131261 – package)

(NOTE: These are the inks I used. The stamp image(s) you select obviously will dictate the inks you use.)

Accessories: Big Shot Die Cutting Machine (113439), Deco Labels Framelits (130102), Stampin’ Dimensionals (104430), and Adhesive

TUTORIAL TO MAKE THE STAMPIN UP DECO LABELS FRAMELITS BIRTHDAY CARD:

Step 1. Cut an 11″ x 4-1/2″ piece of Very Vanilla Card Stock.

Step 2. Score at the 4-1/2″ and 6-1.2″ marks.

Step 3. Make a mountain fold at the 4-1/2″ score line and a valley fold at the 6-1/2″ score line.

Step 4. Lay the folded card stock on top of a Big Shot Cutting Board and center the largest framelit from the Deco Labels Framelits over the folds. You’ll need to slightly lift the left side of the card stock to see the 6-1/2″ fold in order to center the framelit.

Step 5. Finish building the Big Shot sandwich and run it through your Big Shot Die Cutting Machine.  The following pictures show the results. 

Step 6. Repeat Steps 1 – 5, using the Island Indigo and Very Vanilla design from the Soho Subway Designer Series Paper and the next to the largest framelit from the Stampin Up Deco Labels Framelits.

Step 7. Using adhesive, attach the Island Indigo piece to the Very Vanilla Card Stock. If you use liquid glue, allow the piece to dry while lying flat and then crease the folds.

Step 8. Ink and stamp on Very Vanilla Card Stock the floral and bird stamps images from the Morning Meadow Hostess Stamp Set (or use another stamp set for your images).

Step 9. Place the next to the largest Stampin Up Deco Labels Framelit over your image(s) that you stamped in Step 8 and run it through the Big Shot Die Cutting Machine.

Step 10. Sponge Island Indigo Classic Ink around the stamped label and adhere it to the left side of the card.  When attaching this label, it will hang over the crease slightly.  Not to worry!

Step 11. Using the same framelit, cut another label from Very Vanilla Card Stock. This label is too large to fit onto the center. Therefore, you’ll need to cut the sides off as is shown in the below picture.  This piece is for the sentiment or a personal note.  Attach it onto the center of the card.  I stamped onto this piece the “Happy Birthday to you!” image from the Stampin’ Up! Label Love Stamp Set.

Step 12. Ink and stamp onto Very Vanilla Card Stock the image of birds in a tree from the Serene Silhouettes Stamp Set.  Use the same framelit and cut out this label.  It too is too large for the right side of the card, so bear that in mind when cutting the label.  Cut off the sides as done in Step 11.  If you don’t cut off the right side of the label, the card will not look correct when closed.

Step 13. Attach the stamped and modified Very Vanilla label to the right side of the card.

Step 14.  Finished!  Enjoy the Stampin Up Deco Labels Framelits Card!

God’s Blessings!
Stamping With Guneaux Designs
by
Beverly Polen
STAMPIN UP DECO LABELS FRAMELITS AND MORNING MEADOW CARD

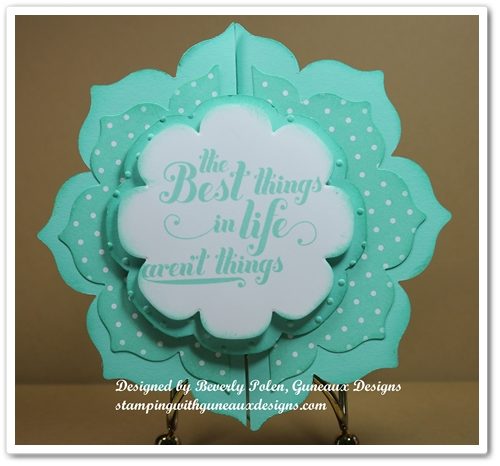
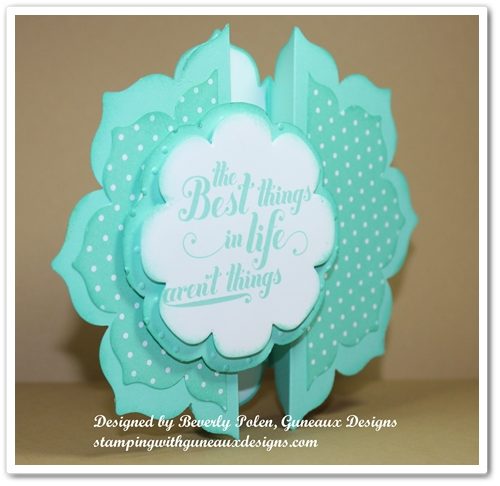
Gate Fold Card Made With Floral Frames Framelits

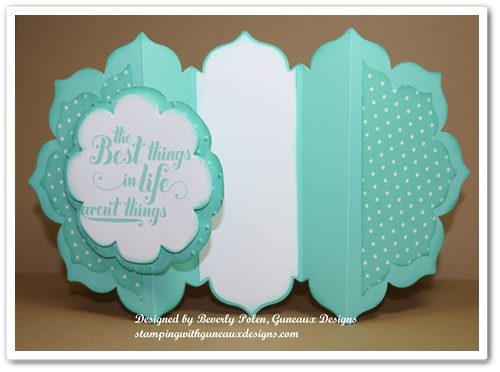
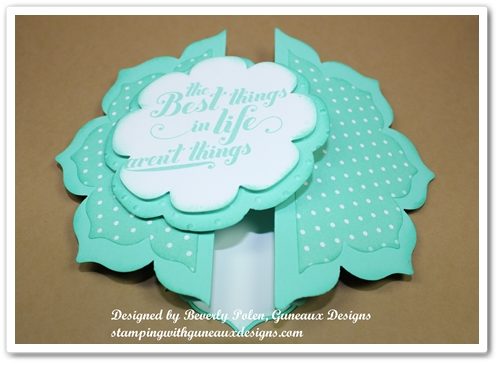
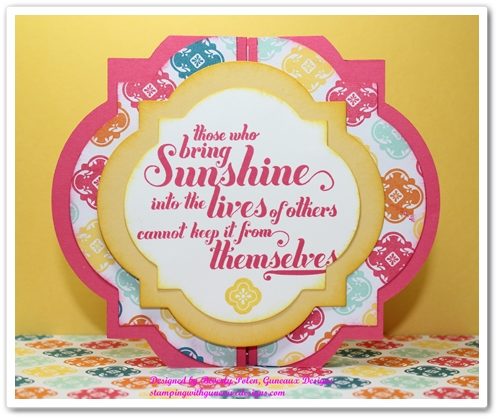
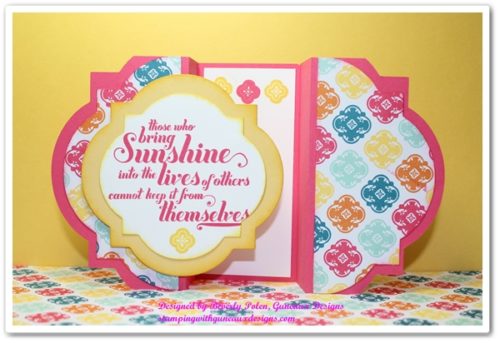
Not all cards are created equal and not all cards are folded in half.  My card today, a Gate Fold Card made with floral frames framelits from Stampin’ Up!, folds on the left and right sides.  However, it is folded differently than most gate fold cards.  The difference is that most gate fold cards are folded with the center piece being the largest part of the card.  My card’s center piece is the smallest part of the card.  I love my newly discovered way of using Stampin’ Up!’s framelits to create gate fold cards, and I hope you enjoy them.

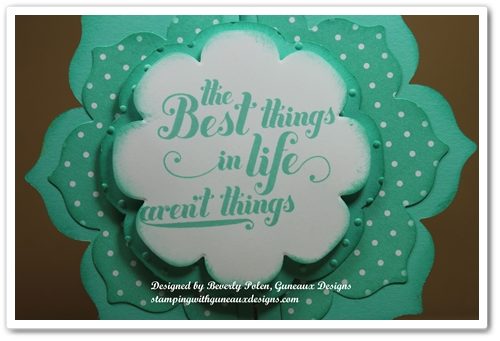
The following is a close-up picture of the sentiment, which is from the Stampin’ Up! Feel Goods Stamp Set:


This picture shows the open card:


SUPPLIES USED FOR THE GATE FOLD CARD MADE WITH FLORAL FRAMES FRAMELIST

Paper:  Coastal Cabana Card Stock (131297), Whisper White Card Stock (100730), and 2013-2015 In-Color Designer Series Paper Stack (130136)

Stamps:  Feel Goods Stamp Set (129684 – c)

InkCoastal Cabana Classic Ink (131175)

Accessories:  Floral Frames Framelits (127012)


 INSTRUCTIONS:

Any of the larger Stampin’ Up! Framelits can be used to create a gate fold card in the manner I created this one.  To make this gate fold card made with floral frames framelits, follow the tutorial I posted HERE.  The primary difference for this card is simply the framelits used.  Enjoy!


 God’s Blessings!
Stamping With Guneaux Designs
by
Beverly Polen
 GATE FOLD CARD MADE WITH FLORAL FRAMES FRAMELITS

Polished Stone Technique

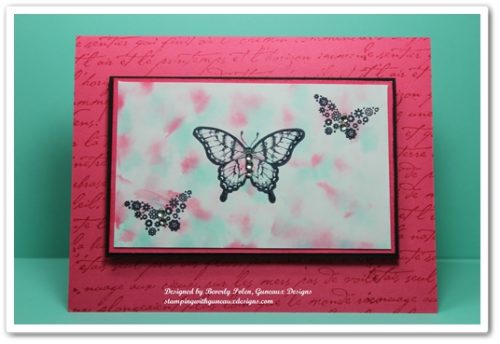
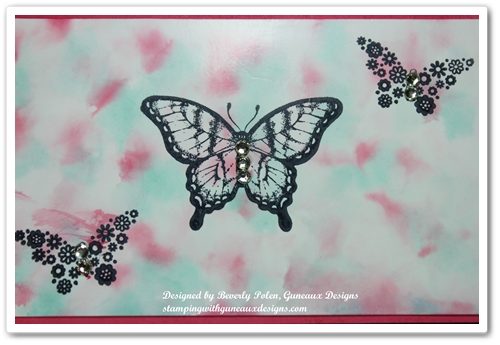
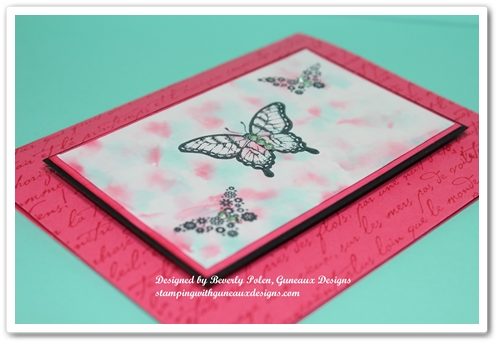
I suspect most crafters have tried the Polished Stone Technique.  However, this is my first time although the technique has been around for some time.  Polished Stone is a rich background technique that looks like rich marble.  It is an excellent background for both feminine and masculine cards.

After looking closely at the above picture, can you tell that I left out one key product that most, but not all, crafters use for the Polished Stone Technique?   It is the metallic ink.  I have seen examples of this technique where the metallic ink was used and examples where it was not used.  Well, I left it out because I did not have any metallic ink.  However, I’ll provide you with the instructions that include the ink.


SUPPLIES USED FOR THE POLISHED STONE TECHNIQUE:

Paper:  Glossy White Card Stock (I used Stampin’ Up!’s), Strawberry Slush Card Stock (131295), and Basic Black Card Stock (121045)

Stamps:  Papillon Potpourri Stamp Set (123759) and Stampin’ Up!’s old French Script Background Stamp

Ink:  Coastal Cabana Classic Ink Re-Inker (131164), Strawberry Slush Classic Ink Re-Inker (131167), and Stazon Ink

Accessories:  Cotton Ball, Rubbing Alcohol, and Basic Rhinestones (119246)


INSTRUCTIONS FOR THE POLISHED STONE TECHNIQUE:

  • Add a few drops of metallic re-inker randomly onto glossy card stock.
  • Add rubbing alcohol onto a cotton ball.
  • Add two or three drops of each classic re-inker color onto the cotton ball.
  • Dab the cotton ball over the glossy card stock, continuing until you achieve the desired look.  The rubbing alcohol will cause the re-inker colors to blend together, and the metallic re-inker will sit on top of the re-inker colors to give a marble look.
  • Allow the card stock to dry, and if desired, seal it with an acrylic sealer.
  • Stamp the desired image onto the “marbled” card stock with Stazon Ink.
  • Create your card!

This card can be a Happy Birthday, Happy Anniversary, Thinking of You, Thank You, or any type of card.


 God’s Blessings!
Stamping With Guneaux Designs
by
Beverly Polen
POLISHED STONE TECHNIQUE

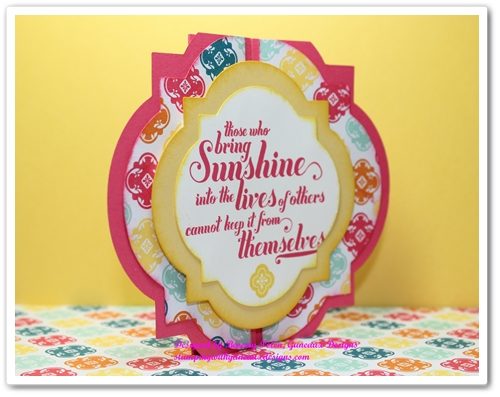
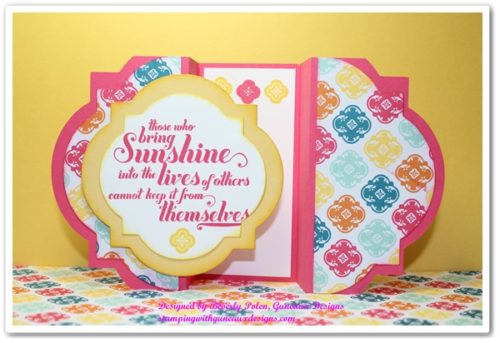
Gate Fold Card Tutorial Using Window Frames Framelits

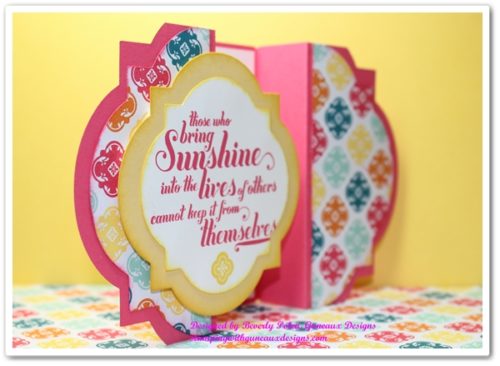
I have for you today a Gate Fold Card Tutorial that uses the Stampin’ Up! Window Frames Collection Framelits, Feel Goods Stamp Set, Mosaic Madness Stamp Set, and Quatrefancy Specialty Designer Series Paper.  This is a gate fold card that I created and I have not seen this type of card before.  It is a card cut and folded in the shape of a framelit or die.

GATE FOLD CARD TUTORIAL USING WINDOW FRAMES FRAMELITS:

Step 1:  Cut an 11″ x 4-1/4″ piece of card stock (the size of card stock can vary, depending on the framelit used).  I used the new Strawberry Slush Card Stock (131295).

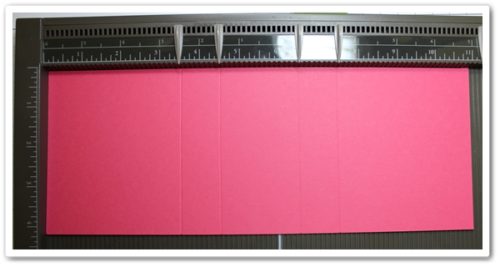
Step 2:  Score on the 11″ side at 3 1/2″, 4 1/2″, 6 1/2″, and 7 1/2″.

Step 3:  Starting from the left side, fold the score lines in this order: valley fold, mountain fold, mountain fold, and valley fold.

Step 4:  Crease the score lines well so the card stock will lay flat for the next step.

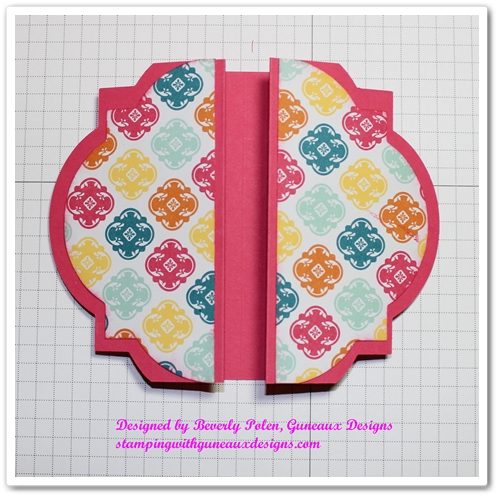
Step 5:  Lay the largest framelit from the  Window Frames Collection Framelits  (129021) onto the folded card, making sure to center it top to bottom and exactly around the mountain folds. Use a temporary tape to hold the die in place. Cut using Big Shot Die Cutting Machine (113439).

 RESULTS:

Step 6:  Cut a 6″ x 5-1/4″ piece of designer series paper.  I used Stampin’ Up! Quatrefancy Specialty Designer Series Paper.

Step 7:  Lay the second to the largest framelit from the Window Frames Collection onto the piece of designer series paper.  Cut using the Big Shot Die Cutting Machine, and then cut the piece in half.

Step 8:  Adhere one piece of the designer series paper to the left side of the Gate Folded Card and the other to the right side.

Step 9:  You may need to cut off a very small portion of the top and bottom ends of the designer series paper if they overlap the card base.

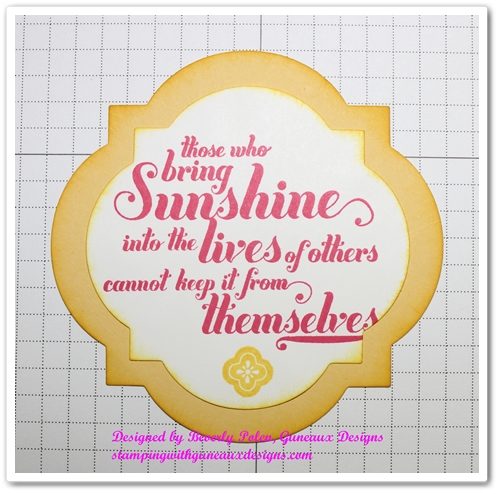
Step 10:  Lay the third largest framelit onto a piece of card stock and cut using the Big Shot Die Cutting Machine.  I used Stampin’ Up!’s Daffodil Delight Card Stock.

Step 11.  Stamp a sentiment onto a piece of Whisper White Card Stock and cut it out using the fourth largest framelit. I used a sentiment from the Stampin’ Up! Feel Goods Stamp Set.

Step 12:  Adhere the Whisper White Card Stock with the sentiment onto the piece of card stock cut out in step 10 above.

Step 13.  To achieve dimension, adhere the sentiment piece onto the left side of the card base with foam adhesive.

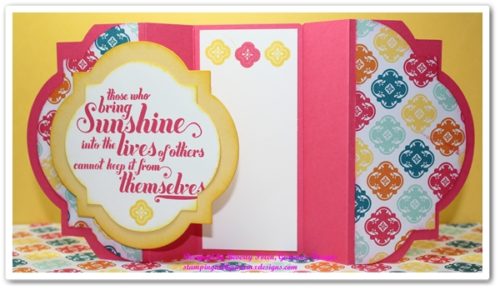
Step 14.  Cut and adhere a small piece of Whisper White Card Stock into the inside of the card for your personal note.  (I used a stamp image from the Mosaic Madness Stamp Set at the top of the Whisper White Card Stock.)

If you followed along with the Gate Fold Card Tutorial, you’ll now have a beautiful and unique card.  I think you’ll love the outcome!

 God’s Blessings!

Stamping With Guneaux Designs
by
Beverly Polen

 GATE FOLD CARD TUTORIAL USING WINDOW FRAMES FRAMELITS