Gate Fold Card Using A Framelit Tutorial

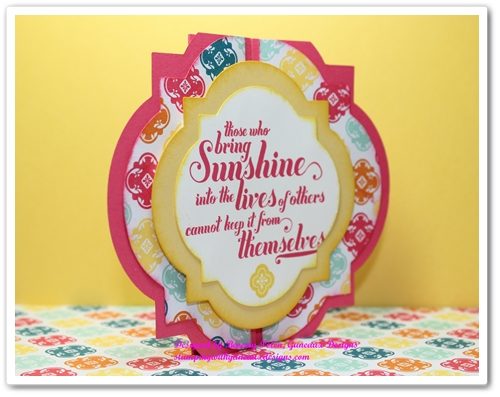
In August 2013, I posted two tutorials on how to make a Gate Fold Card using a framelit to form the shape of a card.  One Tutorial was for using the Stampin’ Up!  Window Frames Framelits, and the Second Tutorial was for using the Stampin’ Up! Deco Frames Framelits.   

Recently, I was asked by a viewer, Eileen, to provide another tutorial for making a Gate-Fold Card Using a Framelit from the Stampin’ Up! Floral Frames Framelits.  This post provides the requested tutorial. (Sorry, Eileen that it has taken some time!)

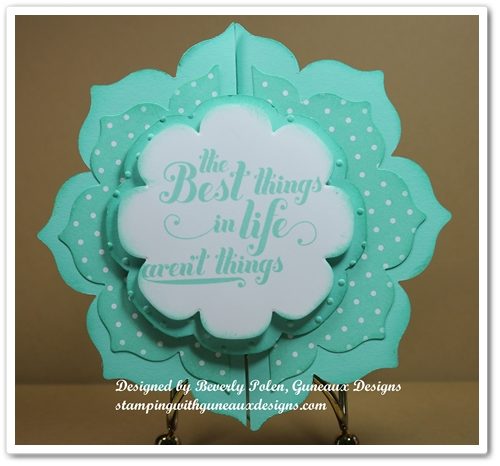
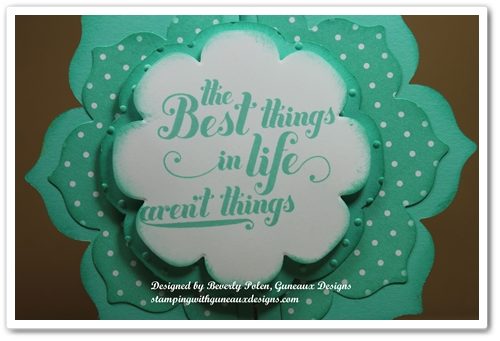
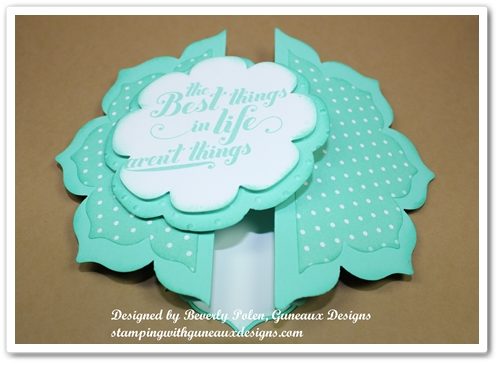
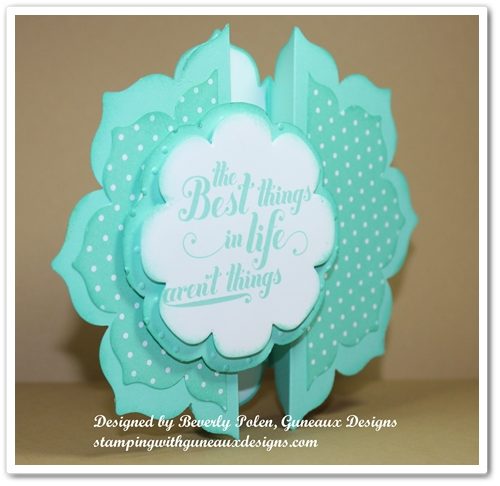
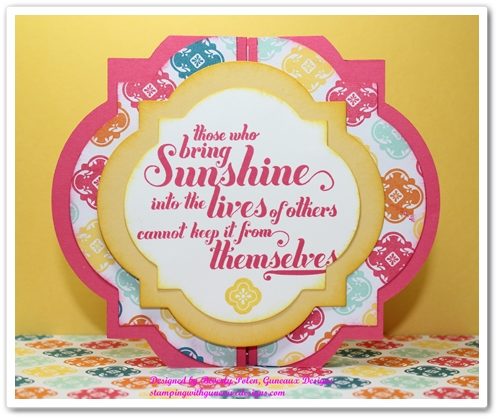
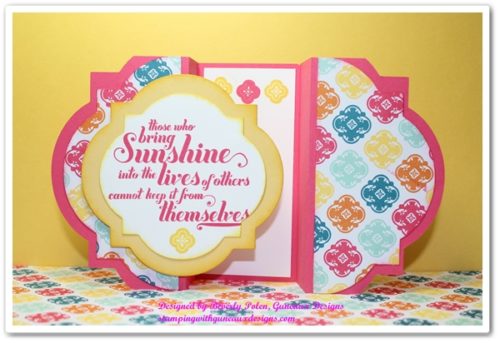
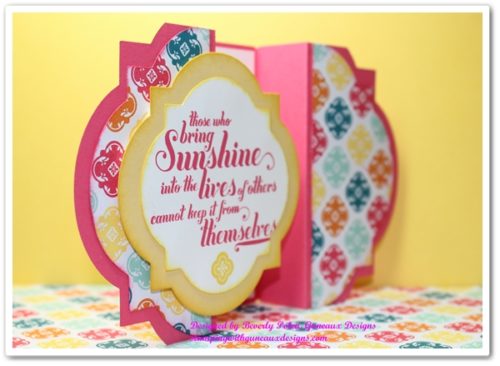
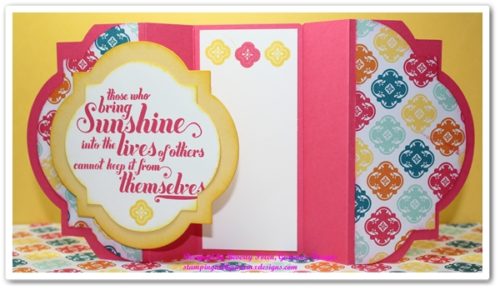
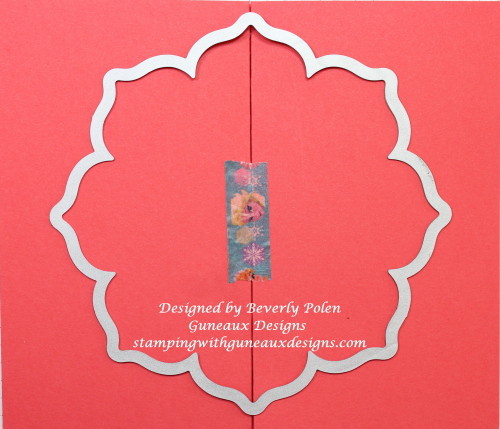
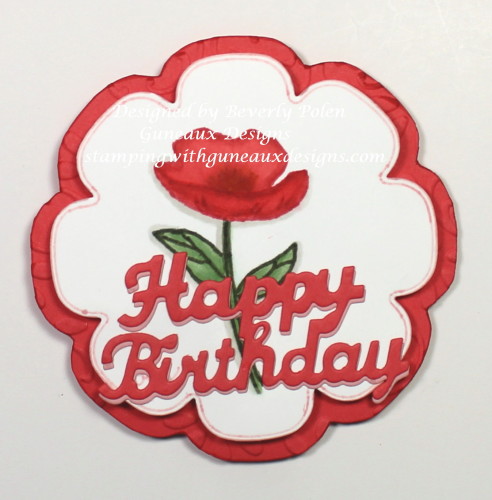
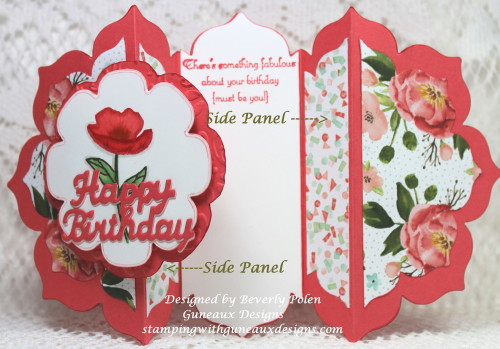
But first, let me show you photos of the Happy Birthday card I created using the featured framelits:

Gate Fold Card Using A Framelit

Gate Fold Card Using A Framelit

Gate Fold Card Using A Framelit

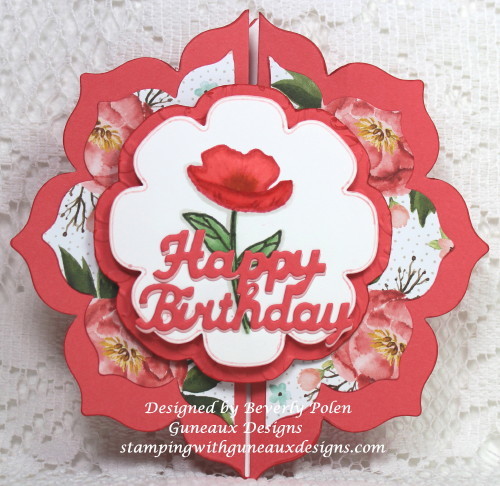
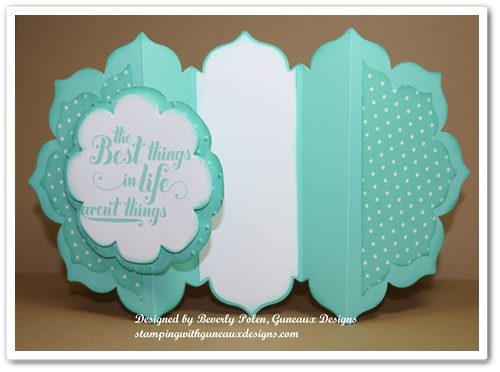
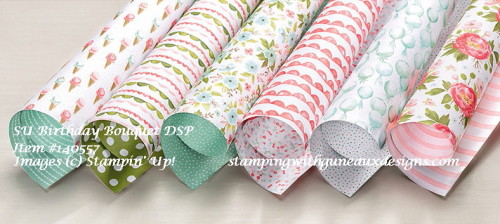
You can see in the above picture that I used another design from the Stampin’ Up! Birthday Bouquet DSP to cover both side panels on the inside of the card.  Now, on to the tutorial.

BlogDivider_zpsed339ea1

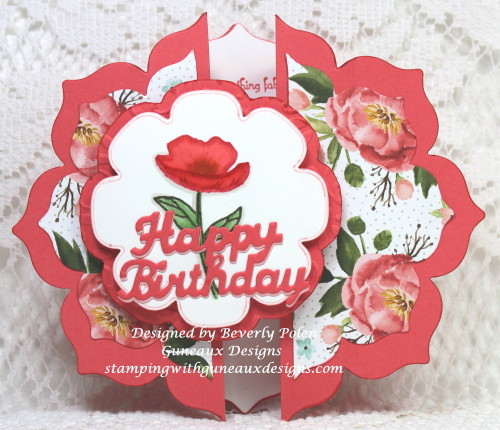
UPDATE:  This card was selected as a favorite on Splitcoaststampers for the week ending January 24, 2016.

BlogDivider_zpsed339ea1

TUTORIAL FOR MAKING A GATE FOLD CARD USING A FRAMELIT

Step 1.  Select a framelit that you want to use to form the shape of your card.

(NOTE:  I recommend selecting one that is no wider than 5″ and longer than 7″, otherwise, you’ll need 12″ card stock).

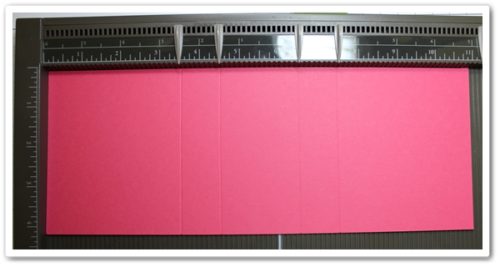
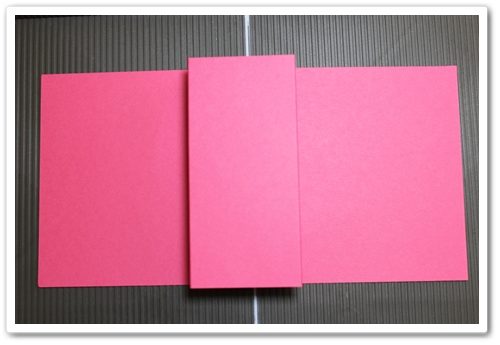
Step 2.  Score an 8-1/2″ x 11″ piece of card stock on the 11″ side at the 3-1/2″, 4-1/2″, 6-1/2″, and 7-1/2″ measurements.

Step 3.  Fold the 3-1/2″ score line into a mountain fold, 4-1/2″ into a valley fold, 6-1/2″ into a valley fold, and 7-1/2″ into a mountain fold.

Step 4.  Crease the score lines well using a bone folder.  

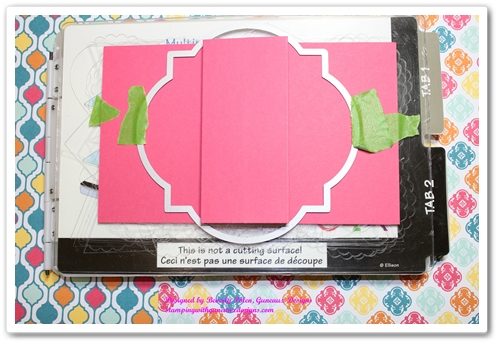
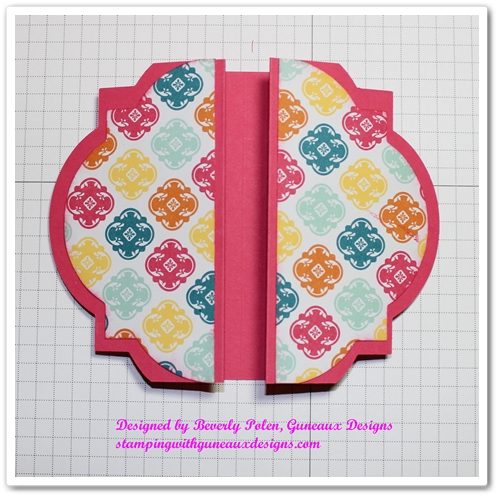
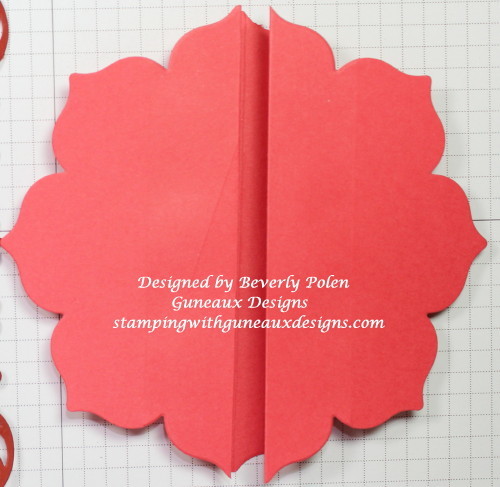
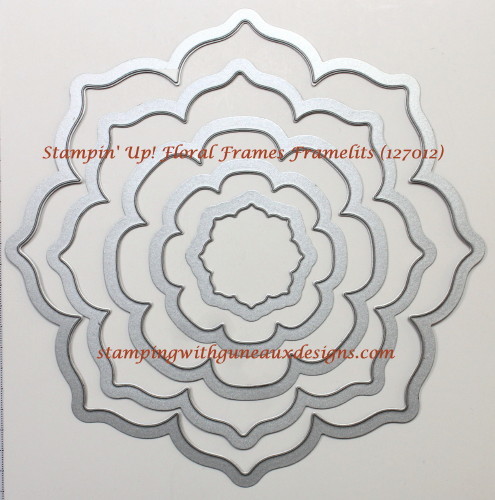
Step 5.  Lay your selected framelit onto the front of the folded card stock, centering the framelit.  Use temporary tape to hold the folds and framelit in place. (I used the largest framelit from the Floral Frames Framelits.)

Gate-Fold Card Using Framelits

Step 6.  Using your die-cutting machine’s recommendation for the correct die-cutting sandwich, run the card stock and framelit through the machine.

(NOTE:  If using a Stampin’ Up! framelit, run the sandwich through your machine at least two times to get all layers cut.)

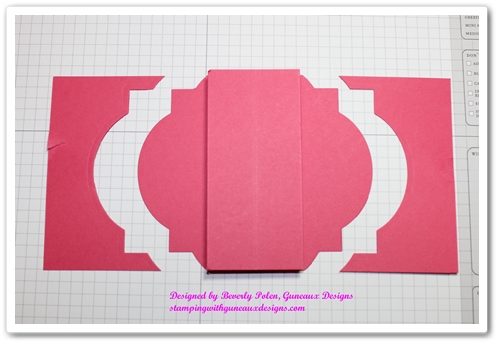
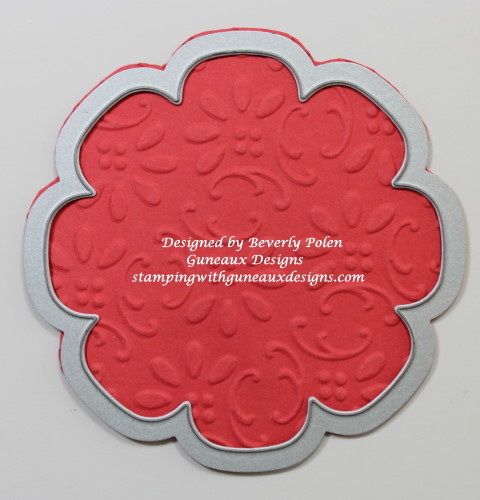
Your cutout will look like the one in this photo if you use the featured framelits.

Gate Fold Card Using A Framelit Tutorial

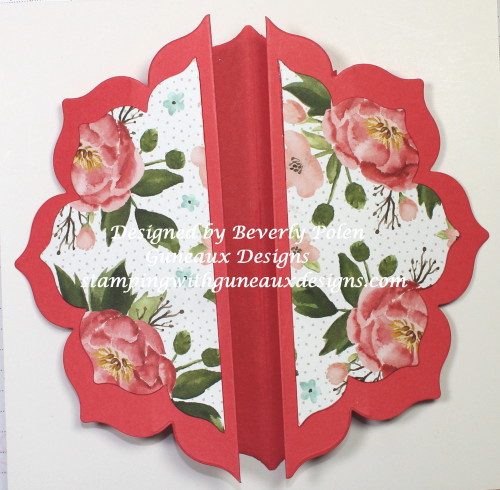
Step 7.  Using the remaining framelits of your selected set to cut designer series paper to decorate your card.

STOP AT THIS STEP OF THE TUTORIAL UNLESS:

Step 8.  IF you are using the Stampin’ Up! Floral Frames Framelits, follow the remaining steps.

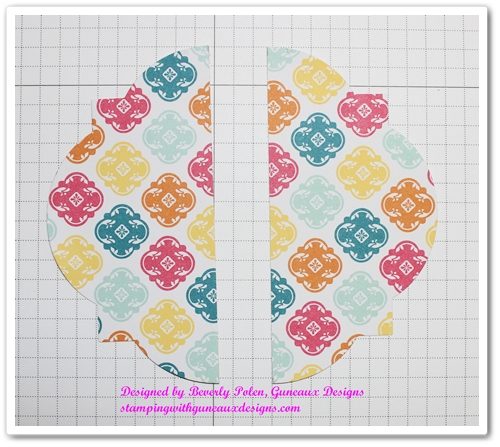
  • a.  If you decide to use designer series paper as I did, use the next to the largest framelit from the Stampin’ Up! Floral Frames Framelits to cut out a framelit design.
  • b.  Cut the design piece in half from the top to the bottom.
  • c.  Attach the pieces onto the left and right sides of the card.Gate Fold Card Using a Framelit Tutorial
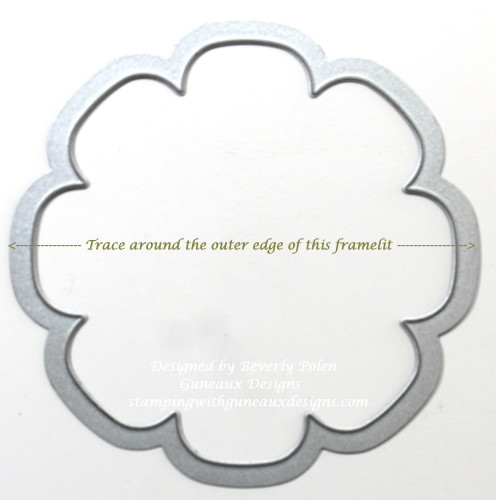
  • d.  Cut a piece of card stock that matches the base card color.  Lay the third largest framelit onto the card stock and trace around the outer edge of the framelit.  Fussy cut the design (i.e., use scissors).

Gate Fold Card Using A Framelit Tutorial

  • e.  Using an embossing folder, emboss this piece of card stock to achieve texture.

Gate Fold Card Using A Framelit Tutorial

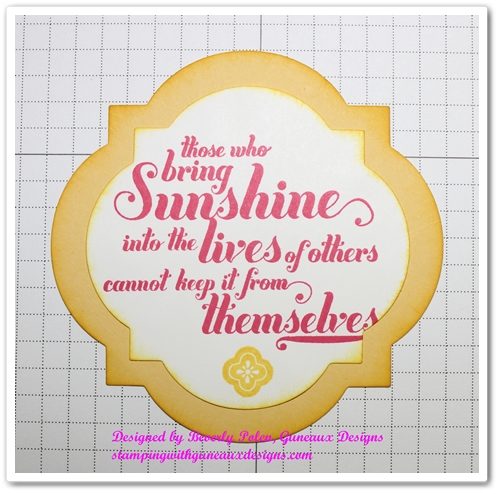
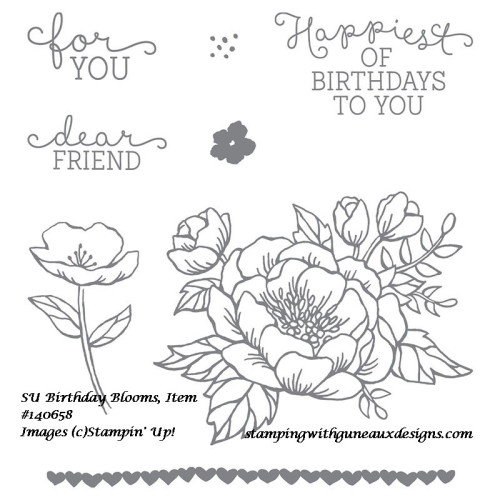
  • f.  Select a design for the top layer of your card with the same framelit, but cutting it with your die-cutting machine (no need to fussy cut).  I used Whisper White Card Stock on which I cut the framelit and stamped a floral image from the Stampin’ Up! Birthday Blooms Stamp Set.  I used copic markers to color the image.  I used foam dots to attach it to the embossed piece of card stock.  Lastly, I added a Happy Birthday sentiment.

Gate Fold Card Using A Framelit-5

  • g.  Place foam dots onto the left side of the embossed card stock (right side when turned over),
  • h.  Adhere this piece to the left side of the card, allowing it to overlap, but not adhere, to the right side of the card.
  • i.  For the inside of the card, cut a 1-15/16″ x 5-1/2″ piece of Whisper White Card Stock.
  • j.  Center the largest framelit onto the card stock and run it through your die-cutting machine.

Gate Fold Card Using A Framelit-6

  • k.  If desired, stamp a sentiment onto the card stock.  Adhere it to the inside center of the card.
  • l.  Use the same framelit (i.e., largest one) to cut another piece of DSP.
  • J. Measure the left and right inside panels of the card base (i.e. those on each side of the center piece).  Use the measurements to cut the sides of the DSP from top to bottom and adhere them to the panels.

Gate Fold Card Using A Framelit

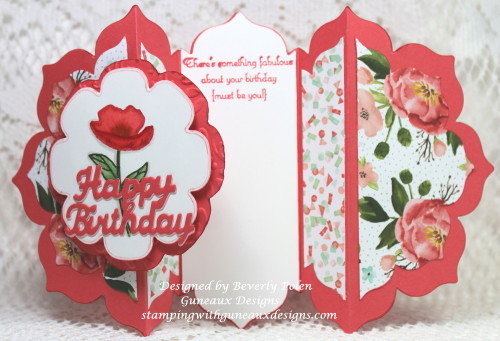
Enjoy your beautiful gate fold card in the shape of your selected framelit!

BlogDivider_zpsed339ea1

SUPPLIES USED

Stamps:  Stampin’ Up! Birthday Blooms Stamp Set and Retired Stampin’ Up! Create a Cupcake Stamp Set (inside sentiment)

Paper:  Stampin’ Up! Birthday Bouquet Designer Series Paper, Watermelon Wonder, and Whisper White Card Stock

Ink:  Stampin’ Up! Watermelon Wonder and Mossy Meadow Classic Ink, Copic Markers

Accessories: Stampin’ Up! Floral Frames Framelits, North Coast Creations Happy Birthday Die, Retired Stampin’ Up! Finial Press Embossing Folder

Gate Fold Card Using a Framelit Tutorial

Gate Fold Card Using A Framelit Tutorial

Gate-Fold Card Using A Framelit Tutorial

If you have questions or comments, please feel free to leave them in the comment section of this post.


Swallowtail Butterfly

God’s Blessings!

Stamping With Guneaux Designs By Beverly Polen

Gate Fold Card Using A Framelit

GATE FOLD CARD USING A FRAMELIT

Gate Fold Card Made With Floral Frames Framelits

Not all cards are created equal and not all cards are folded in half.  My card today, a Gate Fold Card made with floral frames framelits from Stampin’ Up!, folds on the left and right sides.  However, it is folded differently than most gate fold cards.  The difference is that most gate fold cards are folded with the center piece being the largest part of the card.  My card’s center piece is the smallest part of the card.  I love my newly discovered way of using Stampin’ Up!’s framelits to create gate fold cards, and I hope you enjoy them.

The following is a close-up picture of the sentiment, which is from the Stampin’ Up! Feel Goods Stamp Set:


This picture shows the open card:


SUPPLIES USED FOR THE GATE FOLD CARD MADE WITH FLORAL FRAMES FRAMELIST

Paper:  Coastal Cabana Card Stock (131297), Whisper White Card Stock (100730), and 2013-2015 In-Color Designer Series Paper Stack (130136)

Stamps:  Feel Goods Stamp Set (129684 – c)

InkCoastal Cabana Classic Ink (131175)

Accessories:  Floral Frames Framelits (127012)


 INSTRUCTIONS:

Any of the larger Stampin’ Up! Framelits can be used to create a gate fold card in the manner I created this one.  To make this gate fold card made with floral frames framelits, follow the tutorial I posted HERE.  The primary difference for this card is simply the framelits used.  Enjoy!


 God’s Blessings!
Stamping With Guneaux Designs
by
Beverly Polen

 GATE FOLD CARD MADE WITH FLORAL FRAMES FRAMELITS

Gate Fold Card Tutorial Using Window Frames Framelits

I have for you today a Gate Fold Card Tutorial that uses the Stampin’ Up! Window Frames Collection Framelits, Feel Goods Stamp Set, Mosaic Madness Stamp Set, and Quatrefancy Specialty Designer Series Paper.  This is a gate fold card that I created and I have not seen this type of card before.  It is a card cut and folded in the shape of a framelit or die.

GATE FOLD CARD TUTORIAL USING WINDOW FRAMES FRAMELITS:

Step 1:  Cut an 11″ x 4-1/4″ piece of card stock (the size of card stock can vary, depending on the framelit used).  I used the new Strawberry Slush Card Stock (131295).

Step 2:  Score on the 11″ side at 3 1/2″, 4 1/2″, 6 1/2″, and 7 1/2″.

Step 3:  Starting from the left side, fold the score lines in this order: valley fold, mountain fold, mountain fold, and valley fold.

Step 4:  Crease the score lines well so the card stock will lay flat for the next step.

Step 5:  Lay the largest framelit from the  Window Frames Collection Framelits  (129021) onto the folded card, making sure to center it top to bottom and exactly around the mountain folds. Use a temporary tape to hold the die in place. Cut using Big Shot Die Cutting Machine (113439).

 RESULTS:

Step 6:  Cut a 6″ x 5-1/4″ piece of designer series paper.  I used Stampin’ Up! Quatrefancy Specialty Designer Series Paper.

Step 7:  Lay the second to the largest framelit from the Window Frames Collection onto the piece of designer series paper.  Cut using the Big Shot Die Cutting Machine, and then cut the piece in half.

Step 8:  Adhere one piece of the designer series paper to the left side of the Gate Folded Card and the other to the right side.

Step 9:  You may need to cut off a very small portion of the top and bottom ends of the designer series paper if they overlap the card base.

Step 10:  Lay the third largest framelit onto a piece of card stock and cut using the Big Shot Die Cutting Machine.  I used Stampin’ Up!’s Daffodil Delight Card Stock.

Step 11.  Stamp a sentiment onto a piece of Whisper White Card Stock and cut it out using the fourth largest framelit. I used a sentiment from the Stampin’ Up! Feel Goods Stamp Set.

Step 12:  Adhere the Whisper White Card Stock with the sentiment onto the piece of card stock cut out in step 10 above.

Step 13.  To achieve dimension, adhere the sentiment piece onto the left side of the card base with foam adhesive.

Step 14.  Cut and adhere a small piece of Whisper White Card Stock into the inside of the card for your personal note.  (I used a stamp image from the Mosaic Madness Stamp Set at the top of the Whisper White Card Stock.)

If you followed along with the Gate Fold Card Tutorial, you’ll now have a beautiful and unique card.  I think you’ll love the outcome!

 God’s Blessings!

Stamping With Guneaux Designs
by
Beverly Polen

 GATE FOLD CARD TUTORIAL USING WINDOW FRAMES FRAMELITS