Splitcoaststampers Pretty In Pink, Field Flowers

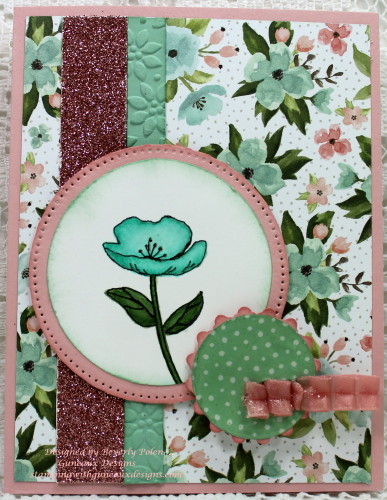
Today’s card share is a card I made in response to today’s Splitcoaststampers’ Pretty In Pink, Free For All Challenge, F4A.  The challenge is to make a card with pink in it. Pretty easy, right?  I made this Pretty In Pink card as my submission for the the challenge.

Splitcoaststampers Pretty in Pink Field Flowers


UPDATE:  Congratulations! In the General Stamping forum, you’re in the FAVORITES for the week ending February 14. (From Splitcoaststampers).


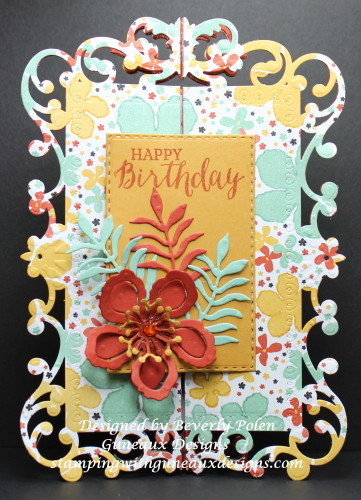
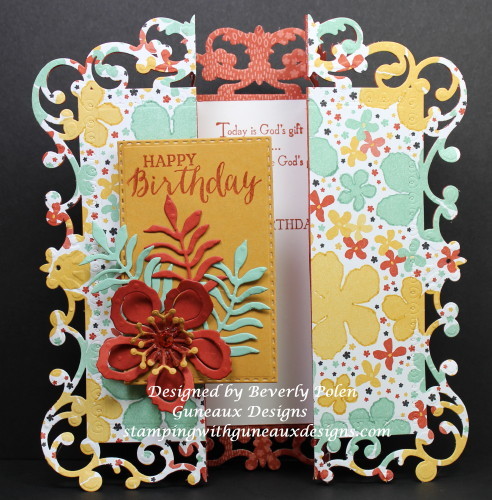
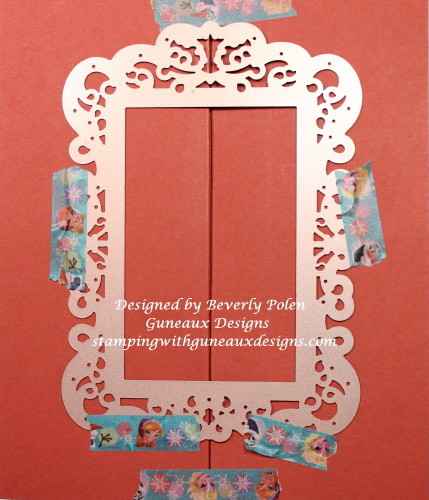
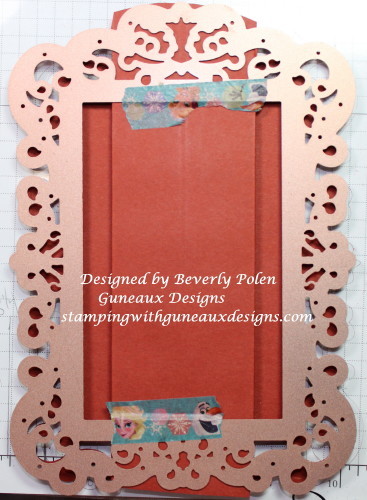
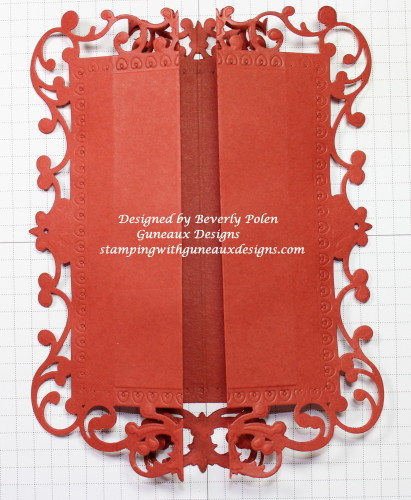
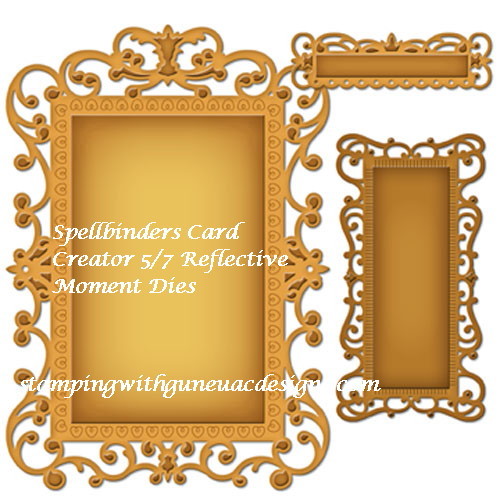
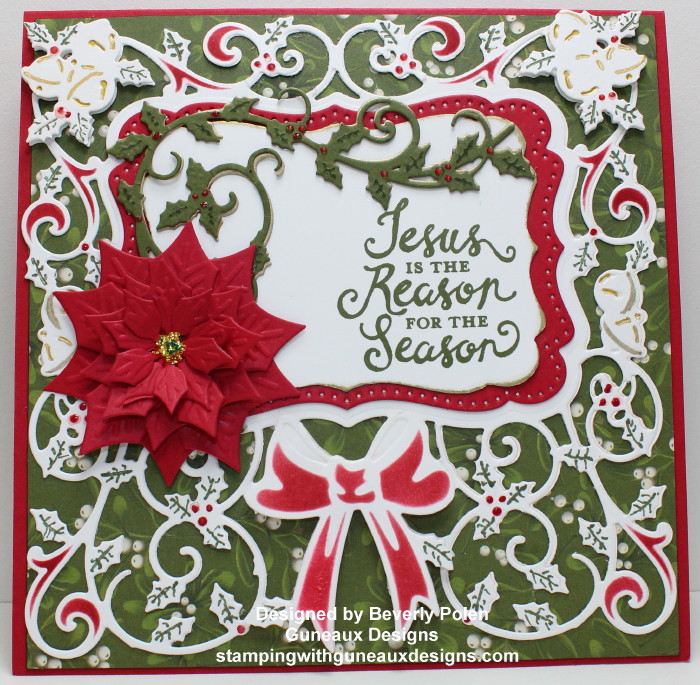
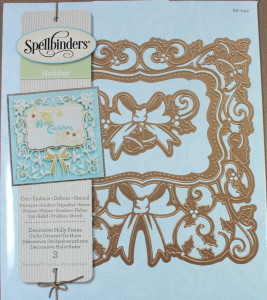
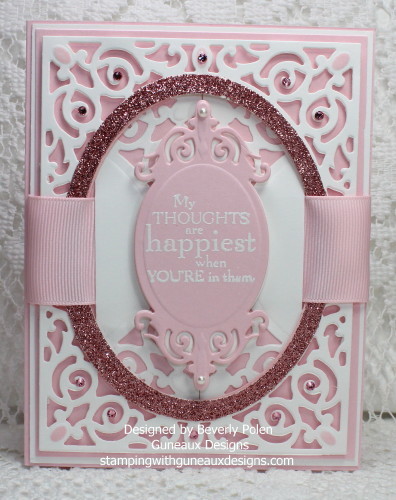
To create the card, I used a Stampin’ Up! Pink Pirouette card base, covered with a piece of Whisper White card stock.  I then added a small piece of Pink Pirouette card stock upon which I added the Whisper White die cut.  The die that I used for the die cut is from the Spellbinders A 2 Filigree Delight Dies.

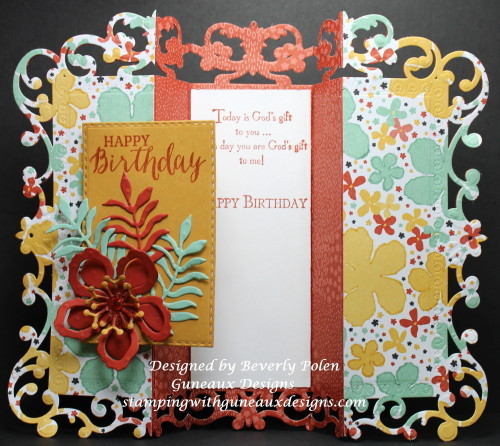
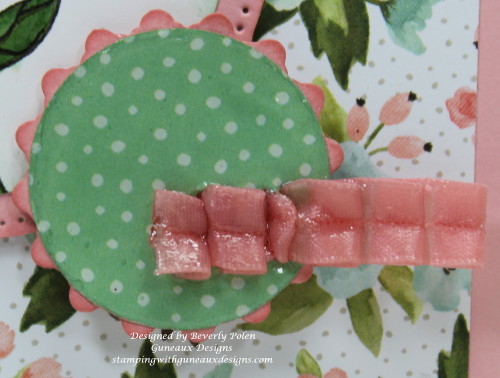
You will note that there is another Whisper White die cut behind the sentiment that a Pink Pirouette ribbon weaves through.  This die cut is the same as the main one; however, I cut it into two pieces, cutting each piece to fit, and reversed them when adhering to the card (the top and bottom of the die cut are touching each other in the center of the card).

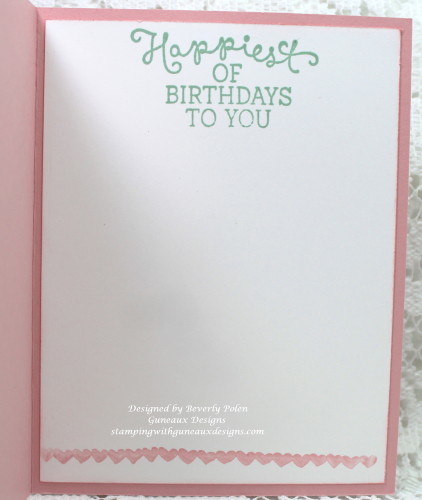
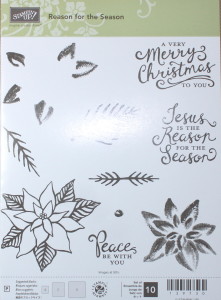
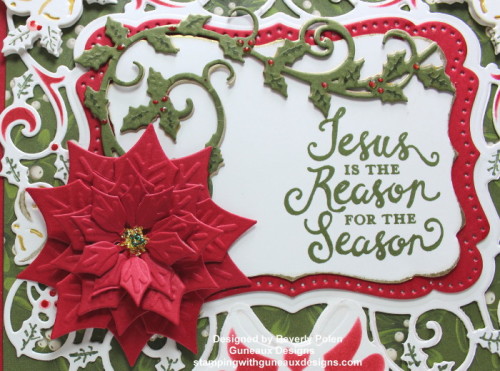
I added the sentiment from the retired Stampin’ Up! Field Flowers stamp set, “My Thoughts Are Happiest When You’re In Them.”  I think that sentiment is a very positive one and I love using it when I make cards for my children and grandchildren.  I placed the sentiment, created with VersaMark Ink and White Embossing Powder, onto a Pink Pirouette die cut.  This die is from the same Spellbinders Die set.

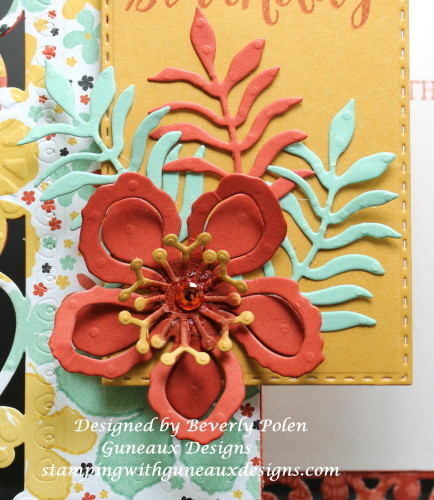
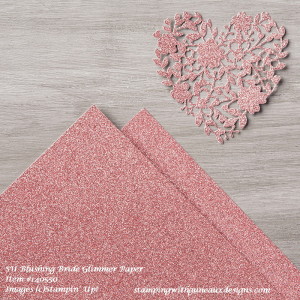
For embellishments, I die cut an oval from the Stampin’ Up! Pink Pirouette Glimmer Paper and placed it over the oval portion of the main die cut.  I added several Swarovski Pink Crystals and two Stampin’ Up! Basic Pearls to give the card some bling.

Enjoy and thanks for stopping by.  You may leave a comment in the comments section.  Comments are greatly appreciated!

BlogDivider_zpsed339ea1

SUPPLIES USED:

Stamps: SU Field Flowers

Paper: SU Whisper White and Pink Pirouette CS and SU Pink Pirouette Glimmer Paper

Card Size: A2

Ink: VersaMark

Accessories: Spellbinders Filigree Delight Dies, SU Pink Pirouette Ribbon, White Embossing Powder, SU Basic Pearls, Swarovski Pink Crystals

 BlogDivider_zpsed339ea1

Swallowtail Butterfly

God’s Blessings!

Stamping With Guneaux Designs By Beverly Polen

“God so loved the world that He gave His one and only Son, that whoever believes in Him shall not perish but have eternal life.”  John 3:16

Gate Fold Card Using An Intricate Die Tutorial

In August 2013, I posted two tutorials on how to make a Gate Fold Card using Stampin’ Up! framelits to form a card into the shape of one framelit.  One Tutorial was for using the Stampin’ Up!  Window Frames Framelits, and the Second Tutorial was for using the Stampin’ Up! Deco Frames Framelits. Today’s tutorial is for making a Gate Fold Card Using An Intricate Die.

Creating a gate fold card using an intricate die to form the shape of the card can be difficult and a little rough on your die-cutting machine.  However, if you are willing to take the risk, you can create a beautiful gate fold card.  The gate fold card that is the subject of this tutorial was created with the largest die from the Spellbinders Card Creator 5/7 Reflective Moment Dies.

These photos are of the card I created for this tutorial.

Gate Fold Card Using An Intricate Die

Gate Fold Card Using An Intricate Die Tutorial

Gate Fold Card Using An Intricate Die Tutorial

Gate Fold Card Using An Intricate Die Tutorial

BlogDivider_zpsed339ea1

UPDATE:  This card was selected as a favorite on Splitcoaststampers for the week ending January 24, 2016.

BlogDivider_zpsed339ea1

TUTORIAL FOR MAKING A GATE FOLD CARD USING AN INTRICATE DIE

Step 1.  Select a die that you want to use to form the shape of your card (I recommend selecting one that is no wider than 5″ and longer than 7″, or you’ll need 12″ card stock).

Step 2.  Score an 8-1/2″ x 11″ piece of card stock on the 11″ side at the 3-1/2″, 4-1/2″, 6-1/2″, and 7-1/2″ measurements.

Step 3.  Fold the 3-1/2″ score line into a mountain fold, 4-1/2″ into a valley fold, 6-1/2″ into a valley fold, and 7-1/2″ into a mountain fold.

Step 4.  Crease well the score lines with a bone folder.  The two photos below show the front and back of the folded card stock.

Gate Fold Card Using An Intricate Die TutorialGate Fold Card Using An Intricate Die Tutorial

Step 5.  Lay your selected die onto the front of the folded card stock and use temporary tape to hold the folds and die in place.

(NOTE:  I selected the largest die from Spellbinders Card Creator 5″ x 7″ Reflective Moment Dies (S6-011). 

Gate Fold Card Using Dies & Framelits-3_1Step 6.  Using your die-cutting machine’s recommendation for the correct die-cutting sandwich, run the card stock and die through the machine.

(NOTE:   Because you are using an intricate die, you will need to run the sandwich through your machine at least four to five times.)

Step 7. Remove the die from the front of the cut card stock and re-position it onto the back of the cut out. Carefully line up the die with the cutout. Run though your die-cutting machine approximately three to four times.  There will be some pieces remaining in the cutout that can be removed by hand.

Gate Fold Card Using An Intricate Die Tutorial

The photo below shows the front of the cutout.

Gate Fold Card Using An Intricate Die Tutorial

Step 8.  Decorate your card as desired.   I used Stampin’ Up! Botanical Gardens Designer Series Paper to decorate mine.

Enjoy your beautifully created gate fold card!

BlogDivider_zpsed339ea1

SUPPLIES USED

Stamps:  Stampin’ Up Rose Wonder Stamp Set (item # 140697) and God’s Blessings (retired)

Paper:  Stampin’ Up! Botonical Gardens Designer Series Paper; and Whisper White, Cajun Craze, Mint Macaron, and Hello Honey Card Stock

Ink: Stampin’ Up! Cajun Craze Classic Ink

AccessoriesSpellbinders Card Creator 5/7 Reflective Moment Dies, Our Daily Bread Designs Double Stitched Rectangles Dies, Stampin’ Up! Botanical Builder Framelits Dies, Swarovski Crystal Gem (center of flower),

Gate Fold Card Using An Intricate Die TutorialGate Fold Card Using An Intricate Die Tutorial

Spellbinders Card Creator 5x7 Reflective Moment Dies_1

Gate Fold Card Using An Intricate Die Tutorial

BlogDivider_zpsed339ea1


Swallowtail Butterfly

God’s Blessings!

Stamping With Guneaux Designs By Beverly Polen

Gate Fold Card Using An Intricate Die TutorialGATE FOLD CARD USING AN INTRICATE DIE TUTORIAL

Stampin’ Up! Birthday Blooms & Birthday Bouquet DSP

Hello and thanks for stopping in to browse.  Have you seen in person the new Stampin’ Up! Birthday Blooms Stamp Set and Birthday Bouquet Designer Series Paper (DSP)?  If not, the stamp set is gorgeous and the DSP contains some beautiful designs.  Before I show you my greeting card that I made with these two products, let me show you the products first.

This is the gorgeous stamp set:

Stampin Up Birthday Blooms Stamp Set

I am anxious to create a card using the gorgeous large flower stamp!  Here is a photo of the Birthday Bouquet DSP:

Birthday Bouquet DSP

Here is my card, which I made for a Splitcoaststampers Sketch Challenge:

Stampin' Up! Birthday Blooms & Birthday Bouquet DSP

This is the Splitcoaststampers sketch for SC574 that I followed.

Splitcoastampers Sketch 574

To make the card, I used the SU 2-1/2″ circle punch to cut out a Whisper White circle on which I stamped the small flower from the Stampin’ Up! Birthday Blooms Stamp Set.  I used copic markers to color the flower as close to Mint Macaron as possible.  I attached the colored flower to a circular mat made with Blushing Bride Card Stock.  I cut out the mat with a Spellbinders Splendid Circles Die, and then modified it to remove the outer layer.

Here’s a closeup of the flower:

Stampin' Up! Birthday Blooms and Birthday Bouquet DSP

Next I used I cut the Stampin’ Up! 1-3/8″ Circle Punch to cut a Mint Macaron circle from a design of the Birthday Bouquet DSP.  Using a smaller die from the Spellbinders Splendid Circles Dies, I cut a Blushing Bride Card Stock mat upon which the Mint Macaron circle rests.  Finally, I added a piece of Blushing Bride Ribbon covered with Crystal Effects.

Stampin' Up! Birthday Blooms and Birthday Bouquet DSP

To assemble the card, I attached a piece of the DSP to an A-2 Blushing Bride card base. To adhere to the Splitcoaststampers sketch, I added a strip of the Stampin’ Up! Blushing Bride Glimmer Paper and an embossed strip of Mint Macaron Card Stock.  Finally, the two circle elements were attached in place.

Blushing Bride Glimmer Paper

I did not add a sentiment to the card’s front; however, I know it will be a Happy Birthday Greeting Card as you can see from the card’s inside:

Stampin' Up! Birthday Blooms and Birthday Bouquet DSP

Enjoy the card and feel free to leave comments or questions.  You never know when I’ll select  your comment and ask for your address to send you the card!


Swallowtail Butterfly

God’s Blessings!

Stamping With Guneaux Designs

Stampin' Up! Birthday Blooms and Birthday Bouquet DSP

STAMPIN’ UP! BIRTHDAY BLOOMS AND BIRTHDAY BOUQUET DSP

Awesomely Artistic Stamp Set CAS358 CC564

Hello, my friends!  Do you have the Awesomely Artistic Stamp Set from Stampin’ Up!? It has wonderful Spring images.  The floral image makes me want Spring to not tarry!  LOL

I created my Awesomely Artistic card below for two challenges with Splitcoaststampers.com.  If you are not familiar with this website, I recommend you look at it as there are many galleries of artwork to see.  Another reason for creating my card is I plan to send it to my sister for her birthday.

Awesomely Artistic Stamp Set

The first Splitcoaststampers challenge, CAS358, is to create a card with the word, “happy” on it.  That was easy enough!  The second challenge, CC564, is a Color Challenge featuring the following colors.

Awesomely Artistic Stamp Set

This photo is a closeup of the dragonfly from the Awesomely Artistic Stamp Set.  I stamped it in Blackberry Bliss Ink, fuzzy cut it, and enhanced the end of its wings with Stampin’ Up! Dazzling Details and Dazzling Diamonds Glitter.  Also in this closeup you can see the color, Sahara Sand, in the background.

Awesomely Artistic Stamp Set CAS358 CC564

Enjoy my card and have a blessed day!


SUPPLIES

Card Size: A2

Stamps:   SU Awesomely Artistic Stamp SetAwesomely Artistic Stamp Set

Paper: SU Whisper White, Cucumber Crush, and Pacific Point Card Stock

Ink: SU Cucumber Crush, Pacific Point, Sahara Sand, and Blackberry Bliss

Accessories: Spellbinders Sentiments Die (S2-118), SU Dazzling Details, and Dazzling Diamonds Glitter 

SU = Stampin’ Up!


Swallowtail Butterfly

God’s Blessings!

Stamping With Guneaux Designs By Beverly Polen


Awesomely Artistic Stamp Set

AWESOMELY ARTISTIC STAMP SET

ODBD Christmas Candles Christmas Card

This ODBD Christmas Candles Christmas Card is my last Christmas card for 2015. Among other items, it features Our Daily Bread Designs Christmas Candles Dies, which I think are rather striking.

ODBD Christmas Candles Christmas Card

I used the ODBD Lovely Leaves Dies to enhance the candles.  I placed the vines and pine needles behind the candles and added poinsettias onto the vines.  I made the poinsettias on the vines, four corners, and bottom of the candles with the Spellbinders Holiday 5×7 Holly Frame Dies (S6-040).    I used the same die to make the Very Vanilla holly and berries frame upon which the candles sit.  (By the way, the Spellbinders Holiday Collection Dies are 50% off while they last.  Use discount code HOLIDAY50 when ordering.)   Lastly, I used ODBD Merry Christmas Dies for my sentiment.

Other supplies used: 

Stampin’ Up! Lost Lagoon Card Stock (item #133679)
Stampin’ Up! Very Vanilla Card Stock (item #101650)
Stampin’ Up! Tip Top Taupe Card Stock (item # 138336)
Stamping Up! Red Foil Sheets ( item #139607)
Stampin’ Up! Crystal Effects (item #101055)
Stampin’ Up! Lost Lagoon Marker (item #138333 – 2015-2017 In Color package of five)
Stampin’ Up! Real Red Marker (item #100052)
Stampin’ Up! Tip Top Taupe Marker (item #138333 – 2015-2017 In Color package of five)

 I hope you find inspiration through my ODBD Christmas Candles Christmas Card!


Swallowtail ButterflyGod’s Blessings!

Stamping With Guneaux Designs by Beverly Polen

Jesus Is The Reason For The Season

In my mind there is no doubt about it, Jesus is the reason for the season!!

I was delighted when Stampin’ Up! issued a new stamp set with a “Jesus is the Reason for the Season” sentiment.  I love the Reason for the Season Stamp Set, especially the three sentiments in the set, and “Jesus is the Reason for the Season” is my favorite. The font of the sentiments is gorgeous.  I used the Stampin’ Up! Reason for the Season Stamp Set and other products (see below) to create this card.  To accommodate the size of the largest die that I used, I had to make the card a 6″ x 6″ card.


UPDATE:  This card was selected for one of the FAVORITES of the week ending December 20, 2015 on Splitcoaststampers.com.


FOLLOW ME ON TWITTER!

Jesus is the Reason for the Season

The Spellbinders Holiday Decorative Holly Frame Dies (S6-042), Spellbinders Holiday 5×7 Holly Frame, and Spellbinders Layered Poinsettia Dies (S5-055) are the primary features on the card.  Also featured on the card is the Stampin’ Up! Home for Christmas Designer Series Paper.

Reason for the Season Stamp SetSpellbinders Decorative Holly FrameSpellbinders 5x7 Holly FrameJesus is the Reason for the Season

Jesus is the Reason for the Season

ADDITIONAL PHOTOS OF THE JESUS IS THE REASON FOR THE SEASON CARD

Jesus is the Reason for the Season

Jesus is the Reason for the Season


Thanks for stopping by!  Have a wonderful day, and leave a comment or question in the comment section.

Jesus is the Reason for the Season

God’s Blessings!

Stamping with Guneaux Designs

Jesus is the Reason for the Season

JESUS IS THE REASON FOR THE SEASON