
In August 2013, I posted two tutorials on how to make a Gate Fold Card using Stampin’ Up! framelits to form a card into the shape of one framelit. One Tutorial was for using the Stampin’ Up! Window Frames Framelits, and the Second Tutorial was for using the Stampin’ Up! Deco Frames Framelits. Today’s tutorial is for making a Gate Fold Card Using An Intricate Die.
Creating a gate fold card using an intricate die to form the shape of the card can be difficult and a little rough on your die-cutting machine. However, if you are willing to take the risk, you can create a beautiful gate fold card. The gate fold card that is the subject of this tutorial was created with the largest die from the Spellbinders Card Creator 5/7 Reflective Moment Dies.
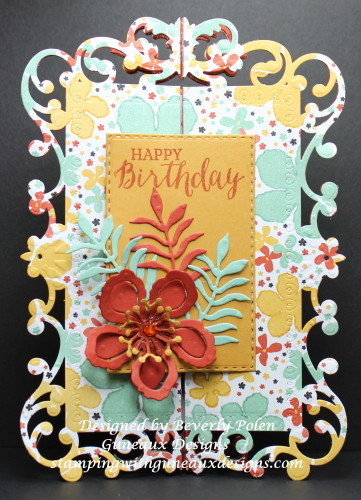
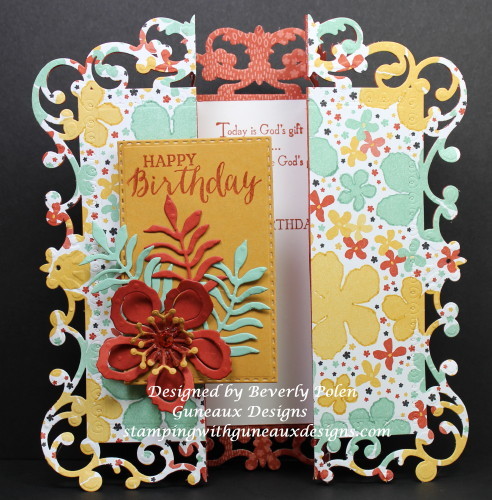
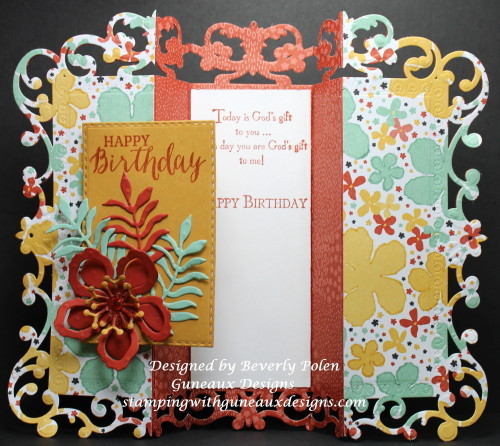
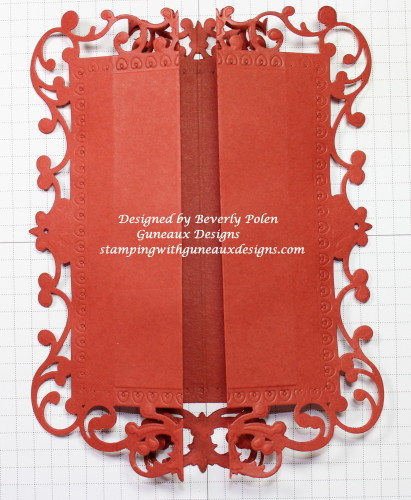
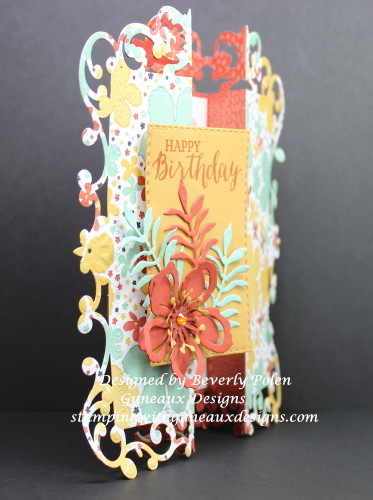
These photos are of the card I created for this tutorial.
![]()
UPDATE: This card was selected as a favorite on Splitcoaststampers for the week ending January 24, 2016.
![]()
TUTORIAL FOR MAKING A GATE FOLD CARD USING AN INTRICATE DIE
Step 1. Select a die that you want to use to form the shape of your card (I recommend selecting one that is no wider than 5″ and longer than 7″, or you’ll need 12″ card stock).
Step 2. Score an 8-1/2″ x 11″ piece of card stock on the 11″ side at the 3-1/2″, 4-1/2″, 6-1/2″, and 7-1/2″ measurements.
Step 3. Fold the 3-1/2″ score line into a mountain fold, 4-1/2″ into a valley fold, 6-1/2″ into a valley fold, and 7-1/2″ into a mountain fold.
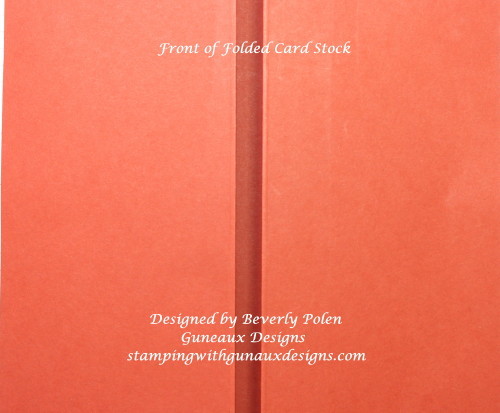
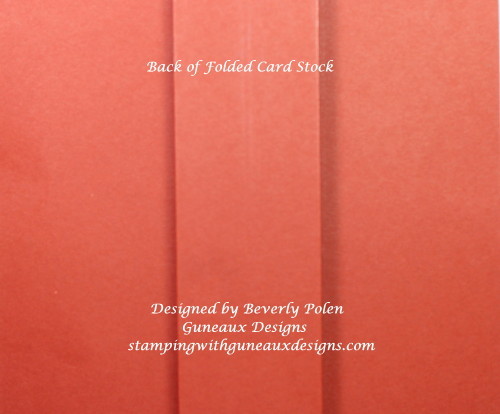
Step 4. Crease well the score lines with a bone folder. The two photos below show the front and back of the folded card stock.
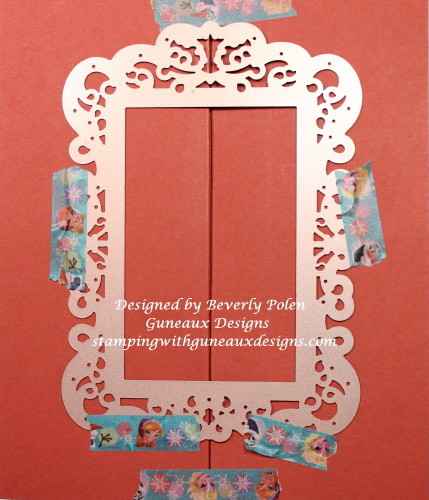
Step 5. Lay your selected die onto the front of the folded card stock and use temporary tape to hold the folds and die in place.
(NOTE: I selected the largest die from Spellbinders Card Creator 5″ x 7″ Reflective Moment Dies (S6-011).
 Step 6. Using your die-cutting machine’s recommendation for the correct die-cutting sandwich, run the card stock and die through the machine.
(NOTE: Because you are using an intricate die, you will need to run the sandwich through your machine at least four to five times.)
Step 7. Remove the die from the front of the cut card stock and re-position it onto the back of the cut out. Carefully line up the die with the cutout. Run though your die-cutting machine approximately three to four times. There will be some pieces remaining in the cutout that can be removed by hand.
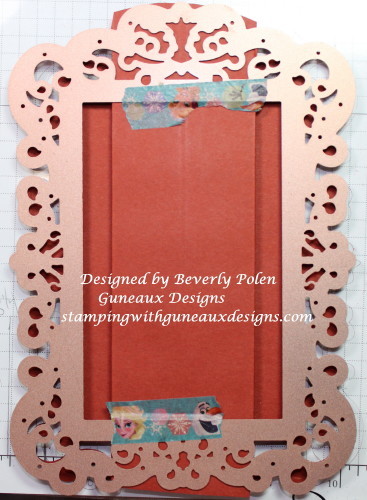
The photo below shows the front of the cutout.
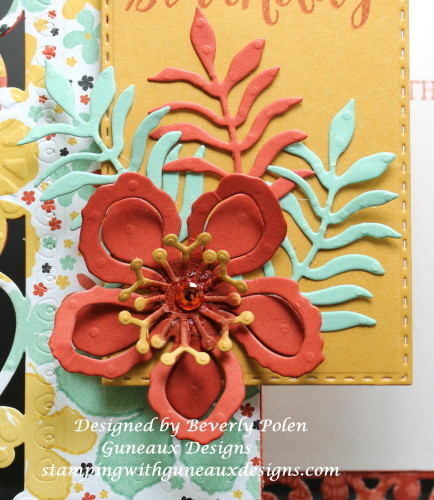
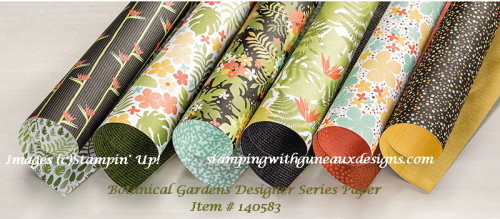
Step 8. Decorate your card as desired. I used Stampin’ Up! Botanical Gardens Designer Series Paper to decorate mine.
Enjoy your beautifully created gate fold card!
![]()
SUPPLIES USED
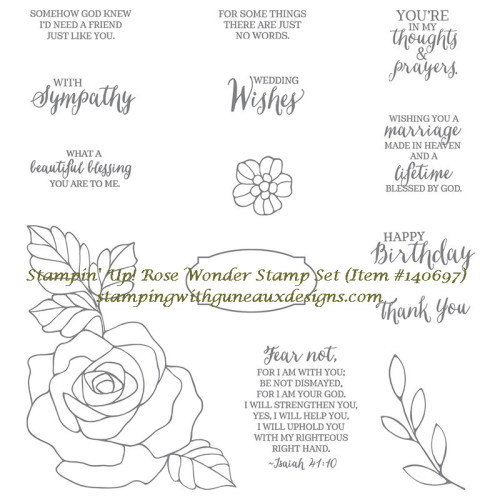
Stamps: Stampin’ Up Rose Wonder Stamp Set (item # 140697) and God’s Blessings (retired)
Paper: Stampin’ Up! Botonical Gardens Designer Series Paper; and Whisper White, Cajun Craze, Mint Macaron, and Hello Honey Card Stock
Ink: Stampin’ Up! Cajun Craze Classic Ink
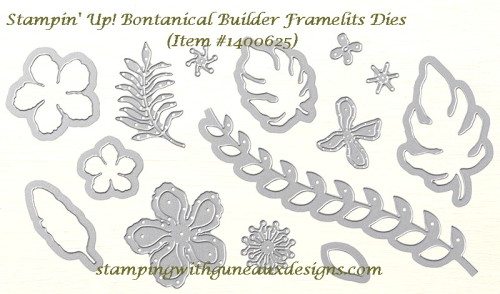
Accessories: Spellbinders Card Creator 5/7 Reflective Moment Dies, Our Daily Bread Designs Double Stitched Rectangles Dies, Stampin’ Up! Botanical Builder Framelits Dies, Swarovski Crystal Gem (center of flower),

![]()

God’s Blessings!
Stamping With Guneaux Designs By Beverly Polen
Hey Bev! This is beautiful!! Wow, I can’t believe you got that intricate die to cut through!!! It looks gorgeous cut all at once though! Love it!! Love the paper you used too, so pretty! Your embellishments on top are beautiful!
Awww, Robin, you’re such a sweetheart to visit my site and leave a comment. So glad you like the card as it took some effort to produce! I’m touched that such an accomplished artist would like my artwork. Again, thanks so very much!
So pleased that you like it!!
Wow! So beautiful and creative! Thanks very must for the great tutorial.