Iris Folding Hot-Air Balloon

Hello, crafters!  When was the last time you used the Iris Folding Technique?  It has been a while for me, but I have an example for you today.  This technique was featured as a Technique Lovers’ Challenge on Splitcoaststampers on Monday.  I went through my iris folding designs and selected an Iris Folding Hot-Air Balloon.  This design was more difficult from one’s I’ve tried before.
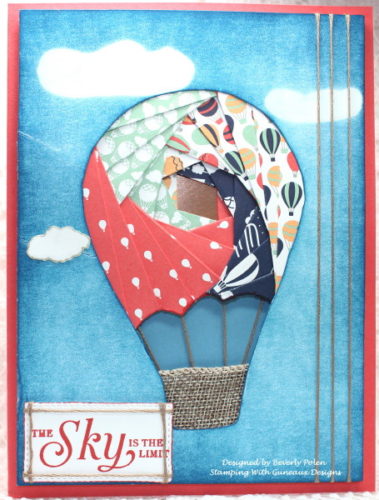
The iris folding on this card  is the upper part of the balloon.  I wish I could show you the actual design; however, it is copyrighted.  But you can get a sense of the design by the flow of the folded pieces of designer series paper.  An iris folding design includes lines, which represent where the folds go, and numbers (e.g., 1 – 26) within the shape.  Each number represents a fold.

There are four different “patterns” of numbers for this design.  A pattern is the designer paper, specialty paper, card stock, etc., that you chose to use to fold and adhere to the card stock where numbers are located.  For example, Pattern A of this design included the numbers 1, 3, 7, 11, 15, 19 and 23.  I selected a pattern from the Stampin Up Carried Away Designer Series Paper (i.e., the colorful hot-air balloons), cut 1-1/2″ strips of the pattern, folded them in half, placed them over the numbers for Pattern A, and attached them to my card stock that has the outline cutout of the design.  The right side of the balloon is where Pattern A is located.

Pattern B is located where the folds of Mint Macaron paper is located, Pattern C is where the Watermelon Wonder (orange) folds are located, and Pattern D is where the Night of Navy folds are located.  To get a better sense of a design, numbers, and patterns, you can go HERE for numerous pictures.

These are examples of other cards I have created featuring Iris Folding:       


If you have not tried this technique, I encourage you to try it.  It is a lot of fun.  Thanks for stopping in, and I hope you enjoyed your visit!


Butterfly_1_1God’s Blessings!
Stamping With Guneaux Designs By Beverly Polen
Firm Reliance on Divine Providence!


PROVERBS 30:5 & 6 (NIV)

Every word of God is flawless; he is a shield to those who take refuge in him.  Do not add to his words, or he will rebuke you and prove you a liar.”

Altenew Peony Bouquet Birthday Card

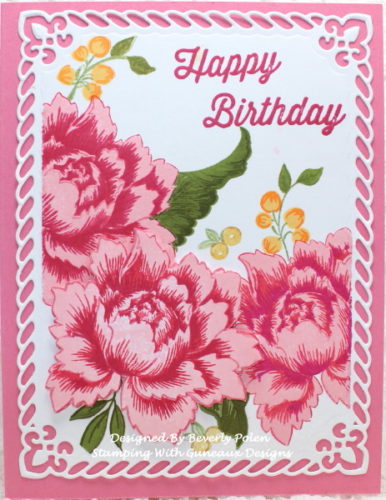
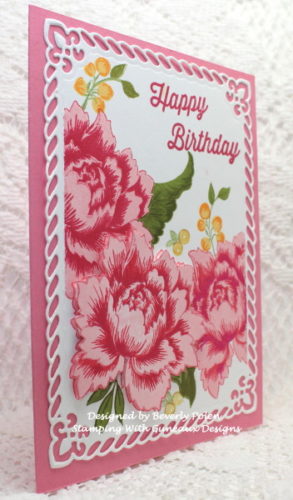
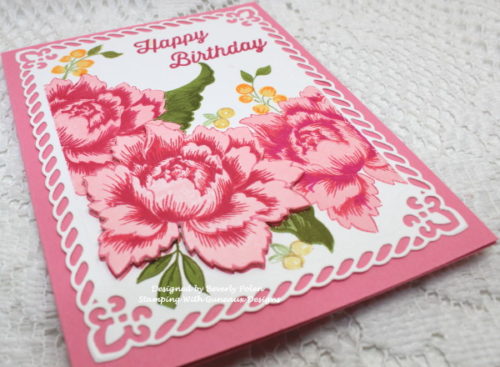
Happy Monday!  Did you have a nice weekend?  The weather was wonderful where I live in Florida!  During the weekend I made this gorgeous Altenew Peony Bouquet Birthday Card.  I love the Altenew Peony Bouquet Stamp Set!

Altenew Peony Bouquet Birthday Card

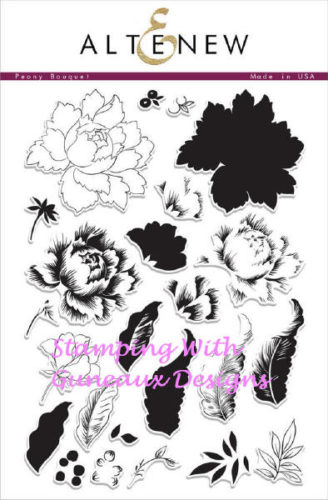
The Altenew Peony Bouquet Stamp Set is a multi-layering group of stamps.  They create a beautiful peony.  To create the three peonies on this beautiful card, I used three different pink inks for the five stamps that create a peony.  I did not like the way the ink appeared on the bottom center peony, so I stamped it again on separate card stock and fussy cut it out.  I have a matching die set for the peonies; however I did not what the white edges that a die cut typically leaves.  I used double-sided foam tape to pop up the flower.

Altenew Peony Bouquet Birthday Card

The frame that the images are on was cut out using the Spellbinders Enchanted Labels.  I think it is a beautiful frame.  I used the Hero Arts Birthday Celebration Stamp Set for the Happy Birthday sentiment.

Altenew Peony Bouquet Birthday Card

I hope I have inspired you with the beautiful card!  Have a wonderful day, and if you have feedback, I would love to hear it.  Leave a message in the comment section.


Altenew Peony Bouquet Birthday Card  Altenew Peony Bouquet Birthday Card  https://www.ellenhutson.com/a-cardstock-neenah-classic-crest-solar-white-25-pk/


MATTHEW 6:22-24

Jesus said:  “The eye is the lamp of the body.  If your eyes are good, your whole body will be full of light.  But if your eyes are bad, your whole body will be full of darkness.  If then the light within you is darkness, how great is that darkness!”

Step Ladder Center Cut Card Fold

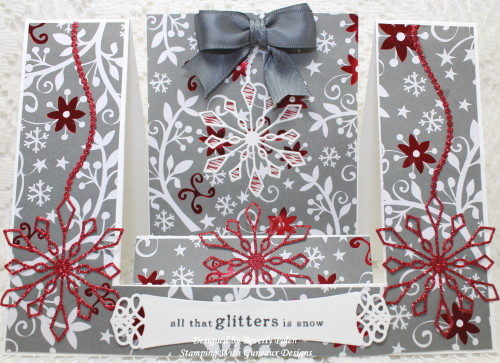
Have you searched for instructions on how to make a Step Ladder Center Cut Card Fold?  I have searched and searched for a tutorial or video for this card fold, and I have found so many different measurements and names given for the fold.  I do not know what is correct.  However, I wanted to make a card with the fold, thus, I did a lot of guessing.  Here is my creation, and I will share a tutorial below about the card fold.

Step Ladder Center Cut Card

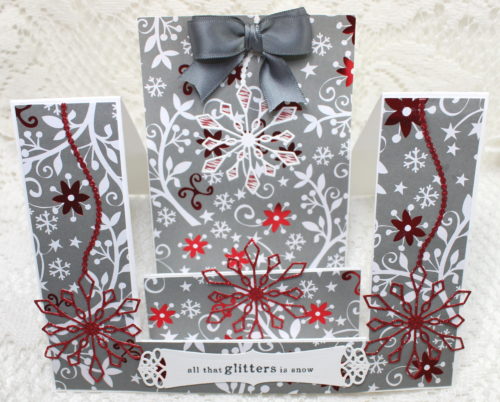
But first, I want to share a little information about the card.  There are three “steps” in the center of the card with each one higher than the other.  The third step in the back is the highest and includes an additional piece of card stock for the main feature of the card.

Step Ladder Center Cut Card Fold

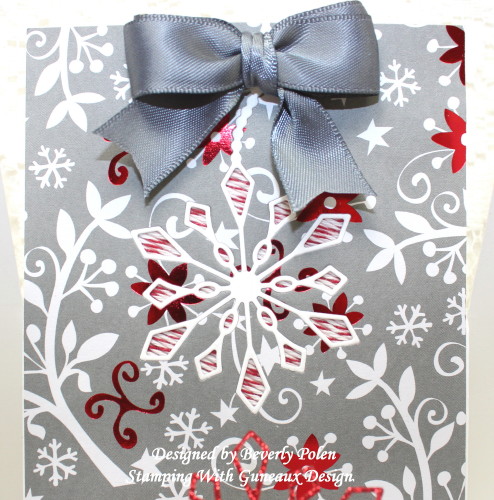
The measurements I used for the card resulted in a 5″ x 7″ card, or an A7 size card.  I want to draw your attention to the third step that I mentioned includes an additional piece of card stock.  Look closely, and you will see an inlaid snowflake in white.  Look even closer and you will see twine behind the snowflake.  This technique is called the Twine Inlay Technique.  Here is a tutorial for this technique.  The following photo is a closeup of the results of using the technique.

I prepared this card for submission to a Splitcoaststampers “Technique Lovers Challenge”, which involved using the Twine Inlay Technique. I created this main feature of the card with the Memory Box Alpine Snowflake Die.

Enjoy the card, and leave a comment about it!


STEP LADDER CENTER CUT CARD FOLD TUTORIAL

  • Cut a 7″ x 10″ piece of card stock,
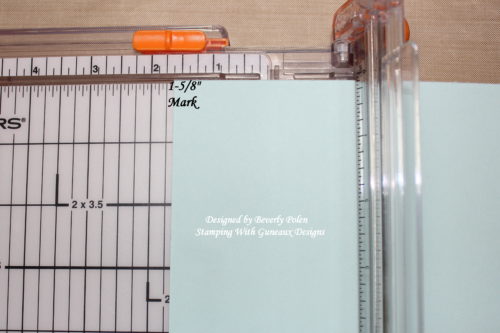
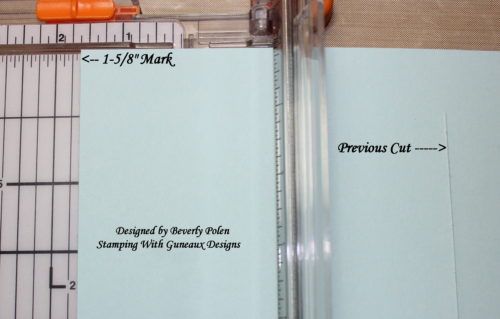
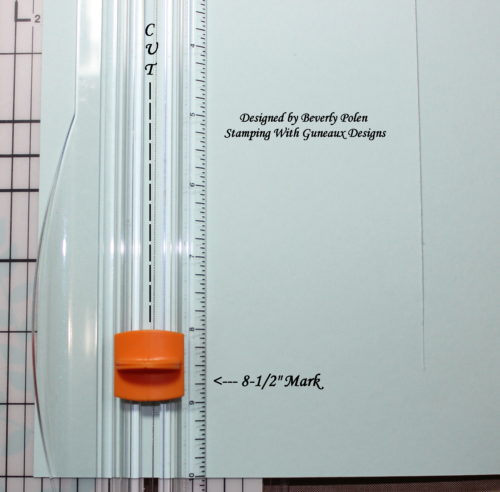
  • With the 7″ side at the top of a cutting tool (henceforth, trimmer) move the card stock to the left to the 1-5/8″ mark,
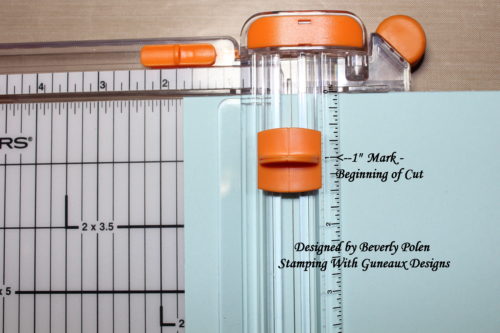
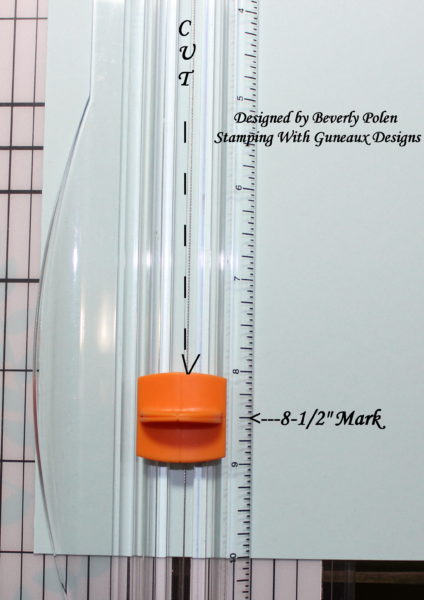
  • Move the cutting blade of your trimmer down to the 1″ mark,

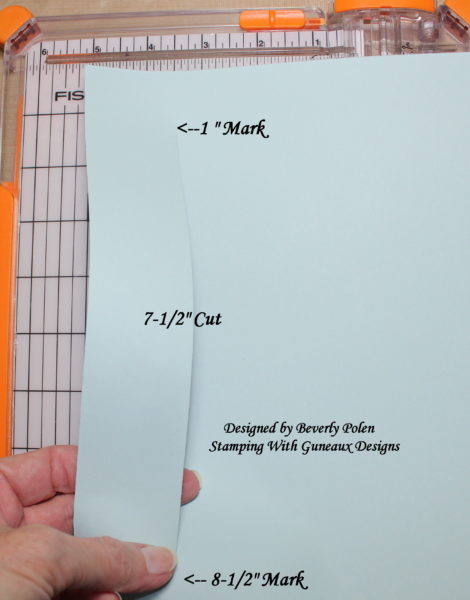
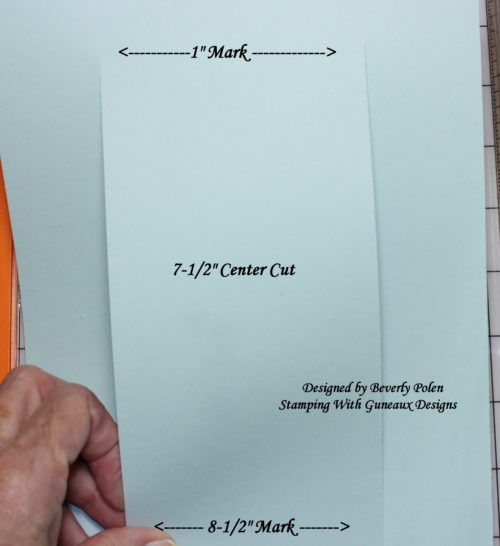
  • Cut the card stock from the 1″ mark down to the 8-1/2″ mark,

  • The result is a 7-1/2″ cut,

  • Flip the card stock over, not around, so that the BACK that was face down is now face up (if you turn the card stock around 90 degrees instead, the cuts will not line up),
  • With the 7″ side at the top of the trimmer, move the card stock to the left to the 1-5/8″ mark,

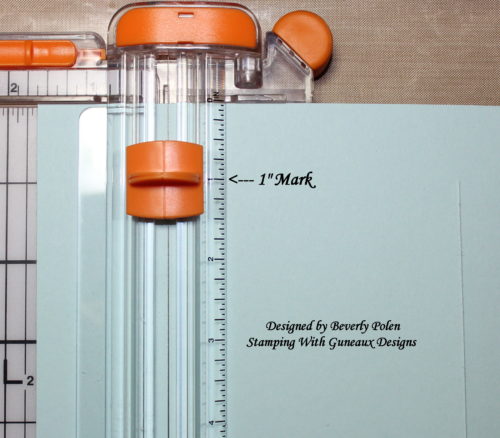
  • Move the cutting blade of your trimmer down to the 1″ mark,

  • Cut the card stock from the 1″ mark down to the 8-1/2″ mark, resulting in the cuts on both sides lining up evenly,

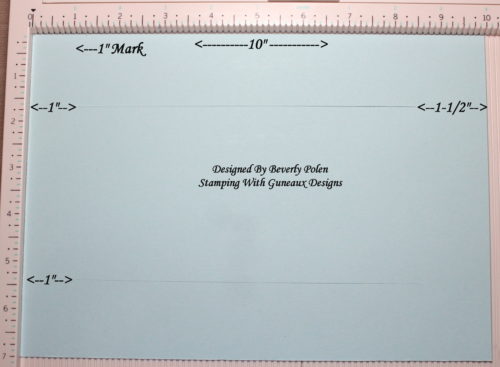
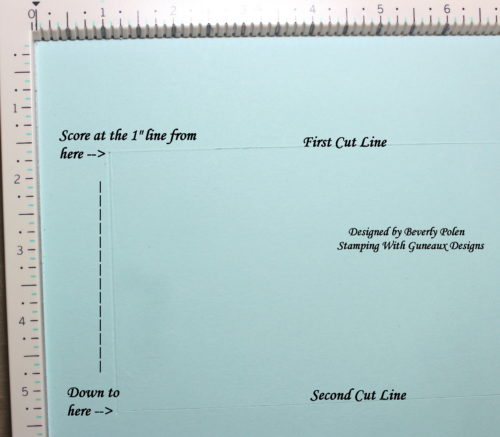
  • Place the card stock onto a scoring tool with the 10″ side at the top and the cuts beginning at the 1″ mark against the left of the tool,

  • Beginning at the 1″ mark and at the first cut line, score down to the second cut line,

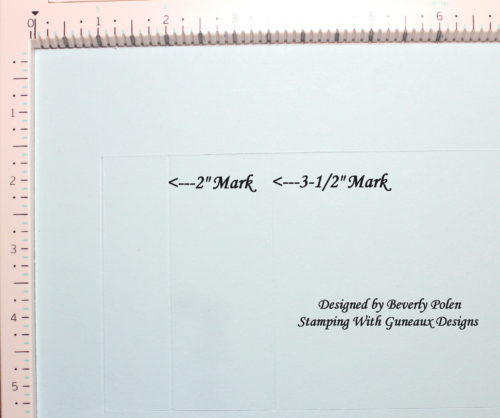
  • Score at the 2″ and 3-1/2″ within the two cut lines,

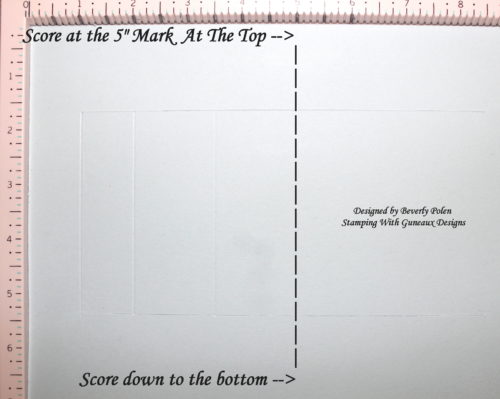
  • Score at the 5″ mark from the top of the card stock to the bottom,

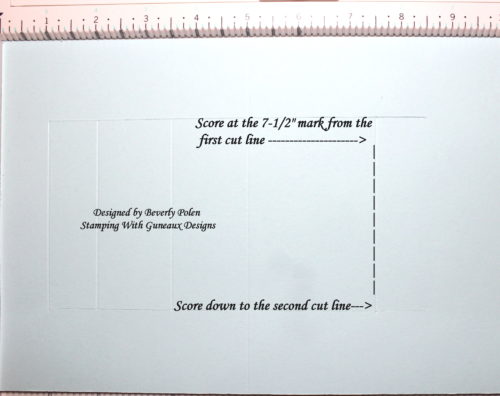
  • Score at the 7-1/2″ mark within the two cut lines,

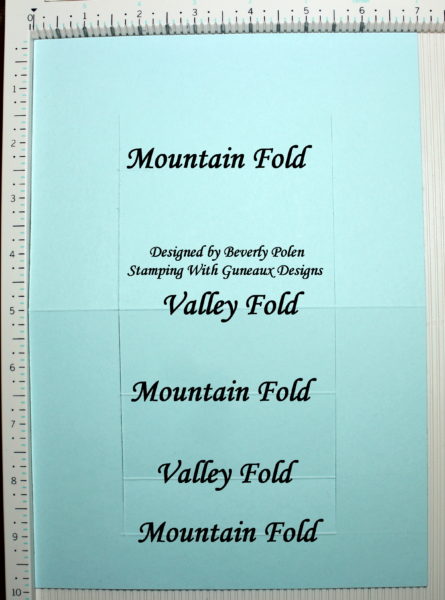
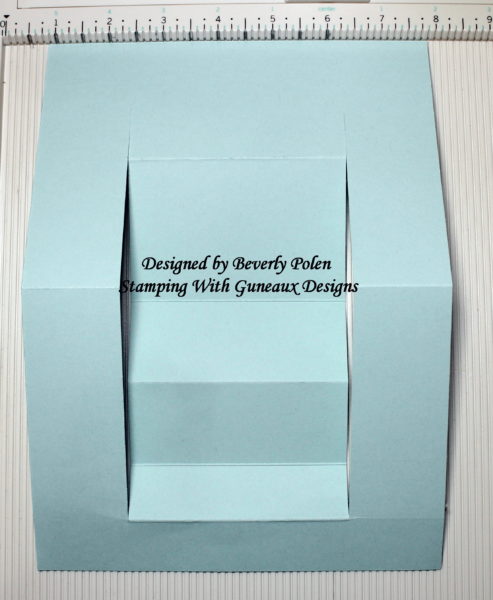
  • With the card stock cut and scored, begin folding the score lines as shown in this photo,

  • The Step Ladder Center Cut Card Fold will look like the following after folding.

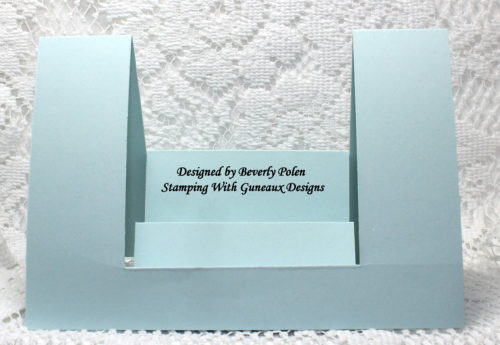
  • With the card stock standing after the folding, it will look like this:

  • Decorate the card as desired.  If a piece of card stock with the main feature is added to the third step of the step ladder card, cut the piece at 3-11/16″ x 4-7/8″ so it will fit horizontally and vertically.   Of course die cuts or other elements can be added on the third step as a main feature.  Enjoy your creation.

Butterfly_1_1God’s Blessings!
Stamping With Guneaux Designs By Beverly Polen
Firm Reliance on Divine Providence!


 1 PETER 3:12-15 (NIV)

“For the eyes of the Lord are on the righteous and his ears are attentive to their prayer, but the face of the Lord is against those who do evil.  Who is going to harm you if you are eager to do good?  But even if you should suffer for what is right, you are blessed. Do not fear what they fear; do not be frightened.  But in your hearts set apart Christ as Lord.  Always be prepared to give an answer to everyone who asks you to give the reason for the hope that you have.”
Greeting Card Kids

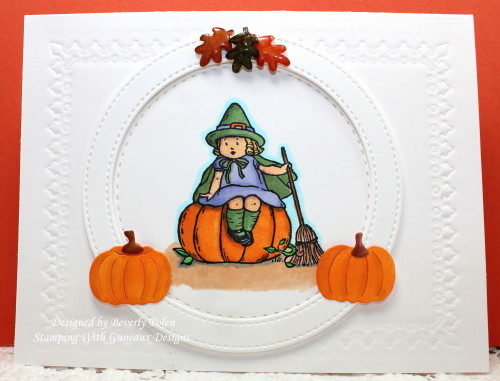
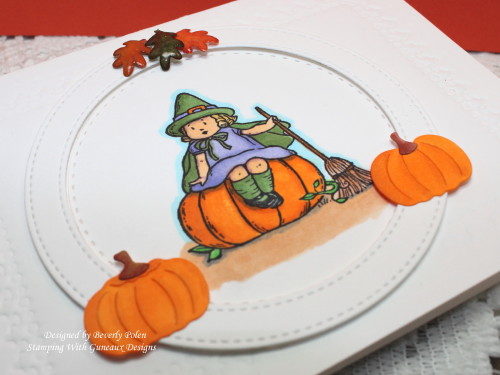
Happy Monday!!  Hope you had a great weekend!  For today, I created a card using the retired Stampin’ Up! Greeting Card Kids Stamp Set.  I love this stamp set, especially the image I used on this card.

Greeting Card Kids

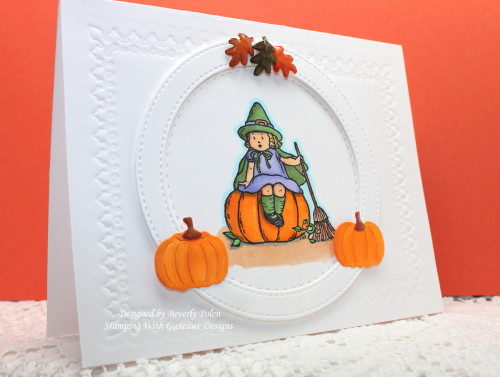
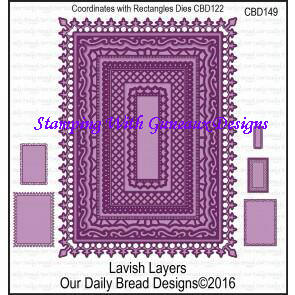
To create the card, I cut a piece of Neenah White Card Stock at 8-1/2″ x 5-1/2″ and folded it in the middle for an A2 size card (5-1/2″ x 4-1/4).  I dry embossed the front of the card base with the largest rectangle die from the Our Daily Bread Designs Lavish Layers dies.

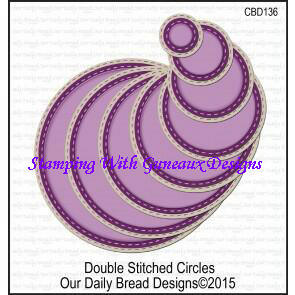
Using the second largest die from Our Daily Bread Designs Double Stitched Circles dies, I cut a circle from Neenah Solar White Card Stock (I used this card stock for all elements and where needed, colored them with Copic Sketch Markers.  I stamped the image onto the circle using Memento Tuxedo Black Ink, and colored it with Copics.

greeting-card-kids-3_1

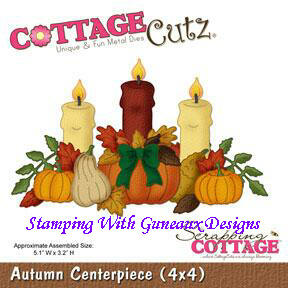
After coloring the image, I cut out one circle frame using the Cottage Cutz Stitched Wide Circle Frame Dies, two pumpkins from the Cottage Cutz Autumn Centerpiece Die, and three leaves from an old punch I have.  I colored the pumpkins and leaves with copics, and used Stampin Up Clear Embossing Powder on the leaves.  I attached these elements to the card front.  I finished the card and submitted it for a Splitcoaststampers Clean and Simple Challenge to add pumpkins to a card.

greeting-card-kids-4_1


SUPPLIES USED

a-cardstock-neenah-classic-crest-solar-white-25-pk-ncsw_image1__89431-1406030158-250-250  lavish_layers_cbd149  odbd-double-stitched-circles  copicsketchmarkers  memento-ink-pad-tuxedo-black-tsme-900_image1__01192-1406041667-250-250

cottagecutz-stitched-wide-circle-dies  cottagecutz-autumn-centerpiece  suclearembossingpowder


Butterfly_1_1

God’s Blessings!

Stamping With Guneaux Designs By Beverly Polen


Jesus said to the disciples, “In that day you will no longer ask me anything.  I tell you the truth, my Father will give you whatever you ask in my name.  Until now you have not asked for anything in my name.  Ask and you will receive, and your joy will be complete.”  John 16:23-24
Scented Stain Glass Window

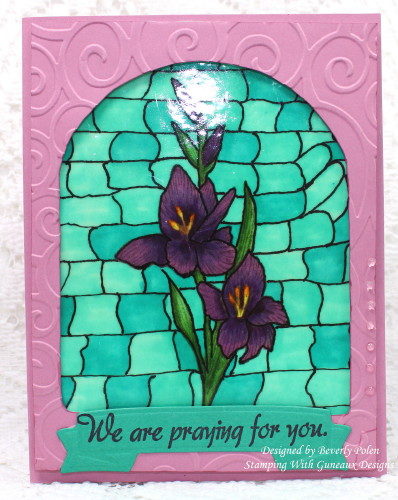
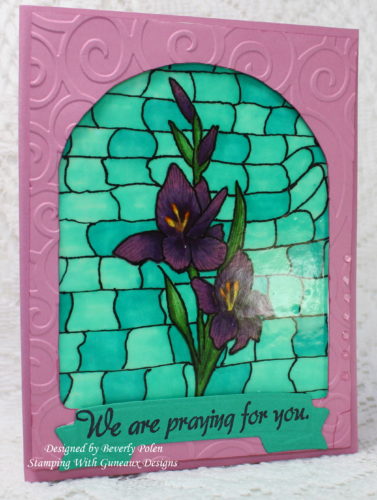
Hello, friends!!  The card I am sharing today is a Scented Stained Glass Window card. I started developing the card in response to a faux stained glass challenge on Splitcoaststampers.  As I created the card, it evolved into more than a faux stained glass challenge response.

Scented Stained Glass Window

As I started thinking of other Splitcoaststampers challenges for the week, I decided to incorporate all of these challenges, but the faux stained glass would be the primary focus for the card.

MIX190 – Ky (Scrapacat) is the hostess of the challenge to create a card with faux stained glass. I began my window by stamping and coloring (with copics) a purple Gladiolus flower, which is from Our Daily Bread Designs. Upon completion, I used a MICRON pen to draw my wonky pieces of “glass”.  I used two greenish Copic markers to color the glass.

TLC630 – Judy (StampingQueenJAR) hosted a challenge to add texture to a card by using a technique and not an embellishment. The technique I used is the stain-glass window technique. The texture I added was a flavorful embossing powder. It smells like Vanilla and it is a retired Stampin’ Up! powder!

WT601 – Carla (Covington Crafter) hosted a challenge to create a card that “Mmmmm, Smells Good!” by adding or creating a scented embossing powder.  I used three layers of SU Vanilla Scented Embossing Power, and I was surprised that it had not lost its scent as it is old. I was wrong, mmmmmm, my card smells GOOD!

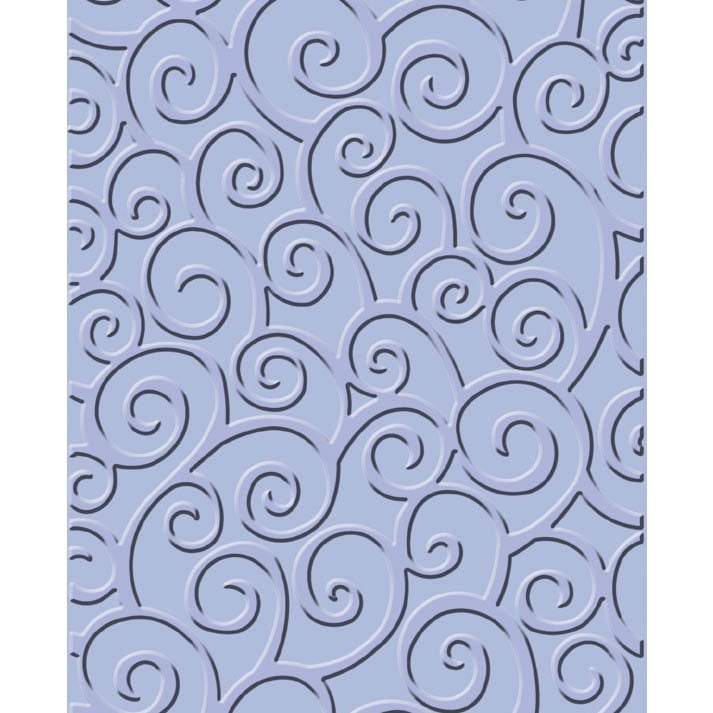
F4A343 – Shirley (wannabcre8tive) hosted a challenge to get “Swirly” by creating a card with swirls. The front panel, my hand-made cathedral window, is covered with swirls made from a Cuttlebug Swirls Embossing Folder.

Scented Stained Glass Window

Whee, that was a lot of work, but does my card ever smell good!  If interested in seeing all the wonderful comments made about this card, you can see them HERE!


SUPPLIES

GLADIOLUS  DOGWOOD MINI

  susweetsugarplum  gardengreen  Copic Sketch Markers  eleganteggplantink

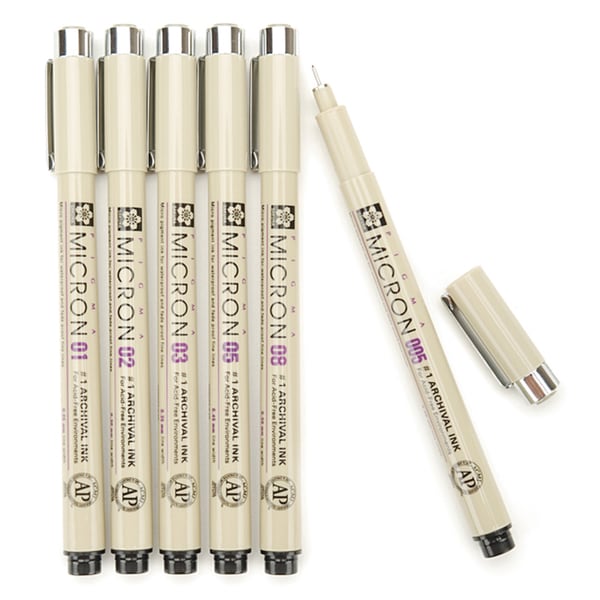
Spellbinders Shapeabilities 'Ribbon Banners' Dies    Sakura Pigma Micron Pens (Set of 6)

suembossing-buddy  versamark   scotch-double-sided-foam-mounting-tape


Butterfly_1_1

God’s Blessings!

Stamping With Guneaux Designs By Beverly Polen


“See to it, brothers, that none of you has a sinful, unbelieving heart that turns away from the living God.  But encourage one another daily, as long as it is called Today, so that none of you may be hardened by sin’s deceitfulness.”  Hebrews 3:12-13

ODBD Sweet As Perfume

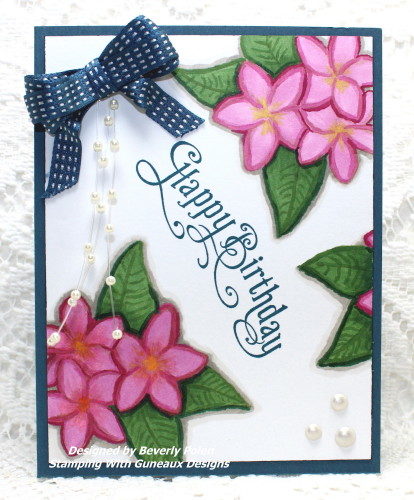
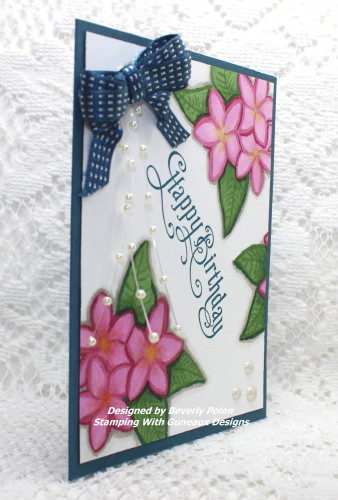
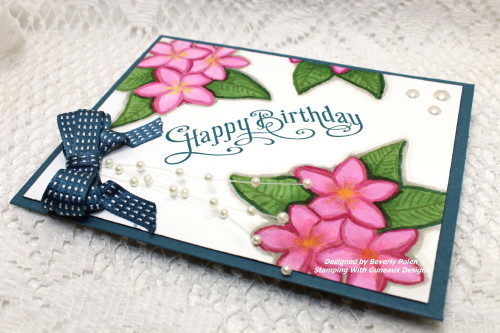
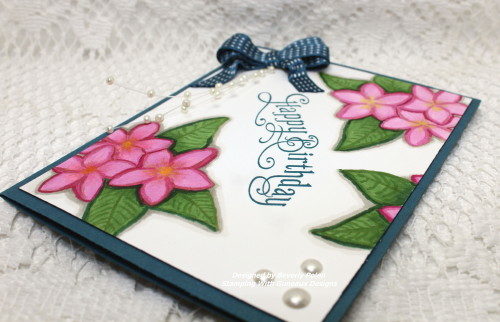
Welcome, crafters!!  Hope your day is going well!  Today’s card share features the ODBD Sweet As Perfume Stamp Set.  (ODBD stands for Our Daily Bread Designs.)  The floral image from this set is a Frangipani!  The Frangipani is also know as the Hawaiian Lei flower.  They come in whites, yellows, pinks, reds, and multiple pastels.  Mine is several colors in the pink family, as I used multiple Copic Sketch Markers to color them.

ODBD Sweet As Perfume_1

I created the card in response to a color challenge on the Splitcoaststampers website. The colors chosen for the challenge are two of the 2016-2018 SU In-Colors – Dapper Denim and Sweet Sugarplum, and one from the 2015-2017 SU In-Colors – Cucumber Crush.

Dapper Denim 8-1/2 x 11 Cardstock   Sweet Sugarplum 8-1/2 x 11 CardstockCucumber Crush 8-1/2 x 11 Cardstock

After coloring the floral images, I added the Happy Birthday sentiment from the SU Perfectly Penned stamp set.  To finish the card, I added a bow, three strings of beaded pearls, and three crystal drops.  Here are additional photos of the card.

ODBD Sweet As Perfume2_1 ODBD Sweet As Perfume3_1 ODBD Sweet As Perfume4_1

Have a wonderful day and come back soon!!


SUPPLIES

STAMPS:   ODBD Sweet As Perfume, SU Perfectly Penned

PAPER:   Neenah Solar White, SU Blue (don’t know the name)

INK:  Various Copic Sketch Markers

ACCESSORIES:  SU Ribbon, Beaded Strings, Crystal Drops


SU Fifth Avenue Floral

God’s Blessings!

Stamping With Guneaux Designs By Beverly Polen


“Remember this:  Whoever sows sparingly will also reap sparingly, and whoever sows generously will also reap generously.”  2 Corinthians 9:6