SU Secret Garden & Splitcoaststampers

Hello, stampers!  Are you having a good Wednesday?  I’m in my craft room creating and having fun.  Today’s card share features the Stampin’ Up! (SU) Secret Garden and Splitcoaststampers Color Challenge, CC575,  Blushing Blissful Brides ~ DO THE MACARON-A!  

SU-Secret-Garden-Splitcoaststampers

(Update:  This card was included in Splitcoaststampers Favorites for the week ending on March 27, 2016.)

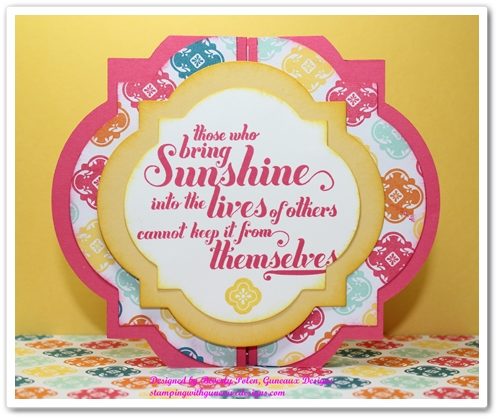
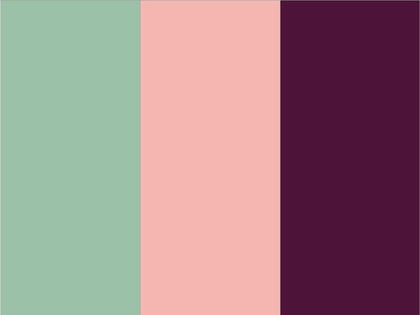
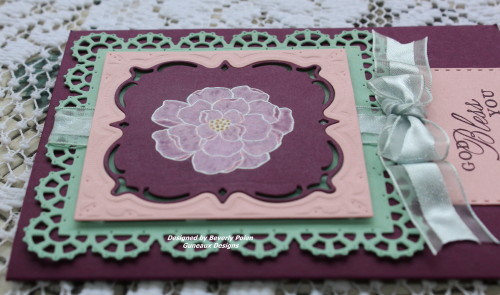
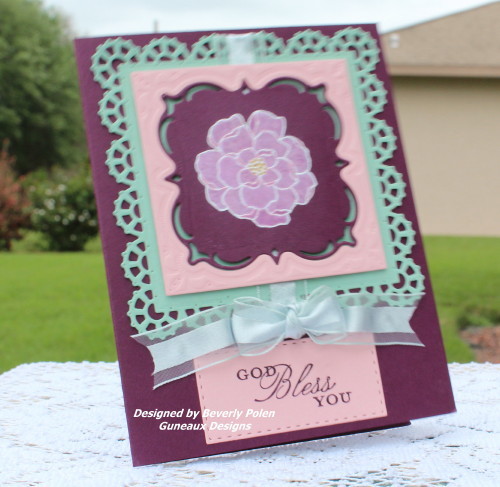
The SU colors selected for the Color Challenge are Mint Macaron, Blushing Bride, and Blackberry Bliss

SU Secret Garden and Splitcoaststampers

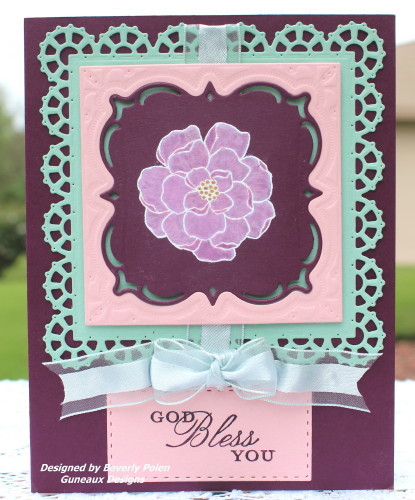
Creating this card took some time as it involves using SU’s White Craft Ink as the initial layer of ink for the flower in the center.  This flower is from the SU Secret Garden Stamp Set.

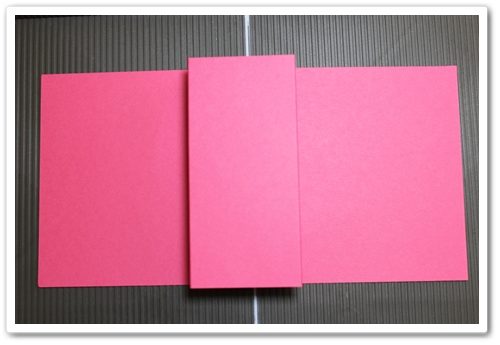
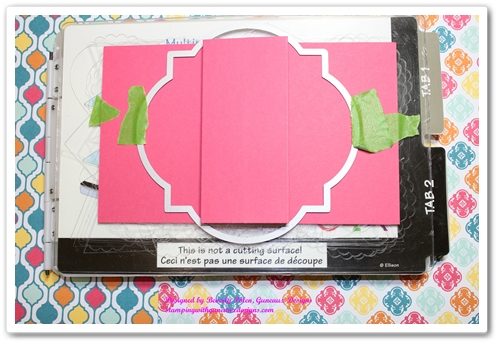
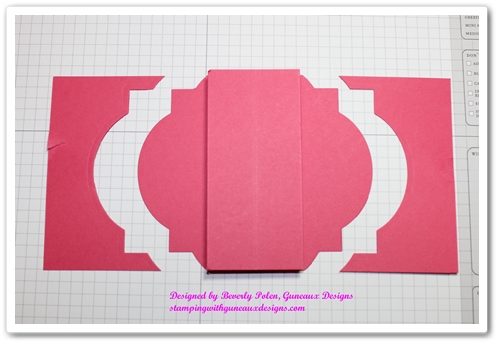
I am not sure of the name for this technique, but I’ll explain how I did it. Normally this technique is not used on a dark piece of card stock like Blackberry Bliss.  A craft color of card stock (i.e., Crumb Cake) is typically used.  However, I decided that I wanted to use the technique on a die cutout (i.e., ODBD Layered Lacey Squares) from Blackberry Bliss card stock.

To use the technique, I first covered the floral stamp with VersaMark Watermark Ink, added SU White Embossing Powder, and heat set it.  Using a dry Aqua Painter, I applied SU Whisper White Craft Ink over each petal, being careful to stay inside the embossed petals lines.  I allowed the Whisper White Craft Ink to dry before I used the SU Blushing Bride Marker to color the petals of the flower.  It took several layers of ink, and it’s still not what I wanted.  However, I did the best I could.  That’s all, folks – it’s that simple, but time consuming!

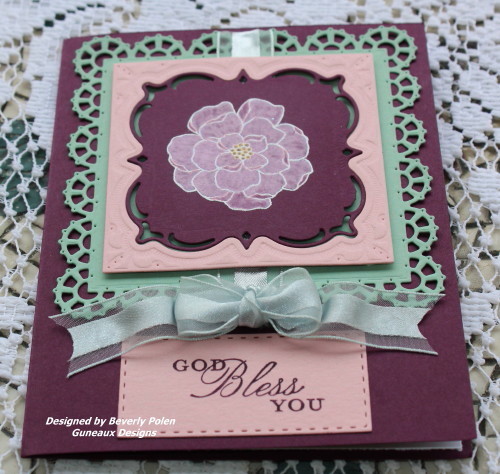
Here are more photos:

SU Secret Garden and SplitcoaststampersSU Secret Garden & Splitcoaststampers

SU Secret Garden & Splitcoaststampers

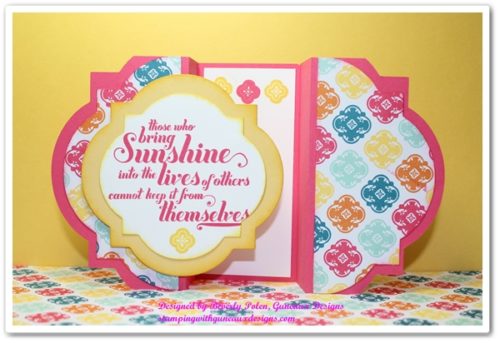
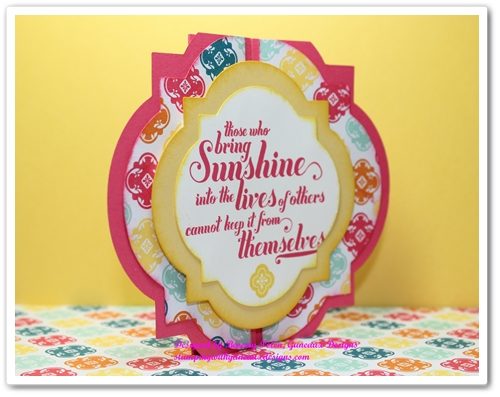
I had to include this poor quality photo below.  I was outside taking photos of the card when a breeze whipped up and blew my card over just as I was snapping the photo.  I caught the card just as it was falling.  A flying card makes a blurred photo.  LOL

SU Secret Garden & Splitcoaststampers

Enjoy and come back soon!

BlogDivider_zpsed339ea1

SUPPLIES:

Stamps:  SU Secret Garden and Trust God (sentiment)

Paper:  SU Mint Macaron, Blushing Bride, and Blackberry Bliss

Card Size:  A2

Ink:  VersaMark Watermark Ink, SU Whisper White Craft Ink, SU Blushing Bride Marker, SU Mint Macaron Reinker

Accessories:  SU White Embossing Powder, Heat Gun, ODBD Layered Lacey Squares, ODBD Double Stitched Rectangles,  SU Organza Ribbon (dyed Mint Macaron), and a dry Aqua Painter

BlogDivider_zpsed339ea1

Swallowtail Butterfly

God’s Blessings!

Stamping With Guneaux Designs by Beverly Polen

“Blessed is the one who perseveres under trial because, having stood the test, that person will receive the crown of life that the Lord has promised to those who love him”  James 1:12


Happy Scenes Snowy Scenes

I think that one of the most beautiful scenes in the Northern United States is a beautiful snowy scene that is untouched by tire tracks, foot prints, animal hoof/paw prints, road slush, and more.  The quietness of a landscape with trees that are covered with freshly fallen white snow is a gift from heaven and it certainly is a happy scene.  You can see things in the landscape that you have not noticed before.  If there is a red cardinal in the landscape, that pop of red upon the glistening white snow is breathtaking.

Last week I created a similar scene for my card that I am sharing today.  I created the card in response to a Splitcoastampers.com  Inspirational Challenge, IC527.  The challenge involved picking a picture from a particular Pinterest board that inspired you, and then creating a card based on that inspiration.  This is the beautiful picture I chose as my inspiration:

 And this is my inspirational card that I created

Happy Scene Snowy Scene

I was excited to hear that my card was selected for one of the Splitcoaststampers FAVORITES for the week ending January 10.  

To create the scene, I used Stampin’ Up! stamp sets that included trees and one that included the bench in the scene.  The stamp sets are:

  1. Lovely as a Tree (Item #128655)
  2. Happy Scenes (retired)
  3. Branch Out (retired)
  4. Plant Hope (retired)
  5. Pendant Park (retired)

I began by stamping the large tree from the Branch Out Stamp Set into VersaMark Ink and stamping it in four places on the Whisper White Card Stock.  I then embossed these trees (including the branches at the top left and right) with Stampin’ Up! Pewter Embossing Powder (retired).

Using light gray inks, I stamped the remaining trees in the background.  Because the inspirational picture has yellow and orange in the sky portion of the background, I sponged Stampin’ Up! So Saffron and Peach Parfait Ink onto the snowy scene background.  I added a bench into the foreground with red birds (from other stamp sets) on and around the bench.  I added the sentiment from the Happy Scenes Stamp Set.

Once I was satisfied with the scene, I added white acrylic paint to place “snow” within the trees.  I covered the complete scene with VersaMark Ink and heat embossed with Stampin’ Up! Iridescent Ice Embossing Powder.

I attached the scene to a piece of Brushed Silver Card Stock which was attached to the Real Red card base.

Enjoy my snowy scene greeting card!


Swallowtail Butterfly

God’s Blessings!

Stamping With Guneaux Designs

Stampin Up Venetian Romance DSP – MOJO310

Stampin Up Venetian Romance DSP
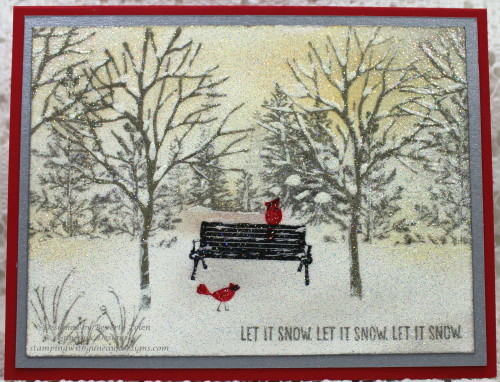
My special friend, Melody, from N.VA has left to return home, and I feel sad.  However, I am very pleased that we had a fantastic visit, and I hope to see her again soon.  Because I feel sad about her leaving, I chose to create a card that would provide comfort to anyone who has such feelings when a loved one visits and leaves.  Therefore, I am featuring the Stampin Up Venetian Romance DSP and Verve Stamps on my card share today.  The Verve Stamps “Let It Be” Stamp Set has the perfect sentiment stamp for the card:  “Every Little Thing is Going to be All Right“.  This picture provides a close up of the sentiment. Venetian Romance DSP

I think that the design I used from the Stampin Up Venetian Romance DSP is one of the prettiest designs from the DSP.  Its colors are Island Indigo and Pistachio Pudding.  I used the Stampin’ Up! Pistachio Pudding Card Stock for the card base and the Island Indigo Card Stock for a couple of highlighting elements.

I used this past Monday’s MOJO Monday MOJO310 sketch for the design of my card.  The MOJO310 sketch follows.  

MOJO310 Sketch

It is great to have a sketch to follow when creating a card.  Julee Tilman’s sketches are always beautiful.  She is one of the designers for MOJO Monday.

IN ADDITION TO THE STAMPIN UP VENETIAN ROMANCE DSP, OTHER SUPPLIES USED ARE:  (You can find the Stampin’ Up! supplies here.)

Paper:  Stampin’ Up! Island Indigo Card Stock, Pistachio Pudding Card Stock, and Very Vanilla Card Stock

Stamps:  Verve Stamps – Let It Be Stamp Set

Ink:  Stampin’ Up! Island Indigo Classic Ink

Accessories:  Stampin’ Up! Basic Pearls

 Stampin Up Venetian Romance DSP

 Stamping With Guneaux Designs

 God’s Blessings!
Stamping With Guneaux Designs
By
Beverly Polen
 Stampin Up Venetian Romance DSP

 STAMPIN’ UP! VENETIAN ROMANCE DSP

Venetian Romance DSP – Let It Be Verve Stamps

The Stampin’ Up! Venetian Romance DSP’s coordinating colors are Crisp Cantaloupe, Island Indigo, Pistachio Pudding, Soft Suede, Tangerine Tango, and Very Vanilla.  I chose to use Pistachio Pudding and Crisp Cantaloupe Card Stock to highlight the Venetian Romance DSP design that I used on the left side of my inspirational card below.

Venetiam Romance DSP - Let It Be Verve Stamps

This is my first time using Verve Stamps, and I especially like the inspirational Let It Be stamp set. The verse (the sentiment) for my card is from that stamp set.  I wish Stampin’ Up!’s inventory of stamp sets includes ones with Biblical verses.  

Venetian Romance DSP  - Let It Be Verve Stamps

I used the Stampin’ Up! Apothecary Accents Framelits, the medium rectangle accent, for cutting the Very Vanilla Card Stock on which the sentiment rests.  I traced around the same framelit onto Crisp Cantaloupe Card Stock and fussy cut it to create the sentiment’s mat.  I punched holes in the top left and right corners of the mat to insert ribbon through.  The ribbon used is the Everyday Enchantment Organdy Ribbon from this year’s Sale-a-Bration.  I colored with a permanent marker a Very Vintage Designer Button to top the ribbon and to give the appearance that the sentiment is hanging from the ribbon and button.

 Venetian Romance DSP - Let it Be Verve Stamps

I embossed the front of the Pistachio Pudding card base with the Stampin’ Up Beautifully Baroque Embossing Folder.  This embossing folder is one of Stampin’ Up!’s best embossing folders.

BESIDES THE VENETIAN ROMANCE DSP (130144), OTHER SUPPLIES USED ARE:

Paper:  Pistachio Pudding Card Stock (131294), Crisp Cantaloupe Card Stock (131298), Very Vanilla Card Stock (101650), and Baked Brown Sugar Card Stock (131296)

Stamps:  Let It Be (Verve Stamps – vs-0191)

Ink:  Baked Brown Sugar Classic Ink (131174)

Accessories:  Stampin’ Up! Apothecary Accents Framelits (127003),  Sale-A-Bration’s Everyday Enchantment Organdy Ribbon, Beautifully Baroque Embossing Folder (130917)and Very Vintage Designer Button (129327) 

Venetian Romance DSP - Let It Be Verve Stamps


 God’s Blessings!
Stamping With Guneaux Designs
By
Beverly Polen 

Venetian Romance DSP - Let It Be Verve Stamps

VENETIAN ROMANCE DSP – LET IT BE VERVE STAMPS

Stampin Up Trust God and Mosaic Madness Stamp Sets

It’s the beginning of a weekend and I am ready for it!  I hope everyone has a blessed one!  My card share today features two stamp sets, the Stampin Up Trust God and Mosaic Madness sets.  Also featured on the card is the Quatrefancy Specialty Designer Series Paper.  Stampin Up Trust God

The base for this card is made with Pool Party Card Stock.  The first layer on the card is a design from the Quatrefancy Specialty Designer Series Paper.  Although I like the design, I think it is a bit “loud”.  Therefore, I tried to tone it down by covering it with solid colors that are within the design.  The colors used are Pool Party, Strawberry Slush, Daffodil Delight, and Island Indigo.  I think I was successful in muting the design.

  Stampin Up Trust God

SUPPLIES USED:

Paper:  Quatrefancy Specialty Designer Series Paper (130141), Pool Party Card Stock, Strawberry Slush Card StockWhisper White Card Stock, and Island Indigo Card Stock

Stamps:  Stampin Up Trust God  (126702 – c) and Mosaic Madness (130249 – c) stamp sets [Mosaic Madness images are on the inside of the card – see picture below.]

Ink: Island Indigo Classic Ink (126986) and Strawberry Slush Classic Ink (131178)

Accessories: In Color Dahlia (127556) [in Island Indigo], Island Indigo Ruffled Ribbon (retired), and a Martha Steward Border Punch 

 Stampin Up Trust God

STAMPIN’ UP! NEWS – Magnetic Platform Update

Have you been waiting on Stampin’ Up! to fill your order for the Big Shot Magnetic Platform (130658)?  Well, today Stampin’ Up! announced that it has received a shipment of the product and is currently filling backorders.  However, it does not have sufficient inventory to fill new orders.  Stampin’ Up! will let us know when all backorders have been filled and it is able to turn the item back on for ordering.

 God’s Blessings!
Stamping With Guneaux Designs
by
Beverly Polen Stampin Up Trust God

STAMPIN UP TRUST GOD, MOSAIC MADNESS, AND QUARTREFANCY SPECIALTY DESIGNER SERIES PAPER

Gate Fold Card Tutorial Using Window Frames Framelits

I have for you today a Gate Fold Card Tutorial that uses the Stampin’ Up! Window Frames Collection Framelits, Feel Goods Stamp Set, Mosaic Madness Stamp Set, and Quatrefancy Specialty Designer Series Paper.  This is a gate fold card that I created and I have not seen this type of card before.  It is a card cut and folded in the shape of a framelit or die.

GATE FOLD CARD TUTORIAL USING WINDOW FRAMES FRAMELITS:

Step 1:  Cut an 11″ x 4-1/4″ piece of card stock (the size of card stock can vary, depending on the framelit used).  I used the new Strawberry Slush Card Stock (131295).

Step 2:  Score on the 11″ side at 3 1/2″, 4 1/2″, 6 1/2″, and 7 1/2″.

Step 3:  Starting from the left side, fold the score lines in this order: valley fold, mountain fold, mountain fold, and valley fold.

Step 4:  Crease the score lines well so the card stock will lay flat for the next step.

Step 5:  Lay the largest framelit from the  Window Frames Collection Framelits  (129021) onto the folded card, making sure to center it top to bottom and exactly around the mountain folds. Use a temporary tape to hold the die in place. Cut using Big Shot Die Cutting Machine (113439).

 RESULTS:

Step 6:  Cut a 6″ x 5-1/4″ piece of designer series paper.  I used Stampin’ Up! Quatrefancy Specialty Designer Series Paper.

Step 7:  Lay the second to the largest framelit from the Window Frames Collection onto the piece of designer series paper.  Cut using the Big Shot Die Cutting Machine, and then cut the piece in half.

Step 8:  Adhere one piece of the designer series paper to the left side of the Gate Folded Card and the other to the right side.

Step 9:  You may need to cut off a very small portion of the top and bottom ends of the designer series paper if they overlap the card base.

Step 10:  Lay the third largest framelit onto a piece of card stock and cut using the Big Shot Die Cutting Machine.  I used Stampin’ Up!’s Daffodil Delight Card Stock.

Step 11.  Stamp a sentiment onto a piece of Whisper White Card Stock and cut it out using the fourth largest framelit. I used a sentiment from the Stampin’ Up! Feel Goods Stamp Set.

Step 12:  Adhere the Whisper White Card Stock with the sentiment onto the piece of card stock cut out in step 10 above.

Step 13.  To achieve dimension, adhere the sentiment piece onto the left side of the card base with foam adhesive.

Step 14.  Cut and adhere a small piece of Whisper White Card Stock into the inside of the card for your personal note.  (I used a stamp image from the Mosaic Madness Stamp Set at the top of the Whisper White Card Stock.)

If you followed along with the Gate Fold Card Tutorial, you’ll now have a beautiful and unique card.  I think you’ll love the outcome!

 God’s Blessings!

Stamping With Guneaux Designs
by
Beverly Polen

 GATE FOLD CARD TUTORIAL USING WINDOW FRAMES FRAMELITS