Diamond Fold Card

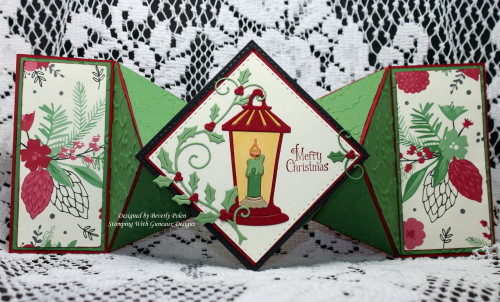
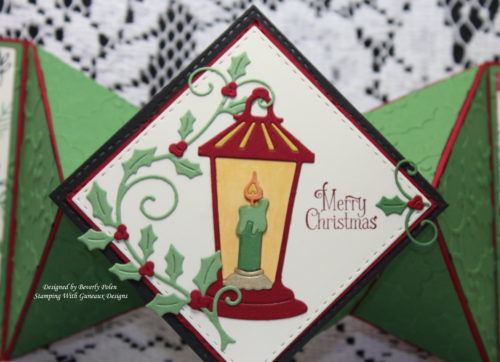
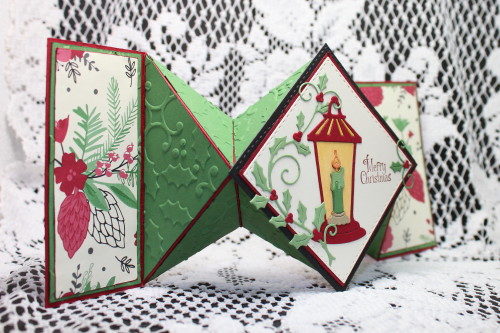
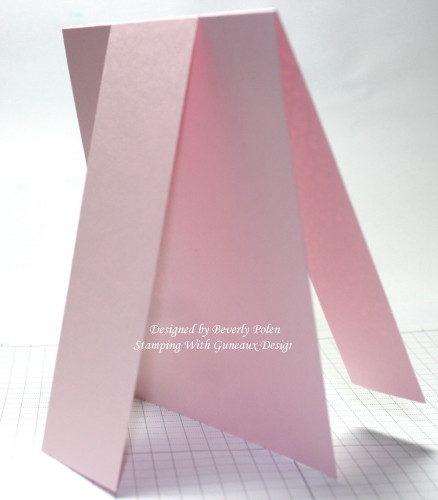
Hello, my friends, and thanks for stopping by.  I am posting a Diamond Fold Card that I created a few weeks ago.  I made this card for a “Ways To Use It Challenge” on Splitcoaststampers.  The hostess of the challenge asked to see some “fancy fold” cards, which was a great challenge as we tend to get in a rut and regularly use the same folds.  This diamond fold card is a Christmas card and it measures 4″ x 11″ and has 12 folds.

diamond-fold-card_1

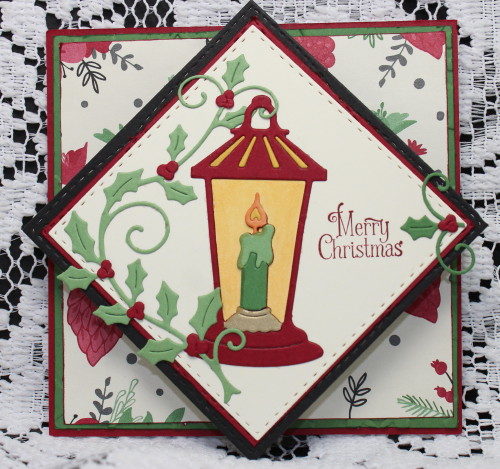
I used Stampin’ Up!’s “This Christmas Specialty DSP” on the far left and right of the card.  For the middle folds, I used the Stampin’ Up! Holly Embossing Folder to emboss Garden Green Card Stock.  I cut the necessary sections and adhered them to 10 sections of the card.  The main element of the card is the lantern and holly that I made with the CottageCutz Lantern w/ Holly Vine Die.  The card was time consuming but fun!

diamond-fold-card2

diamond-fold-card3_1 diamond-fold-card4_1

Stamps: ODBD Home For The Holidays
Paper: SU Very Vanilla, Basic Black, Cherry Cobbler, Garden Green, Wild Wasibi, Brushed Gold, and This Christmas Specialty DSP
Ink: SU Cherry Cobbler and Yellow Copics
Accessories: CottageCutz Lantern w/ Holly Vine Die (currently on sale), SU Holly Embossing Folder, My Favorite Things Die-namics Dies, ODBD Double Stitched Squares Dies, Tombow Glue, and Mounting Tape

Thanks for viewing and leaving comments!!


Butterfly_1_1

God’s Blessings!

Stamping With Guneaux Designs By Beverly Polen

Firm Reliance on Divine Providence! 

“Be joyful always; pray continually; give thanks in all circumstances, for this is God’s will for you in Christ Jesus.”  1 Thessalonians 5:16-18

Ribbon Of Hope

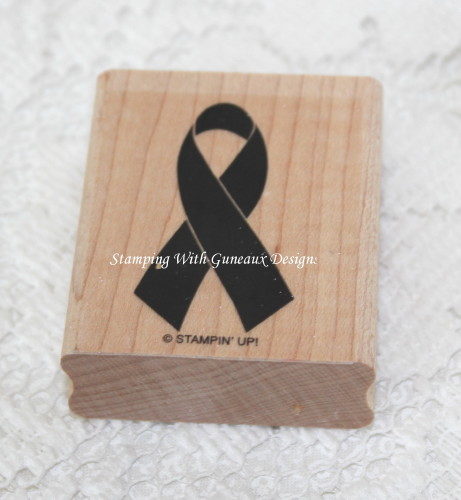
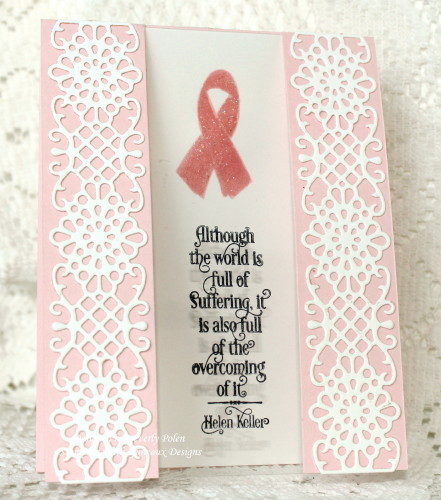
A blessed day to you, and thanks for stopping by.  My card share today features the Stampin’ Up! retired Ribbon of Hope Stamp, and it is in honor of Marg Mortimer (aka Margscardcrazy) who honors us with wonderful creations on  the Splitcoaststampers site. Marg is the “Featured Stamper” this week on Splitcoastampers, and the challenge is to select one of her card to CASE.  This is my card that I CASEd from one of hers:

Ribbon of Hope

Marg has a wonderful gallery on Splitcoaststampers.  As I strolled through her gallery, I saw this card that she made in 2014.  The card spoke to my heart so I selected it for my CASE in honor of her.

In her description of her card, she shared that she created it for a challenge “to make a card with something missing. To let those who have had a mastectomy or double mastectomy know that they are still a whole person. That it’s not what they now look like that makes them who they are. What makes us who we are is how we treat others, what’s in our heads and what’s in our hearts and how we chose to share that with others.. One, whole, beautiful!”  Well, I’m one of the ladies who she is describing.  

To create her card, Marg said,  “I cut a strip away from the front panel and then backed the front with some acetate and stamped on the inside of the card so that you could see the image through the card window.”  The piece cut out from the front of her card base represented “something missing”.

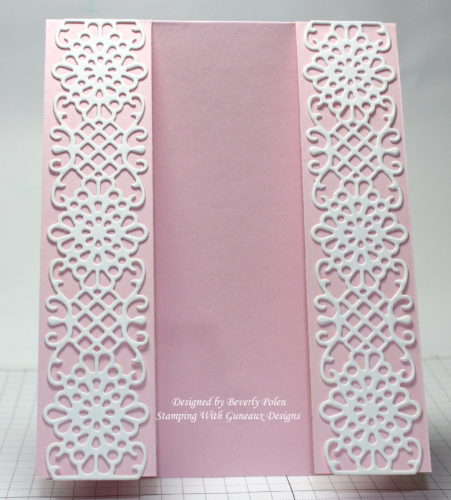
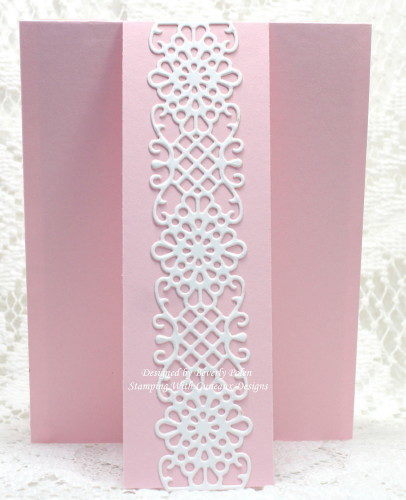
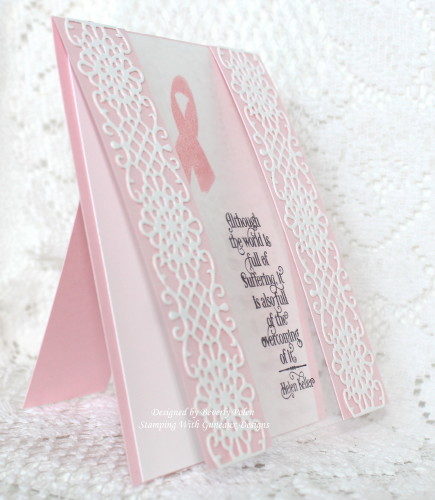
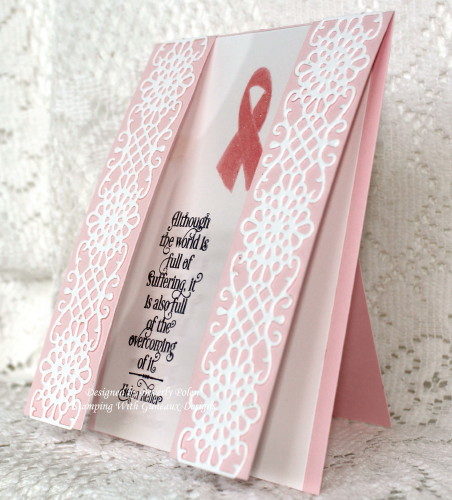
Therefore, I cut a strip from the front of my card’s base, and instead of cutting off this piece, I folded it to the back to resemble an easel card.  I then added three lovely Our Daily Bread Designs Flower Lattice die cuts to the front and back strips.

Ribbon of Hope   Ribbon of Hope Ribbon of Hope-4_1

I cut a piece of Neenah Solar White Card Stock for the card’s inside, and stamped the Ribbon of Hope stamp image in Pink Pirouette ink.  I embossed the image with Stampin’ Up! Iridescent Ice Embossing Powder (I believe this powder is unavailable), and attached it to the card’s inside.  I used a sentiment from the Our Daily Bread Designs Healing Prayers to stamp in black Stazon ink onto a piece of window sheet (i.e., acetate) and adhered it to the two front strips.  There is space to write a personal message when you lift the front panel.

Ribbon of Hope-b_1  Ribbon of Hope-c_1

Since Breast Cancer Awareness Month is next month, October, I believe this card is timely.  I hope you’ve enjoyed it.


SUPPLIES (the Ribbon of Hope Stamp is unavailable)

Ribbon of Hope_1  SU Pink Pirouette   HEALING PRAYERS FLOWER LATTICE DIE   Window Sheets

Tsukineko Full-Size StazOn Multi-Surface Inkpad, Jet Black    


SU Fifth Avenue Floral

God’s Blessings!

Stamping With Guneaux Designs By Beverly Polen


Jesus said to his disciples, “No good tree bears bad fruit, nor does a bad tree bear good fruit.  Each tree is recognized by its own fruit.  People do not pick figs from thornbushes, or grapes from briers.  The good man brings good things out of the good stored up in his heart, and the evil man brings evil things out of the evil stored up in his heart.  For out of the overflow of his heart his mouth speaks.”  Luke 6:43-45

Explosion Heart Card

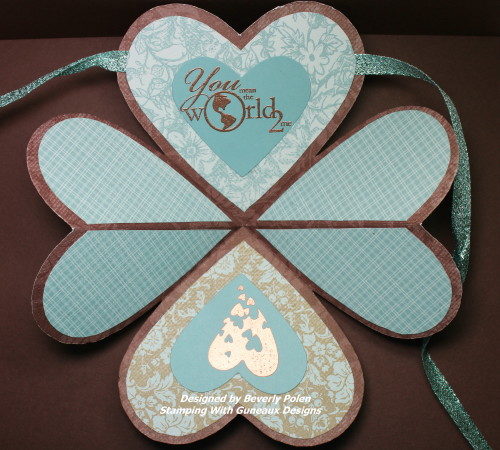
Hola, my friends!  I have for you today an Explosion Heart Card!  Have you ever made one?  This is my first time, and I made it for a Technique Lovers Challenge on Splitcoaststampers.

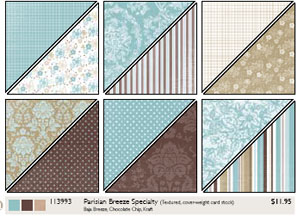
If you are a Stampin’ Up! (SU) consumer, do you remember this gorgeous Parisian Breeze Specialty Designer Paper (retired)?  It came out in 2009 and is a heavy double-sided Designer Series Paper (DSP).  The colors of the DSP are Baja Breeze, Chocolate Chip, and Kraft.  I used the paper to create my Explosion Heart Card!  This photo is the card closed with a ribbon.

Explosion Heart Card

This is the card’s inside after it “explodes”.  LOL

Explosion Heart Card

And, this is a photo of the lovely SU Parisian Breeze Specialty Designer Paper.

parisian_breeze


UPDATE:  This card was selected as a Splitcoaststampers Favorite for the Week Ending July 17, 2016!


Here are the steps for creating an Explosion Heart Card:

  • Cut an 8-1/2″ square piece of the DSP (or card stock).
  • Score and fold the paper in half.
  • Unfold, score, and fold in half in the opposite direction.
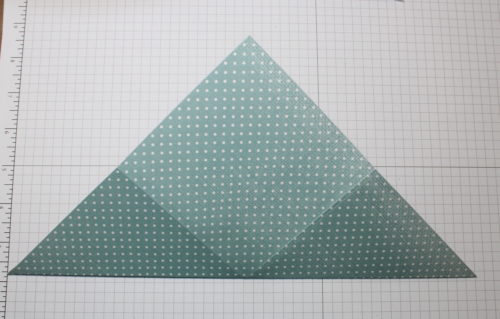
  • Score and fold two corners together to form a triangle.

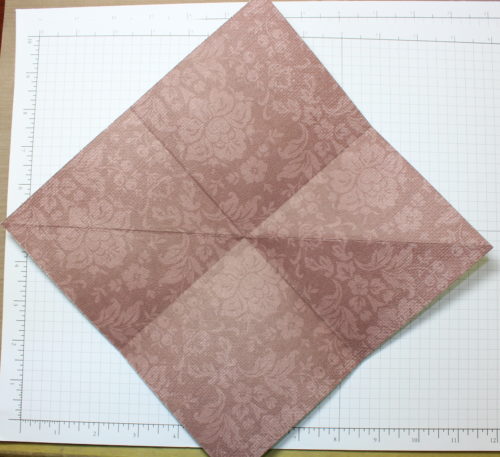
The first photo is the outside of the DSP after all of the folding, and the second photo is of the inside.

Explosion Heart CardExplosion Heart Card2


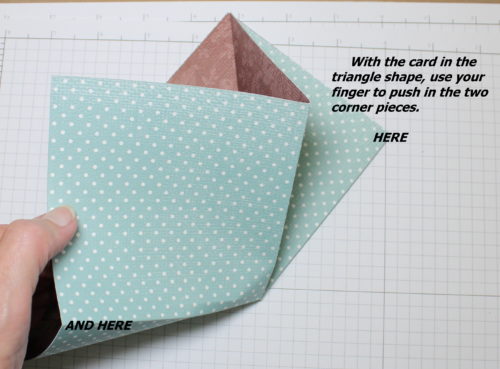
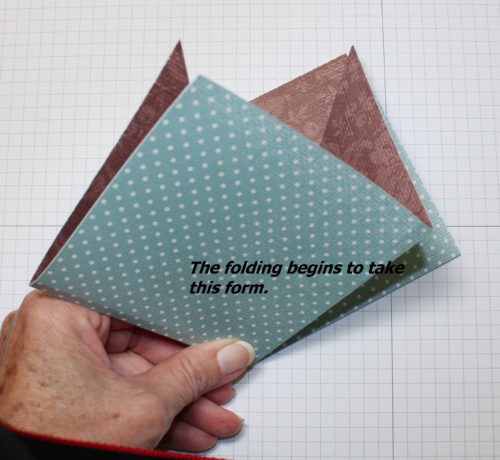
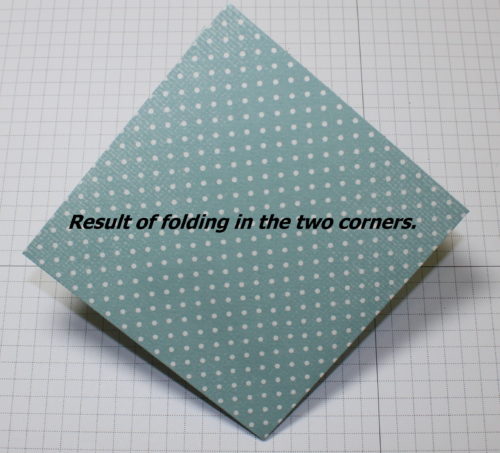
  • Using your finger, push in the two corners of the triangle just created.

Explosion Heart Card3

Explosion Heart Card4Explosion Heart Card5

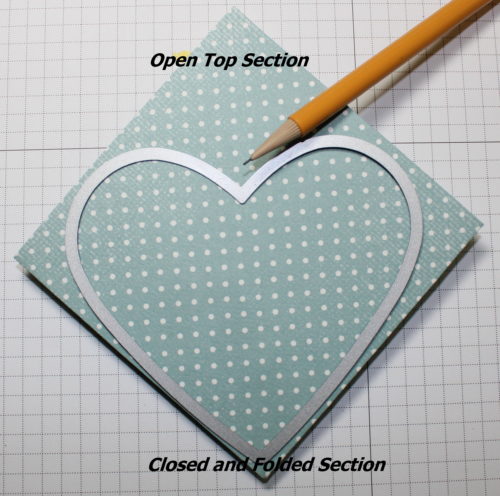
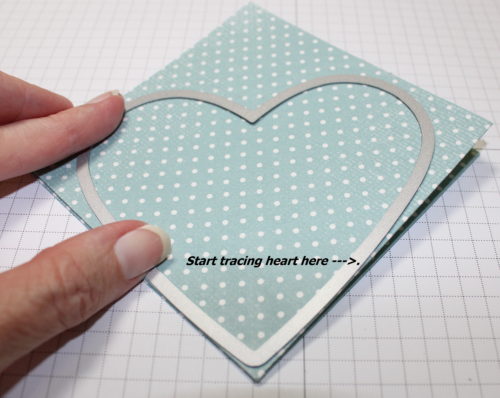
  • Using a heart shaped die or framelit (I used the next to the largest Stampin’ Up!’s retired heart framelits), lay it onto the folded DSP to trace the heart onto the paper.
  • Place the die/framelit close to the bottom closed portion of the DSP, ensuring the open section is at the top.

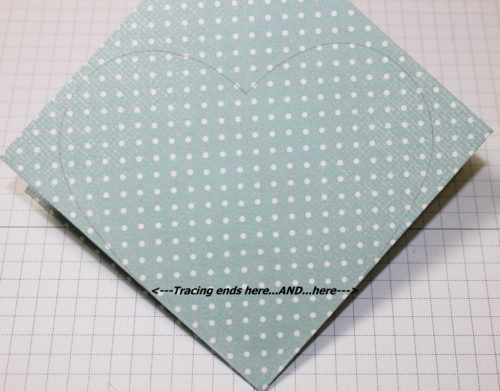
Explosion Heart Card7Explosion Heart Card8

  • NOTE:  Don’t trace the very bottom of the die/framelit as the bottom must stay folded and uncut.
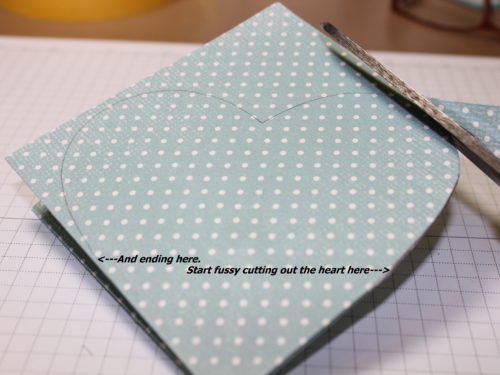
  • Ensure your tracing starts and ends as shown.

Explosion Heart Card9

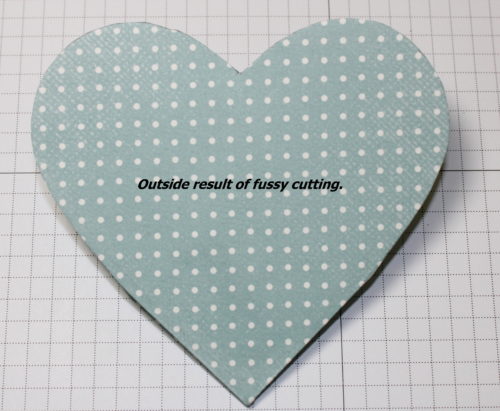
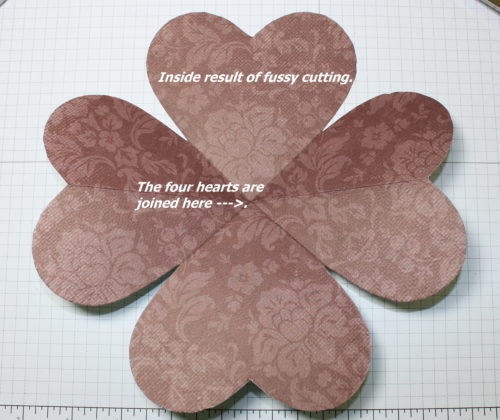
  • Using scissors, cut out the heart ensuring you’re cutting through all the layers.

Explosion Heart Card10Explosion Heart Card11Explosion Heart Card12

  • Decorate the outside and inside of your card as desired.  I added a ribbon to ensure the card stays closed.  If you add a ribbon, add it to the top heart BEFORE you adhere any decoration (e.g,. cardstock, etc.) to that heart.  Refer to the second photo above to see where my ribbon was added.
  • Enjoy your card!

If the instructions are confusing, PLEASE feel free to leave me a question or comment in the comments section or by email (address is in the header of the page).


SU Fifth Avenue Floral

God’s Blessings!

Stamping With Guneaux Designs By Beverly Polen

“The Lord says: “These people come near to me with their mouth and honor me with their lips, but their hearts are far from me. Their worship of me is based on merely human rules they have been taught.”  Isaiah 29:13

Gate Fold Card Using An Intricate Die Tutorial

In August 2013, I posted two tutorials on how to make a Gate Fold Card using Stampin’ Up! framelits to form a card into the shape of one framelit.  One Tutorial was for using the Stampin’ Up!  Window Frames Framelits, and the Second Tutorial was for using the Stampin’ Up! Deco Frames Framelits. Today’s tutorial is for making a Gate Fold Card Using An Intricate Die.

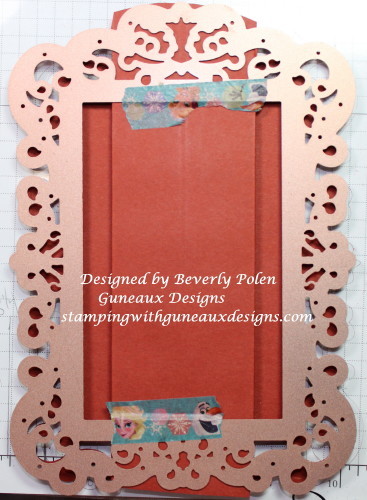
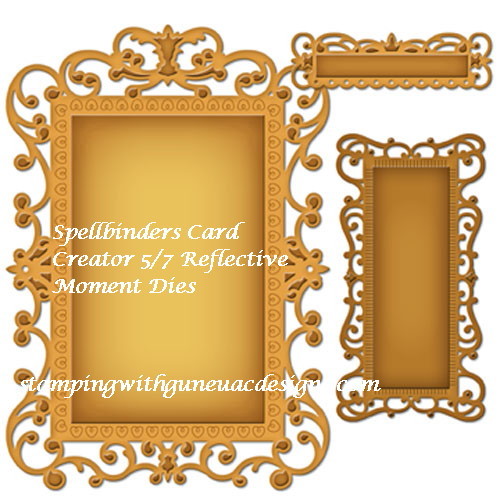
Creating a gate fold card using an intricate die to form the shape of the card can be difficult and a little rough on your die-cutting machine.  However, if you are willing to take the risk, you can create a beautiful gate fold card.  The gate fold card that is the subject of this tutorial was created with the largest die from the Spellbinders Card Creator 5/7 Reflective Moment Dies.

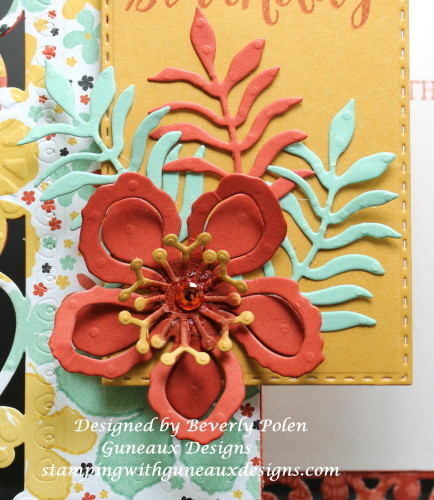
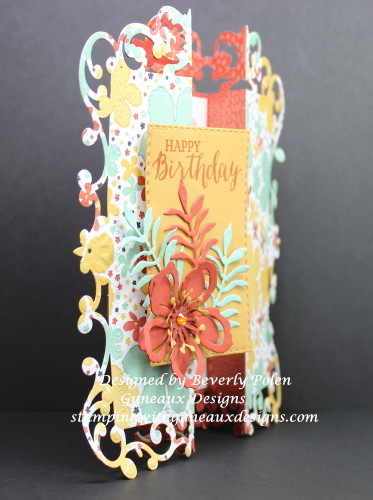
These photos are of the card I created for this tutorial.

Gate Fold Card Using An Intricate Die

Gate Fold Card Using An Intricate Die Tutorial

Gate Fold Card Using An Intricate Die Tutorial

Gate Fold Card Using An Intricate Die Tutorial

BlogDivider_zpsed339ea1

UPDATE:  This card was selected as a favorite on Splitcoaststampers for the week ending January 24, 2016.

BlogDivider_zpsed339ea1

TUTORIAL FOR MAKING A GATE FOLD CARD USING AN INTRICATE DIE

Step 1.  Select a die that you want to use to form the shape of your card (I recommend selecting one that is no wider than 5″ and longer than 7″, or you’ll need 12″ card stock).

Step 2.  Score an 8-1/2″ x 11″ piece of card stock on the 11″ side at the 3-1/2″, 4-1/2″, 6-1/2″, and 7-1/2″ measurements.

Step 3.  Fold the 3-1/2″ score line into a mountain fold, 4-1/2″ into a valley fold, 6-1/2″ into a valley fold, and 7-1/2″ into a mountain fold.

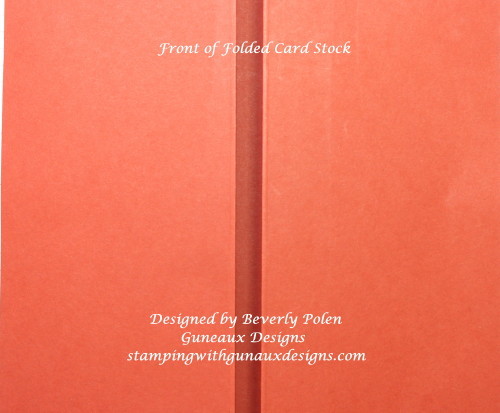
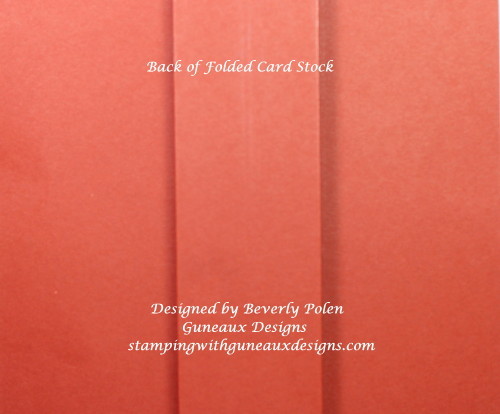
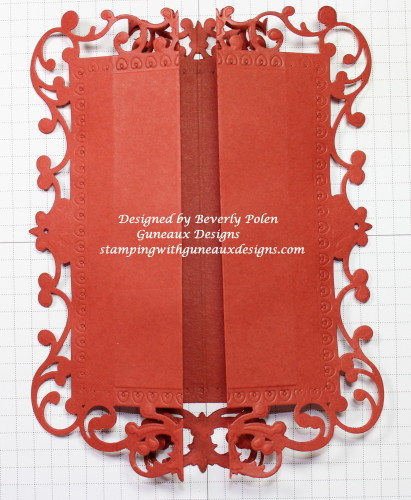
Step 4.  Crease well the score lines with a bone folder.  The two photos below show the front and back of the folded card stock.

Gate Fold Card Using An Intricate Die TutorialGate Fold Card Using An Intricate Die Tutorial

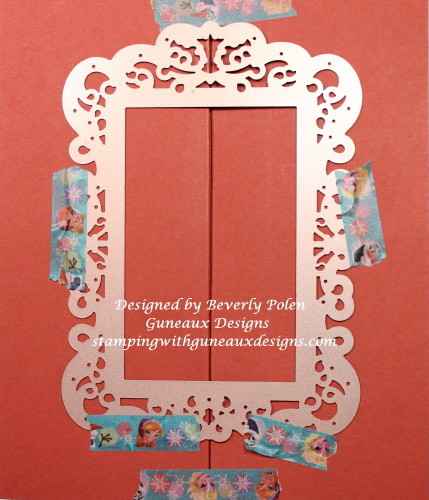
Step 5.  Lay your selected die onto the front of the folded card stock and use temporary tape to hold the folds and die in place.

(NOTE:  I selected the largest die from Spellbinders Card Creator 5″ x 7″ Reflective Moment Dies (S6-011). 

Gate Fold Card Using Dies & Framelits-3_1Step 6.  Using your die-cutting machine’s recommendation for the correct die-cutting sandwich, run the card stock and die through the machine.

(NOTE:   Because you are using an intricate die, you will need to run the sandwich through your machine at least four to five times.)

Step 7. Remove the die from the front of the cut card stock and re-position it onto the back of the cut out. Carefully line up the die with the cutout. Run though your die-cutting machine approximately three to four times.  There will be some pieces remaining in the cutout that can be removed by hand.

Gate Fold Card Using An Intricate Die Tutorial

The photo below shows the front of the cutout.

Gate Fold Card Using An Intricate Die Tutorial

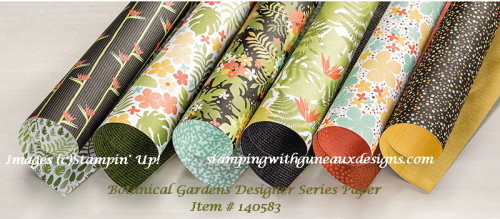
Step 8.  Decorate your card as desired.   I used Stampin’ Up! Botanical Gardens Designer Series Paper to decorate mine.

Enjoy your beautifully created gate fold card!

BlogDivider_zpsed339ea1

SUPPLIES USED

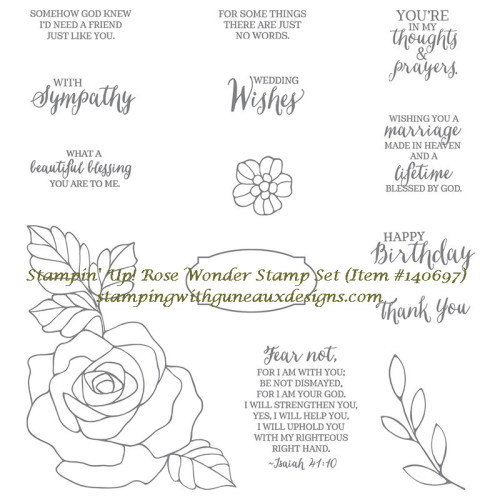
Stamps:  Stampin’ Up Rose Wonder Stamp Set (item # 140697) and God’s Blessings (retired)

Paper:  Stampin’ Up! Botonical Gardens Designer Series Paper; and Whisper White, Cajun Craze, Mint Macaron, and Hello Honey Card Stock

Ink: Stampin’ Up! Cajun Craze Classic Ink

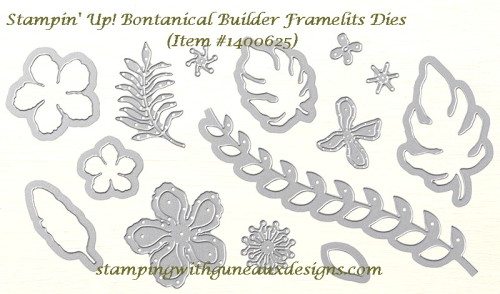
AccessoriesSpellbinders Card Creator 5/7 Reflective Moment Dies, Our Daily Bread Designs Double Stitched Rectangles Dies, Stampin’ Up! Botanical Builder Framelits Dies, Swarovski Crystal Gem (center of flower),

Gate Fold Card Using An Intricate Die TutorialGate Fold Card Using An Intricate Die Tutorial

Spellbinders Card Creator 5x7 Reflective Moment Dies_1

Gate Fold Card Using An Intricate Die Tutorial

BlogDivider_zpsed339ea1


Swallowtail Butterfly

God’s Blessings!

Stamping With Guneaux Designs By Beverly Polen

Gate Fold Card Using An Intricate Die TutorialGATE FOLD CARD USING AN INTRICATE DIE TUTORIAL

Gate Fold Card Using A Framelit Tutorial

In August 2013, I posted two tutorials on how to make a Gate Fold Card using a framelit to form the shape of a card.  One Tutorial was for using the Stampin’ Up!  Window Frames Framelits, and the Second Tutorial was for using the Stampin’ Up! Deco Frames Framelits.   

Recently, I was asked by a viewer, Eileen, to provide another tutorial for making a Gate-Fold Card Using a Framelit from the Stampin’ Up! Floral Frames Framelits.  This post provides the requested tutorial. (Sorry, Eileen that it has taken some time!)

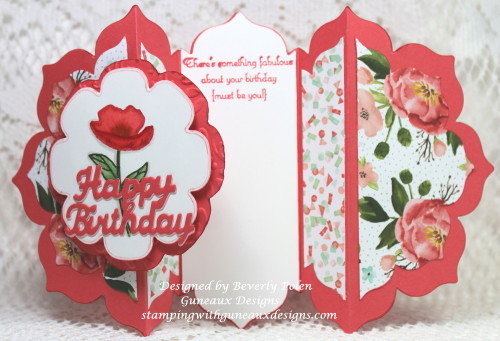
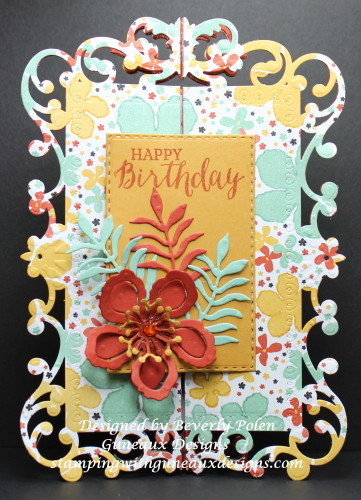
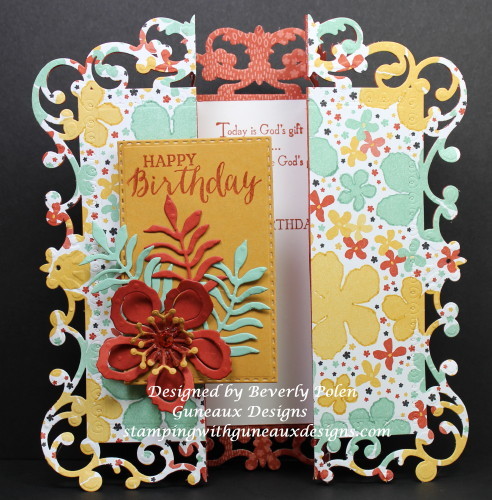
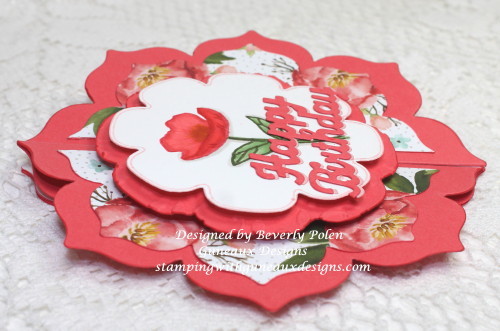
But first, let me show you photos of the Happy Birthday card I created using the featured framelits:
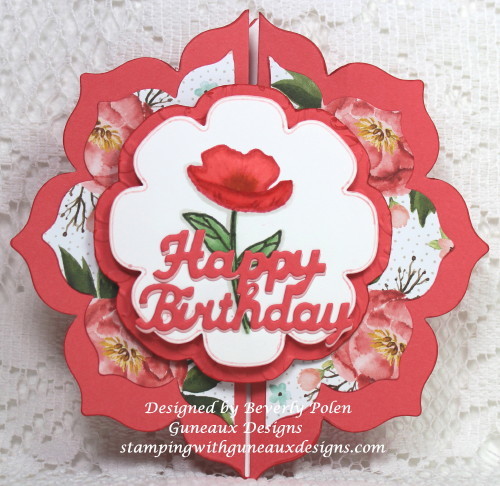
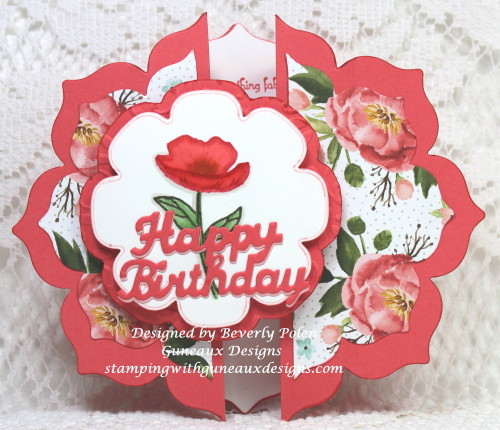
Gate Fold Card Using A Framelit

Gate Fold Card Using A Framelit

Gate Fold Card Using A Framelit

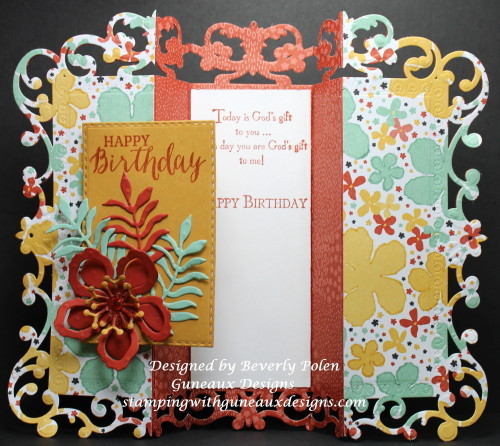
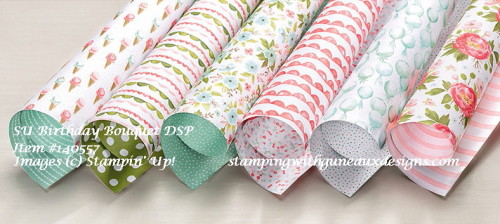
You can see in the above picture that I used another design from the Stampin’ Up! Birthday Bouquet DSP to cover both side panels on the inside of the card.  Now, on to the tutorial.

BlogDivider_zpsed339ea1

UPDATE:  This card was selected as a favorite on Splitcoaststampers for the week ending January 24, 2016.

BlogDivider_zpsed339ea1

TUTORIAL FOR MAKING A GATE FOLD CARD USING A FRAMELIT

Step 1.  Select a framelit that you want to use to form the shape of your card.

(NOTE:  I recommend selecting one that is no wider than 5″ and longer than 7″, otherwise, you’ll need 12″ card stock).

Step 2.  Score an 8-1/2″ x 11″ piece of card stock on the 11″ side at the 3-1/2″, 4-1/2″, 6-1/2″, and 7-1/2″ measurements.

Step 3.  Fold the 3-1/2″ score line into a mountain fold, 4-1/2″ into a valley fold, 6-1/2″ into a valley fold, and 7-1/2″ into a mountain fold.

Step 4.  Crease the score lines well using a bone folder.  

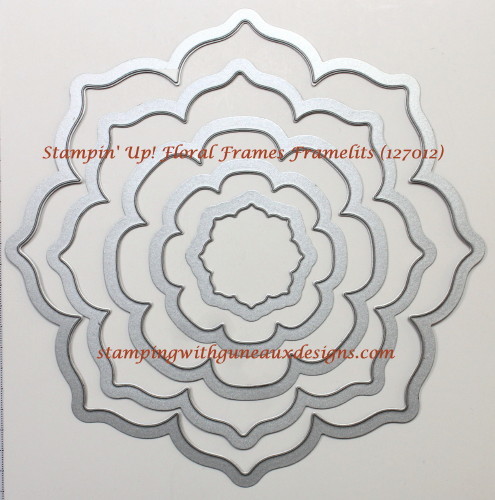
Step 5.  Lay your selected framelit onto the front of the folded card stock, centering the framelit.  Use temporary tape to hold the folds and framelit in place. (I used the largest framelit from the Floral Frames Framelits.)
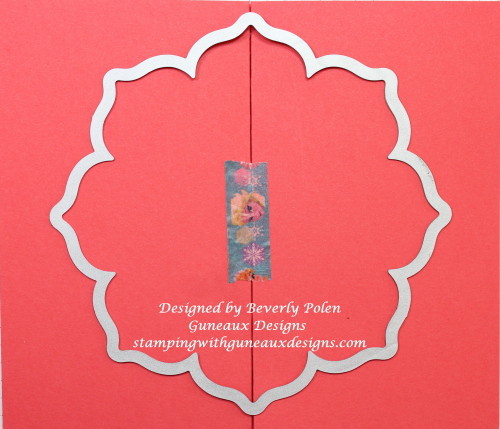
Gate-Fold Card Using Framelits

Step 6.  Using your die-cutting machine’s recommendation for the correct die-cutting sandwich, run the card stock and framelit through the machine.

(NOTE:  If using a Stampin’ Up! framelit, run the sandwich through your machine at least two times to get all layers cut.)

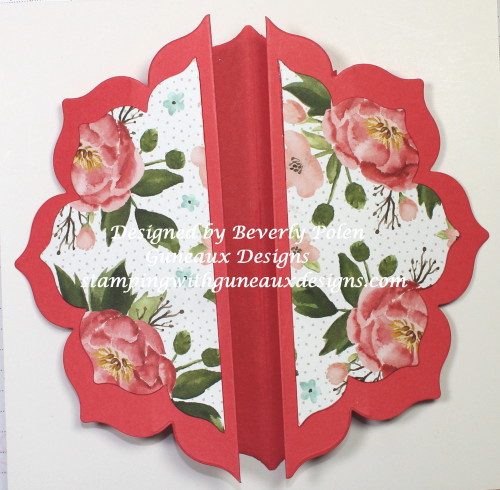
Your cutout will look like the one in this photo if you use the featured framelits.
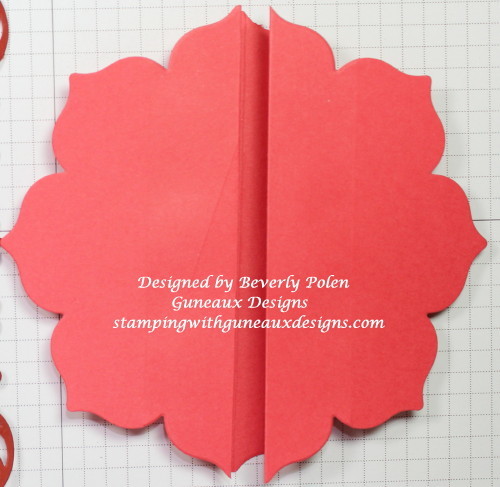
Gate Fold Card Using A Framelit Tutorial

Step 7.  Using the remaining framelits of your selected set to cut designer series paper to decorate your card.

STOP AT THIS STEP OF THE TUTORIAL UNLESS:

Step 8.  IF you are using the Stampin’ Up! Floral Frames Framelits, follow the remaining steps.

  • a.  If you decide to use designer series paper as I did, use the next to the largest framelit from the Stampin’ Up! Floral Frames Framelits to cut out a framelit design.
  • b.  Cut the design piece in half from the top to the bottom.
  • c.  Attach the pieces onto the left and right sides of the card.Gate Fold Card Using a Framelit Tutorial
  • d.  Cut a piece of card stock that matches the base card color.  Lay the third largest framelit onto the card stock and trace around the outer edge of the framelit.  Fussy cut the design (i.e., use scissors).
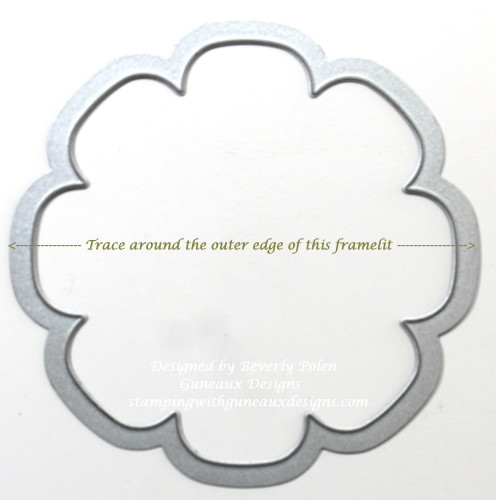
Gate Fold Card Using A Framelit Tutorial

  • e.  Using an embossing folder, emboss this piece of card stock to achieve texture.
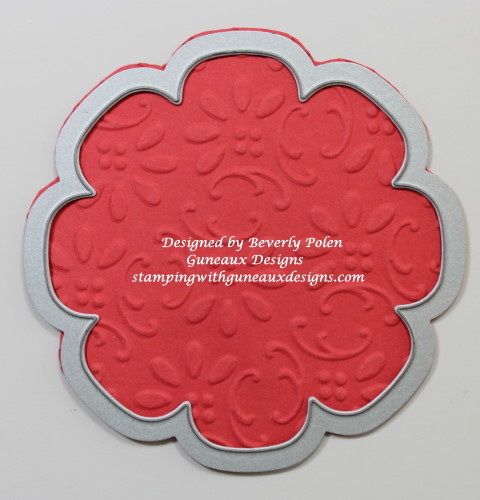
Gate Fold Card Using A Framelit Tutorial

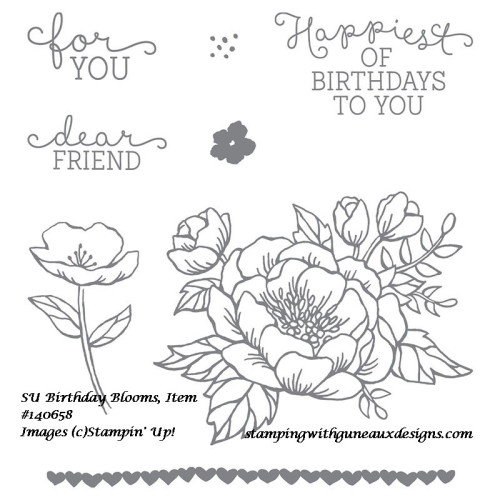
  • f.  Select a design for the top layer of your card with the same framelit, but cutting it with your die-cutting machine (no need to fussy cut).  I used Whisper White Card Stock on which I cut the framelit and stamped a floral image from the Stampin’ Up! Birthday Blooms Stamp Set.  I used copic markers to color the image.  I used foam dots to attach it to the embossed piece of card stock.  Lastly, I added a Happy Birthday sentiment.
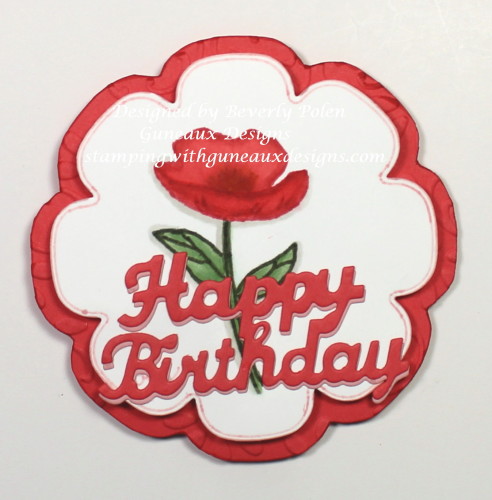
Gate Fold Card Using A Framelit-5

  • g.  Place foam dots onto the left side of the embossed card stock (right side when turned over),
  • h.  Adhere this piece to the left side of the card, allowing it to overlap, but not adhere, to the right side of the card.
  • i.  For the inside of the card, cut a 1-15/16″ x 5-1/2″ piece of Whisper White Card Stock.
  • j.  Center the largest framelit onto the card stock and run it through your die-cutting machine.
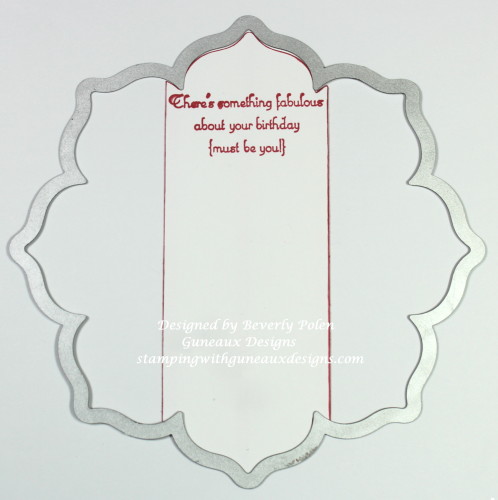
Gate Fold Card Using A Framelit-6

  • k.  If desired, stamp a sentiment onto the card stock.  Adhere it to the inside center of the card.
  • l.  Use the same framelit (i.e., largest one) to cut another piece of DSP.
  • J. Measure the left and right inside panels of the card base (i.e. those on each side of the center piece).  Use the measurements to cut the sides of the DSP from top to bottom and adhere them to the panels.
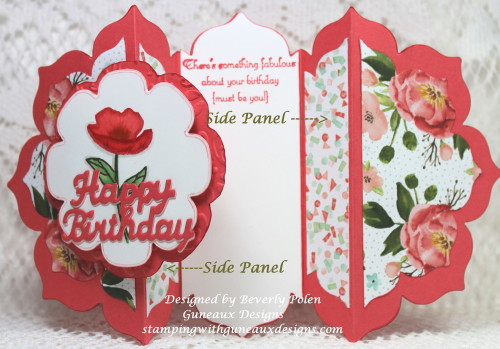
Gate Fold Card Using A Framelit

Enjoy your beautiful gate fold card in the shape of your selected framelit!

BlogDivider_zpsed339ea1

SUPPLIES USED

Stamps:  Stampin’ Up! Birthday Blooms Stamp Set and Retired Stampin’ Up! Create a Cupcake Stamp Set (inside sentiment)

Paper:  Stampin’ Up! Birthday Bouquet Designer Series Paper, Watermelon Wonder, and Whisper White Card Stock

Ink:  Stampin’ Up! Watermelon Wonder and Mossy Meadow Classic Ink, Copic Markers

Accessories: Stampin’ Up! Floral Frames Framelits, North Coast Creations Happy Birthday Die, Retired Stampin’ Up! Finial Press Embossing Folder
Gate Fold Card Using a Framelit Tutorial

Gate Fold Card Using A Framelit Tutorial

Gate-Fold Card Using A Framelit Tutorial

If you have questions or comments, please feel free to leave them in the comment section of this post.


Swallowtail Butterfly

God’s Blessings!

Stamping With Guneaux Designs By Beverly Polen
Gate Fold Card Using A Framelit

GATE FOLD CARD USING A FRAMELIT
Happy Birthday Frozen Style

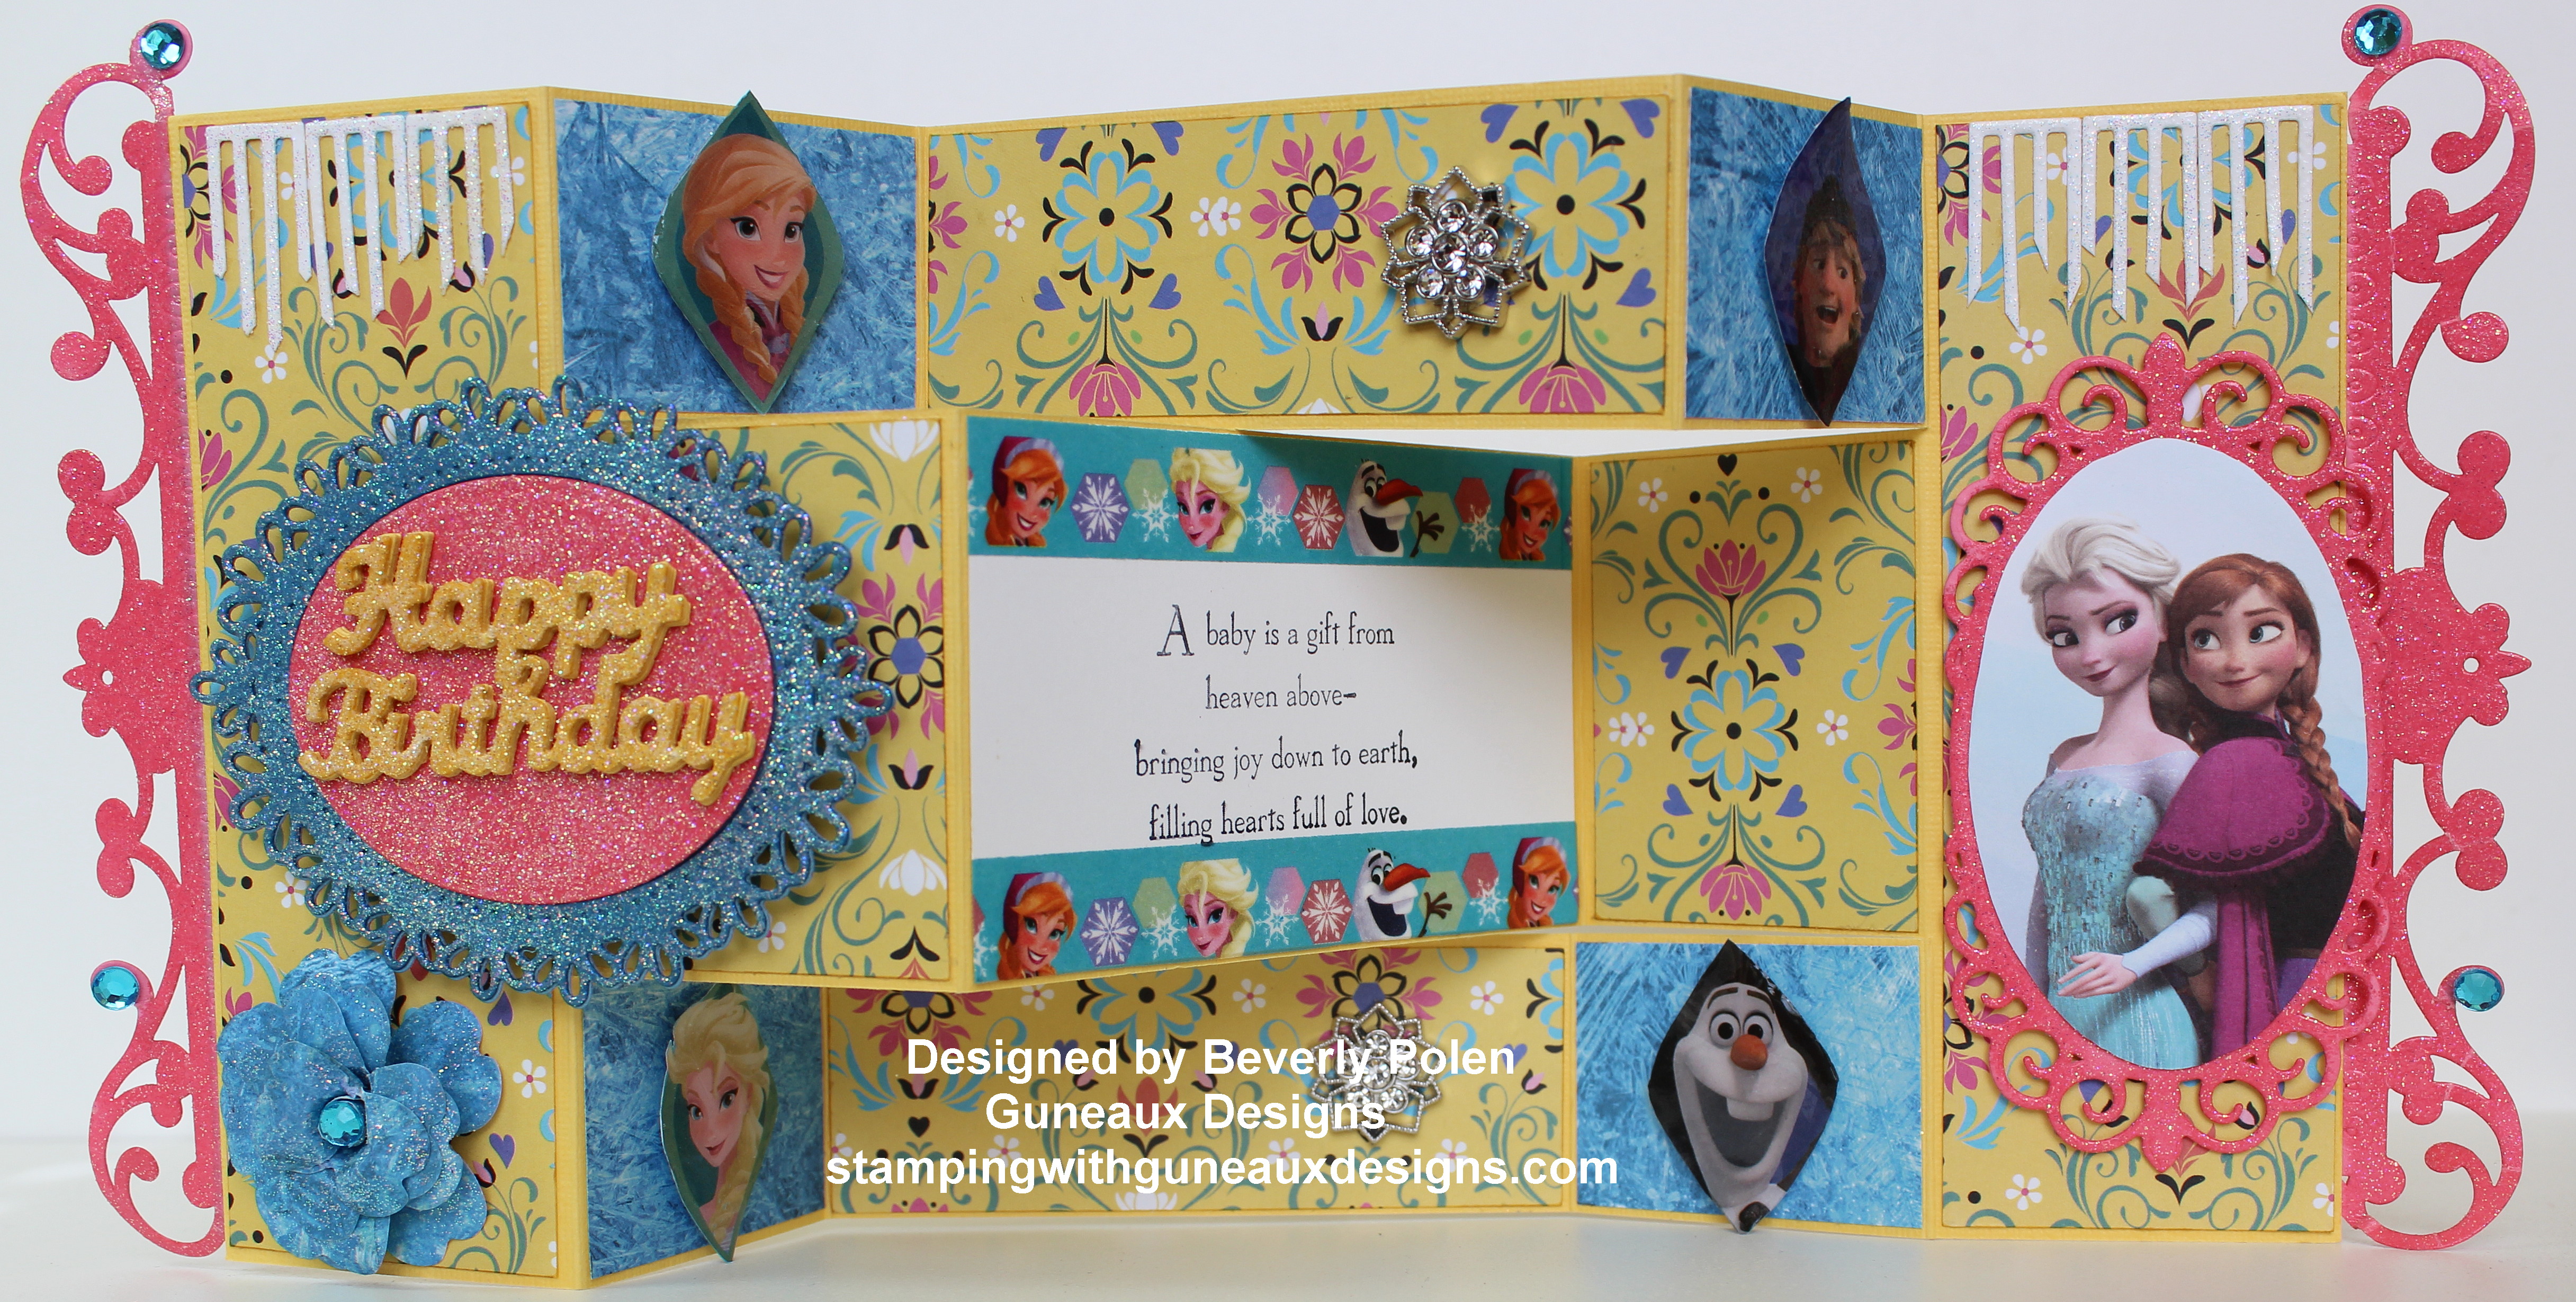
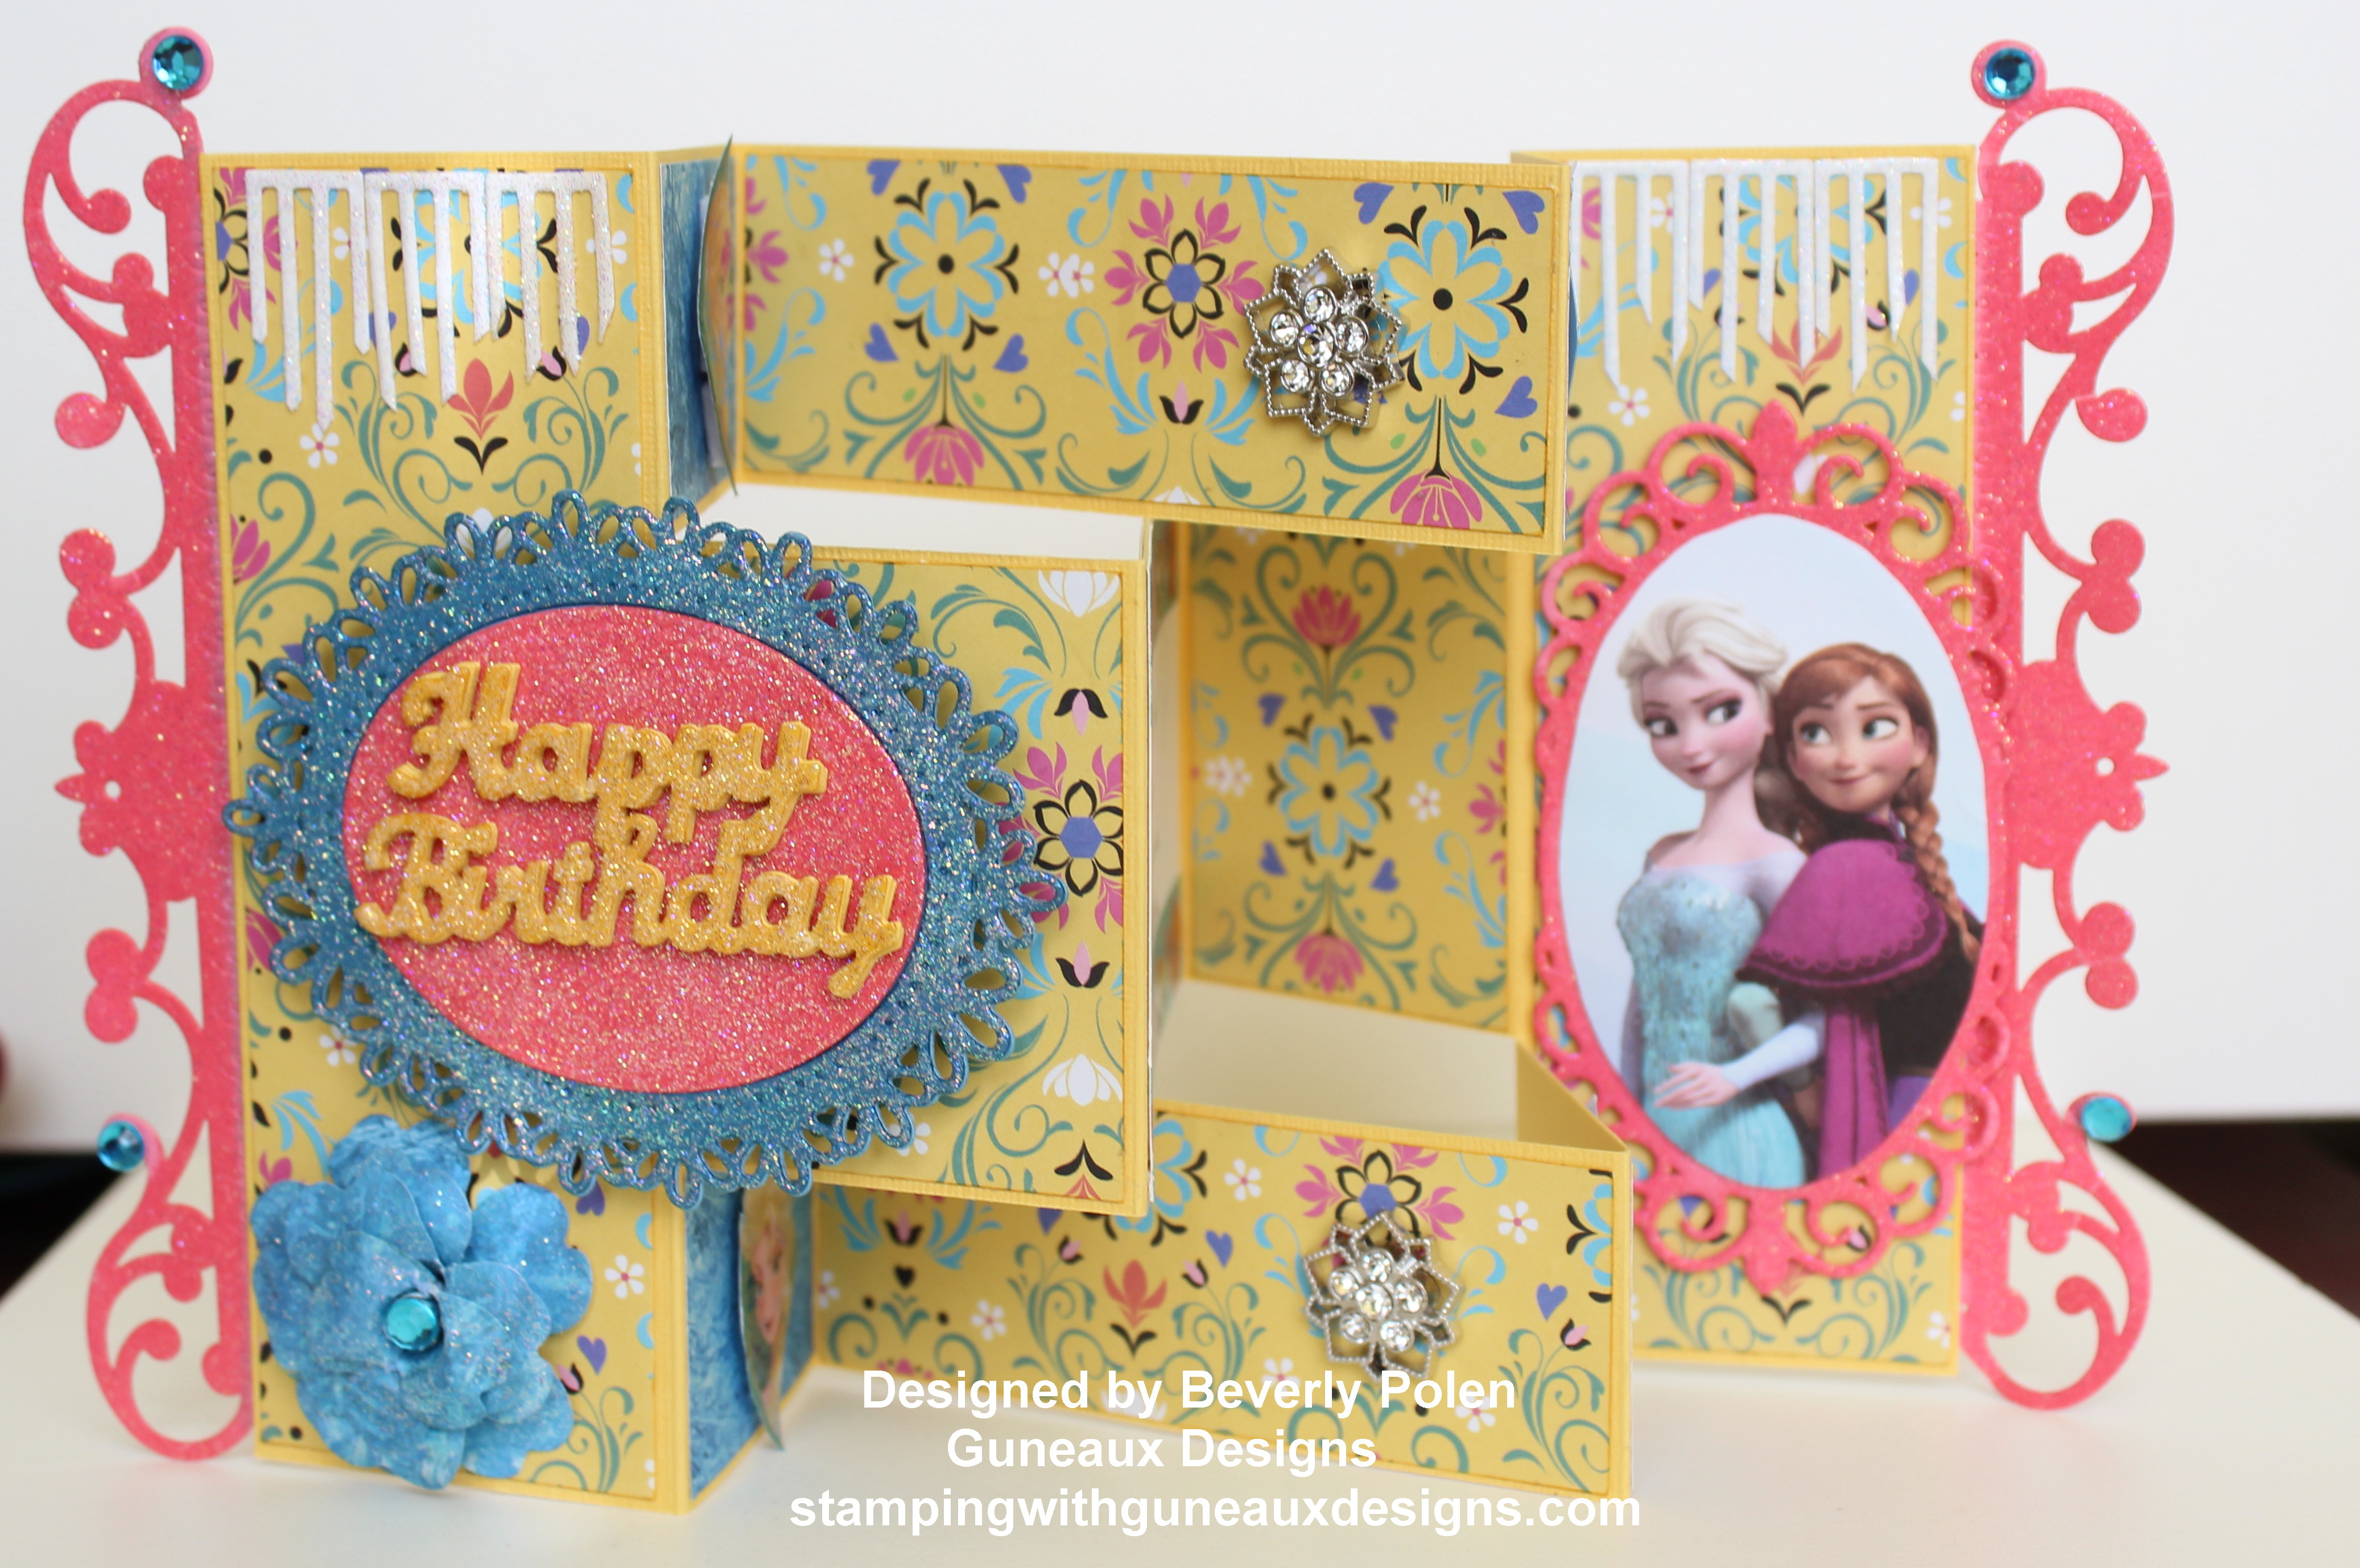
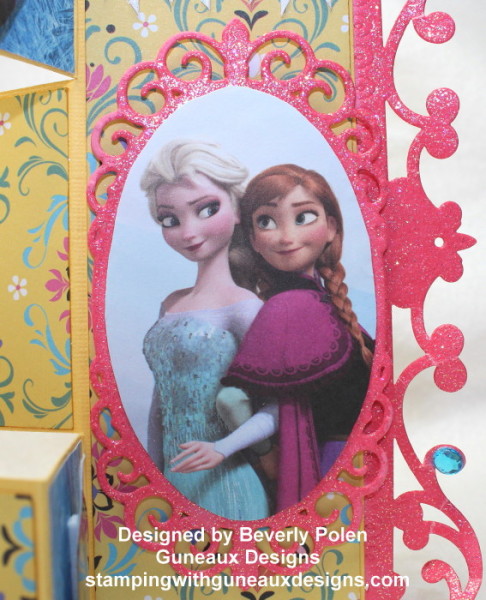
I have had three birthdays to celebrate in the last several days, one of which was for my one-year old granddaughter.  She LOVES the Disney movie, Frozen; therefore, I made her card around the Frozen theme and call it “Happy Birthday Frozen Style“.  As you can see, the card is a Tri-Shutter card.


UPDATE:  This card was chosen for one of the Splitcoaststampers FAVORITES for the week ending December 20, 2015.  Splitcoaststampers’ comment:  

“Congratulations! In the General Stamping forum, you’re in the FAVORITES for the week ending December 20, 2015.”


Happy Birthday Frozen Style


Happy Birthday Frozen Style

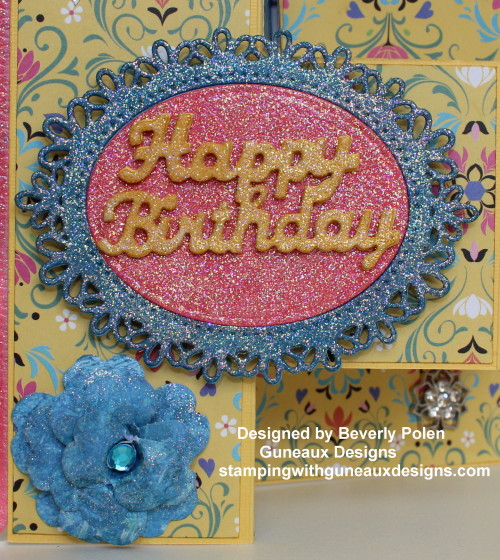
The above photo shows the happy birthday sentiment and “frozen” flower.  You will note the blue stone in the center of the flower as well as on the sides of the card. My granddaughter’s birthstone is Blue Zircon as she was born in December.  I had to include them on the card.  Several elements on the card are embossed with Stampin’ Up!’s Iridescent Ice embossing powder to accentuate the “frozen” theme.

Happy Birthday Frozen Style

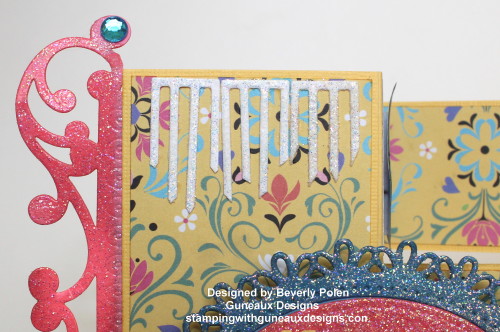
The above photo shows the ice icicles that I included on both sides of the card.  You can also see them in the below photo.

Happy Birthday Frozen Style

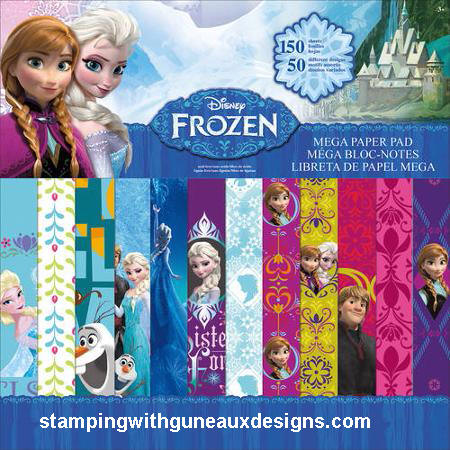
The crafting paper that I used (see below) in making the card is from the Disney Frozen Mega Paper Pad that can be purchased at Walmart as well as other places.  I was surprised to see the color yellow in the paper pad, but it was perfect as my granddaughter loves the color yellow.

(FOLLOW ME ON TWITTER! I share things there that you won’t find here.)

This is a photo of the Disney Frozen Mega Paper Pad:


Happy Birthday Frozen Style

SUPPLIES USED:

Stampin’ Up! Daffodil Delight and Rose Red Card Stock
Disney Frozen Mega Paper Pad
Spellbinders 5×7 Reflective Moment Die (S6-011)
Spellbinders 5×7 Mystical Embrace Die (S6-012)
Spellbinders Oval Floral Die (S6-028)
Disney Frozen Washi Tape
Stampin’ Up! Frosted Finishes Embellishment (unavailable)
Stampin’ Up! Pansy Punch
Stampin’ Up! Iridescent Ice Embossing Powder


Swallowtail Butterfly

God’s Blessings!

Stamping With Guneaux Designs
By
Beverly Polen

Happy Birthday Frozen Style

HAPPY BIRTHDAY FROZEN STYLE BIRTHDAY CARD