Blending Inks Technique – Stampin Up

Today’s post is about blending inks to create beautiful artwork.  This technique is very easy and you can quickly create very attractive cards using the technique, such as the following  three cards.

What is blending inks?   Looking at the cards below, it seems obvious, right?  Regardless, let me share that it is selecting and blending two or more inks to create subtle shades and colors to your paper crafting artwork.

Blending Inks

I have selected one of the three cards to provide you with instructions on the blending inks technique.
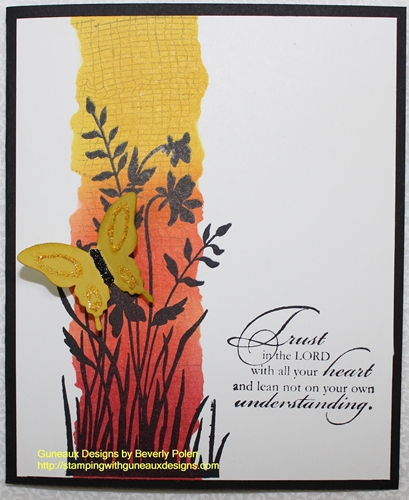

 STAMPIN’ UP! SUPPLIES:

Stamp Sets:  Just Believe (120453), Trust God (126702)  [love this stamp set], and a Background Stamp of your choice (I used a retired Stampin’ Up stamp)

Paper:  Basic Black Card Stock (121045) and Whisper White Card Stock (100730)

Ink (Classic):  Summer Starfruit (126991), Calypso Carol (126983), Primrose Petals (126858), Crumb Cake (126975), and Jet Black StazOn (101406)

Accessories:  Stamping Sponge wedges (101610), Elegant Butterfly Punch (127526), and Post-It Notes or scrap card stock


 Instructions for the blending inks technique are below the two following pictures.
INSTRUCTIONS:

  • Cut a piece (the size depends on the stamp image used) of Whisper White Card Stock (mine is 4″ x 4-7/8″)
  • Tear the edges of the sticky side of two Post-It Notes, being careful to leave some of the sticky edge available
  • Place the torn Post-It Notes onto the Whisper White Card Stock as shown in the below picture with the opening between the Notes closer to the left side of the card stock
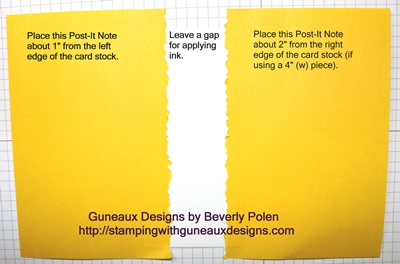
Now you are ready to start blending inks according to the following:

  • Cover a sponge wedge (or blending tool) with Summer Starfruit ink and apply in a circular motion to the upper 1/3 of the opening in the card stock, being careful to avoid lifting the edges of the Post-It Notes
  • Cover a sponge wedge with Calypso Carol ink and apply in a circular motion to the middle 1/3 of the card stock below the Summer Starfruit ink
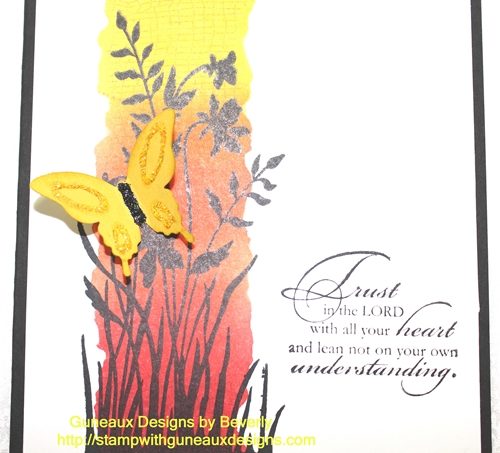
  • Blend the edges of the two inks (see picture of card), producing a different shade of color
  • Cover a sponge wedge with Primrose Petals ink and apply to the bottom 1/3 of the card stock, blending it with the Calypso Carol ink to create a different shade of color
  • Cover a background stamp with Crumb Cake ink and stamp over the three colors you’ve just blended
  • Remove the Post-It Notes

At this point, you’ll decorate the card stock according to the following:

  • Cover the largest stamp image from the Just Believe Stamp Set  (a floral silhouette) with Jet Black StazOn ink and stamp the image over the blended inks
  • Cover a sentiment from the Trust God Stamp Set with Jet Black StazOn ink and stamp the sentiment on the lower-right side of the card stock
  • Cut an 8-1/2″ x 5-1/4″ piece of Basic Black Card Stock and fold in the middle for a card base
  • Attach the decorated piece of Whisper White Card Stock to the Basic Black card base
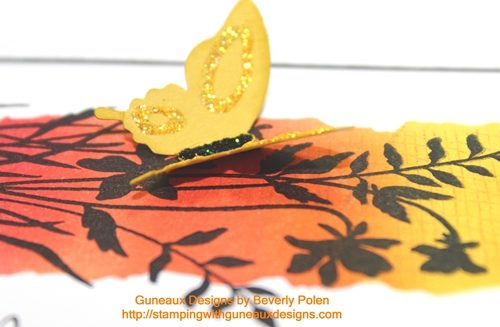
  • Using the Elegant Butterfly Punch, cut out a butterfly, decorate it as desired, and attach to the card

You have just learned the Blending Inks Technique!

God’s Blessings!
Stamping With Guneaux Designs
Beverly Polen

Use the blending inks technique to create quick and easy cards!

Paper Flowers – Stampin Up

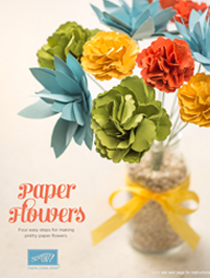
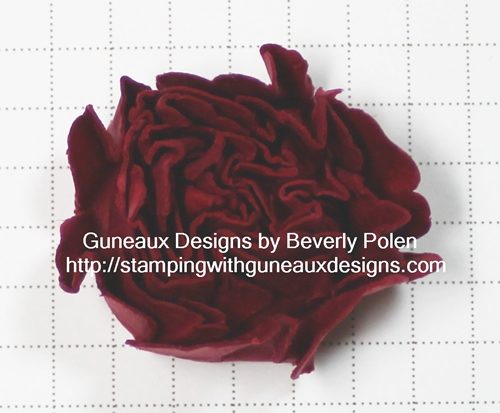
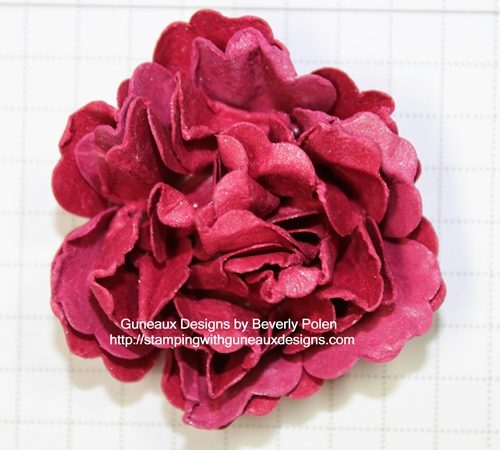
Making paper flowers to enhance your paper crafts is such a hot trend, and it’s so much fun to do.  There are many techniques for making paper flowers and various mediums from which to make them (i.e., card stock, crepe paper, fabric, metal, tissue paper, etc.).  Have you made any paper flowers for your paper crafts?  If you haven’t, this post will provide you with instructions on how to make them from card stock.  I’m sure you’ll enjoy having elegant paper flowers on your greeting cards and other crafts.
The technique that I discuss below is simple and I call it “scrunching”.  Follow these steps to make “scrunched” paper flowers:

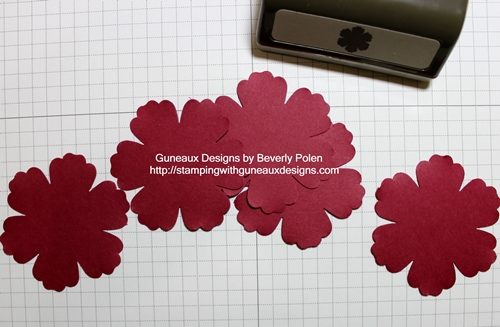
STEP 1: Punch five flowers from card stock (of any color) using the Blossom Punch (125603), or a floral punch or floral die cut of your choice.

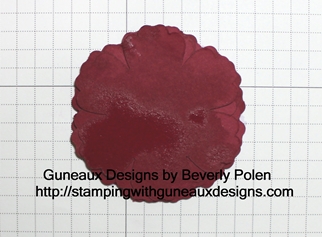
STEP 2:  Spritz each flower with water,  Vanilla Shimmer Smooch Spritz (118772), or other liquid of your choice.  This is important for getting the right texture when you scrunch the petals.

STEP 3:  After spritzing them, layer the five flowers one on top of another (you can offset them as well).
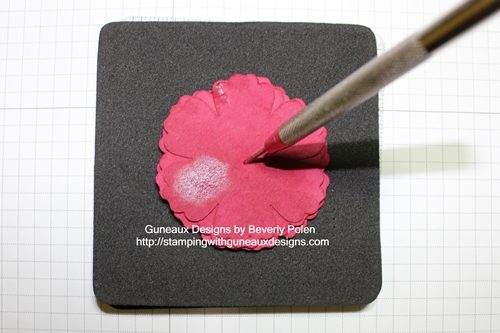
STEP 4:  Using a Paper-Piercing Tool (126189) and Mat (126199), poke a hole in the center of the layered flowers.
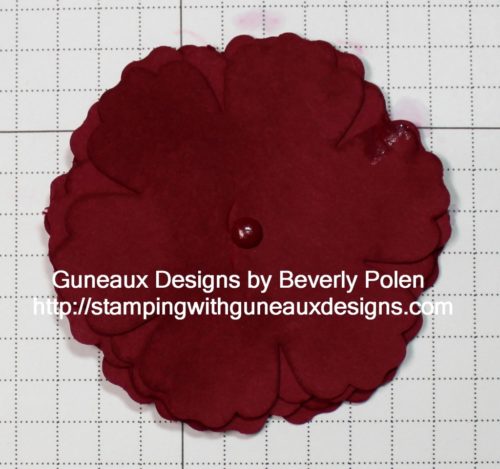
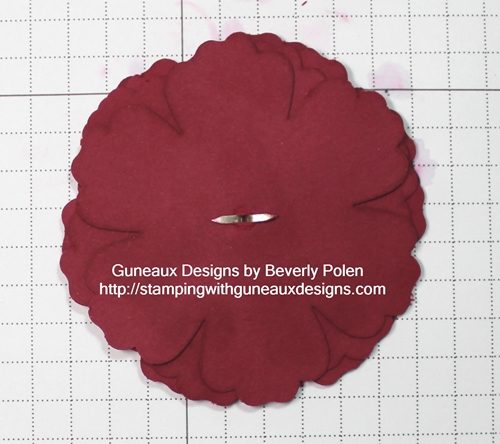
 STEP 5:  Insert a brad into the hole and spread the prongs.
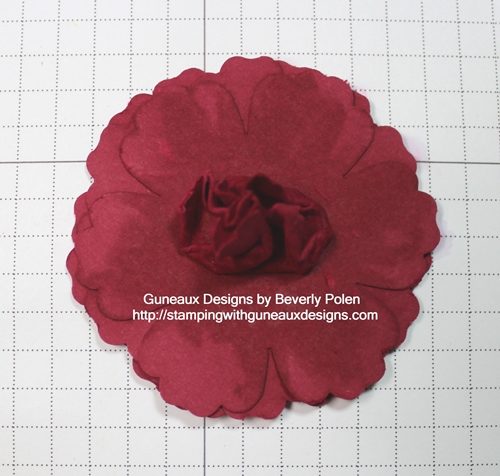
STEP 6:  Beginning with the top flower, scrunch it tightly while wet.
 STEP 7:  Continue scrunching the remaining layers.

STEP 8:  While the layers are wet (if not, spritz again), reshape the flower to your desire and let it completely dry.

(now that the flower is dry, the color of the card stock is true.)

STEP 9:  Use your beautiful flower on a card, scrapbook page, or 3-D paper craft.

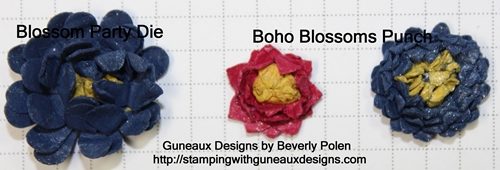
The following picture shows other flowers I made with the Blossom Party Die (115971) and Boho Blossoms Punch (119858).  Add a piece of Daffodil Delight or Summer Starfruit card stock as the top flower to create the appearance of a stamen.

Enjoy making paper flowers!


God’s Blessings!

Stamping With Guneaux Designs

by

Beverly Polen

Faux Patina Technique Featuring Stampin Up Tweet Leaves

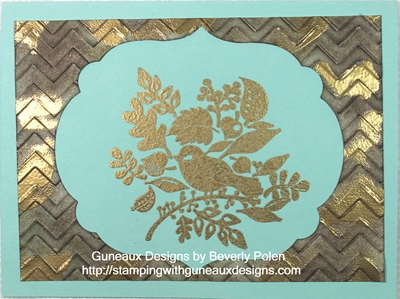
Have you created a card using the Faux Patina Technique?  Pull up a chair at your craft table, get out a few supplies (see below), and let’s make a card that uses the Faux Patina Technique and the Tweet Leaves Stamp Set from Stampin’ Up!  This is my first creation using the Faux Patina Technique, and I’m sure if I practice I’ll get better at it.  But for now, let’s try a simple card featuring the technique.  This is the card we’ll develop:

STAMPIN’ UP! SUPPLIES:

Stamp Set: Tweet Leaves (128111)

Paper:  Whisper White Card Stock (100730) and Pool Party Card Stock (122924)

Ink (Classic):  Crumb Cake (126975), Marina Mist (126962), Always Artichoke (126972), and Early Expresso (126974)

Accessories: Chevron Embossing Folder (127749), Labels Collection Framelits (125598),  Big Shot Die-Cutting Machine (113439), (Stamping Sponges (101610), VersaMark Ink (102283), Gold Embossing Powder (109129), and Heat Tool (129053)

INSTRUCTIONS:     Now let’s begin applying the Faux Patina Technique.

  • Cut a 5″ x 3-5/8″ piece of Whisper White Card Stock.
  • Center on the card stock the largest label from Labels Collection Framelits and run through the Big Shot on Tab 2.
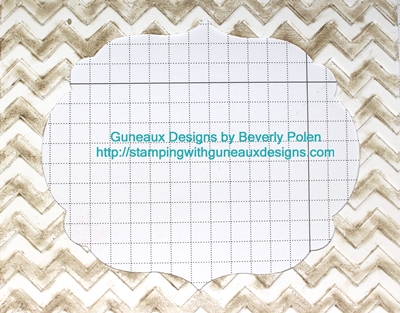
  • Lightly ink one side of the Chevron Embossing Folder with Crumb Cake ink, insert the card stock, and run it through the Big Shot on Tab 1.

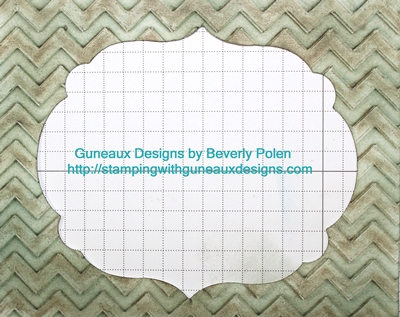
  •  Sponge Marina Mist ink over the embossed portion of the card stock.Faux Patina Technique
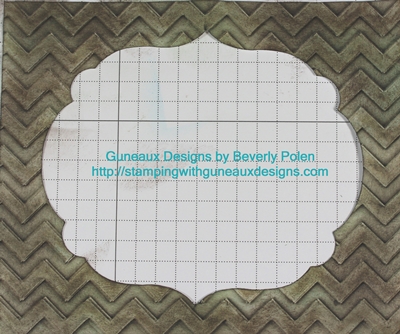
  • Sponge Always Artichoke ink over the Marina Mist ink.Sponge Early Expresso ink over the Always Artichoke ink.

  • Let the ink dry naturally or use a heat tool.
  • Randomly apply the edge of the VersaMark ink pad over the patina piece.  Do not completely cover the card stock with VersaMark.
  • Cover the patina piece with Gold Embossing Powder and heat set.

So, what do you think thus far about the Faux Patina Technique?  You can use other colors of ink of course if you desire.  Now, let’s create the card.

  • Cut an 8-1/2″ x 5-1/2″ piece of Pool Party card stock.
  • Fold the card stock in the center to form the card base.
  • Cover the Tweet Leaves stamp with VersaMark ink.
  • Stamp onto the card front, being careful to position the image on the card so the patina piece will be centered over the image.
  • Apply Gold Embossing Powder and heat set.
  • Attach the patina piece onto the card front centering it over the Tweet Leaves image.

You have just created a beautiful card using the Faux Patina Technique!  It will be interesting to try other color combinations for the technique.

God’s Blessings!

Stamping With Guneaux Designs

by

Beverly Polen

Have fun with the Faux Patina Technique!

Stamping Multiple Card Stock Layers – Guneaux Designs

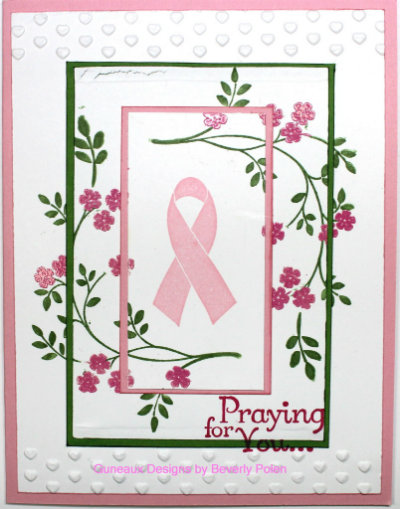
Stamping multiple card stock layers is a hot trend in the paper crafting world.  I created a card featuring the trend of stamping multiple card stock layers for an acquaintance who was diagnosed recently with breast cancer.  I wanted to send her a card to let her know that I care and am praying for her.  Therefore, I decided to use this technique of stamping multiple card stock layers for her card.

Everyone knows that the outcome of stamping multiple card stock layers would leave gaps in the stamped images, right?  Additionally, the result will be less than the aspired goal, which is to have a pretty card.  Agree?

Well, there is a method to use; however, you’ll still have gaps, but let’s see what we can do with those gaps.  Follow these instructions to use this technique:

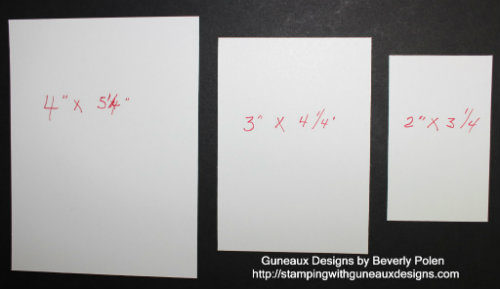
1.  Cut pieces of Whisper White Card Stock according to this picture:

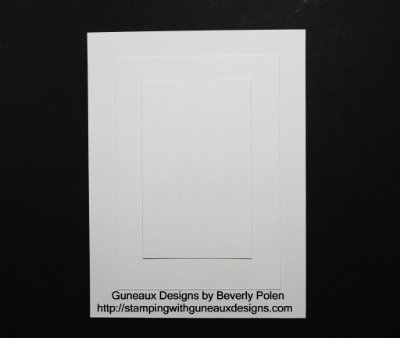
2.  Layer the Whisper White Card Stock according to the following picture.  You’ll need to use a temporary glue on the backside of the two top layers to prevent them from moving as you stamp the images.

3.  Using a single inked stamp, randomly stamp the image around the multiple card stock layers.

4.  Disassemble the three pieces of card stock.

5.  Cut two pieces of colored card stock that match your ink (your choice) of a size to form mats for the top two layers.

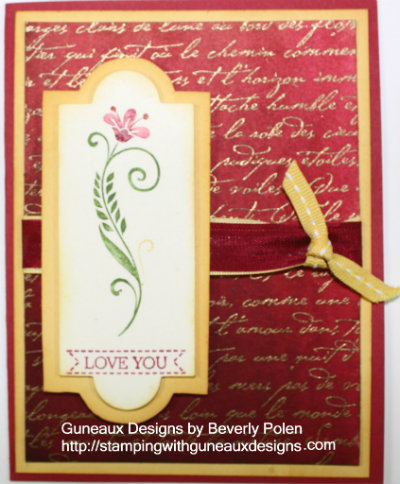
6.  Assemble the pieces and your gaps will appear as intended, and you’ll have a beautiful card, like this one.

Stampin’ Up! Supplies Used for the Above Card (including item numbers):

Paper:  Whisper White Card Stock (100730), Pretty in Pink Card Stock (100459), and Gumball Green Card Stock (126840)

Stamp Sets:  Thoughts and Prayers (127805 – c) and the retired Ribbon of Hope

Ink:  Gumball Green Stampin’ Write Marker (126856 – comes in one package of the new 2012-2014 In Colors) and Pretty in Pink Classic Stampin’ Pad (126861)

Accessories:  VersaMark Ink (102283), Melon Mambo Stampin’ Emboss Powder (123223) , Heat Gun (129053) , and Adorning Accents Folders (125601)

 Enjoy!

God’s Blessings!

Stamping With Guneaux Designs By Beverly Polen

Have fun Stamping Multiple Card Stock Layers

Water Coloring Technique Tutorial – Ombre’ Watercolor Resist

Would you like a new water coloring technique tutorial?  In this post, Guneaux Designs is providing you with a water coloring technique tutorial that teaches you about  how to use the Ombre’ Watercolor Resist Technique.

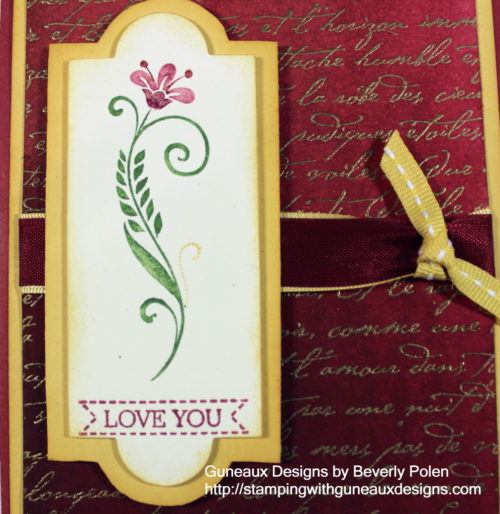
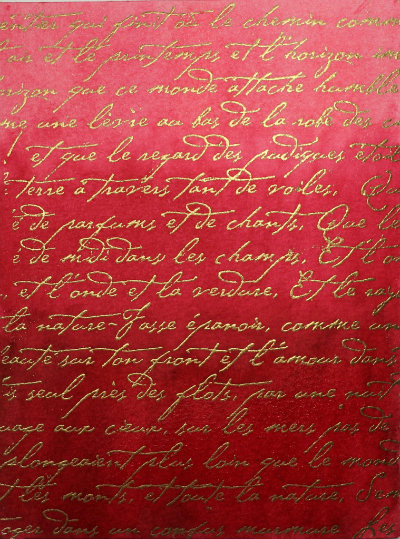
I love watercoloring techniques, especially when using the Stampin’ Up! Watercolor Paper.   I think it is the best around.  I used it when developing my card with the Ombre’ Watercolor Resist Technique.  Below is a picture of the watercolor paper after applying the Ombre’ Watercolor Resist Technique, and a picture of the card I made using the paper.

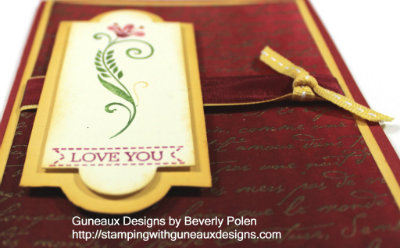
Here are additional pictures of the card (sorry – a little dark):

Stampin’ Up! Supplies Used (includes catalog numbers):

Stamp Sets:  Flowering Flourishes (126367), Itty Bitty Banners (126257), and En Francais (109521 – or a background stamp of your choice)

Paper:  Watercolor Paper (122959), Daffodil Delight Card Stock (119683), Primrose Petals Card Stock (129841), and Whisper White Card Stock

Ink: Stampin’ Write Markers – Gumball Green, Primrose Petals, Raspberry Ripple (126856 – the 2013-2014 In Colors come in one package) , Daffodil Delight (119677), Reinkers – Pretty in Pink (102295), Rose Red (102109), Primrose Petals (126851), and Raspberry Ripple (126852) {or colors of your choice}

Accessories:  Aqua Painter (103954), Cherry Cobbler Seam Binding Ribbon (120992), Daffodil Delight 1/8″ Taffeta Ribbon (119254), Embossing Buddy® (103083), VersaMark® Stamp Pad (102283), Gold Stampin’ Emboss® Powder (109129), and Heat Gun (129053)

Instructions:

1.  Swipe the Watercolor Paper with the Embossing Buddy®.

2.  Cover a background stamp with VersaMark® and stamp it onto the Watercolor Paper.

3.  Cover the Watercolor Paper with the Gold Stampin’ Emboss® Powder and use the Heat Gun to heat and melt the powder.  Allow to cool.

4.  With the Aqua Painter filled with water, completely cover the Watercolor Paper with water only.

5.  Beginning with the lightest color of ink (colors other than those I used may be used; just be certain to incorporate the same range of color intensity from light to dark), brush it onto the Watercolor Paper, starting at the bottom edge and moving upward.  The color will become lighter as you move up the paper.  If you have to add more ink to the Aqua Painter brush, begin applying the ink at the bottom edge and moving upward.

6.  Apply the next lightest color of ink onto the bottom ½ of the paper.

7.  Apply the medium color of ink onto the bottom 1/3 of the paper.

8.  Apply the dark color of ink onto the bottom ¼ of the paper.

9.  Allow the Watercolor Paper to dry and use on a card as desired.

ENJOY!

God’s Blessings!

Stamping with Guneaux Designs by Beverly Polen

ONE MORE DAY UNTIL THE DEBUT OF THE STAMPIN’ UP! HOLIDAY CATALOG!

Enjoy creating with this water coloring technique tutorial!

Guneaux Designs Sliced Rock Technique – Polished

Last week I posted a video featuring the first version of my new Guneaux Designs Sliced Rock Technique.  That version, discussed in this previous post, is called "Guneaux Designs Sliced Rock Technique - Unpolished".  Today's version is called "Guneaux Designs Sliced Rock Technique - Polished".  The YouTube video LINK for this technique is posted below.  

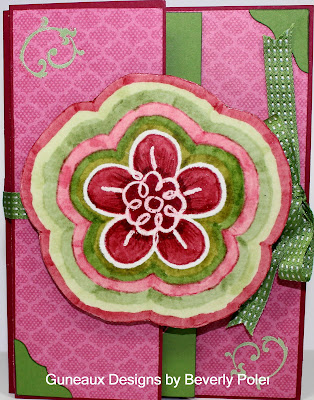
This beautiful card below has a fold that I created and is different from any I have seen.  It may be “out there”; I just have not seen it.

Guneaux Designs Sliced Rock Technique - Polished

Note the ribbon that ties the card closed.  The ribbon is the new Gumball Green 3/8″ Stitched Satin Ribbon, and it is great to work with!  I looooove the feel of the new Satin Ribbons!

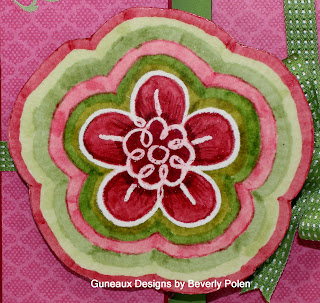
This picture below is a closeup of the card’s element (the flower) that I created with my new technique.  In the video below, you can see better how the element is “polished”.

Guneaux Designs Sliced Rock Technique - Polished   

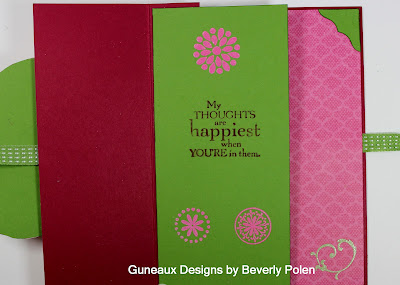
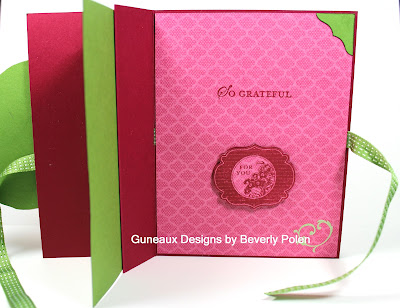
 This is the first portion of the card’s inside:

 Guneaux Designs Sliced Rock Technique - Polished

 This is the second portion of the card’s inside:

 Guneaux Designs Sliced Rock Technique - Polished

Enjoy the video featuring my new technique!


 God’s Blessings!

 Stamping With Guneaux Designs by Beverly Polen

Guneaux Designs Sliced Rock Technique – Polished