
Would you like a new water coloring technique tutorial? In this post, Guneaux Designs is providing you with a water coloring technique tutorial that teaches you about how to use the Ombre’ Watercolor Resist Technique.
I love watercoloring techniques, especially when using the Stampin’ Up! Watercolor Paper. I think it is the best around. I used it when developing my card with the Ombre’ Watercolor Resist Technique. Below is a picture of the watercolor paper after applying the Ombre’ Watercolor Resist Technique, and a picture of the card I made using the paper.
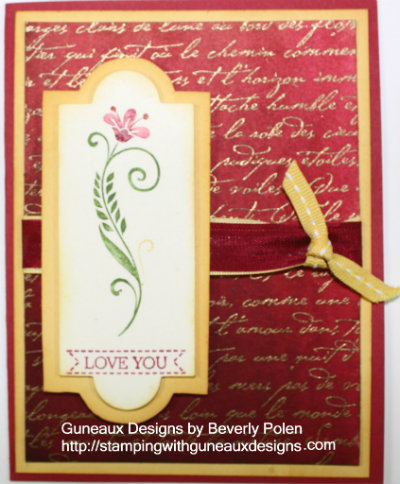
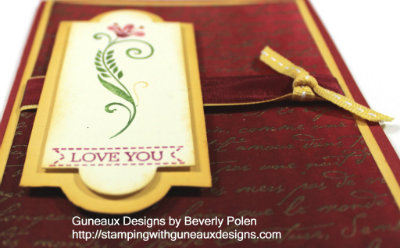
Here are additional pictures of the card (sorry – a little dark):

Stampin’ Up! Supplies Used (includes catalog numbers):
Stamp Sets: Flowering Flourishes (126367), Itty Bitty Banners (126257), and En Francais (109521 – or a background stamp of your choice)
Paper: Watercolor Paper (122959), Daffodil Delight Card Stock (119683), Primrose Petals Card Stock (129841), and Whisper White Card Stock
Ink: Stampin’ Write Markers – Gumball Green, Primrose Petals, Raspberry Ripple (126856 – the 2013-2014 In Colors come in one package) , Daffodil Delight (119677), Reinkers – Pretty in Pink (102295), Rose Red (102109), Primrose Petals (126851), and Raspberry Ripple (126852) {or colors of your choice}
Accessories: Aqua Painter (103954), Cherry Cobbler Seam Binding Ribbon (120992), Daffodil Delight 1/8″ Taffeta Ribbon (119254), Embossing Buddy® (103083), VersaMark® Stamp Pad (102283), Gold Stampin’ Emboss® Powder (109129), and Heat Gun (129053)
Instructions:
1. Swipe the Watercolor Paper with the Embossing Buddy®.
2. Cover a background stamp with VersaMark® and stamp it onto the Watercolor Paper.
3. Cover the Watercolor Paper with the Gold Stampin’ Emboss® Powder and use the Heat Gun to heat and melt the powder. Allow to cool.
4. With the Aqua Painter filled with water, completely cover the Watercolor Paper with water only.
5. Beginning with the lightest color of ink (colors other than those I used may be used; just be certain to incorporate the same range of color intensity from light to dark), brush it onto the Watercolor Paper, starting at the bottom edge and moving upward. The color will become lighter as you move up the paper. If you have to add more ink to the Aqua Painter brush, begin applying the ink at the bottom edge and moving upward.
6. Apply the next lightest color of ink onto the bottom ½ of the paper.
7. Apply the medium color of ink onto the bottom 1/3 of the paper.
8. Apply the dark color of ink onto the bottom ¼ of the paper.
9. Allow the Watercolor Paper to dry and use on a card as desired.

ENJOY!
God’s Blessings!
Stamping with Guneaux Designs by Beverly Polen
ONE MORE DAY UNTIL THE DEBUT OF THE STAMPIN’ UP! HOLIDAY CATALOG!
Enjoy creating with this water coloring technique tutorial!