Dry Embossing With A Stencil Technique

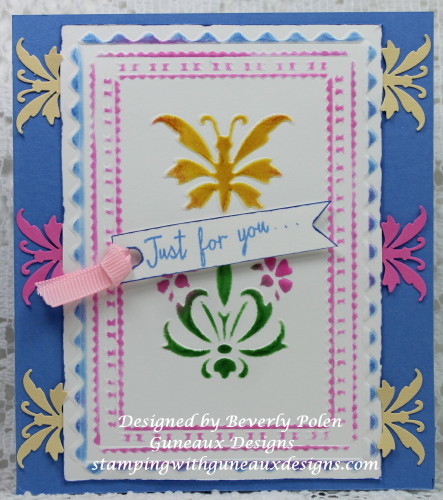
Yesterday’s card challenge at Splitcoaststampers was to create a card featuring the dry embossing with a stencil technique.  It has been many years since I’ve used a stencil to dry emboss card stock.  Regardless, I found the challenge to be fun.  When was the last time you dry embossed with a stencil?

Dry Embossing With A Stencil Technique

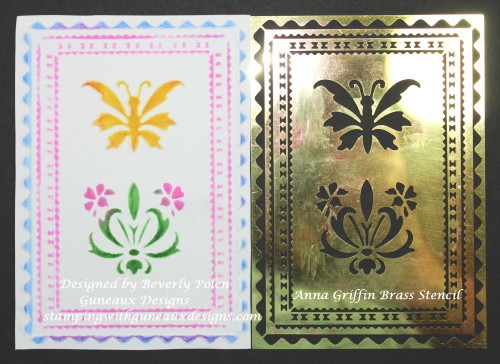
To create this card, I used an Anna Griffin Brass Stencil and Whisper White Card Stock.  With a correct die-cutting sandwich, I ran the paper and stencil through my die-cutting machine, which created an embossed piece of card stock.  Turning the embossed card stock face up, I placed the stencil over the embossed areas and used three different colors of ink to color the paper.  Because the embossed areas are raised, it was easy to color over the stencil onto the card stock.

Dry Embossing With A Stencil Technique

I have a matching butterfly punch that I used to punch out yellow and pink butterflies. These butterflies were adhered underneath and down the sides of  the embossed and colored card stock.  I adhered this piece to a Ballet Blue card base and created the sentiment with a ribbon attached.

It is just that simply!!!  If you’ve not tried this in a while, give it a try.  It’s easy and fun.

Thanks for stopping in and I hope you return soon!

BlogDivider_zpsed339ea1

SUPPLIES

Stamps:  SU Watercolor Wings (sentiment) and Rose Wonder (inside of card)

Paper: SU Whisper White, Pixie Pink, and Ballet Blue Card Stock

Paper Size: 4-1/2″ x 5-1/4″

Ink: SU Daffodil Delight, Pixie Pink, Ballet Blue, and Cucumber Crush

Accessories: Anna Griffin Brass Stencil, Anna Griffin Butterfly Punch, and Pink Ribbon

Techniques: Dry Embossing With A Stencil Technique

BlogDivider_zpsed339ea1

Swallowtail Butterfly

God’s Blessings!
Stamping With Guneaux Designs by Beverly Polen

DRY EMBOSSING WITH A STENCIL TECHNIQUE

Water Coloring Technique – Stampin’ Up! Bold Butterfly Framelits

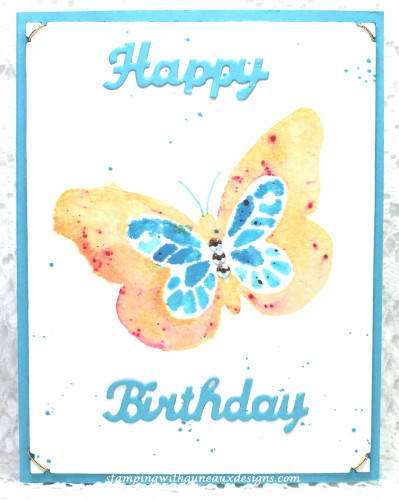
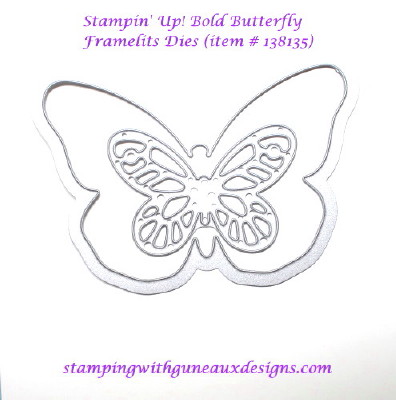
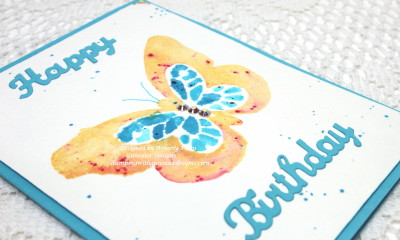
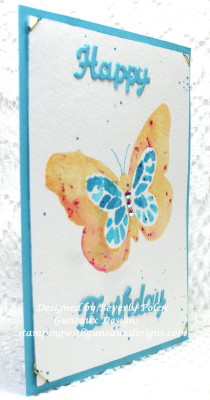
I hope everyone had a blessed and safe New Year!  Mine was uneventful, which is just what I wanted.  Today’s card features a water coloring technique and is a Happy Birthday Card that features the Stampin’ Up! Bold Butterfly Framelits Dies.

http://stampingwithguneauxdesigns.com/water-coloring-technique-su-bold-butterfly-framelits

http://stampingwithguneauxdesigns.com/water-coloring-technique-su-bold-butterfly-framelits

Have you ever been inspired to create a piece of artwork based on something you saw on a website (e.g., websites featuring jewelry, clothes, shoes, purses, etc.)?  It is a fun process, and that process was used for creating this card.

Yesterday’s (1/2/15) Inspirational Challenge on the Splitcoaststampers.com website involved using punches or die cuts for a basic shape, and then picking a favorite medium and several colors to get a beautiful confetti effect. The Etsy.com website, The Wildlands, was to be viewed for inspiration.  This item inspired me to use the Stampin’ Up! Bold Butterfly Framelits Dies (item #138135) to create my project.  Check out the site as you will find such beautiful artwork featured there.

Water Coloring Technique SU Bold Butterfly Framelits4_1The Water Coloring Technique required using an adhesive tape (e.g., Frog Tape, a Painters’ Tape) from which to punch or die cut an image.  After cutting out an image, what is left (i.e., the tape’s negative cutout)  became a “mask” that is attached to a piece of water color paper.  After attaching the mask, the image is to be water colored.

A better explanation of the technique can be found in this YouTube video by Lydia (aka; Understand Blue) who was the wonderful hostess for this challenge.  Her video provides a wonderful tutorial on the technique.  Stop by and watch it.

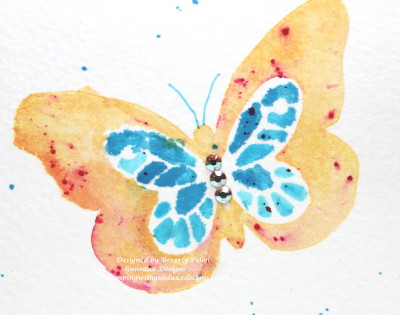
This is a closeup of the water colored butterflies.  Unfortunately, I didn’t have my tape adhered correctly to my piece of water color paper, so the colors bled.  🙁  But, I gave it my best shot as water coloring is not my forta.

Water Coloring Technique SU Bold Butterfly Framelits3_1I added three Swarovski® crystals to the butterfly body to give it some dimension.

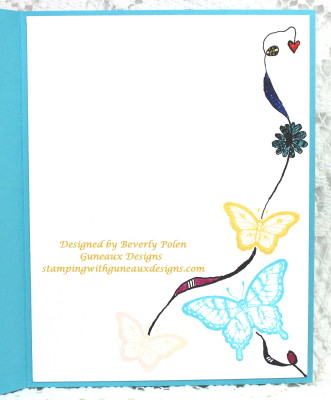
The photo below is one of the inside of the card.  I added some doodling along with stamp images from Stampin’ Up! Papillon Potpourri Stamp Set (item # 123759).

water-coloring-technique-su-bold-butterfly-framelits

Don’t forget to watch Lydia’s video and try the technique!


http://stampingwithguneauxdesigns.com/water-coloring-technique-su-bold-butterfly-framelits

God’s Blessings!
Stamping With Guneaux Designs By Beverly Polen

Water Coloring Technique - SU Bold Butterfly Framelits

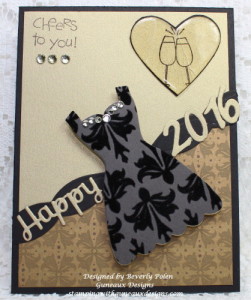
Happy New Year 2016 – Cracked Glass Technique

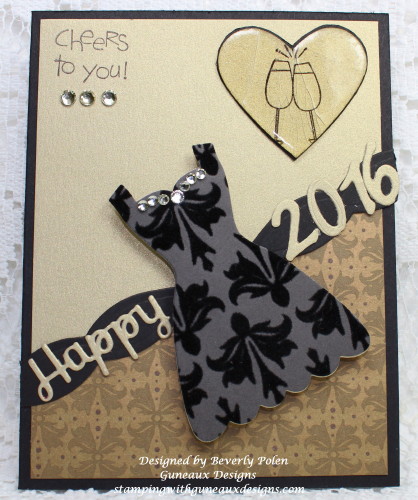
Happy New Year 2016, everyone!!  May you be blessed with a wonderful 2016 year!  
Happy New Year 2016I made this card for two Splitcoastampers.com challenges: 1) the Wednesday (12/30) Sketch Challenge, SC573, and 2) today’s (Thursday – 12/31) Cracked Glass Technique Challenge, WT564.    The following is the sketch to be used in the challenge.

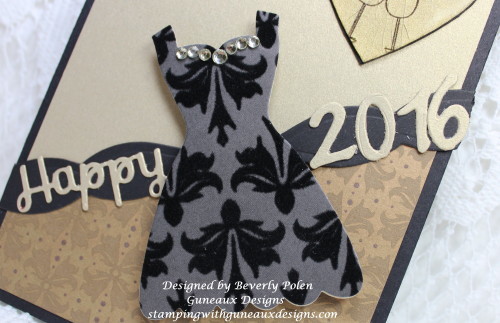
The challenge included adding a tag to my card. Therefore, I used a black “Evening Gown/Dress” for my tag that I made with the lovely retired Stampin’ Up! Dress Up Framelits.

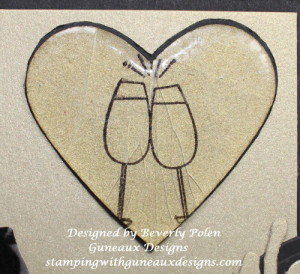
Creating a card using the Cracked Glass Technique was the challenge for the WT564. I remembered I had the retired Stampin’ Up! Cheers to You Stamp Set that would be perfect for the challenge.  You will note that as the glasses clang in celebration of the New Year, they cracked!!! LOL. The glasses in the embossed heart was created for the Cracked Glass Technique. (If you need information on this technique, please let me know by leaving a comment.)

Happy New Year 2016, Cracked Glass Technique

Happy New Year 2016, Cracked Glass Technique

SUPPLIES USED:

Stamps: SU Cheers to You (retired)

Paper: SU Mocha Morning DSP (retired), Brushed Gold, and Basic Black Card Stock

Accessories: SU Dress Up Framelits (retired), SU Heart Punch (retired), SB Holiday Sentiments Dies, SB Happy Days Dies, Sizzix Numbers Dies, SU Rhinestones, VersaMark, and Ultra Thick Embossing Enamel


Happy New Year 2016, Cracked Glass Technique

God’s Blessings!
Stamping With Guneaux Designs by Beverly Polen


Happy New Year 2016, Cracked Glass TechniqueCRACKED GLASS TECHNIQUE 

Partial Die-Cutting Technique TLC566

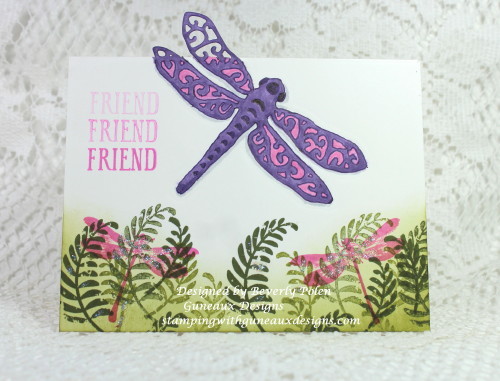
Yesterday, the Splitcoaststampers Website had a challenge to create a card using the Partial Die-Cutting Technique (TLC566). The Partial Die-Cutting Technique is somewhat self-explanatory as it is using a die, card stock, and die-cutting machine of your choice to partially cut a shape.  It can be done in different ways. My card shows one way and that is to have the partially cut portion of the die above the fold of a card base. (You will find a link to the Splitcoaststampers’ tutorial video on this technique below.)

Partial Die-Cutting Technique TLC566

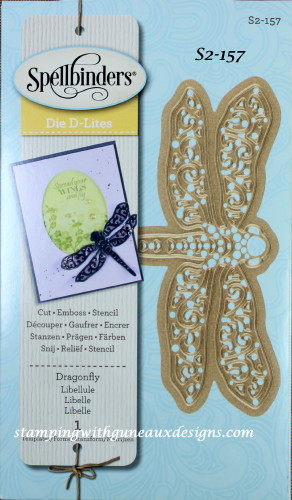
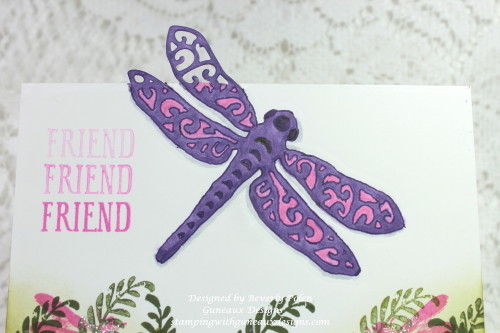
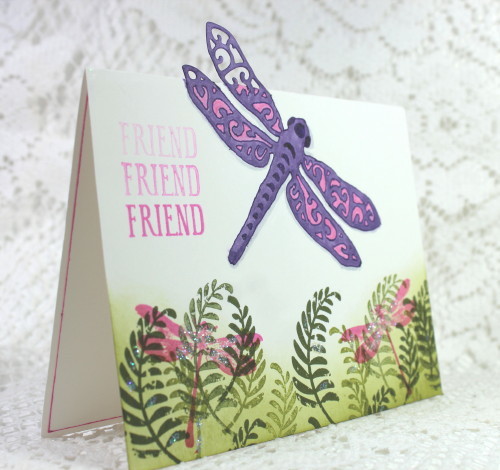
This is the first time I have used this technique, and I really enjoyed it.  The shape that I chose to partially cut is a dragonfly (Spellbinders Die).  As you can see, my dragonfly’s wings on the left side of its body were cut but not the rest of the dragonfly’s body.  After achieving the partial cut and leaving the die and card stock in the same position, I ran them back through my die-cutting machine with embossing pads to emboss the dragonfly onto my card front.

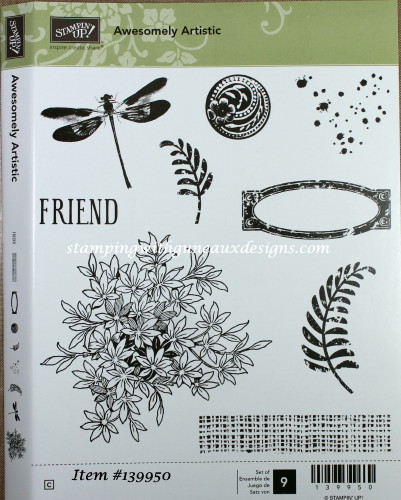
I used copic markers to color the embossed dragonfly so the rest of the body would show. To finish the card front, I used the Stampin’ Up! Awesomely Artistic Stamp Set (clear mount) to add other elements to the card.

Partial Die-Cutting Technique & Spellbinders Dragon Fly DiePartial Die-Cutting Technique & Spellbinders Dragon Fly Die


Partial Die-Cutting Technique TLC566

The above photo provides a close up of the dragonfly.  I hope you will try this technique if you have not tried it before.


SUPPLIES USED:

Spellbinders Dragonfly Die D-Lites (S2-157)
 Stampin’ Up! Sizzix Big Shot Die-Cutting Machine
Stampin’ Up! Whisper White Card Stock (item #100730)
 Stampin’ Up! Awesomely Artistic Stamp Set (item #139950) (clear mount)
Stampin’ Up! Ink Pads – Mossy Meadow (item #133645), Old Olive (item #126953), and Pink Passion (retired)
Copic Markers N2 (Neutral Gray), RV55 (Hollyhock), and V17 (Amethyst)


A video tutorial from Splitcoaststampers can be found HERE.  Once you have viewed the video, you will have a better understanding of the Partial Die-Cutting Technique.  If not, please feel free to leave a comment or ask a question about the technique by clicking on the conversation bubble to the right of this post title and leave a comment or question. Or, if viewing this post on the exact post URL, the comment section will be at the bottom of the post for comments and/or questions.

Now it’s your turn to use the Partial Die-Cutting Technique.


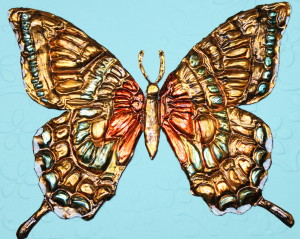
Swallowtail Butterfly

God’s Blessings!
Stamping With Guneaux Designs by Beverly Polen

Partial Die-Cutting Technique TLC5666PARTIAL DIE-CUTTING-TECHNIQUE

Sunset Scene with Happy Scenes Stamp Set

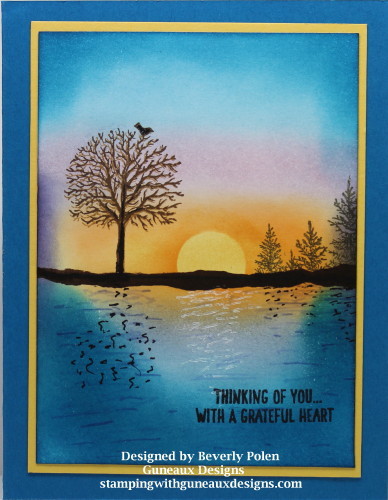
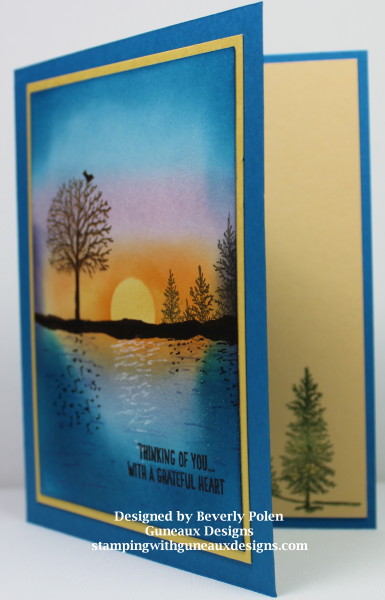
I have for you today a Sunset Scene featuring the Stampin’ Up! Happy Scenes Stamp Set.  I used the sponging technique to create my “Happy Scene”.

Happy Scenes Stampin Up


UPDATE:  This card was chosen as one of Splitcoaststampers’ FAVORITES for the week ending on November 8, 2015!  Splitcoaststamper’s comment:   

“Congratulations! In the General Stamping forum, you’re in the FAVORITES for the week ending November 8, 2015.”


Using the sponging technique, I created the sunset scene first before using the two stamps from the Stampin’ Up! Happy Scenes Stamp Set to complete the scene.  I love using the Stampin’ Up! Sponges for “sponging”.  I have tried other brands of sponges and I do not get the same result.

What is the sponging technique, you ask?  For the purpose of a greeting card, it is the art Sof using a small portion of a sponge to apply ink in a circular motion onto a piece of card stock.  Sponging is used to achieve a scene, background, or other art form.  When applying the sponging technique for my card, I used several Stampin’ Up! Classic Ink Pads.  The inks I used are: So Saffron, Pumpkin Pie, Wisteria Wonder, Pink Pirouette, Concord Crush (old ink pad), Marina Mist, Pacific Point, and Early Espresso (used in this order – hope you can read the light text :-)).

After achieving my scene, I applied ink to two of the stamps from the Stampin’ Up! Happy Scenes Stamp Set and strategically stamped them onto the scene.  The two stamps are of trees.

Stampin' Up! Happy Scenes Stamp Set

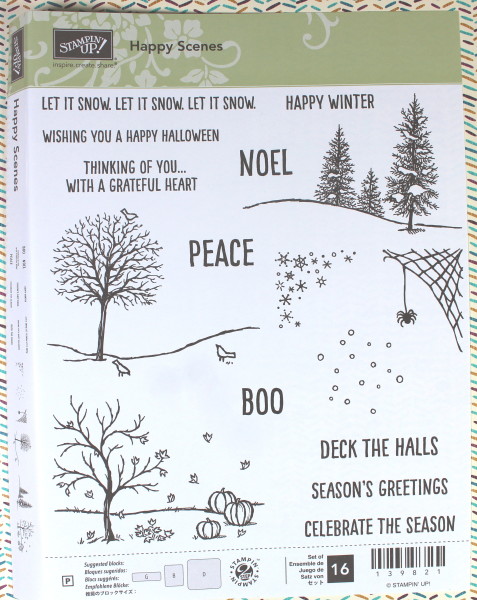
If you have used the Stampin’ Up! Happy Scenes Stamp Set, what do you think about the birds on the tree stamp that is shown on the left of my card?  Personally, I think whoever designed the stamp did not have a good sense of proportions.  When I stamped the image onto the card, I covered my stamp to prevent the two birds at the bottom from showing.  Just my spin on the stamp!!!

Stampin Up Happy Scenes Stamp Set

Stampin’ Up! Happy Scenes Stamp Set Item #139821

I hope you enjoy my card!  Make my day and give me feedback or ask questions on this card or other Guneaux Designs artwork!

ButterflyGod’s Blessings!
Stamping With Guneaux Designs

By

Beverly Polen

Stampin’ Up! Happy Scenes Stamp Set

Polished Stone Technique

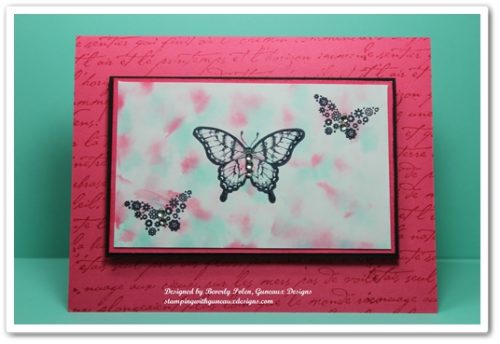
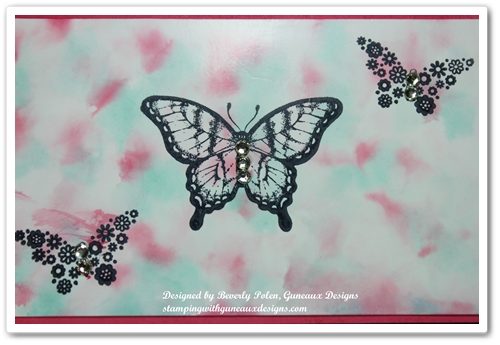
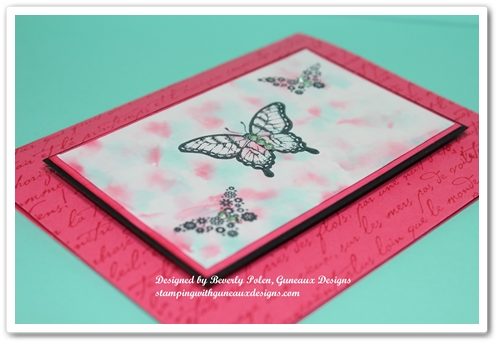
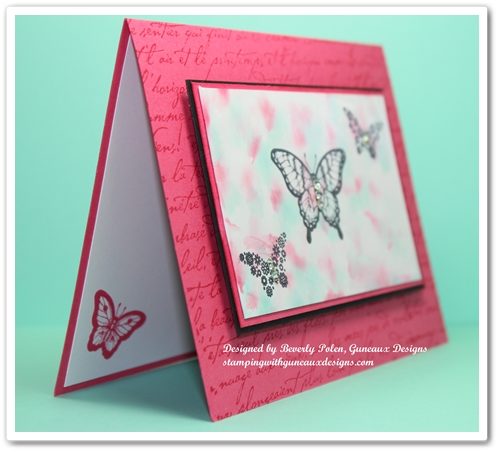
I suspect most crafters have tried the Polished Stone Technique.  However, this is my first time although the technique has been around for some time.  Polished Stone is a rich background technique that looks like rich marble.  It is an excellent background for both feminine and masculine cards.

After looking closely at the above picture, can you tell that I left out one key product that most, but not all, crafters use for the Polished Stone Technique?   It is the metallic ink.  I have seen examples of this technique where the metallic ink was used and examples where it was not used.  Well, I left it out because I did not have any metallic ink.  However, I’ll provide you with the instructions that include the ink.


SUPPLIES USED FOR THE POLISHED STONE TECHNIQUE:

Paper:  Glossy White Card Stock (I used Stampin’ Up!’s), Strawberry Slush Card Stock (131295), and Basic Black Card Stock (121045)

Stamps:  Papillon Potpourri Stamp Set (123759) and Stampin’ Up!’s old French Script Background Stamp

Ink:  Coastal Cabana Classic Ink Re-Inker (131164), Strawberry Slush Classic Ink Re-Inker (131167), and Stazon Ink

Accessories:  Cotton Ball, Rubbing Alcohol, and Basic Rhinestones (119246)


INSTRUCTIONS FOR THE POLISHED STONE TECHNIQUE:

  • Add a few drops of metallic re-inker randomly onto glossy card stock.
  • Add rubbing alcohol onto a cotton ball.
  • Add two or three drops of each classic re-inker color onto the cotton ball.
  • Dab the cotton ball over the glossy card stock, continuing until you achieve the desired look.  The rubbing alcohol will cause the re-inker colors to blend together, and the metallic re-inker will sit on top of the re-inker colors to give a marble look.
  • Allow the card stock to dry, and if desired, seal it with an acrylic sealer.
  • Stamp the desired image onto the “marbled” card stock with Stazon Ink.
  • Create your card!

This card can be a Happy Birthday, Happy Anniversary, Thinking of You, Thank You, or any type of card.


 God’s Blessings!
Stamping With Guneaux Designs
by
Beverly Polen

POLISHED STONE TECHNIQUE