Cottage Cutz Hummingbird

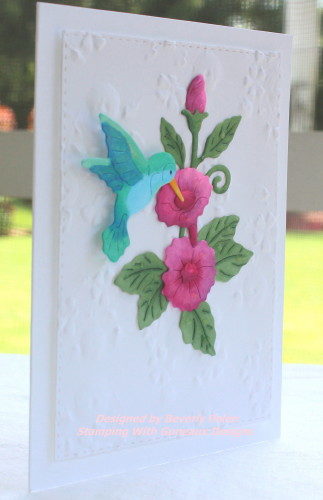
Hello, my friends!  I am hoping to get back into crafting on a part-time basis at least, and I have for you today a card made with the beautiful Cottage Cutz Hummingbird die.  I die cut the pieces and colored them with copic sketch markers.

Cottage Cutz Hummingbird

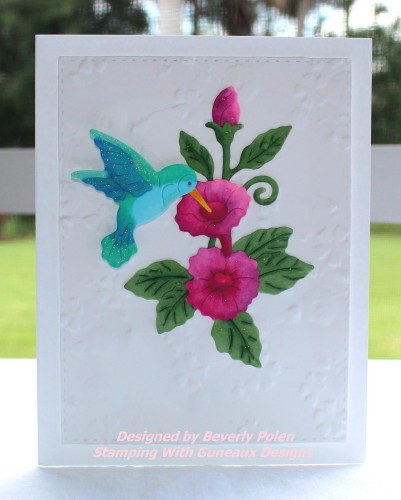
The card base is white as well as the first layer that I embellished with a floral embossing folder.  I embossed the bottom portion of this layer very lightly as that is where I’ll place the sentiment when I decide on the recipient of the card.

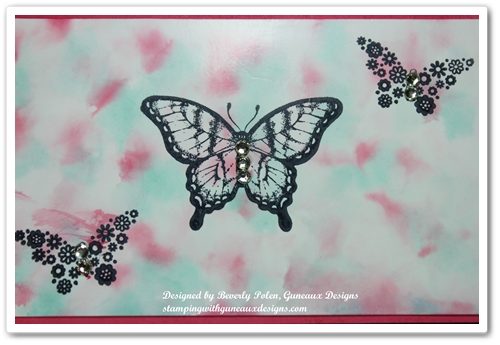
The photo below is a closeup of the flowers and hummingbird.  I used a clear Wink of Stella Brush to add a shine and glitter to the bird’s wings, and drops of Stampin’ Up! Crystal Effects onto the floral portion of the card.  Hopefully, you can see that in the photo. Actually, I think you can see it better in the first photo…LOL.


JUNE 26, 2016 UPDATE:  Card was included in both the Splitcoaststampers Favorites of the Week, and CAS Favorites.


Cottage Cutz Hummingbird-3_1

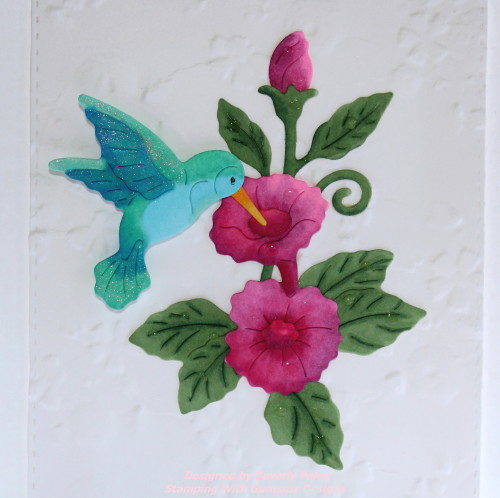
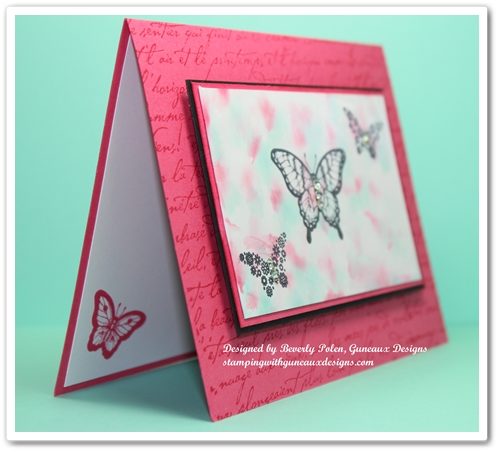
This photo is a side view of the beautiful hummingbird and floral arrangement.  I used copic sketch markers to color all of the die cuts.
Cottage Cutz Hummingbird-2_1I am posting this card on Splitcoastampers for one of the site’s challenges, the Splitcoaststampers “Wing It” Clean and Simple Challenge CAS382.  The challenge is, “Winging It with Birds, Bees and Butterflies” to celebrate the first day of summer.  Kiagc (aka Kia) is the host for the challenge.  She is such a wonderful lady and I love her work!  Hope you enjoy the card and come back soon!

BlogDivider_zpsed339ea1

SUPPLIES

Stamps:  None
Paper:  Neenah Solar White (110 lb.) Cardstock
Ink:  Copic Sketch Markers
Accessories:  Our Daily Bread Designs Double Stitched Rectangles Die, We R Memory Keepers Next Level Bouquet Embossing Folder, Cottage Cutz Hummingbird Die, 3M Mounting Tap, and Stampin’ Up! Crystal Effects

BlogDivider_zpsed339ea1

SU Fifth Avenue Floral

God’s Blessings!
Stamping With Guneaux Designs By Beverly Polen

“But when you ask, you must believe and not doubt, because the one who doubts is like a wave of the sea, blown and tossed by the wind.”  James 1:6

Stampin Up Butterfly Bundle

Are you like me and love butterflies?  Butterflies that are real or are in a stamp form make me happy.  As a paper crafter, we have an opportunity to have more butterflies!  The Stampin Up Butterfly Bundle was announced today by Stampin Up.  The best part about the bundle is that it is 15% off from today until September 30, 2013!

What is included in the Stampin Up Butterfly Bundle, you ask?  Well, it is the wonderful Papillion Potpourri Stamp Set and the Bitty Butterfly Punch.

Bundle Item Description Retail Price 15% Savings Price Amount Saved!
135311 Butterfly Bundle (Clear-Mount)Papillion Potpourri Clear-Mount Stamp SetBitty Butterfly Punch $30.90 USD$39.90 CAD $26.27 USD$33.92 CAD $4.63 USD$5.98 CAD
135312 Butterfly Bundle (Wood-Mount)Papillion Potpourri Wood-Mount Stamp SetBitty Butterfly Punch $34.90 USD$44.90 CAD $29.67 USD$38.17 CAD $5.23 USD$6.73 CAD

Butterfly shapes are great on projects for any occasion.  The greeting card below is one I made with the Papillion Potpourri Stamp Set:

Stampin Up Butterfly Bundle

So make sure to get in on the offer and save 15 percent on the butterfly stamp set and punch between August 29-September 30, 2013!

COME BACK TOMORROW FOR A REAL CUTIE! 

 God’s Blessings!
Stamping With Guneaux Designs
By
Beverly Polen

STAMPIN UP BUTTERFLY BUNDLE

Polished Stone Technique

I suspect most crafters have tried the Polished Stone Technique.  However, this is my first time although the technique has been around for some time.  Polished Stone is a rich background technique that looks like rich marble.  It is an excellent background for both feminine and masculine cards.

After looking closely at the above picture, can you tell that I left out one key product that most, but not all, crafters use for the Polished Stone Technique?   It is the metallic ink.  I have seen examples of this technique where the metallic ink was used and examples where it was not used.  Well, I left it out because I did not have any metallic ink.  However, I’ll provide you with the instructions that include the ink.


SUPPLIES USED FOR THE POLISHED STONE TECHNIQUE:

Paper:  Glossy White Card Stock (I used Stampin’ Up!’s), Strawberry Slush Card Stock (131295), and Basic Black Card Stock (121045)

Stamps:  Papillon Potpourri Stamp Set (123759) and Stampin’ Up!’s old French Script Background Stamp

Ink:  Coastal Cabana Classic Ink Re-Inker (131164), Strawberry Slush Classic Ink Re-Inker (131167), and Stazon Ink

Accessories:  Cotton Ball, Rubbing Alcohol, and Basic Rhinestones (119246)


INSTRUCTIONS FOR THE POLISHED STONE TECHNIQUE:

  • Add a few drops of metallic re-inker randomly onto glossy card stock.
  • Add rubbing alcohol onto a cotton ball.
  • Add two or three drops of each classic re-inker color onto the cotton ball.
  • Dab the cotton ball over the glossy card stock, continuing until you achieve the desired look.  The rubbing alcohol will cause the re-inker colors to blend together, and the metallic re-inker will sit on top of the re-inker colors to give a marble look.
  • Allow the card stock to dry, and if desired, seal it with an acrylic sealer.
  • Stamp the desired image onto the “marbled” card stock with Stazon Ink.
  • Create your card!

This card can be a Happy Birthday, Happy Anniversary, Thinking of You, Thank You, or any type of card.


 God’s Blessings!
Stamping With Guneaux Designs
by
Beverly Polen

POLISHED STONE TECHNIQUE

Stampin Up Courage Stamp Set – 4th of July 3-D Card

As I shared in my last post, I love the Stampin Up Courage stamp set that retired recently.  Having family members who were in the military and a Dad who loved the American Flag, I especially like this stamp set.  Personally, I think it was a mistake to retire the Stampin Up Courage stamp set.  Regardless, it’s retired, but I am featuring it on my card share for today.  This is my Stampin Up Courage Stamp Set – 4th of July 3-D Card.

Actually, I CASEd (i.e., copy and share everything) myself when making this card.  I made a similar card in 2010 for a special son-in-law who at the time was on active duty with the Army.  God took him home a year ago last month and I really miss him.

As for the card, it is a three-dimensional card.  It may not appear to be based on the photo, so let me share why it is.

I decided that I wanted each piece on the military-related image to be raised at varying levels.  So I stamped the image onto scrap paper and numbered what part of the image that I wanted at what level.

The picture to the right explains.  I numbered as 
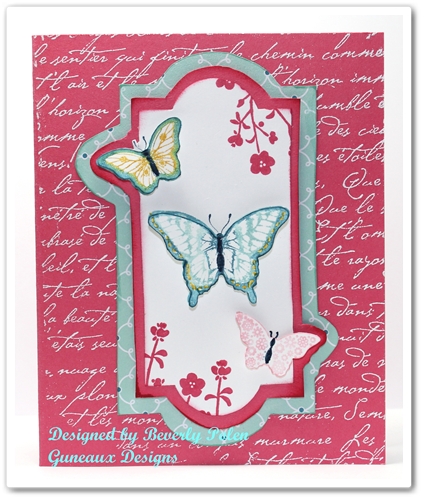
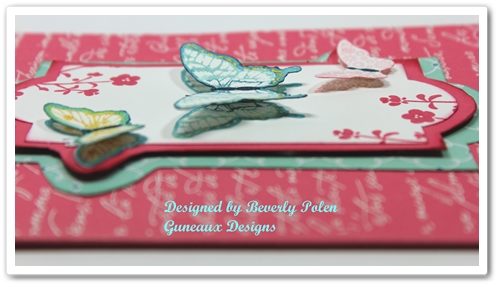
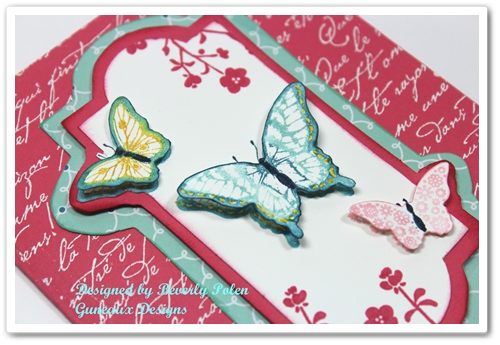
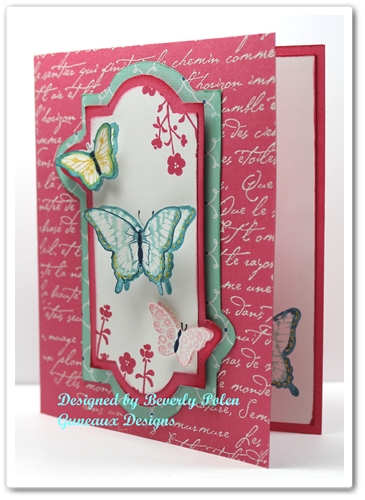
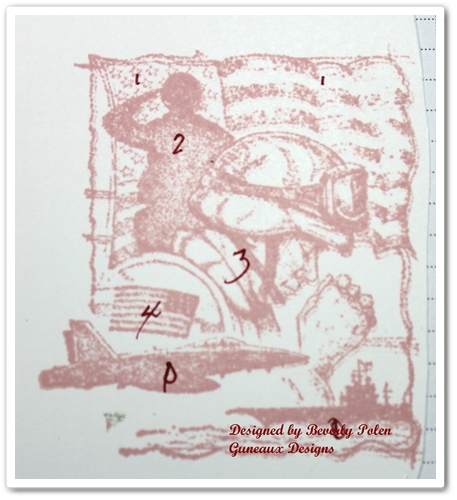
“1” the item I wanted raised with one layer of Stampin Up Dimensionals (i.e., adhesive foam), “2” for those with two layers of dimensionals, and so on.  I re-stamped the image, applied various ink colors, and cut out the pieces.  I then attached the pieces according to the “map” in the photo.

The following picture shows the process of attaching the pieces for the first level, which is the American Flag in the background.

Moving to the 2nd level, I attached the saluting soldier using two layers of dimensionals.  That is shown in the picture to the right.

Moving to the 3rd level, I attached the praying soldier with three layers of dimensionals.  However, I did make one change.  I wanted the helmet and the American Flag on the soldier’s uniform to be raised a level above the soldier.  Therefore, I added four layers of dimensionals to the helmet and one to the flag. The following picture reflects this and the completed image.

 The following pictures provide a better view of the dimensional elements.

The final product of the Stampin Up Courage card includes Real Red Card Stock as the base, Whisper White Card Stock for the 1st layer, and Night of Navy Card Stock as the 2nd layer.  Included is the sentiment from the Stampin Up Courage stamp set.

If you enjoyed the card and tutorial, please let me know by leaving a comment.


God’s Blessings!
Stamping With Guneaux Designs
by
Beverly Polen

STAMPIN UP COURAGE STAMP SET – 4TH OF JULY CARD

Papillon Potpourri Stamp Set – Stampin’ Up!

Papillon Potpourri Stamp Set – Stampin’ Up!

Today’s greeting card features the Papillon Potpourri Stamp Set – Stampin’ Up!(123759 – catalog item number – clear mount).  I love butterflies, so the Papillon Potpourri is one of my favorite stamp sets.

The card base is made with a piece of the new In-Color Strawberry Slush Card Stock.  Using VersaMark Ink (102283), I stamped a background stamp onto the card front.  It was  covered with White Embossing Powder  (109132 – catalog item number) and heat set. (I love any kind of embossing).

I think the butterflies in the above picture of the card appear to be hovering over the card with their shadow showing underneath.  I have to give the credit for the effect to my camera (lol).  Oh, wait….maybe it was the person behind the camera creating the effect.  Regardless, I think those wonderful Stampin’  Dimensionals (104430 – catalog item number) played a role as well!  Don’t you just love the 3-D effect on greeting cards?

Look closely at the layers on the card.  You also may want to look at the card front in the picture below.  It appears as though I cut out the pieces using a framelit from the Apothecary Accents Framelits (127003 – catalog item number).  Well, my framelit doesn’t have the two “bump outs” on it, does yours?

I did use the framelit from the Apothecary Accents, but I did not use it to cut out the paper that forms the layers.

How often do you start making a card with one intent and then the card ends up being completely different?  That’s what happened on my card.

I first stamped the butterflies from the Papillon Potpourri Stamp Set onto a 3-1/2″ x 4-3/4″ piece of Whisper White Card Stock.  I had planned to add some other elements to that piece of card stock, but then I wasn’t happy with it.

I wondered if I had a framelit that would fit around the butterflies, and if so, I would use that to cut out the piece.  Well, the framelits that I have are either too big or small.  As usual, I didn’t let that defeat me.  I wanted to use the Apothecary Accents framelit, so I decided to lay it around the butterflies and trace around the inside with a pencil.  I couldn’t trace across the two small butterflies, so I decided to go around them.  I “fussy cut” out the framelit, which resulted in the two bump outs.  You needed to know all of this, right?

I then traced the outside of the framelit onto a piece of Strawberry Slush Card Stock, allowing for the bump outs.  As for the bottom layer that is the Pool Party design from the Quatrefancy Specialty Designer Series Paper (130141), I free-handed it.

Notice the little flowers at the top right and bottom left of the Whisper White Card Stock.  They are from a stamp in the Hostess Morning Meadow Stamp Set.

I hope you enjoyed the card and my rambling.  You can leave a comment by clicking on the “chat bubble” at the right of the post’s title.  I love to get comments! 


God’s Blessings!
Stamping With Guneaux Designs
by
Beverly Polen

 PAPILLON POTPOURRI STAMP SET – STAMPIN’ UP!

Stampin’ Up! Get Well Card

I made this Stampin’ Up! get well card for a young lady who had a lung removed  recently as a result of a massive tumor.  Her name is Carrie, and if you are inclined, please say a healing prayer for her.

Look at the flowers on this Stampin’ Up! get well card and tell me what current stamp set the floral image is from.  I had not used this image before (or that I remember) and decided to do so on this card.  I wanted the card to be cheerful, and the floral image satisfied my need.

Loving butterflies as I do, I had to add a couple of them to the card.  The butterfly images are from the Stampin’ Up! Kindness Matters Stamp Set.  The “Get Well” sentiment is from the Stampin’ Up! Perfectly Penned Stamp Set.

The card base is made from Stampin’ Up! Daffodil Delight Card Stock.  The red piece of card stock on the left is a 2-3/8″ x 4-1/2″ piece of Real Red Card Stock.  The black piece of card stock on the right is a 2-1/2″ x 4-1/4″ piece of Basic Black Card Stock.  The white center piece is a 3-3/4″ x 4-1/2″ piece of Whisper White Card Stock.  Notice the matching envelope in the first photo.

Enjoy your day, and take time to leave a comment!  I love reading your comments.


Stampin’ Up! Supplies Used for this Stampin’ Up! Get Well Card:

Stamp Sets:  Kindness Matters (122902), Perfectly Penned (122892), and an additional set that you’ll guess for me

Paper:  All mentioned above

Ink:  Various Alcohol Ink Markers

Accessories:  Basic Black 1/2″ Scallop Dots Ribbon (124145), a retired Real Red 3/16″ Gingham Ribbon, and a retired Real Red Holly Berry Designer Button.


Butterfly_1_1

God’s Blessings!
Stamping With Guneaux Designs By Beverly Polen
Firm Reliance on Divine Providence!

STAMPIN’ UP! GET WELL CARD