Papillon Potpourri Stamp Set – Stampin’ Up!
Today’s greeting card features the Papillon Potpourri Stamp Set – Stampin’ Up!(123759 – catalog item number – clear mount). I love butterflies, so the Papillon Potpourri is one of my favorite stamp sets.
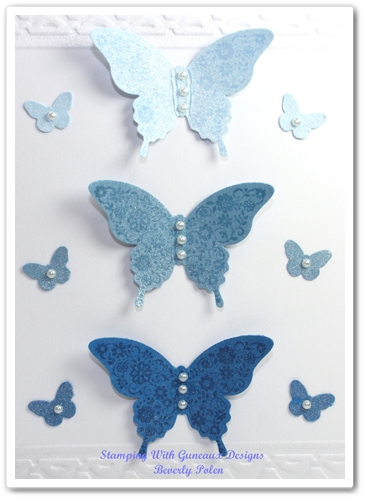
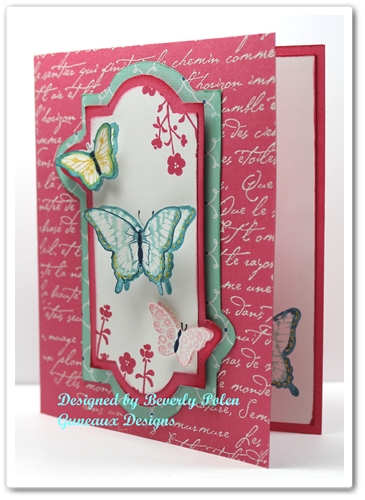 The card base is made with a piece of the new In-Color Strawberry Slush Card Stock. Using VersaMark Ink (102283), I stamped a background stamp onto the card front. It was covered with White Embossing Powder (109132 – catalog item number) and heat set. (I love any kind of embossing).
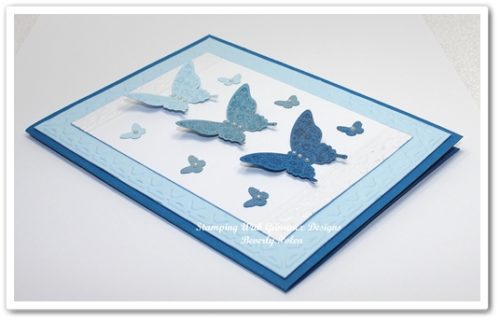
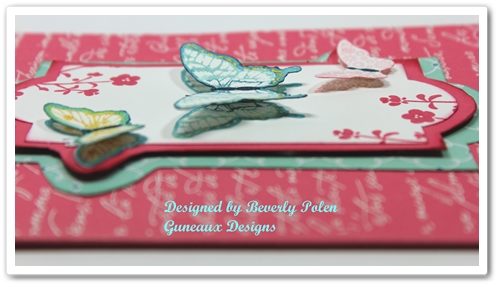
I think the butterflies in the above picture of the card appear to be hovering over the card with their shadow showing underneath. I have to give the credit for the effect to my camera (lol). Oh, wait….maybe it was the person behind the camera creating the effect. Regardless, I think those wonderful Stampin’ Dimensionals (104430 – catalog item number) played a role as well! Don’t you just love the 3-D effect on greeting cards?
Look closely at the layers on the card. You also may want to look at the card front in the picture below. It appears as though I cut out the pieces using a framelit from the Apothecary Accents Framelits (127003 – catalog item number). Well, my framelit doesn’t have the two “bump outs” on it, does yours?
I did use the framelit from the Apothecary Accents, but I did not use it to cut out the paper that forms the layers.
How often do you start making a card with one intent and then the card ends up being completely different? That’s what happened on my card.
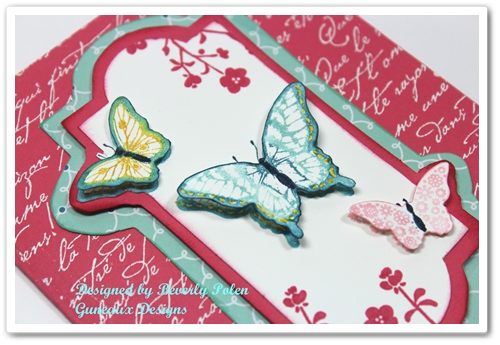
I first stamped the butterflies from the Papillon Potpourri Stamp Set onto a 3-1/2″ x 4-3/4″ piece of Whisper White Card Stock. I had planned to add some other elements to that piece of card stock, but then I wasn’t happy with it.
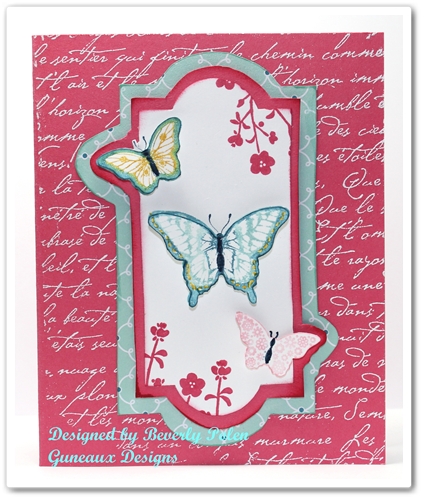
I wondered if I had a framelit that would fit around the butterflies, and if so, I would use that to cut out the piece. Well, the framelits that I have are either too big or small. As usual, I didn’t let that defeat me. I wanted to use the Apothecary Accents framelit, so I decided to lay it around the butterflies and trace around the inside with a pencil. I couldn’t trace across the two small butterflies, so I decided to go around them. I “fussy cut” out the framelit, which resulted in the two bump outs. You needed to know all of this, right?
I then traced the outside of the framelit onto a piece of Strawberry Slush Card Stock, allowing for the bump outs. As for the bottom layer that is the Pool Party design from the Quatrefancy Specialty Designer Series Paper (130141), I free-handed it.
Notice the little flowers at the top right and bottom left of the Whisper White Card Stock. They are from a stamp in the Hostess Morning Meadow Stamp Set.
I hope you enjoyed the card and my rambling. You can leave a comment by clicking on the “chat bubble” at the right of the post’s title. I love to get comments!
God’s Blessings!
Stamping With Guneaux Designs
by
Beverly Polen
 STAMPIN’ UP! PAPILLON POTPOURRI GREETING CARD.