Stampin’ Up! Papillon Potpourri

STAMPIN’ UP! PAPILLON POTPOURRI GREETING CARD.

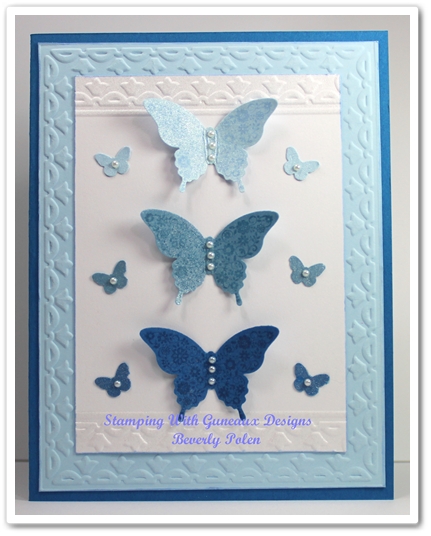
I was excited when Stampin’ Up! chose butterflies for the “Best of” stamp set for the month of April. That decision motivated me to create for you a simple card featuring butterflies from the Stampin’ Up! Papillon Potpourri Stamp Set.


SUPPLIES:

Stamps: Stampin’ Up! Papillon Potpourri Stamp Set (123759 – clear)

Paper: Pacific Point (111350), Bashful Blue (105120), Marina Mist (119682), and Whisper White Card Stock (100730)

Ink: Pacific Point (126951), Bashful Blue (126961), and Marina Mist Classic Ink (126962)

Accessories: Big Shot (113439), Framed Tulips Textured Impressions Embossing Folder (121809), Elegant Butterfly Punch (127526), Beautiful Wings Embosslit (118138) or a small butterfly punch, Vanilla Shimmer Smooch Spritz (118772), Adhesive of Your Choice, and Basic Pearls (119247)


INSTRUCTIONS FOR THIS STAMPIN’ UP! PAPILLON POTPOURRI CARD

Step 1. Cut the following pieces of card stock:

  • an 8-1/2″ x 5-12″ Pacific Point Card Stock for the card base,
  • a 4″ x 5-1/4″ piece of Bashful Blue Card Stock, and
  • a 3-1/8″ x 4-3/8″ piece of Whisper White Card Stock.

Step 2. Place the Bashful Blue Card Stock inside the Framed Tulips Embossing Folder and run through the Big Shot.

Step 3. Place one end of the Whisper White Card Stock inside the Framed Tulips Embossing Folder and run through the Big Shot.

Step 4. Place the other end of the Whisper White Card Stock into the Embossing Folder and run through the Big Shot.

Step 5. Spritz the embossed end of the Whisper White Card Stock (you’ll need to cover the remainder of the card stock so it isn’t spritzed.

Step 6. Using the floral butterfly stamp from the Stampin Up Popillon Potpourii, do the following:

  • Cover the stamp with Bashful Blue Classic Ink and stamp onto a small piece of Bashful Blue Card Stock,
  • Cover the stamp with Marina Mist Classic Ink and stamp onto a small piece of Marina Mist Card Stock, and
  • Cover the stamp with Pacific Point Classic Ink and stamp onto a small piece of Pacific Point Card Stock.

Step 7. Using the Elegant Butterfly Punch, punch out each butterfly and spritz them.

Step 8. Using the Beautiful Wings Embosslit and the Big Shot, cut out a small butterfly from Bashful Blue, Marina Mist, and Pacific Point Card Stock. Spritz the butterflies.

Step 9. Place three small Basic Pearls onto the floral butterflies, and one on the small butterflies.

Step 10. Attached the butteflies to the piece of Whisper White Card Stock
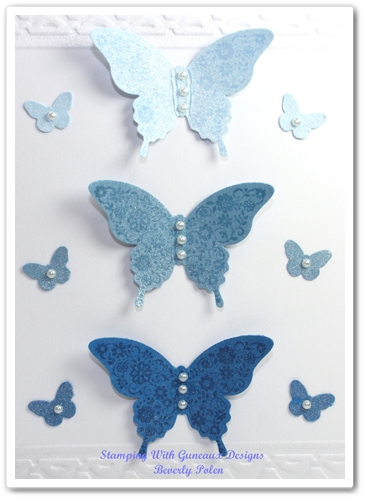
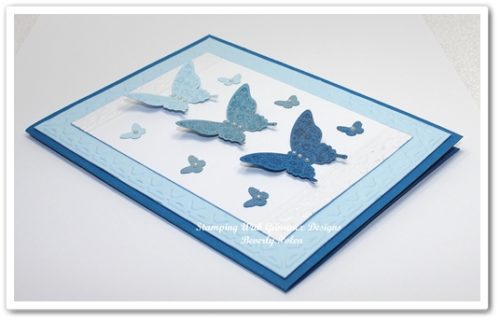
Step 11. Attach the Whisper White Card Stock with the butterflies onto the Bashful Blue Card Stock in the center of the embossed tulips.

Step 12. Attach the above card stock to the card base.

I did not add a sentiment to the card so it can be used for the appropriate occasion when the need arises. Now it’s your turn to make the card and to leave me feedback.


God’s Blessings!
Stamping With Guneaux Designs
by
Beverly Polen
STAMPIN’ UP! PAPILLON POTPOURRI

Stampin’ Up! Best Of Butterflies

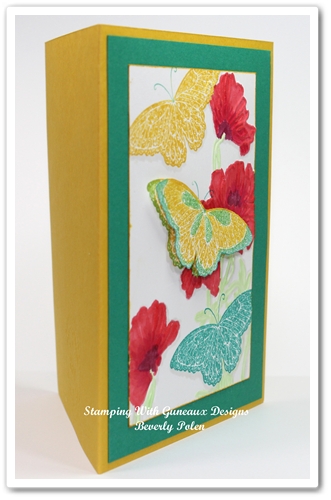
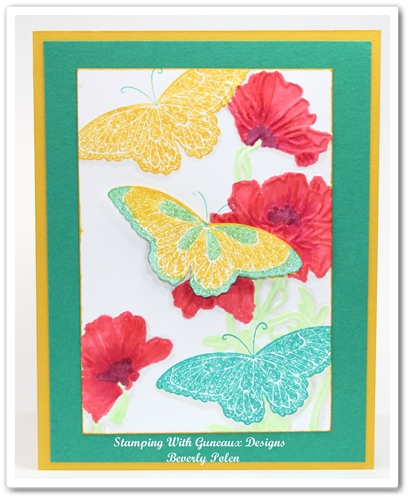
Today’s project share features the Stampin’ Up! Best of Butterflies stamp set, which is the April stamp set for the Stampin’ Up! Best of 25 Years celebration.  The three butterflies on this card is one of the stamp images from this stamp set.

This is a simple card to make, and it is made with two Stampin’ Up! card stock colors that are returning in June – the Bermuda Bay and Crushed Curry.  I love these two colors as they are bold and am excited about them returning.  I love bold colors, and I tend to lean toward using them more often.

Because the 2013 color is Emerald, I shared that I believed Stampin’ Up! would bring us a similar color.  I’m so happy that I was right as I  love Bermuda Bay.  As a matter of fact, I used it on a recent card before I knew about Stampin’ Up!’s decision.  I am lucky that I still had some of the card stock in both colors!  On with the card details!

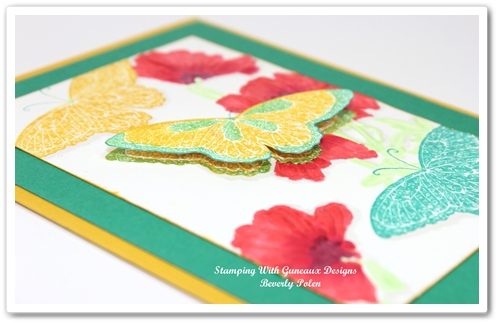
On the card front you’ll also notice that I used the  Stampin’ Up! Flower Garden Textured Impressions Embossing Folder.  I decided to color the flowers in a reddish-orange shade.

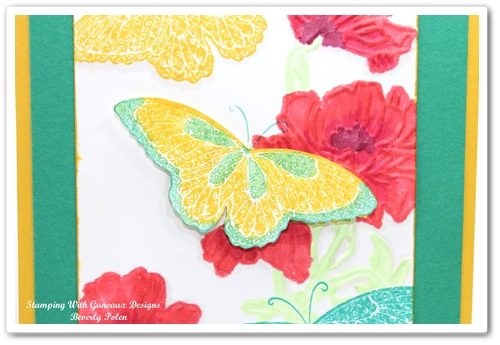
The center butterfly, shown here, is raised with foam circles.  The same image is stamped onto the card underneath the raised butterfly.  I used Bermuda Bay and Crushed Curry Classic Ink for the butterfly images.

The image to the left gives you a better view of the center butterfly, the raised one and the stamped image.

Actually, I first stamped the butterfly images onto the Whisper White Card Stock and then decided to emboss the card stock with the Flower Garden Embossing Folder.  It gives the appearance that I used the masking technique.


SUPPLIES USED FOR THE STAMPIN’ UP BEST OF BUTTERFLIES CARD:

Stamps:  Stampin’ Up! Best of Butterflies Stamp Set (133345)

Paper:  Stampin’ Up! Bermuda Bay, Crushed Curry, and Whisper White Card Stock (100730)

 Ink:  Bermuda Bay Classic Ink, Crushed Curry Classic Ink, and Alcohol Markers

Accessories:  Stampin’ Up! Flower Garden Embossing Folder (123113)

God’s Blessings!
Stamping With Guneaux Designs
by
Beverly Polen

STAMPIN’ UP! BEST OF BUTTERFLIES STAMP SET

Stampin Up All Dressed Up Bundle – Stamping With Guneaux Designs

Boy, am I having fun with the Stampin Up All Dressed Up Bundle!  I am so enjoying playing with paper dolls ….LOL….like I did as a child.  Seriously, I really enjoyed created my Stampin Up All Dressed Up card.

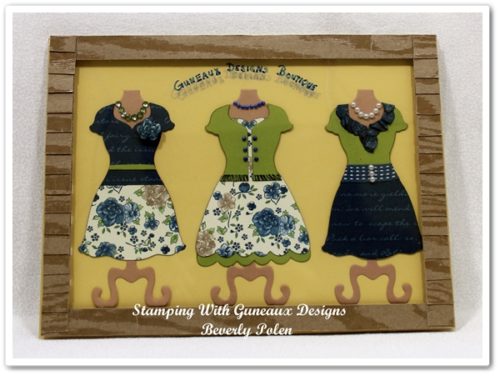
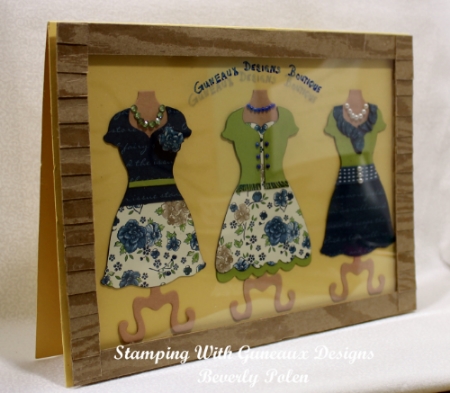
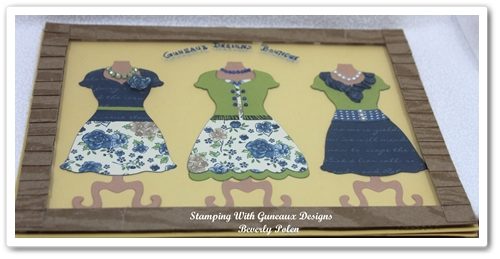
Let me first welcome you to the Guneaux Designs Boutique!  In my store front window are a grouping of “mix and match” outfits.  Come inside the Boutique and let me share with you information about the designs.  Or if you like, you can just window shop.  If you window shop, please don’t touch the window as you will leave fingerprints.  (Don’t you shake your head! lol.  I’m just having fun!)

I have for you several photos of the various elements of this card made with the Stampin Up All Dressed Up Framelits.  To that end, the following three pictures reflect the first mannequin’s outfit.

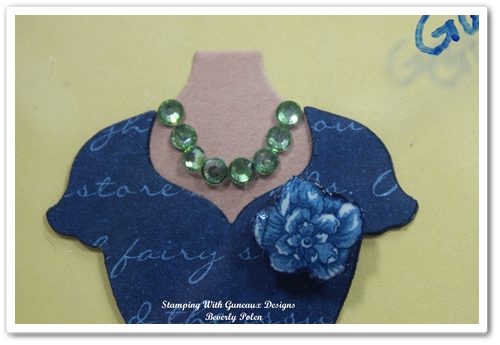
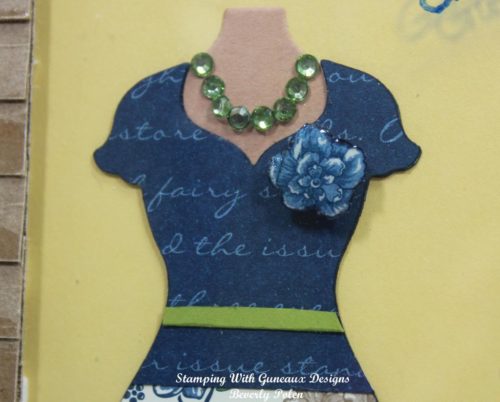
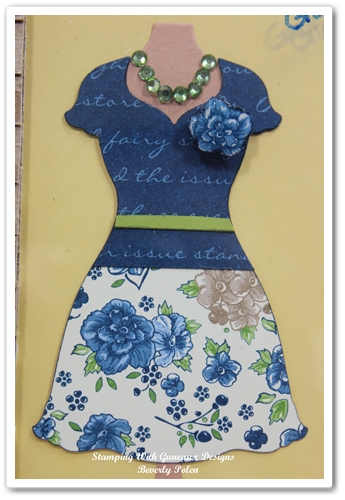
The outfit is made with a beautiful design from the Print Poetry Designer Series Paper Stack.  The designer of the outfit used one of the Stampin Up Dress Up Framelits to cut out the material. The blouse sports a beautiful floral broach.  Around the mannequin’s neck is a gorgeous green diamond necklace made with Stampin Up Basic Rhinestones and a permanent green marker, a state-of-the-art designer tool.  The belt that wraps around the blouse is made from Lucky Limeade Card Stock.  The skirt is made from another beautiful design of the Print Poetry Designer Series Paper Stack.

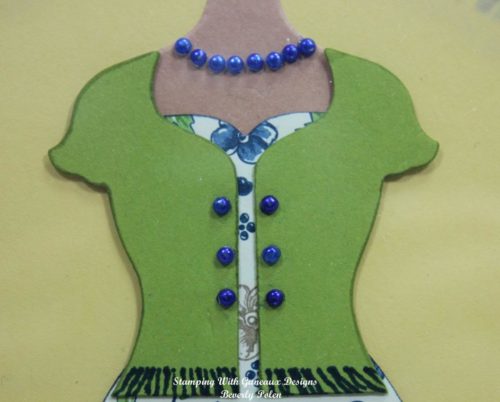
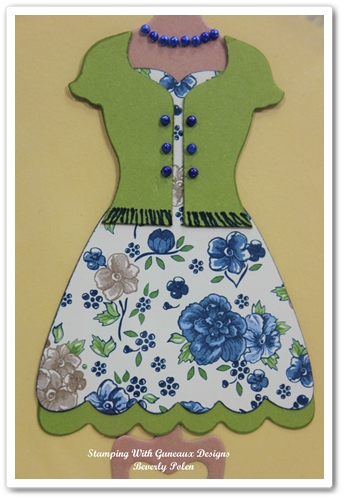
The outfit on the mannequin in the center of the Guneaux Designs Boutique window features a beautiful cardigan (photo to the left). The cardigan is wrapped around a gorgeous dress that was made with Lucky Limeade Card Stock and the same framelit used for the first outfit.  The cardigan has beautiful pearl buttons that match the pearl necklace on the mannequin.  The pearls were made with Stampin Up Basic Pearls that were colored with the state-of-the-art permanent marker.  Don’t they just made this outfit?

The picture below shows the complete outfit.  The dress was made with another Stampin Up Dressed Up Framelit and the above-mentioned Designer Series Paper.  It is enhanced with an added Lucky Limeade ruffle at the bottom made with the same Stampin Up Dressed Up Framelit.

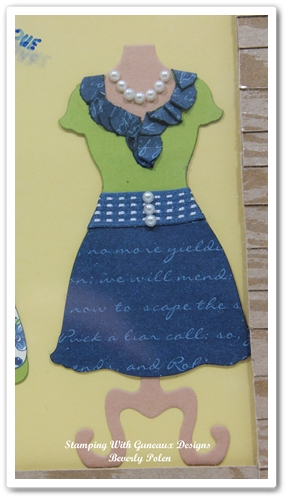
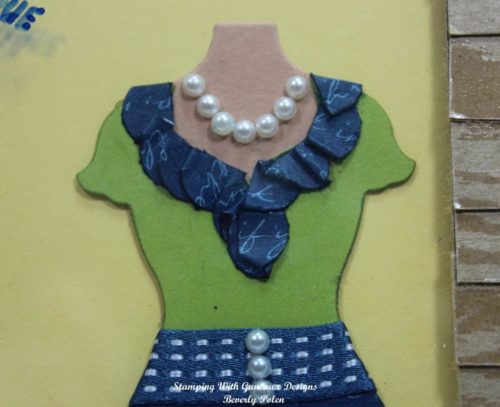
The third mannequin in the window is wearing a more casual outfit.  It is a two-piece outfit of a blouse and skirt as is the first outfit.

The blouse includes ruffles made from the same material as the skirt, the Print Poetry Designer Series Paper Stack.  The designer used a tool to create the ruffles – the Stampin Up Scalloped Edge Border Punch.

The scallops were folded one on top of another to create the ruffles.  Aren’t they very fashionable?  The neck supports a pearl necklace made with Stampin Up Basic Pearls, which are also included on the Midnight Muse Stitched Satin Ribbon belt shown in both photos.

Let’s move on to the store front window itself.  In the following photo, you can see that the light from the sun is creating a reflection on the window.  It also shows a reflection of the Guneaux Designs Boutique lettering onto the wall behind the glass.  The glass window was made with a Stampin Up Window Sheet.

Notice the wood shingles around the window.  Aren’t they cool?  They were made with the Stampin Up Natural Composition Specialty Designer Series Paper.

Let’s give a hand to the designer of these beautiful pieces, Guneaux Designs!!!

 I hope you enjoy your Stampin Up All Dressed Up Bundle as much as I do!


 God’s Blessings!
Stamping With Guneaux Designs
by
Beverly Polen
STAMPIN UP ALL DRESSED UP BUNDLE

Stampin Up Postage Due

Do you allow the title of a stamp set to determine how you create with it, such as the Stampin Up Postage Due stamp set?  Does the word, postage, within the title tell you that your creation has to be postage-related?  How do you find it used mostly when you surf the Internet?  I have found many stampers allowing the title to impact their paper crafting and they tend to use more earth tones in their creations with a stronger focus on male-related projects.

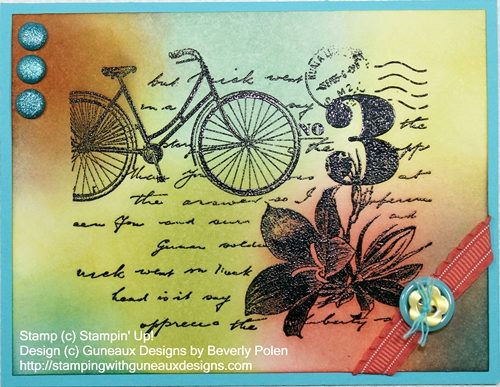
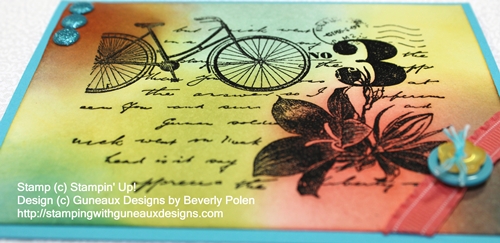
In my card share today, I did not allow the Stampin Up Postage Due stamp set title to impact the way I created my card.  I focused more on the main stamp and the bicycle within that stamp.  From my perspective, the bicycle in the stamp is a female bike, and anything female-related influenced how I would create my card.  Thinking of a female, I think of bright colors; thus, bright colors make up on my card.

STAMPIN UP PRODUCTS (includes product item number):

Stamp Set:  Stampin Up Postage Due (c – 126397)

Paper:  Tempting Turquoise Card Stock (102067) and Whisper White Card Stock (100730)

Ink (Classic):  Summer Starfruit (126991), Calypso Carol (126983), Lucky Limeade (126984), Cajun Craze (126965), Island Indigo (126986), Pool Party (126982), Wisteria Wonder (126985), Tempting Turquoise (126952), and VersaMark (102283)

Accessories:  Brights Glimmer Brads – Tempting Turquoise (121006), Calypso Carol 3/8″ Ruffled Ribbon (122976), Brights Designer Buttons – Tempting Turquoise and Daffodil Delight (119747), Whisper White Bakers Twine (124262), Black Embossing Powder (109133), Heat Tool (129053),  Paper Piercing Tool  (126189), Stampin’ Pierce Mat (126199), and Stampin’ Sponges Wedges (101610)

INSTRUCTIONS:

  • Cover the bicycle stamp with VersaMark and stamp it onto a 5-1/4″ x 4″ piece of Whisper White Card Stock
  • Cover the VersaMark ink with the Black Embossing Powder and set with Heat Tool
  • Using Stampin’ Sponges, apply the above inks (or inks of your choice) in a circular motion onto the card stock (start the sponge off of the card stock and slowly move it onto the card stock)
  • Use the Paper Piercing Tool and Mat to punch three holes in the upper-left side of the colored card stock
  • Insert three Tempting Turquoise Glimmer Brads and spread the prongs
  • Cut a small piece of Calypso Carol Ruffled Ribbon
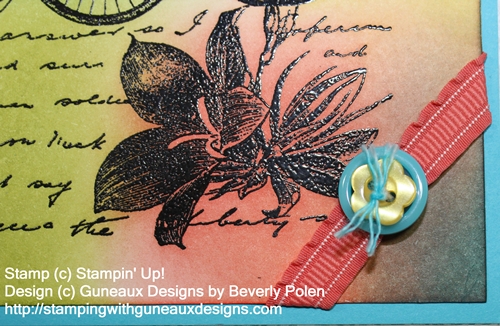
  • Thread the Bakers Twine into the larger button and then the smaller one
  • Before tying into a knot, insert the ribbon through the twine underneath the larger button
  • Tie a tight knot and separate the threads within the twine
  • Cover a sponge with Tempting Turquoise Ink and gently swipe the twine’s threads to apply the ink
  • Attach the buttons and ribbon along the bottom-right edge of the colored card stock
  • Cut an 8-1/2″ x 5-1/2″ piece of Tempting Turquoise Card Stock and fold in the center to create a card base
  • Attach the stamped and decorated card stock onto the front of the card base
  • Enjoy your creation!

NOTE:  Don’t forget that during the month of September, you get a free spool of the 2012-2014 In-Color 3/8″ Stitched Satin Ribbon for every $40 purchase of Stampin’ Up! products.  Spend $200 and get all 5 of the spools!


God’s Blessings!
Stamping With Guneaux Designs
by
Beverly Polen
My posts for the next couple of days will also focus on the Stampin Up Postage Due stamp set.  Come back to see those.

Blending Inks Technique – Stampin Up

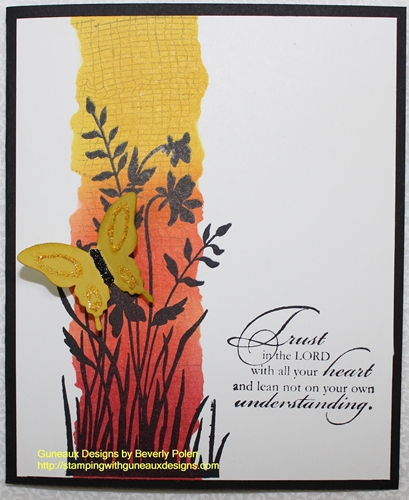
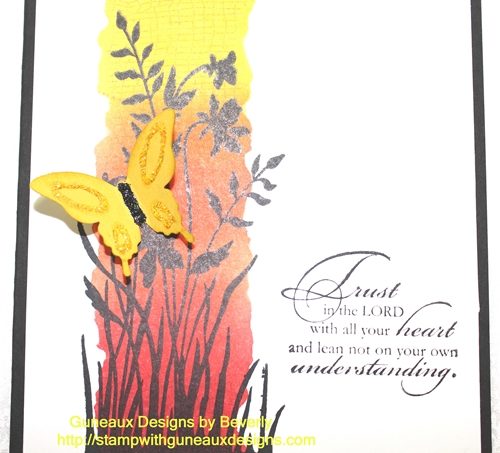
Today’s post is about blending inks to create beautiful artwork.  This technique is very easy and you can quickly create very attractive cards using the technique, such as the following  three cards.

What is blending inks?   Looking at the cards below, it seems obvious, right?  Regardless, let me share that it is selecting and blending two or more inks to create subtle shades and colors to your paper crafting artwork.

Blending Inks

I have selected one of the three cards to provide you with instructions on the blending inks technique.


 STAMPIN’ UP! SUPPLIES:

Stamp Sets:  Just Believe (120453), Trust God (126702)  [love this stamp set], and a Background Stamp of your choice (I used a retired Stampin’ Up stamp)

Paper:  Basic Black Card Stock (121045) and Whisper White Card Stock (100730)

Ink (Classic):  Summer Starfruit (126991), Calypso Carol (126983), Primrose Petals (126858), Crumb Cake (126975), and Jet Black StazOn (101406)

Accessories:  Stamping Sponge wedges (101610), Elegant Butterfly Punch (127526), and Post-It Notes or scrap card stock


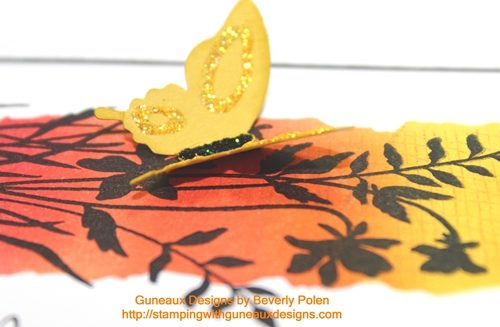
 Instructions for the blending inks technique are below the two following pictures.

INSTRUCTIONS:

  • Cut a piece (the size depends on the stamp image used) of Whisper White Card Stock (mine is 4″ x 4-7/8″)
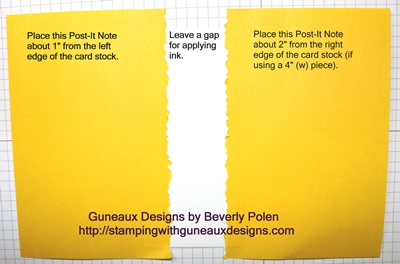
  • Tear the edges of the sticky side of two Post-It Notes, being careful to leave some of the sticky edge available
  • Place the torn Post-It Notes onto the Whisper White Card Stock as shown in the below picture with the opening between the Notes closer to the left side of the card stock

Now you are ready to start blending inks according to the following:

  • Cover a sponge wedge (or blending tool) with Summer Starfruit ink and apply in a circular motion to the upper 1/3 of the opening in the card stock, being careful to avoid lifting the edges of the Post-It Notes
  • Cover a sponge wedge with Calypso Carol ink and apply in a circular motion to the middle 1/3 of the card stock below the Summer Starfruit ink
  • Blend the edges of the two inks (see picture of card), producing a different shade of color
  • Cover a sponge wedge with Primrose Petals ink and apply to the bottom 1/3 of the card stock, blending it with the Calypso Carol ink to create a different shade of color
  • Cover a background stamp with Crumb Cake ink and stamp over the three colors you’ve just blended
  • Remove the Post-It Notes

At this point, you’ll decorate the card stock according to the following:

  • Cover the largest stamp image from the Just Believe Stamp Set  (a floral silhouette) with Jet Black StazOn ink and stamp the image over the blended inks
  • Cover a sentiment from the Trust God Stamp Set with Jet Black StazOn ink and stamp the sentiment on the lower-right side of the card stock
  • Cut an 8-1/2″ x 5-1/4″ piece of Basic Black Card Stock and fold in the middle for a card base
  • Attach the decorated piece of Whisper White Card Stock to the Basic Black card base
  • Using the Elegant Butterfly Punch, cut out a butterfly, decorate it as desired, and attach to the card

You have just learned the Blending Inks Technique!

God’s Blessings!
Stamping With Guneaux Designs
Beverly Polen

Use the blending inks technique to create quick and easy cards!

Plant Hope – Brayering – Stamping With Guneaux Designs

Featuring “Plant Hope”

Let me share with you these three beautiful cards that I made today at a Brayer Workshop. It was great to meet new people at the workshop, and to be taught how to use a brayer by a super, skilled instructor. The cards were made using the Plant Hope Stampin’ Up! Stamp Set (page 119 of the new Idea Book & Catalog (IBC). All items used were from the new IBC. Project recipes follows:
Plant Hope - Brayering

Ink: Old Olive, Always Artichoke, Tempting Turquoise, and Not Quite Navy
Paper: Whisper White, Old Olive, and Not Quite Navy
Accessories: Photo Corners Punch, Silver Brads, Basic Black Stampin’ Write Marker, White Gel Pen, and Snail Adhesive

Plant Hope - Brayering
Ink: Marina Mist , Pacific Point, Basic Black, Old Olive, Always Artichoke
Paper: Whisper White, Marina Mist , Pacific Point, and Old Olive
Accessories: Old Olive Ribbon, Snail Adhesive
Plant Hope - Brayering
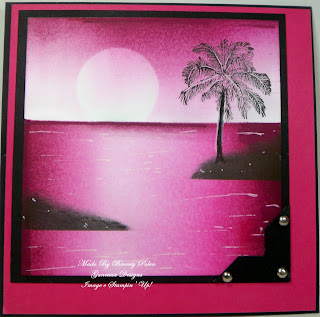
Ink: Melon Mambo Mambo, Rich Razzleberry, and Basic Black;
Paper: Whisper White, Basic Black, Melon Mambo
Accessories: Photo Corners Punch, Silver Brads, White Gel Pen, and Snail Adhesive
GOD BLESS! GUNEAUX DESIGNS BY BEVERLY POLEN