Stampin Up Mosaic Madness Stamp Set

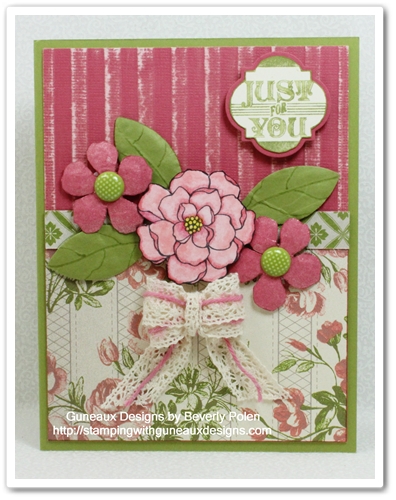
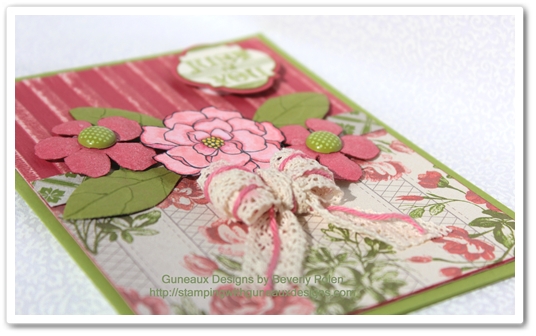
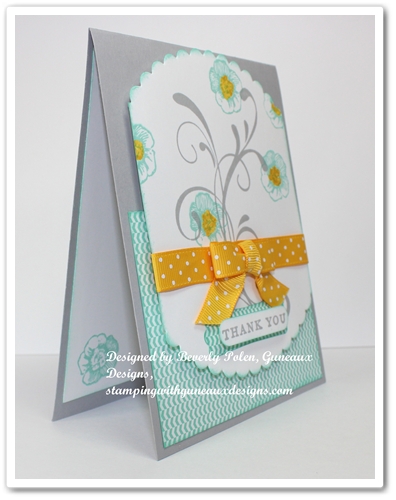
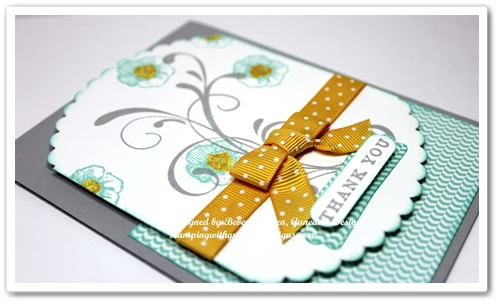
Yesterday I asked that you come back to my site today to see a cutie!  This cutie features the Stampin Up Mosaic Madness Stamp Set, Modern Mosaic Textured Impressions Embossing Folder, and Mosaic Punch.  Now, isn’t it a cutie?  Well, I sure thank so!

 Stampin Up Mosaic Madness Stamp Set

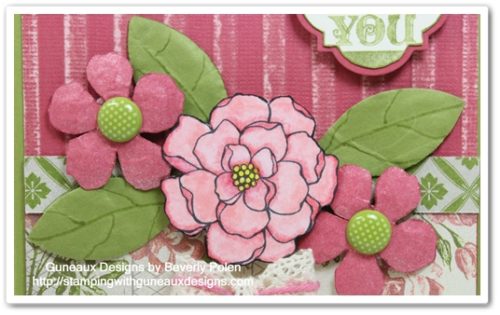
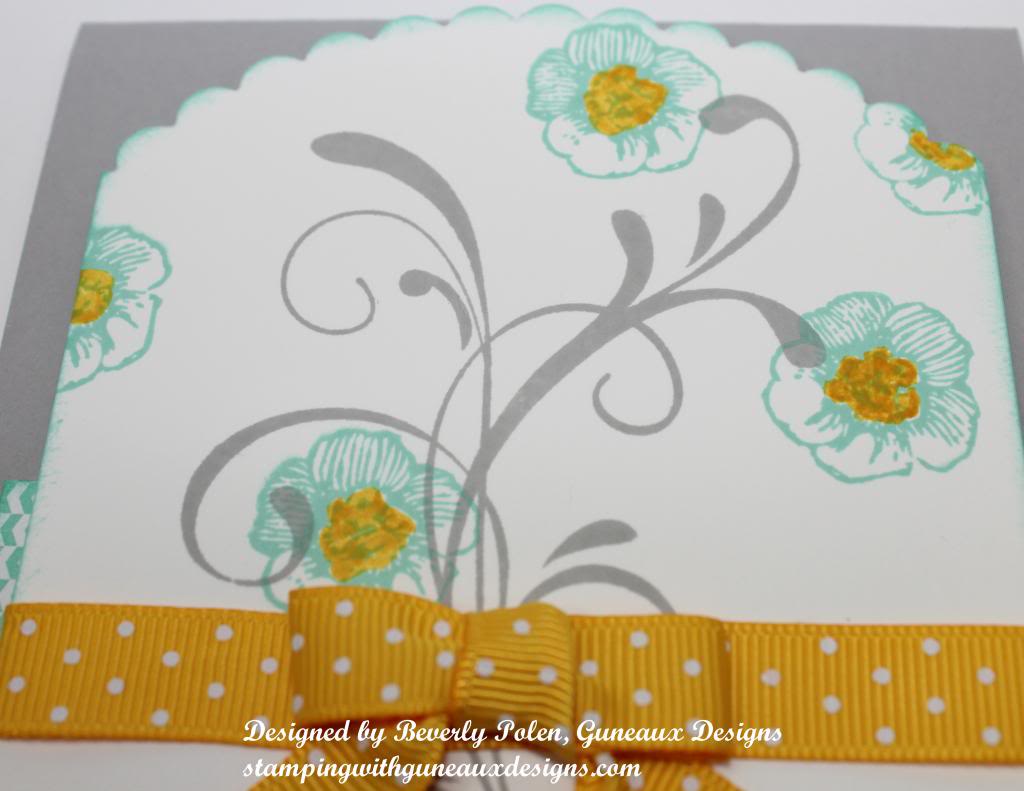
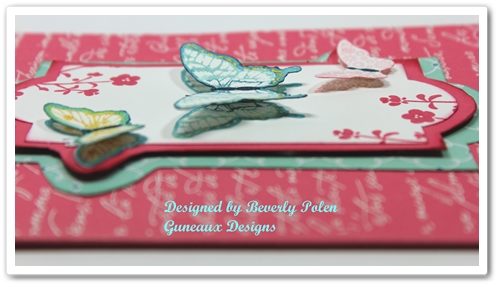
What do you think about the color combination?  I love it!  Although we are approaching September and a lot of Stampin Up crafters are gravitating toward fall colors, I’m not.  I love color – bolds and pastels.  The following picture provides a closer look at the colors used. Stampin Up Mosaic Madness Stamp Set

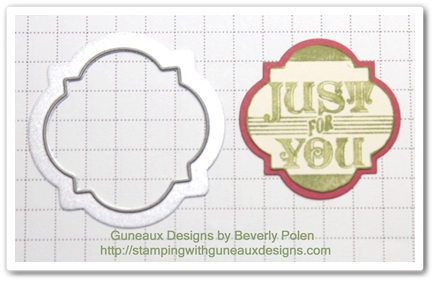
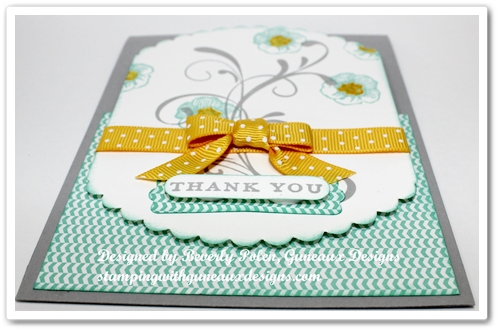
The base of the card is Stampin Up Pacific Point Card Stock.  The second layer is Stampin Up Crushed Curry Card Stock that includes a stamped border from the Stampin Up Mosaic Madness Stamp Set.  The third layer is Stampin Up Bermuda Bay Card Stock that is also framed with a stamped border from the stamp set.  Can you guess the color of the fourth layer?  Give it a try and let me know your guess in the comment section of this post (chat bubble beside the title).

Stampin Up Mosaic Madness Stamp SetStampin Up Mosaic Madness Stamp Set

Now, I have to admit that although I purchased it, I was not too fond of the Stampin Up Mosaic Madness Stamp Set.  But I decided to force myself to create (can you imagine forcing a card maker to create?) a card that featured all things Mosaic!  With the color combination, I think it turned out quite well.  I will use the Stampin Up Mosaic Madness Stamp Set again. 🙂

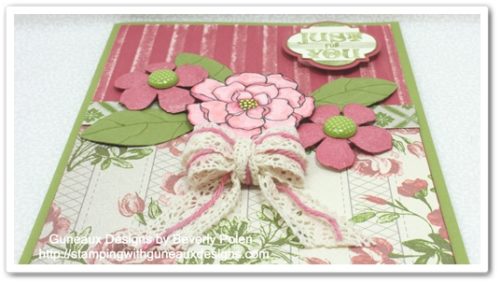
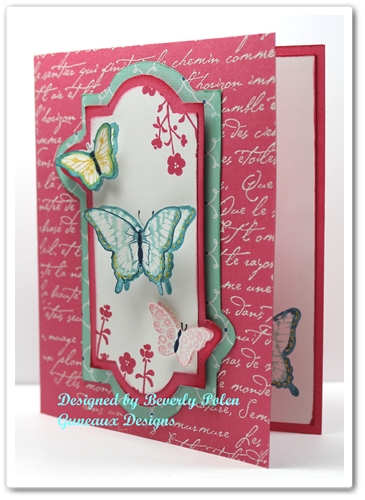
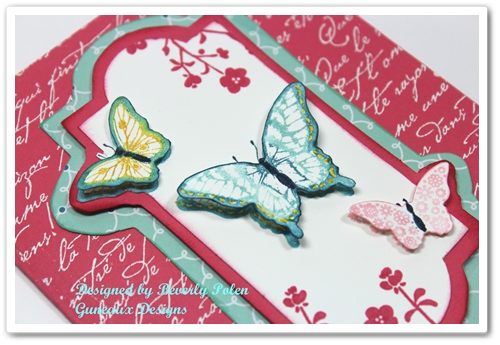
The picture below gives you a peek into the inside of the card:

 Stampin Up Mosaic Madness Stamp Set

BESIDES THE STAMPIN UP MOSAIC MADNESS STAMP SET, OTHER SUPPLIES USED ARE:

Paper:   Stampin Up’s Pacific Point Card Stock, Stampin Up Crushed Curry Card Stock, Stampin Up Bermuda Bay Card Stock, Stampin Up Whisper White Card Stock, and the mystery layer.

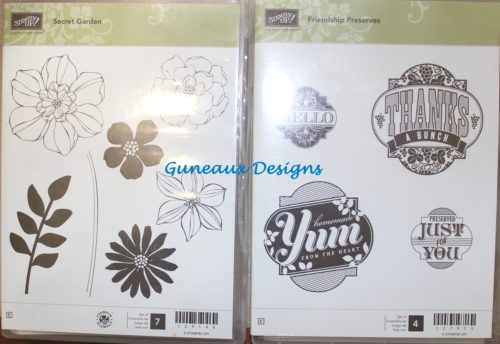
Stamps:  Stampin Up Mosaic Madness Stamp Set (130249)

Ink:  Stampin Up Pacific Point Classic Ink, Stampin Up Crushed Curry Classic Ink, Stampin Up Bermuda Bay Classic Ink, and a mystery ink.

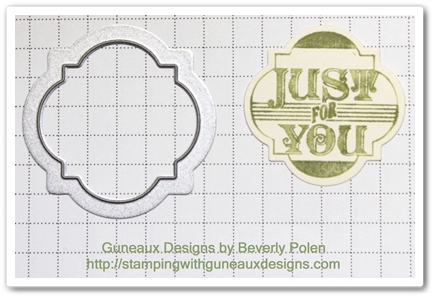
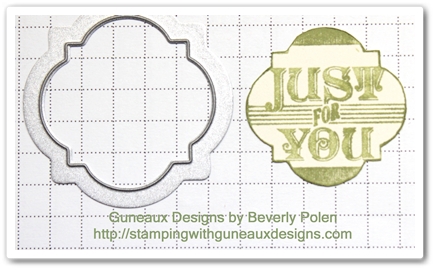
 Accessories:  Stampin Up Modern Mosaic Textured Embossing Folder, Mosaic Punch, and retired Stampin Up Ice Brads

 You can find these supplies at Stampinup.com.

God’s Blessings!
Stamping With Guneaux Designs
By
Beverly Polen

Stampin Up Mosaic Madness Stamp Set

STAMPIN UP MOSAIC MADNESS STAMP SET

Everything Eleanor Stamp Set

Everything Eleanor Stamp Set

Thanks for stopping by for a Monday rubber stamping fix! (lol)  My card share for you today features the beautiful Everything Eleanor Stamp Set and two new Stampin’ Up! colors.  It is such a simple card to make, as you will see in the below instructions.

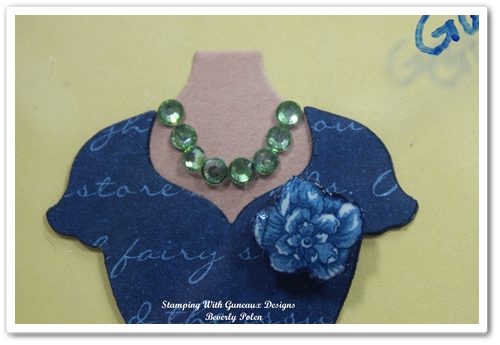
Also featured on the card is a sentiment from the hostess Morning Meadow Stamp Set.


SUPPLIES USED FOR THE CARD FEATURING THE EVERYTHING ELEANOR STAMP SET:

Stamp Sets:  Everything Eleanor Stamp Set (124164 – c) and Morning Meadow Stamp Set (129675 -c)

Paper:  Designer Series Paper Stack (Coastal Cabana – 2013-2015 In Colors – 130136), Smoky Slate Card Stock (new Neutrals color – 131203), and Whisper White Card Stock (100730)

Ink:  Coastal Cabana Classic Ink (new In Color – 131175), Smoky Slate Classic Ink (new Neutrals color – 131181), and Daffodil Delight Marker (119677)

Accessories:  Stampin’ Up! Circles Collection Framelits (130911), Word Window Punch (119857), Modern Label Punch (119849), and retired Daffodil Delight Ribbon


INSTRUCTIONS:

  • Cut an 11″ x 4-1/4″ piece of Smoky Slate Card Stock.  Fold in the center for a card base with the fold at the top.
  • Cut a 4″ x 3″ piece of Coastal Cabana Designer Series Paper from the 2013-2015 In-Color Designer Series Paper Stack.  Use a sponge to apply Costal Cabana Classic Ink around the piece.
  • Using the largest circle from the Circles Collection Framelits, cut a piece of Whisper White Card Stock.
  • Cut both sides of the circle to make the piece 3-5/8″ wide.  Use a sponge to apply Costal Cabana Classic Ink around the piece.
  • Cover the flourish image from the Everything Eleanor Stamp Set with Smoky Slate Classic Ink.  Stamp the image on the Whisper White modified circle.
  • Cover the small flower image from the Everything Eleanor Stamp Set with Coastal Cabana Classic Ink and randomly stamp the image around the stamped flourish.
  • Color the center of the flowers with the Daffodil Delight Marker.
  • Stamp the “Thank You” sentiment from the Morning Meadow Stamp Set onto a piece of Whisper White Card Stock with Smoky Slate Classic Ink.
  • Cut out the sentiment with the Word Window Punch.
  • Cut out a label using the Modern Label Punch from the Coastal Cabana Designer Series Paper.
  • Attach the sentiment onto the modern label using foam adhesive.
  • Attach this piece to the bottom of the stamped Whisper White Card Stock.
  • Add Daffodil Delight ribbon around the piece.
  • Attach the 4″ x 3″ piece of Coastal Cabana Designer Series Paper to the bottom of the Smoky Slate card base.
  • Using foam adhesive, attach the modified circle piece over the Coastal Cabana paper.
  • Finished – enjoy your card!

God’s Blessings!
Stamping With Guneaux Designs
by
Beverly Polen

 EVERYTHING ELEANOR STAMP SET

Papillon Potpourri Stamp Set – Stampin’ Up!

Papillon Potpourri Stamp Set – Stampin’ Up!

Today’s greeting card features the Papillon Potpourri Stamp Set – Stampin’ Up!(123759 – catalog item number – clear mount).  I love butterflies, so the Papillon Potpourri is one of my favorite stamp sets.

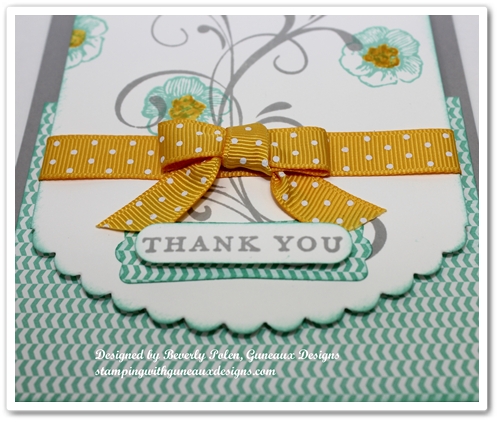
The card base is made with a piece of the new In-Color Strawberry Slush Card Stock.  Using VersaMark Ink (102283), I stamped a background stamp onto the card front.  It was  covered with White Embossing Powder  (109132 – catalog item number) and heat set. (I love any kind of embossing).

I think the butterflies in the above picture of the card appear to be hovering over the card with their shadow showing underneath.  I have to give the credit for the effect to my camera (lol).  Oh, wait….maybe it was the person behind the camera creating the effect.  Regardless, I think those wonderful Stampin’  Dimensionals (104430 – catalog item number) played a role as well!  Don’t you just love the 3-D effect on greeting cards?

Look closely at the layers on the card.  You also may want to look at the card front in the picture below.  It appears as though I cut out the pieces using a framelit from the Apothecary Accents Framelits (127003 – catalog item number).  Well, my framelit doesn’t have the two “bump outs” on it, does yours?

I did use the framelit from the Apothecary Accents, but I did not use it to cut out the paper that forms the layers.

How often do you start making a card with one intent and then the card ends up being completely different?  That’s what happened on my card.

I first stamped the butterflies from the Papillon Potpourri Stamp Set onto a 3-1/2″ x 4-3/4″ piece of Whisper White Card Stock.  I had planned to add some other elements to that piece of card stock, but then I wasn’t happy with it.

I wondered if I had a framelit that would fit around the butterflies, and if so, I would use that to cut out the piece.  Well, the framelits that I have are either too big or small.  As usual, I didn’t let that defeat me.  I wanted to use the Apothecary Accents framelit, so I decided to lay it around the butterflies and trace around the inside with a pencil.  I couldn’t trace across the two small butterflies, so I decided to go around them.  I “fussy cut” out the framelit, which resulted in the two bump outs.  You needed to know all of this, right?

I then traced the outside of the framelit onto a piece of Strawberry Slush Card Stock, allowing for the bump outs.  As for the bottom layer that is the Pool Party design from the Quatrefancy Specialty Designer Series Paper (130141), I free-handed it.

Notice the little flowers at the top right and bottom left of the Whisper White Card Stock.  They are from a stamp in the Hostess Morning Meadow Stamp Set.

I hope you enjoyed the card and my rambling.  You can leave a comment by clicking on the “chat bubble” at the right of the post’s title.  I love to get comments! 


God’s Blessings!
Stamping With Guneaux Designs
by
Beverly Polen

 PAPILLON POTPOURRI STAMP SET – STAMPIN’ UP!

Everything Eleanor Stamp Set, Quatrefancy DSP, Stampin’ Up!

Everything Eleanor Stamp Set, Quatrefancy DSP, Stampin’ Up!

Do you like trying different forms of art?  I sure do.  Actually, I am excited to share with you today a new art form that a special friend shared with me this weekend.  The art requires  using tracing paper to trace images or items, cutting out the traced items, temporarily adhering the cut-outs onto Designer Series Paper, drawing around the cut-outs, and cutting out the drawn pieces and adhering them to paper to create an image.  It closely resembles using a pattern to cut out and sew fabric.  This piece that I’m sharing features the Stampin’ Up! Everything Eleanor Stamp Set and the Stampin’ Up! Quatrefancy Speciality Designer Series Paper.  The piece of art is 6″ x 12″; therefore, my pictures are a little larger than usual.


Isn’t she beautiful?  I think so!!  All of the paper on the piece of art is Stampin’ Up! Designer Series Papers.  My lady has an up-do which is enhanced with a headband decorated with a flower and rhinestone.  Her body is made with a Stampin’ Up! script DSP.  The upper portion of her dress is made with one design  from the upcoming Quatrefancy  Speciality Designer Series Paper, which I love.  The bottom portion is made with various designs from the same DSP.  The stamp image from the Everything Eleanor Stamp Set really causes the piece to pop!  I’m thinking that I will call my lady, Eleanor!  That seems quite fitting! (lol)

The following pictures provide a better view of Eleanor’s dress top and bottom:

The flowers at the top of the dress bottom are enhanced with a Stampin’ Up! Basic Rhinestone that I colored with a permanent marker.  The flowers themselves are from a collection that is not Stampin’ Up! flowers.

After adhering all of the pieces (i.e., her body, dress, flowers) to the yellow piece of paper, which is a design from the Quatrefancy DSP, I adhered it to a piece of cardboard.  This provides the art piece with stability and allows me to set it up in a picture stand.

I hope you enjoy Eleanor and will give this art form a try!


 God’s Blessings!
Stamping With Guneaux Designs

 Everything Eleanor Stamp Set and Quatrefancy Speciality Designer Series Paper

Stampin Up All Dressed Up Bundle – Stamping With Guneaux Designs

Boy, am I having fun with the Stampin Up All Dressed Up Bundle!  I am so enjoying playing with paper dolls ….LOL….like I did as a child.  Seriously, I really enjoyed created my Stampin Up All Dressed Up card.

Let me first welcome you to the Guneaux Designs Boutique!  In my store front window are a grouping of “mix and match” outfits.  Come inside the Boutique and let me share with you information about the designs.  Or if you like, you can just window shop.  If you window shop, please don’t touch the window as you will leave fingerprints.  (Don’t you shake your head! lol.  I’m just having fun!)

I have for you several photos of the various elements of this card made with the Stampin Up All Dressed Up Framelits.  To that end, the following three pictures reflect the first mannequin’s outfit.

The outfit is made with a beautiful design from the Print Poetry Designer Series Paper Stack.  The designer of the outfit used one of the Stampin Up Dress Up Framelits to cut out the material. The blouse sports a beautiful floral broach.  Around the mannequin’s neck is a gorgeous green diamond necklace made with Stampin Up Basic Rhinestones and a permanent green marker, a state-of-the-art designer tool.  The belt that wraps around the blouse is made from Lucky Limeade Card Stock.  The skirt is made from another beautiful design of the Print Poetry Designer Series Paper Stack.

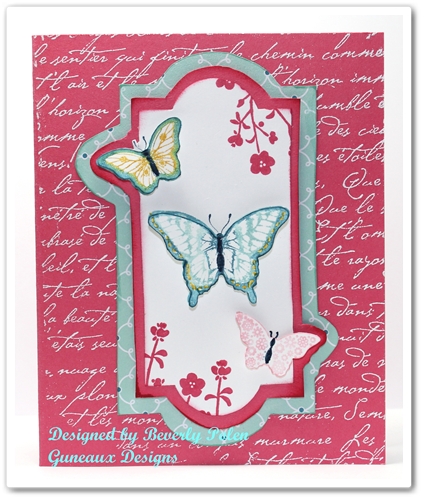
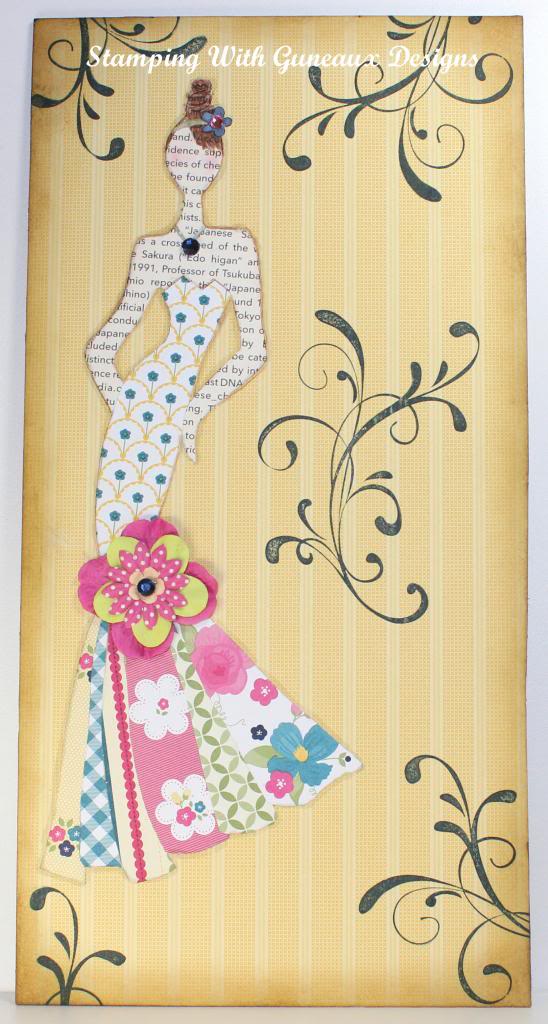
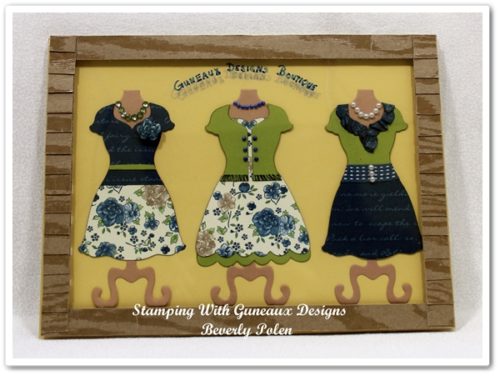
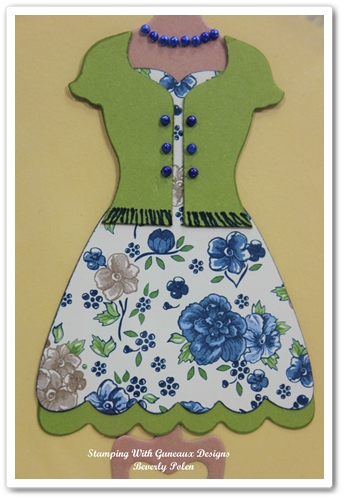
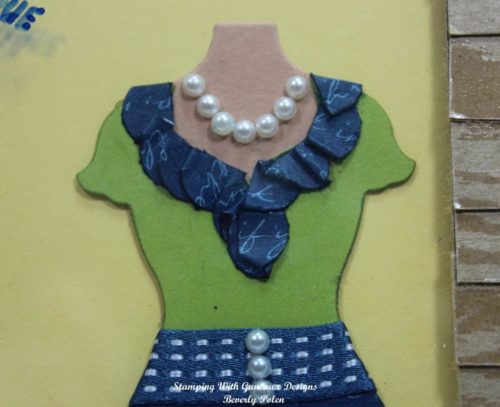
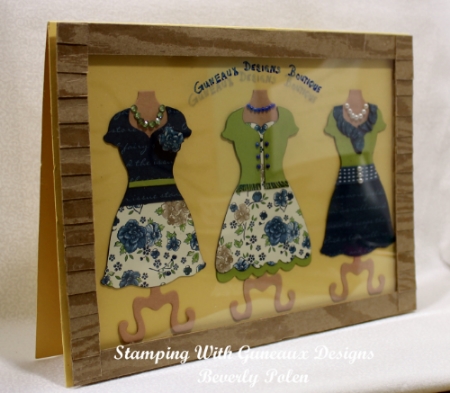
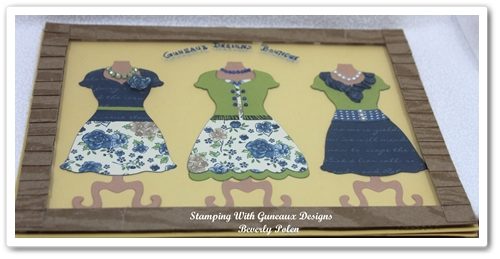
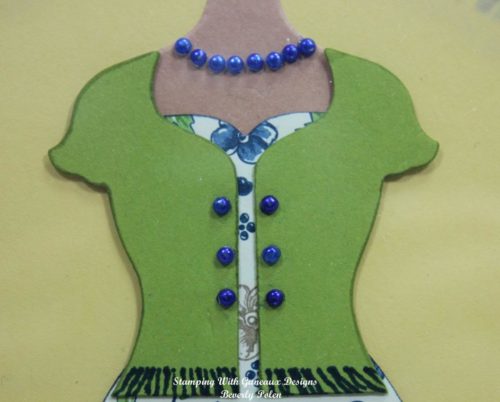
The outfit on the mannequin in the center of the Guneaux Designs Boutique window features a beautiful cardigan (photo to the left). The cardigan is wrapped around a gorgeous dress that was made with Lucky Limeade Card Stock and the same framelit used for the first outfit.  The cardigan has beautiful pearl buttons that match the pearl necklace on the mannequin.  The pearls were made with Stampin Up Basic Pearls that were colored with the state-of-the-art permanent marker.  Don’t they just made this outfit?

The picture below shows the complete outfit.  The dress was made with another Stampin Up Dressed Up Framelit and the above-mentioned Designer Series Paper.  It is enhanced with an added Lucky Limeade ruffle at the bottom made with the same Stampin Up Dressed Up Framelit.

The third mannequin in the window is wearing a more casual outfit.  It is a two-piece outfit of a blouse and skirt as is the first outfit.

The blouse includes ruffles made from the same material as the skirt, the Print Poetry Designer Series Paper Stack.  The designer used a tool to create the ruffles – the Stampin Up Scalloped Edge Border Punch.

The scallops were folded one on top of another to create the ruffles.  Aren’t they very fashionable?  The neck supports a pearl necklace made with Stampin Up Basic Pearls, which are also included on the Midnight Muse Stitched Satin Ribbon belt shown in both photos.

Let’s move on to the store front window itself.  In the following photo, you can see that the light from the sun is creating a reflection on the window.  It also shows a reflection of the Guneaux Designs Boutique lettering onto the wall behind the glass.  The glass window was made with a Stampin Up Window Sheet.

Notice the wood shingles around the window.  Aren’t they cool?  They were made with the Stampin Up Natural Composition Specialty Designer Series Paper.

Let’s give a hand to the designer of these beautiful pieces, Guneaux Designs!!!

 I hope you enjoy your Stampin Up All Dressed Up Bundle as much as I do!


 God’s Blessings!
Stamping With Guneaux Designs
by
Beverly Polen

STAMPIN UP ALL DRESSED UP BUNDLE

Stampin Up Tea for Two DSP and Secret Garden Stamp Set

I love the floral design from the new Stampin Up Tea for Two Designer Series Paper (DSP).  Further, the Secret Garden Stamp Set is one of my favorites from the Stampin Up Spring 2013 Catalog along with the matching Secret Garden Framelits!

This is the card I made using the new products.  (FYI, there is a tool tip at the end of this post.)

This picture is a closeup of the beautiful images from the Secret Garden Stamp Set.

 This picture shows the bow I made while weaving in some baker’s twine.

___________________________________________________________________

SUPPLIES:

Stamp Sets:  Stampin Up Secret Garden and Friendship Preserves (for the sentiment)

Paper:  Stampin Up Tea for Two DSP (129311), Primrose Petals Core’Dinations Card Stock (129322), Very Vanilla Card Stock (101650), Whisper White Card Stock (100730), and Lucky Limeade Card Stock (122926)

Ink:  Lucky Limeade (126984), Primrose Petals (126858), Daffodil Delight Marker (119677), Memento Tuxedo Black, and various non-Stampin Up Makers for the center flower.

Accessories:  Sanding Block (124304 – to sand the core’dinations card stock), Stripes Textured Embossing Folder (123128), Blossom Punch (125603  –  for leaves), Secret Garden Framelits (129372 or 131099 for the Secret Garden Bundle – clear mount), In Color Printed Designer Brads (122940), 5/8″ Crochet Trim (118481), Whisper White Baker’s Twine (124262 – soaked in a water and Primrose Petals Ink mixture)


TOOL TIP:  When cutting with any of the Stampin’ Up! framelits, a mat is created around the image being cut out.  The color of the mat is the same color as the card stock on which the image is stamped.  You can choose to use a framelit that is  the next size up to create a mat of a different color of card stock; however, I believe this process makes the mat too large.  To get a perfect mat of a different color of card stock that is a reasonable size, try this tip:

  • Cut out your image with a framelit,
  • Cut around the edge of the image using paper snips to leave only the outline of the stamp image,
  • Cut a mat from a different color of card stock, using the same framelit.
  • Now you have a perfect mat of a different color and a small size!

God’s Blessings!
Stamping With Guneaux Designs
by
Beverly polen

Stampin Up Tea for Two DSP and Secret Garden Stamp Set