SU Botanical Builder Dies

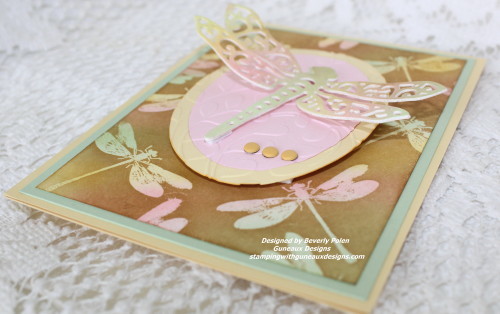
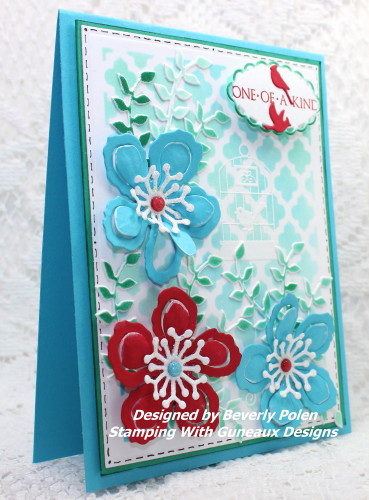
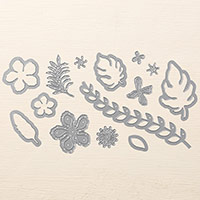
Tomorrow is Tuesday, and that means another week has gone by since the last Color Challenge on Splitcoaststampers.  My card for tomorrow’s color challenge features the SU Botanical Builder Dies.  I think the floral dies are so pretty and can be combined in so many ways to create gorgeous flowers.

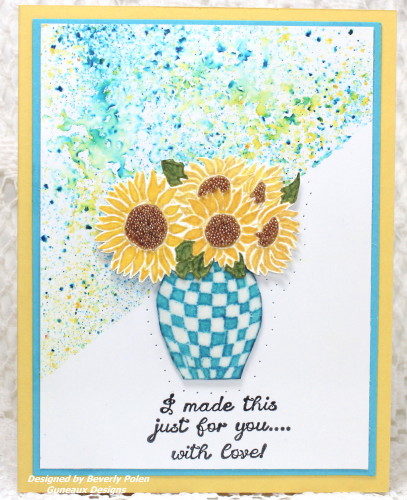
Vicki Dutcher (vdutchr) is the hostess for this week’s Color Challenge, and she asked us to use Stampin’ Up! colors of Tempting Turquoise, Real Red, and Emerald Envy. These colors are beautiful together!  Here is my card featuring the colors.

SU Botanical Builder Dies

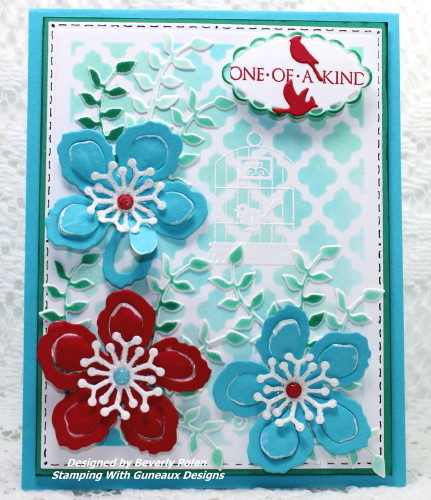
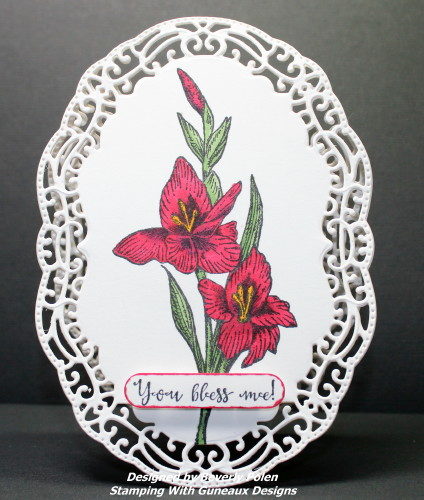
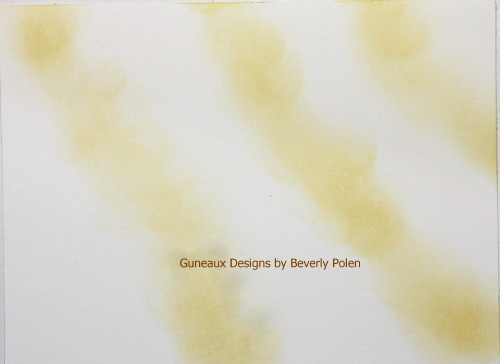
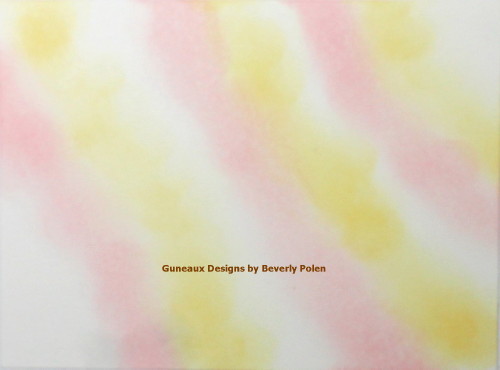
To create the card, I began by cutting a Solar White card stock panel with the ODBD Majestic Medallion Die (the largest die).  Laying the die over the die cut, I used a Black Copic Multiliner to mark the edges.  Then I used the Saharan Screen Card Panel Die to cut out a Solar White stencil.  I laid the stencil over the Majestic Medallion die cut and, using SU Tempting Turquoise and Emerald Envy classic ink, I alternated sponging the inks across the stencil onto the other die cut.

SU Botanical Builder Dies2_1

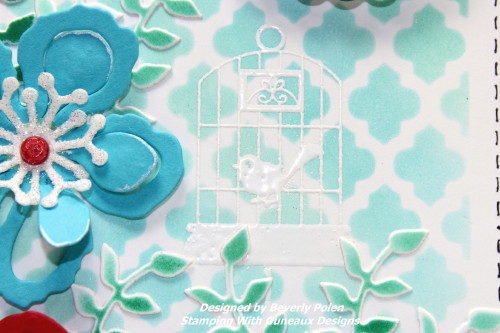
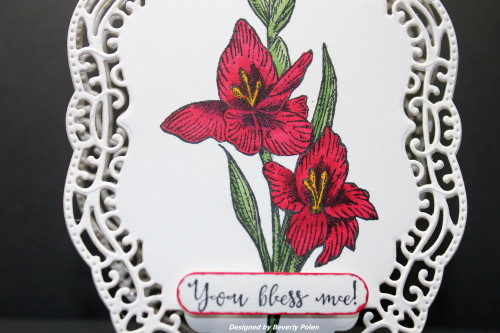
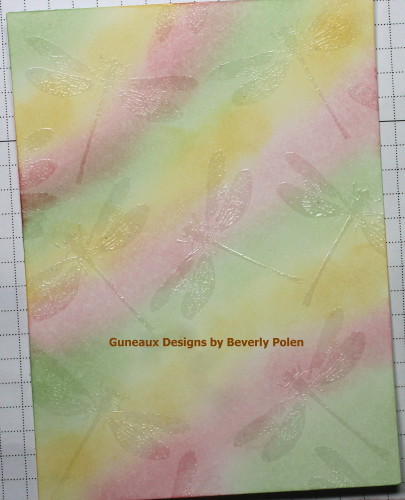
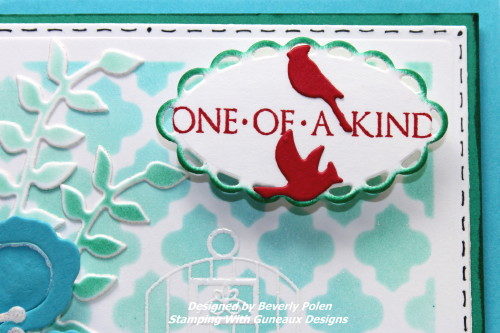
The above photo shows the sponging, as well as a white embossed bird and birdcage. Vicki’s challenge included for dessert (i.e., extra points) the addition of a bird.  I also added red cardinals onto the sentiment piece that I made with the ODBD Ornate Ovals Dies (smallest die).  I added the sentiment, One-of-a-Kind, onto this piece in red ink.  The sentiment is from the Altenew One Of A Kind Stamp Set.  The following photo is of the sentiment.

SU Botanical Builder Dies3_1

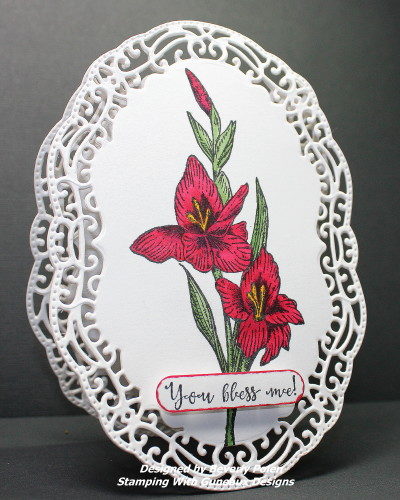
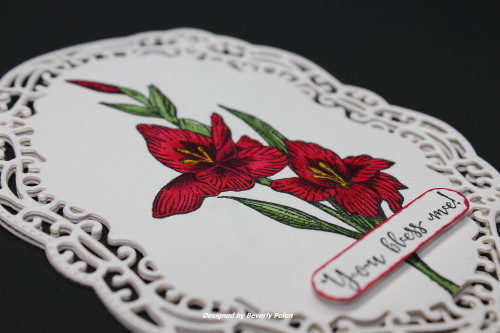
For the foliage around the flowers, I used the ODBD Lovely Leaves Dies to create the leaves and sponged on Emerald Envy ink with different intensity so they would vary in color.  You can see the variations in the photo below.

SU Botanical Builder Dies7_1

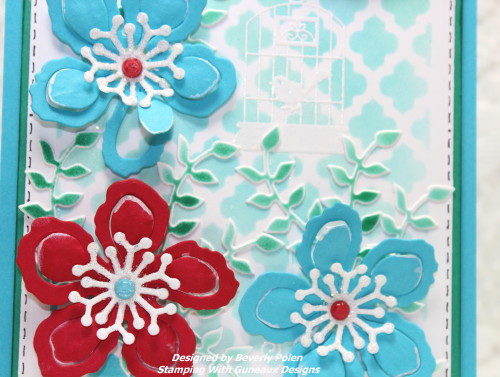
After adhering the flowers to the card, I embellished them by placing Tempting Turquoise and/or Real Red candy dots in the centers.

I hope you are inspired by my card!  Thanks for stopping in and leaving comments!

SU Botanical Builder Dies4_1


SUPPLIES

Stamps:  Altenew One Of A Kind, SU Aviary (retired)

Paper:  SU Tempting Turquoise, Real Red, and Emerald Envy Card Stock and Neenah Solar White

Ink:  SU Tempting Turquoise, Real Red, and Emerald Envy Classic Ink, and  Black Copic Multiliner Pen

Accessories:  SU Botanical Builder Framelits Dies, Saharan Screen Card Panel, ODBD Majestic Medallion, ODBD Ornate Ovals, ODBD Lovely Leaves,  IO Cardinal Dies, SU Brights Candy Dots (retired), SU Heat and Stick Powder, SU Dazzling Diamonds Glitter VersaMark, and SU White Embossing Powder

SU Botanical Builder Dies6_1   Botanical Builder Framelits Dies Frantic Stamper Precision Die - Saharan Screen Card Panel

MAJESTIC MEDALLION DIES ORNATE OVALS DIES LOVELY LEAVES DIES

Impression Obsession - Die - Mini Cardinals  Dazzling Diamonds Stampin' Glitter VersaMark Pad White Stampin' Emboss Powder


SU Fifth Avenue Floral

God’s Blessings!

Stamping With Guneaux Designs By Beverly Polen


“The wrath of God is being revealed from heaven against all the godlessness and wickedness of men who suppress the truth by their wickedness, since what may be known about God is plain to them, because God has made it plain to them.”  Romans 1:18 & 19

ODBD Gladiolus – You Bless Me – ODBDSLC276

Gladiolus flowers are so beautiful, and they come in a large array of colors.  The Gladiolus flower was my Mom’s favorite flower.  When I saw the Gladiolus stamp from the ODBD Gladiolous – You Bless Me stamp set, I immediately thought of her.  So this card is in memory of her.

ODBD Gladious - You Bless Me

This card will be submitted to Our Daily Bread Designs for it’s July challenge, ODBDSLC276, Anything that Grows with ODBD.  The challenge requires the use of at least one stamp from either ODBD, North Coast Creations, or Artistic Outpost.  This card is created with two ODBD products; the frame die cut and the red Gladiolus stamp.

ODBD Gladious - You Bless MeI submitted this card to the Splitcoaststampers Ways to Use It Challenge.  The challenge was to create a card and “decorate all the way to the border. Add lace to the edge, color to the edge, stamp off the edge, die cut your card with a fancy die cut whatever you do go all the way to the border.”  Therefore, I used the largest die from the ODBD Vintage Border Dies to create my card in the form of the die.

ODBD Gladious3_1
I also submitted the card for two other Splitcoaststampers Challenges: 1) F4A334, “add some sort of frame (it can be diecut, punched, stamped, embossed, etc.) to your lovely creation” . Because my card is made in the form a frame die, I decided to submit the same card for this challenge.  2) IC554, Petals, which was to draw inspiration from a website full of gorgeous floral arrangements.

If interested, you may read all the wonderful Splitcoaststampers comments on this card HERE.  You will note that the card was selected as a Favorite For The Week Ending 7/17/16, as well as a CAS (Clean and Simple) favorite.

ODBD Gladious4_1

Thanks for stopping by and I hope you have a blessed day!


SUPPLIES: 

STAMPS:  ODBD You Bless Me (you can get the Gladiolus stamp by itself or in a stamp set with sentiments; click on the photos below)

PAPER:  Neenah Solar White

INK: Memento Tuxedo Black, Copic Sketch Markers

ACCESSORIES: ODBD Vintage Borders Dies (click on photo below), SU Word Window Punch

GLADIOLUS  YOU BLESS ME VINTAGE BORDERS DIES


SU Fifth Avenue Floral

God’s Blessings!

Stamping With Guneaux Designs By Beverly Polen


[Jesus said,] “But I tell you who hear me:  Love your enemies, do good to those who hate you, bless those who curse you, pray for those who mistreat you.  If someone strikes you on one cheek, turn to him the other cheek, turn to him the other also.  If someone takes your cloak, do not stop him from taking your tunic.”  Luke 6:27 – 29 (NIV)


ODBD Quilted With Love

Thanks for stopping by to check out my latest piece of artwork, which features Our Daily Bread Designs (ODBD) Quilted With Love Stamp Set.  The sentiment on the card is from the Quilted With Love Stamp Set.

ODBD Quilted With Love

I made this card for two challenges on Splitcoaststampers –  TLC581, Fancy Piercing, and CAS372, Love the Chips.  Judy (StampingQueenJAR) hosted the TLC581 challenge which is to create fancy paper piercing.  Holly (hbrown) hosted the CAS372 challenge that involves using chipboard.  Both were great challenges!!

(UPDATE:   This card was selected as a Favorite for the week ending April 17 on Splitcoaststampers!)

For TLC581, I hand pierced around the flowers and vase. For CAS372, I made the vase from white chipboard that I cut three of and glued together as the chipboard was not a thick as I wanted.

I decided I would try for a second time to use Brushos.  For some odd reason, it was easier this time.  I used them to create the background behind the flowers.  I angled the application so the paper piercing would show on the bottom portion of the card.

Come back soon!

BlogDivider_zpsed339ea1

Stamps: ODBD Quilted With Love and Sunflowers in Checked Vase (unknown company)  Paper: White Chipboard, Glossy White, Tempting Turquoise, Daffodil Delight Card Size: A2  Ink: Brushos, SU Tempting Turquoise  Accessories: Brushos, Copics, VersaMark, Clear Embossing Power, Paper Piercing Tool, Microbeads  Techniques: Coloring With Brushos and Copics

ODBD QUILTED WITH LOVEBlogDivider_zpsed339ea1Butterfly_1_1

God’s Blessings!

Stamping With Guneaux Designs by Beverly Polen

“Give, and it will be given to you. A good measure, pressed down, shaken together and running over, will be poured into your lap. For with the measure you use, it will be measured to you.”  Luke 6:38

Color on Color Emboss Resist Technique

Sponging and blending inks onto card stock is one of my favorite forms of art.  I have made many cards in this manner; however, I have only used the Color on Color Emboss Resist Technique for very few cards.  This technique requires sponging and blending inks as well.

Color-On-Color-Emboss-Resist-Technique-2

I have been thinking for a while that I wanted to create a card featuring the Color on Color Emboss Resist Technique.  Splitcoaststamper.com gave me the nudge to do so as it posted today a Technique Challenge for using the emboss resist technique.  I have included a tutorial in this post if you should want to try it too.  Here are additional pictures of my card.

Color-on-Color-Emboss-Resist-Technique_8_1Color-on-Color-Emboss-Resist-Technique-2Color-on-Color-Emboss-Resist-TechniqueColor-on-Color-Emboss-Resist-Technique

I did not add a sentiment on the card, but I will when an occasion arises that will dictate the type of sentiment needed. It will most likely be a “Thinking Of You” or “For You” sentiment.

BlogDivider_zpsed339ea1

SUPPLIES USED FOR THIS COLOR ON COLOR RESIST TECHNIQUE CARD:  

Stamps:  Stampin’ Up! Awesomely Artistic Stamp Set

Paper:  Stampin’ Up! Whisper White, Pink Pirouette, Barely Banana (retired), and Pistachio Pudding (retired) Card Stock

Ink: Stampin’ Up! Pistachio Pudding (retired), Barely Banana (retired), Pink Pirouette, and Baked Brown Sugar Classic Inks, and a VersaMark Watermark Stamp Pad

Accessories:  Stampin’ Up! Embossing Buddy, Clear Embossing PowderSponge Daubers, a heat gun, Stampin’ Up! Subtles Candy Dots, and Spellbinders Dragonfly Die – S2-157

Card Size: A2 – 5-1/2″ x 4-1/4″

I hope you enjoyed the card and plan to use the technique.  Now on to the tutorial.


BlogDivider_zpsed339ea1

COLOR ON COLOR RESIST TECHNIQUE TUTORIAL

A.  SUPPLIES NEEDED FOR USING THE COLOR ON COLOR EMBOSS RESIST TECHNIQUE:

Stamp:  Select a solid stamp that you want featured as the primary element.

Paper:  A white piece of card stock for sponging on ink and other card stock of your choice for your card.

Ink: You will need three light colors and one darker color and a watermark stamp pad

Accessories:  Talcum powder for rubbing across card stock before applying embossing powder; clear embossing powder, sponge daubers or sponges, and heat gun

B.  INSTRUCTIONS FOR THE COLOR ON COLOR EMBOSS RESIST TECHNIQUE:

1. Cut card stock accordingly:

  • 8-1/2″ x 5-1/2″ for card base
  • 5-1/4″ x 4″ for 1st layer
  • 5″ x 3-3/4″ for white card stock

2. Select a stamp that you want to be the main feature of the card.

3. Select three colors of ink that are light shades.

4. Using a sponge dauber, swirl your first light color onto the white card stock.

Color-on-Color-Emboss-Resist-Technique
5. Swirl your second light color onto the Whisper White Card Stock, and don’t worry about overlapping the colors.

Color-on-Color-Emboss-Resist-Technique

6. Swirl your third light color onto the Whisper White Card Stock, and then look for places where you want to blend the colors and do that with the daubers. Don’t worry about the look too much as it will completely change when you add the darker color.

Color-on-Color-Emboss-Resist-Technique

7. AFTER the ink dries (make sure the ink is dry), rub the talcum powder over the complete piece of card stock.

8. Cover your selected stamp with a watermark ink and stamp the image randomly on the card stock.

9. Cover with the clear embossing powder and heat set. Let it cool.Color-on-Color-Emboss-Resist-Technique

10. Swirl you dark color of ink all over the piece of card stock. You may need to do this a couple times or more.Color-on-Color-Emboss-Resist-Technique

11. Using a paper towel, rub the excess dark ink from the embossed images. Isn’t it cool how the clear embossing takes on the colors?

12. After reaching the desired colors on the colored piece of card stock, use a stamp image (can be the same that was used for the embossing) to create a center piece for the card.

13. Adhere the pieces together and add your desired embellishments.

14. If desired, add a sentiment to the card.

Enjoy!!

BlogDivider_zpsed339ea1Swallowtail Butterfly
God’s Blessings!

Stamping With Guneaux Designs

by

Beverly Polen

Stampin’ Up! Dress Up

It has been so time since I used my Stampin’ Up! Dress Up Framelits (retired), and I try to not miss an opportunity to use them.  This week on Splitcoaststampers.com, the featured stamper is Kathy at MochaFrap.  As I’ve shared before, other members of the site choose a card to CASE from the featured stamper’s gallery.   Kathy’s gallery is full of whimsical artwork.  I chose this card to case as it features a similar die (Sizzix) .

Stampin' Up! Dress Up

To select a designer series paper to create my card, I researched current fashion trends and found this outfit that I like.
Stampin' Up! Dress UpIt was good to see floral outfits are in style!  The floral outfit was the reason I selected the Stampin’ Up! Birthday Bouquet Designer Series Paper for my design. This DSP has beautiful floral designs.  Here’s a picture of the paper.

Stampin Up Dress Up

Here are closeups of the cardigan and sentiment on my card.

Stampin' Up Dress Up

Stampin' Up Dress Up

I used Stampin’ Up! Basic Pearls for the necklace and cardigan buttons, and Copic markers to achieve the color I wanted.  I created the sentiment in MSWord and stamped the spool image over the sentiment.  The spool stamp is from the retired Stampin’ Up! Sew Suite Stamp Set.

The background designer series paper is from the retired Stampin’ Up! Sweet Stitches Designer Series Paper.  I have an extra, never been open, package of this DSP if there is interest, I’ll sell it to you.

BlogDivider_zpsed339ea1

SUPPLIES USED:

Stamps: SU Sew Suite (retired)
Paper:  SU Sweet Stitches DSP (retired), SU Birthday Bouquet DSP, SU Pool Party Card Paper Size: A2
Ink: None
Accessories: SU Dress Up Framelits (retired) and SU Basic Pearls

BlogDivider_zpsed339ea1

Swallowtail Butterfly

God’s Blessings!

Stamping With Guneaux Designs By Beverly Polen

Stampin' Up! All Dressed Up

Label Love Stamp Set

Hi, my friends.  I am really enjoying my time with my special friend, Melody, who is visiting from N. Virginia.  We are having fun and eating a lot (lol)!  I decided I needed to take time to share a card I made that spotlights the Stampin’ Up! Label Love Stamp Set.

Label Love Stamp Set

I love the new Coastal Cabana Card Stock from Stampin’ Up!.  It goes well with so many colors, such as Crushed Curry, which is the second color for this card.

Label of Love Stamp Set

What do you think of the new Stampin’ Up! Deco Labels Framelits?  I love them.  I used the largest framelit (4-1/8″ x 3-5/8″) to create the primary element for the card.  This label is made with Coastal Cabana Card Stock, Coastal Cabana Designer Series Paper, and Crushed Curry Designer Series Paper.

Also on the Deco Label are two cutouts made with one of the Stampin’ Up! Finishing Touches Edgelits.  Additional embellishments are the basic pearls that rest upon the framelit and the two butterflies.  The Polka Dot Crushed Curry Ribbon is an old Stampin’ Up! ribbon that matches perfectly with the polka dot elements on the card.  Resting on the ribbon is the “Just for You” sentiment from the Stampin’ Up! Label Love Stamp Set.  After cutting out the label with the Artisan Label Punch, I cut off the top and bottom.

 Label Love Stamp Set

TOGETHER WITH THE STAMPIN’ UP! LABEL LOVE STAMP SET, OTHER SUPPLIES USED ARE: 

Stamps:  Stampin’ Up! Label Love Stamp Set (130622)

Paper:  Coastal Cabana Card Stock (131297), Crush Curry Card Stock (131199), Coastal Cabana Designer Series Paper (2013-2015 In-Color Designer Seris Paper Stack – 130136), and Crushed Curry Designer Series Paper (Regals Designer Series Paper – 130139)

Ink:  Costal Cabana Classic Ink (131175)

Accessories:  Stampin’ Up! Deco Labels Framelits (130102), Finishing Touches Edgelits (127010), Elegant Butterfly Punch (127526), Bitty Butterfly Punch (129406), Artisan Label Punch (130920) Basic Pearls (119247), and a matching Crushed Curry Polka Dot Ribbon (retired)

Label Love Stamp Set

 I hope you enjoy the card, and have a wonderful weekend.  I know I sure will!


 God’s Blessings!
Stamping With Guneaux Desings
By
Beverly Polen 

Label Love Stamp Set

STAMPIN’ UP! LABEL LOVE STAMP SET