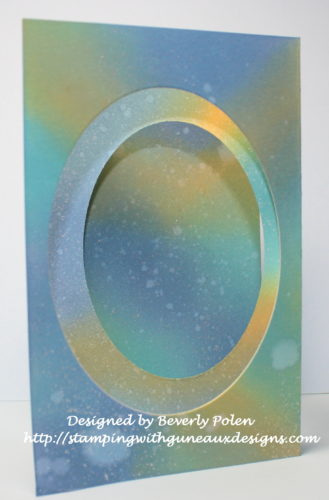
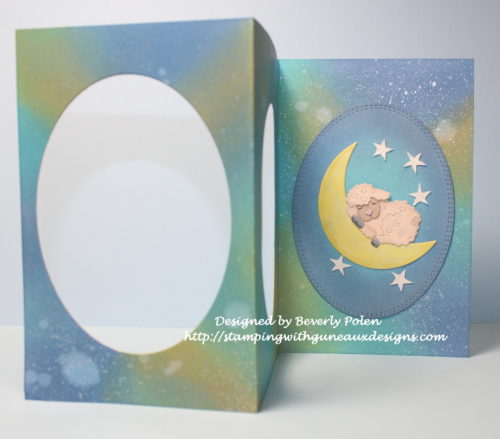
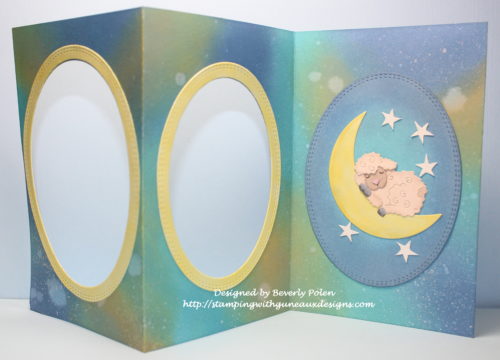
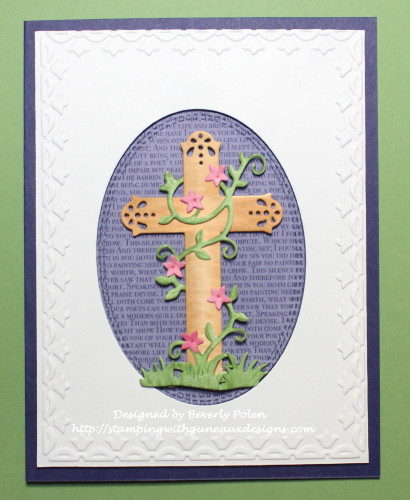
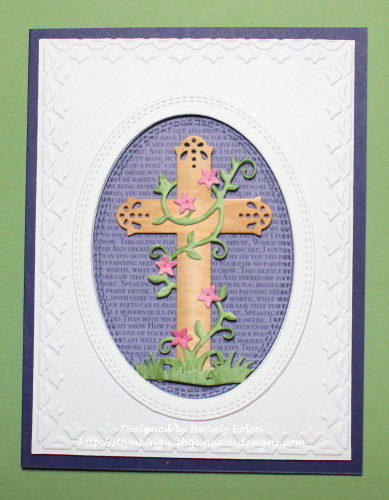
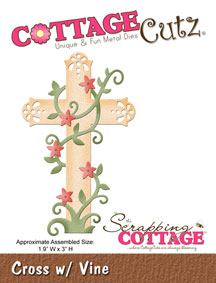
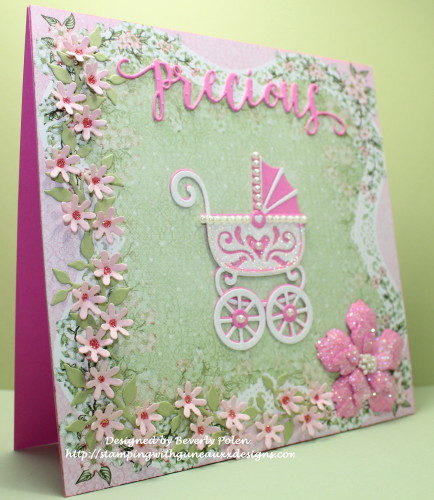
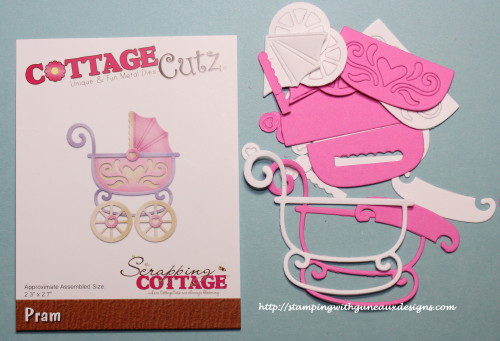
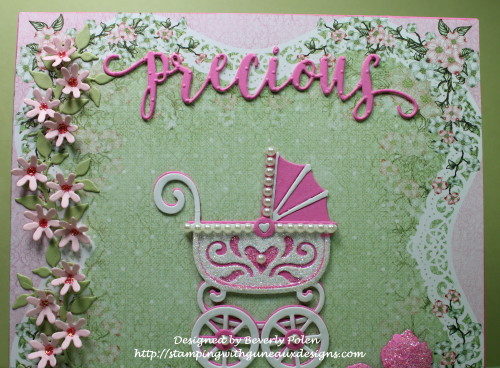
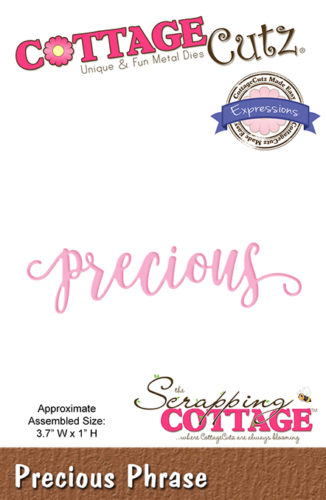
Hello, friends and thank you for stopping by. Today I am a guest designer for the Scrapping Cottage Blog. I am featuring one of the beautiful, recently released Expressions Plus Design Dies, “Precious” and the CottageCutz Pram Die from the April CottageCutz Baby Designs Release. I think that the CottageCutz Pram & Precious Dies are a perfect match!
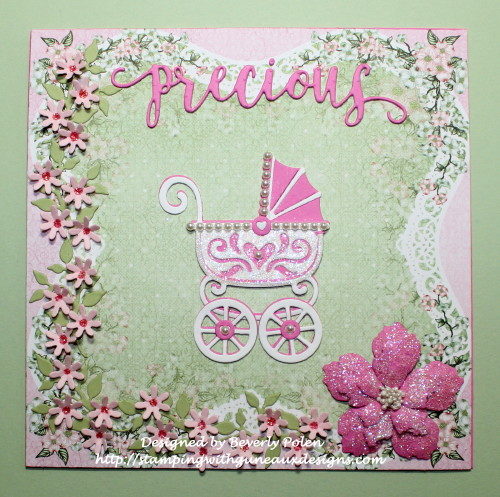
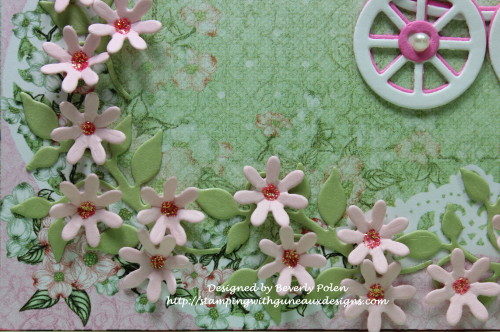
I love the new CottageCutz script dies as they are made with such a beautiful font. They are also a wonderful size. The “precious” die used on this card is approximate 4″W x 1″H. And the darling vintage baby carriage, also showcased on this card, is an awesome die. One can make so many variations of the carriage by using different colors of card stock and other crafting products. I wanted to dress this one up, so I added pearls and sparkling glitter. May this card inspire you to try the CottageCutz Pram die to create such a beauty!
SUPPLIES USED AND STEPS FOR CREATING THE CARD
Supplies:
- 1 – 6″ x 12″ piece of pink card stock
- 1 – 6″ x 6″ piece of pink and green designer paper
- White, pink, and green card stock scraps
- Pink “Precious” sentiment cut from the CottageCutz Expressions Plus Design Precious Die
- Baby Carriage cut from the CottageCutz Pram Die
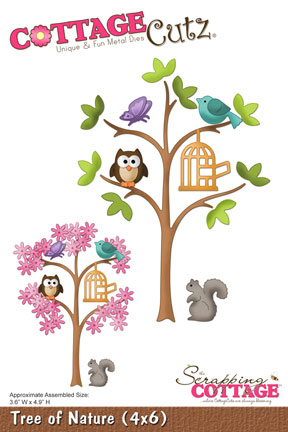
- Pink Flowers cut from the CottageCutz Tree of Nature Die
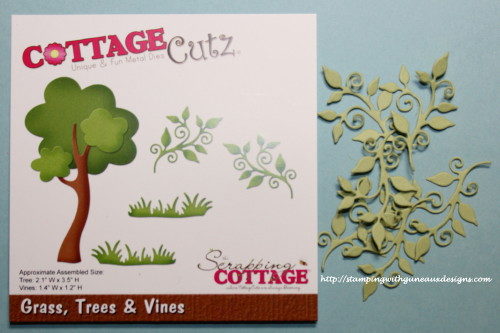
- Green Stems with Leaves cut from the CottageCutz Grass, Trees & Vines Die
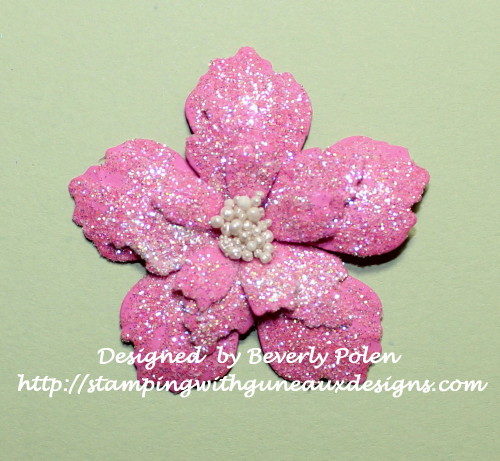
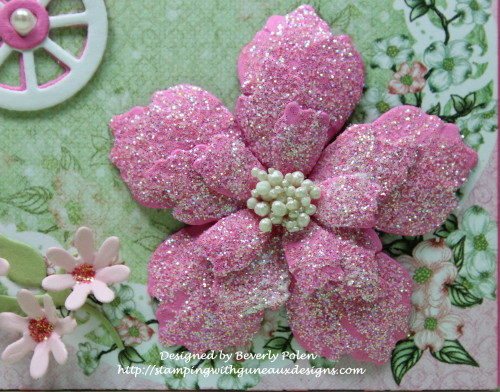
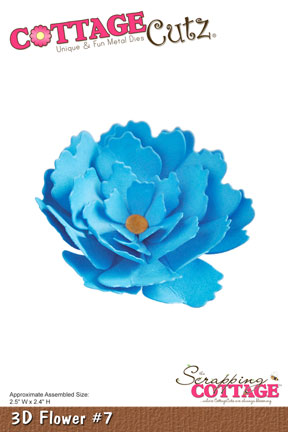
- Pink Flowers cut from the CottageCutz 3D Flower #7 Die
- Crafting pearls
- White sparkly glitter
- Pink Stickles
- Stylus
- Prills
- Adhesive
Steps:
- Cut a 6″ x 12″ piece of pink card stock and fold it in the middle for the card base
- Cut a 6″ x 6″ piece of designer paper with shades of pink and green
- Adhere the 6″ x 6″ designer paper to the front of the card base
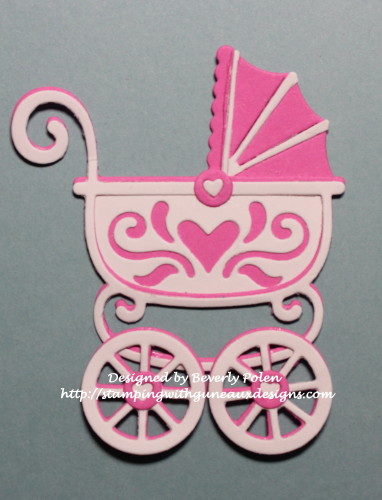
- Using the CottageCutz Pram Die, cut the baby carriage from a piece of white card stock, and repeat with pink card stock
- Adhere the pieces together (I attached one carriage to another to offset mine)
- Cover the center piece of the carriage with white sparkly glitter
- Add crafting pearls to the carriage
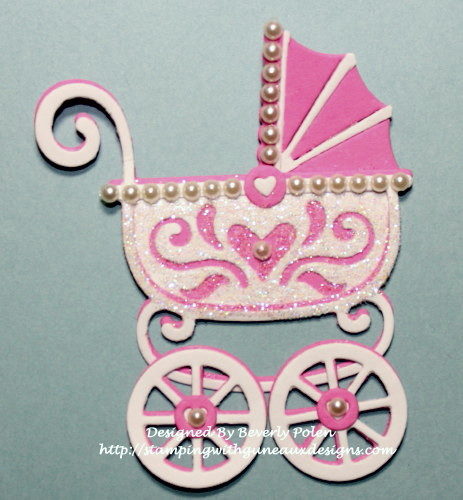
- Attach this to the center of the card front (as seen in the first photo)
- Cut out several pink flowers using the CottageCutz Tree of Nature Die

- Cut out several green stems and leaves using the CottageCutz Grass, Trees & Vines die
- Attach the flowers to the stems
- Add pink stickles to the center of the flowers
- Add the stems and flowers to the bottom and left side of the card
- Cut out the “precious” sentiment from pink card stock using the CottageCutz Precious Die and add it to the top center of the card

- Cut out a flower using the CottageCutz 3-D Flower #7 die
- Shape with a stylus the three smallest flowers, cover them with a white glitter, adhere them together, and add Prills to the center
- Attach the flower to the bottom, right of the card front


 God’s Blessings!
Stamping With Guneaux Designs By Beverly Polen
Firm Reliance on Divine Providence!