CottageCutz Woodlands & Woodland Animals

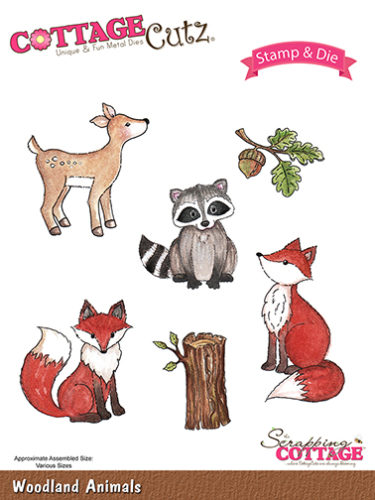
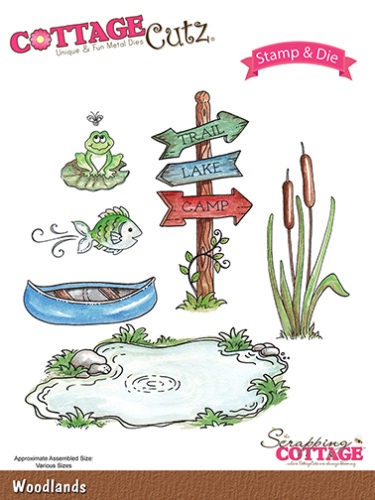
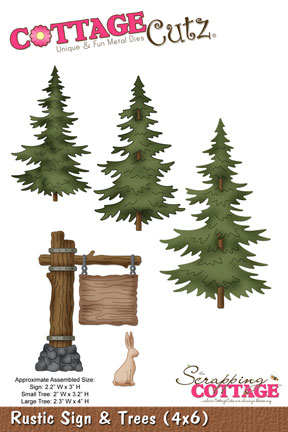
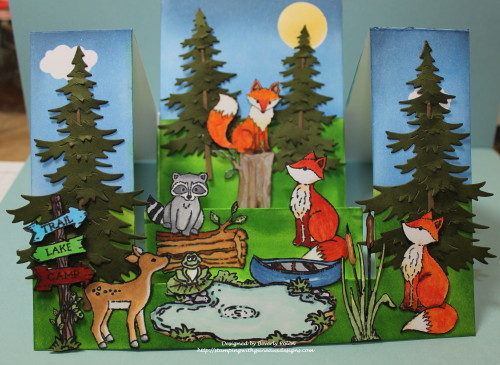
Hello, everyone!  So glad you stopped by Guneaux Designs.  Today I am a guest designer for the Scrapping Cottage blog.  The project I have created for you features the wonderful stamps and dies from the CottageCutz Woodlands & Woodland Animals, and the dies from the Rustic Sign & Trees.  I had so much fun creating this card, and I hope you enjoy it!
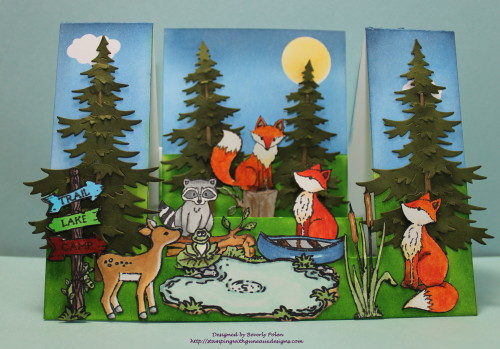
This photo shows the card more  open than the one above.
This photo shows the card at an angle
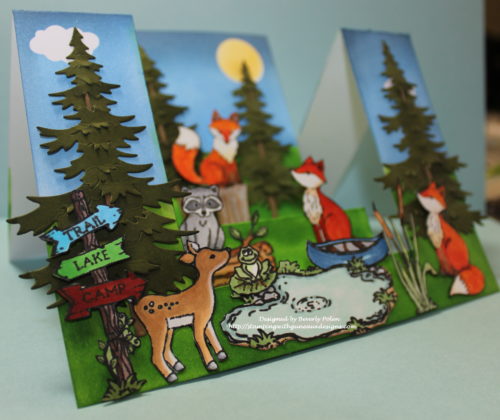
I love the gorgeous fox images and dies from the CottageCutz Woodland Animal Set; therefore, I had to add three foxes to my card.  The little raccoon is so adorable that I planned to add two but there was not room on the card.  If you have not purchased the set yet, I promise you will have so much fun creating with it and the CttageCutz Woodlands Set.

To create the card, I stamped, colored (with copics), and cut out the images I would use for the project.
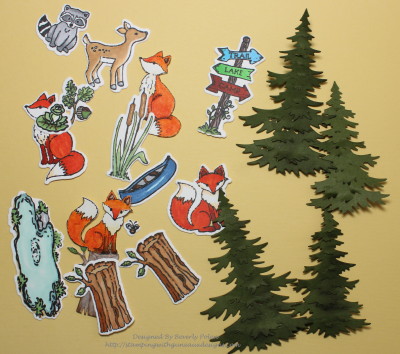
After die cutting the elements, I decided I wanted to fussy cut around them, which I did. Then I created a Step Ladder Center Cut Card with white card stock and sponged on it a sky, sun, and grass.  It was then time to load up the card with the critters.  What fun!!

If you would enjoy making a similar card, select the elements you want to showcase and color and die cut them.  Then create the Step Ladder Center Cut Card by following these instructions.

  • Cut a 7″ x 10″ piece of card stock.
  • With the 7″ side at the top of a cutting tool (henceforth, trimmer), move the card stock to the left to the 1-5/8″ mark,
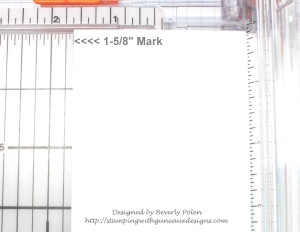
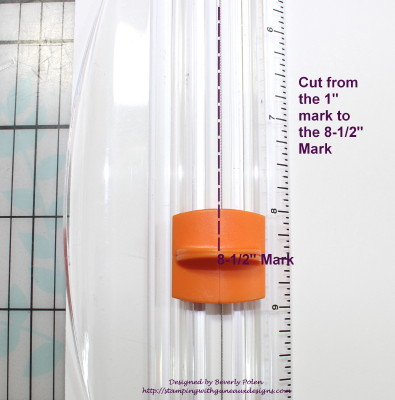
  • Move the cutting blade of your trimmer down to the 1″ mark and lower the cutting arm.
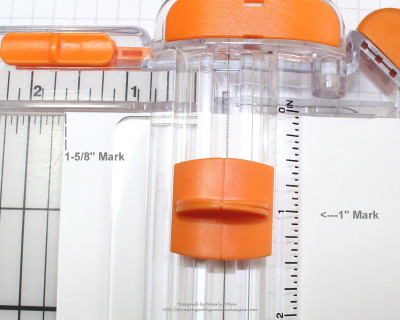
  • Cut the paper from the 1″ mark to the 8-1/2″ mark.
  • Turn the card stock over, (not around or the cut lines will not match), move it to the 1-5/8″ mark on the trimmer, move the cutting blade down to the 1″ mark, and lower the cutting arm.
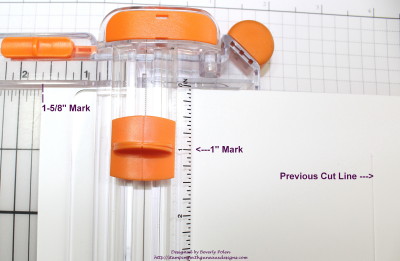
  • Cut the card stock from the 1″ mark to the 8-1/2″ mark.

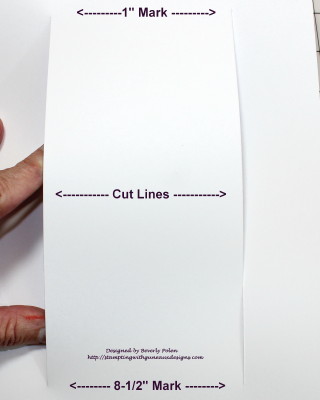
  • Remove card stock from the trimmer, and it will look like the following.  (NOTE: There is 1″ from the top of the 7″ side of the card stock to the first cut line, and 1-1/2″ from the cut line to the bottom.)
  • Place the card stock onto a scoring tool with the 10″ side at the top,  Ensure the 7″ side that is to the left on the scoring tool is the one that has cut lines 1″ from the side. Score at the 1″, 2″, and 3″ marks from the first cut line to the second cut line.  Score at the 5″ mark from the top to the bottom of the card stock.  Score at the 7-1/2″ from the first cut line to the second.
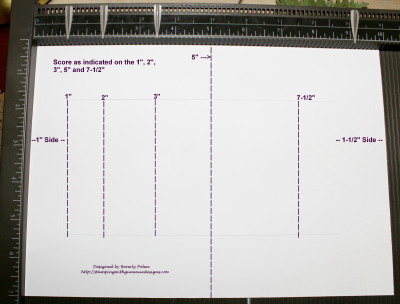
  • Now fold the card stock according to the following: a) 1″ score line is a mountain fold, b) 2″ score line is a valley fold, c) 3″ score line is a mountain fold, d) 5″ score line is a mountain fold on the two sides and a valley fold in the center, and e) 7-1/2″ score line is a mountain fold.
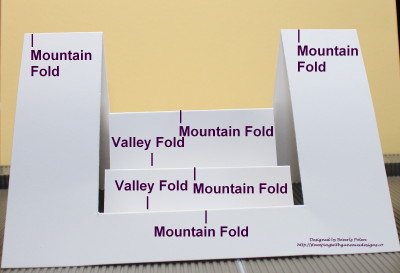
  • Decorate the card to your liking.  If desired and to support the elements placed on the back step (mountain fold) cut a 3-11/16″ x 4-7/8″ piece of card stock and attach it to the back step on which you can add your primary feature.  I added this piece to my card.  When the card is closed, this piece matches the two side folds at the top.

I hope you try this card fold and use the CottageCutz dies found at the Scrapping Cottage to showcase.  Have a great day!


COTTAGECUTZ STAMPS AND DIES USED ON THIS PROJECT:


Butterfly_1_1God’s Blessings!
Stamping With Guneaux Designs By Beverly Polen
Firm Reliance on Divine Providence!


JOHN 11:25-26

Jesus said to her, “I am the resurrection and the life.  He who believes in me will live, even though he dies; and whoever lives and believes in me will never die.  Do you be believe this?”

Buy CottageCutz Products On Sale

Hello, and welcome to Guneaux Designs.  Did you know that you can buy CottageCutz products on sale today?  The Scrapping Cottage, which specializes in making CottageCutz dies and stamps, is having an anniversary sale!  You only have until 9:00 PM PDT today to get wonderful deals on CottageCutz dies and stamps.  The following are examples of some of the products on sale.

The above is just three groupings of 18 that are on sale.  You don’t want to miss out on this outstanding sale, so check it out today!  Click on the photos above.


Stamping With Guneaux Designs

God’s Blessings!
Stamping With Guneaux Designs By Beverly Polen
Firm Reliance on Divine Providence!


1 JOHN 2:15-17

“Do not love the world or anything in the world.  If anyone loves the world, the love of the Father is not in him.  For everything in the world — the cravings of sinful man, the lust of his eyes and the boasting of what he has and does — comes not from the Father but from the world.  The world and its desires pass away, but the man who does the will of God lives forever.”

CottageCutz Daffodil Flower – March

CottageCutz Daffodil Flower – March

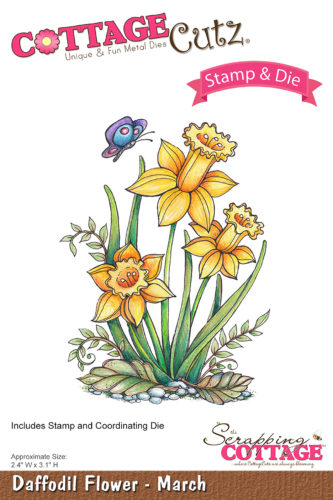
Hello, my friends!  WeIcome to Guneaux Designs.  As a  guest designer for the Scrapping Cottage, I  have for you a project featuring the CottageCutz Daffodil Flower – March stamp and coordinating die set.

Speaking of March, did you know that the  month of March is synonymous with the onset of spring in the Northern Hemisphere. Accordingly, the flower associated with the month of March is the Daffodil.  The Scrapping Cottage has a stamp and coordinating die for the flower of each month. Check out these beautiful stamps and dies HERE.

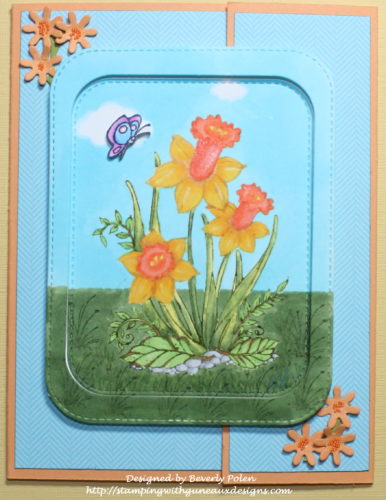
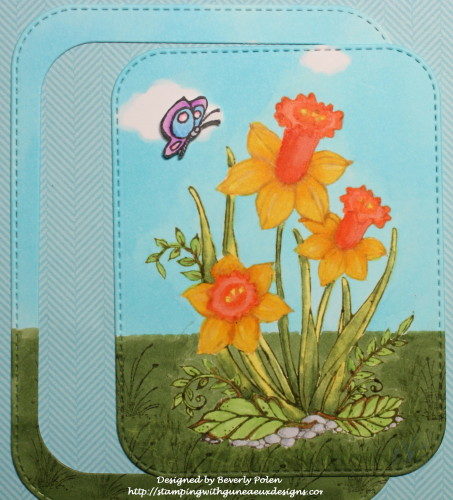
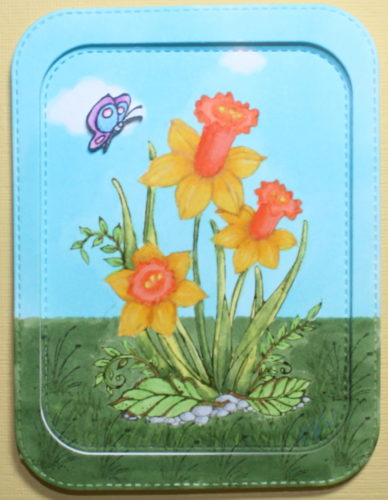
Moving on, here is the card I made with the beautiful CottageCutz Daffodil Flower – March stamp.

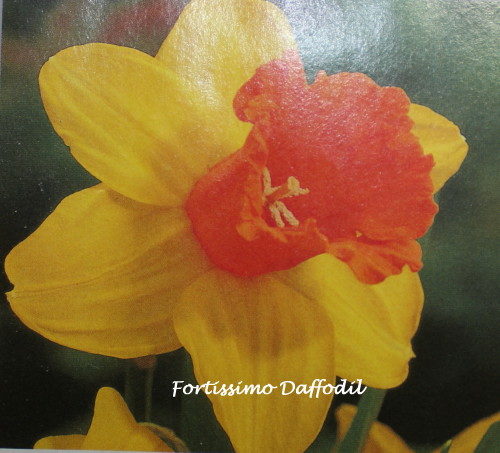
My Daffodil is designed after the Fortissimo Daffodil that has yellow petals and a cup of glowing orange to red.  Here is a picture of the flower.

I made the card as a “Big Flap” card, and you can make this card too by following these instructions:

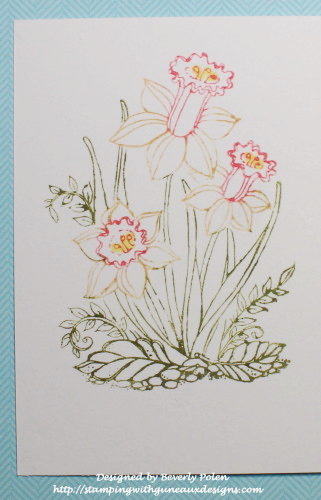
Step 1.  Stamp the CottageCutz Daffodil Flower onto a piece of white card stock.  I wanted a “no-line coloring” image; therefore, I used different colors of markers to add ink to sections of the image and stamped them separately.  I used yellow for the petals of the daffodil, peach for the cup, green for the leaves and stems, and gray for the rocks.

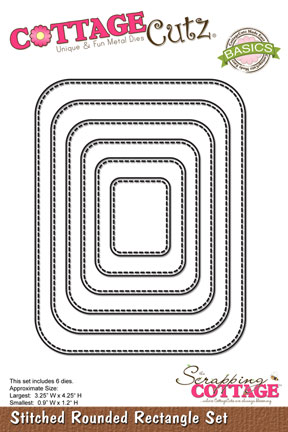
Step 2.  Color the image as desired.  I used various Copic Sketch Markers to color my image.  After coloring it, I used the two largest dies from the CottageCutz Stitched Rounded Rectangle Set to cut out the image.  Also, I stamped, colored, fussy cut, and attached the butterfly that is part of the CuttageCutz Daffodil Flower – March set using foam tape.

Step 3.  Set aside the image and start creating the card base.

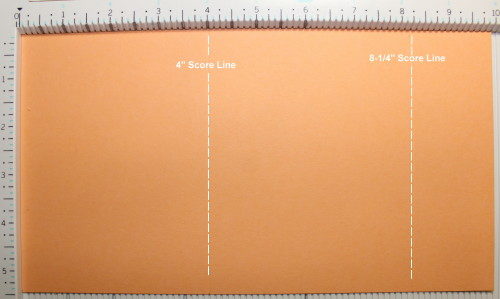
Step 4.  Cut a 5-1/2″ x 10″ piece of card stock (your choice of color).

Step 5.  Place the card stock horizontally onto a score board and score at the 4″ and 8-1/4″  marks.

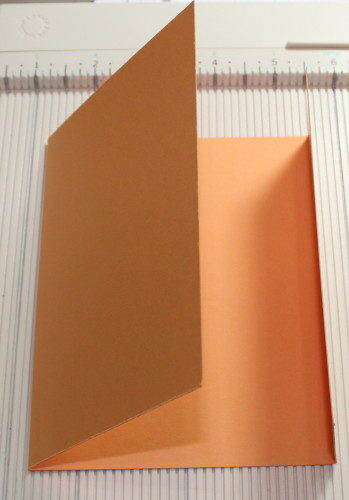
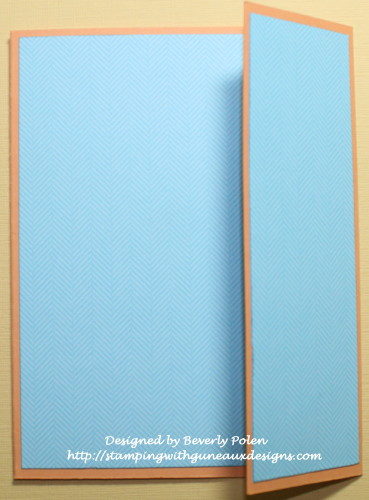
Step 6.  Fold the score lines toward each other.

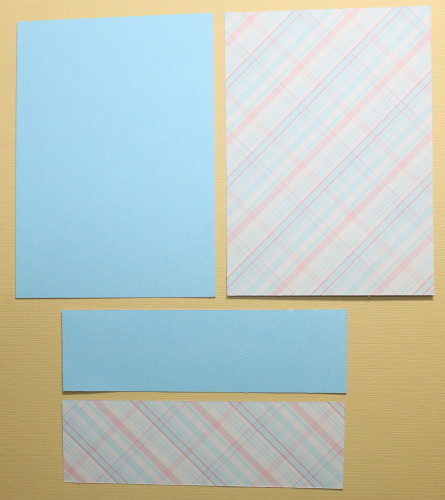
Step 7.  Select a double-sided designer paper and cut two 3-3/4″ x 5-1/4″ pieces, and two 1-1/2″ x 5-1/4″ pieces.

 Step 8.  Attach one of the 3-3/4″ x 5-1/4″  pieces of designer paper to the larger flap on the front of the card base.

Step 9.  Attach one of the 1-1/2″ x 5-1/4″ pieces of designer paper to the small flap on the front of the card base.  (I selected the same side of the designer paper for the front.)

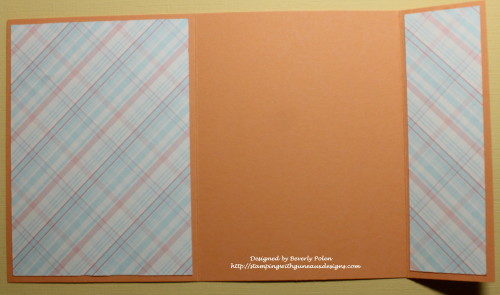
Step 10.  Attach the second 3-3/4″ x 5-1/4″ piece of designer paper onto the inside large flap.  I used the other side of the designer paper.

Step 11.  Attach the second 1-1/2″ x 5-1/4″ piece of designer paper onto the inside small flap..

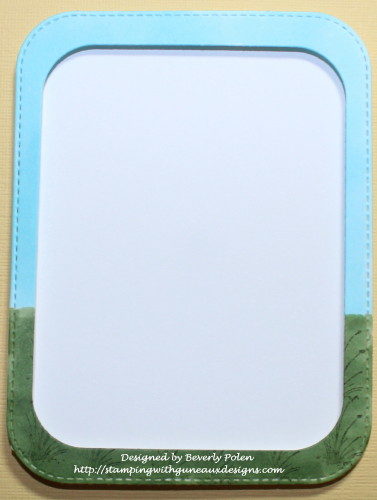
Step 12.  Cut a piece of white card stock with the largest die from the CottageCutz Stitched Rounded Rectangle Set 

Step 13.  Attach the outside frame cut from the image (see Step 2.) to the piece of white card stock using a double layer of double-sided foam tape.

Step 14.  Attach the image inside of the above frame. 

Step 15.  Apply a strong adhesive to the back left side of the above image piece.  

Step 16.  Close both flaps of the card base with the right one over the left one.  Attach the framed image to the front large flap of the card base, ensuring it is centered over the front and not attached to the right small flap of the card.  The strong adhesive is necessary to ensure the image piece will not come off as the card is opened and closed.

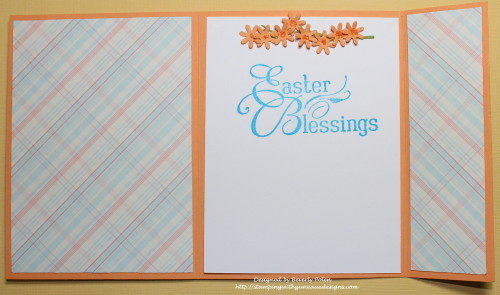
Step 17.  Cut a 4″ x 5-1/4″ piece of card stock, add a sentiment and/or an embellishment, and attach to the center of the inside of the card.

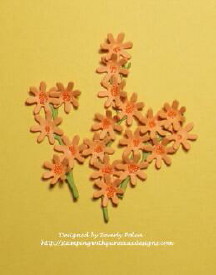
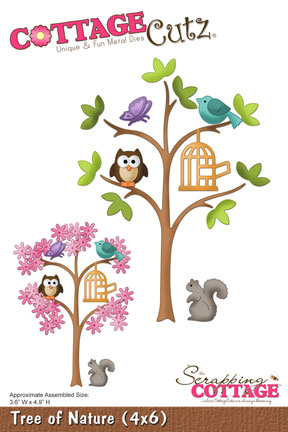
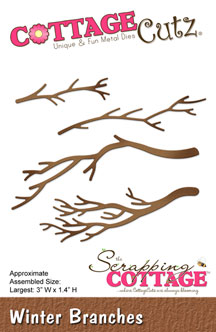
Step 18.  Embellish the card as desired.  I cut several small flowers using the   CottageCutz Tree of Nature Die.  I cupped them with a stylus and adhered micro beads to the centers.  I used the CottageCutz Winter Branches Die to cut green stems (not branches LOL) for the tiny flowers and added them to the two corners of my card front and the center piece inside the card. 

I hope you are inspired by my CottageCutz Daffodil Flower – March card.


CottageCutz Dies Used:


Butterfly_1_1God’s Blessings!
Stamping With Guneaux Designs By Beverly Polen
Firm Reliance on Divine Providence!


II Timothy 3:16 & 17

“All scripture is given by inspiration of God, and is profitable for doctrine, for reproof, for correction, for instructions in righteousness:  That the man of God may be perfect, thoroughly furnished unto all good works.”

CottageCutz Wildflowers 3

COTTAGECUTZ WILDFLOWERS 3

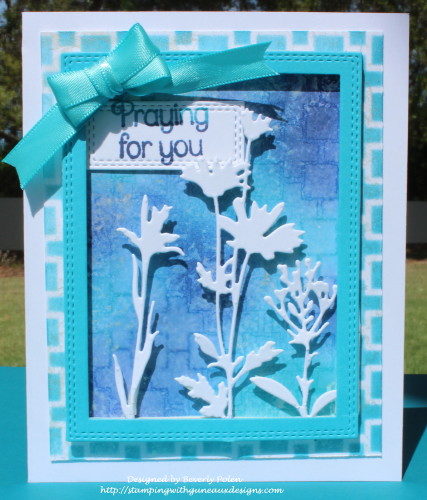
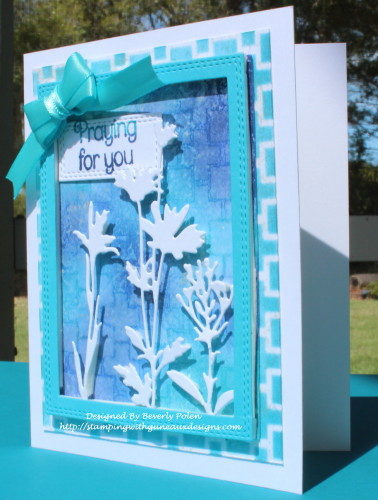
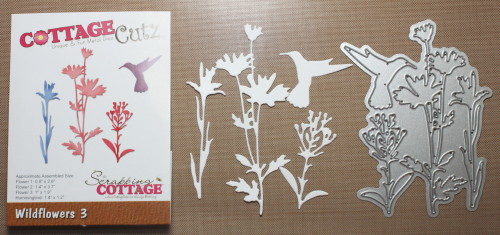
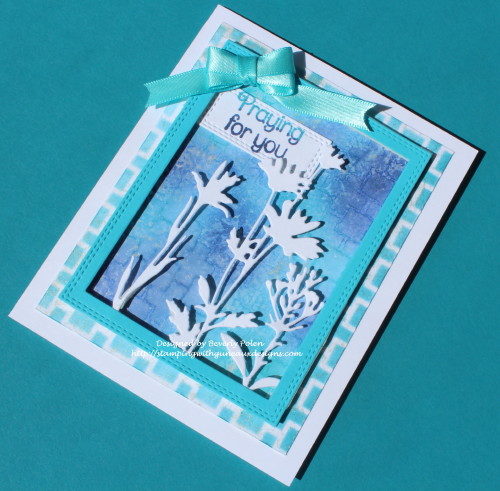
Hello, friends, and welcome to Guneaux Designs!  I am so excited to be a guest designer today for Scrapping Cottage, which specializes in CottageCutz die-cutting designs. In that role, I have for you a beautiful card made with the CottageCutz Wildflowers 3 Die. The card also features a Marbled and Ghost Stamping Technique.

Directions for creating the card:

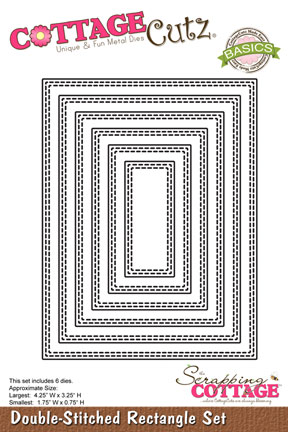
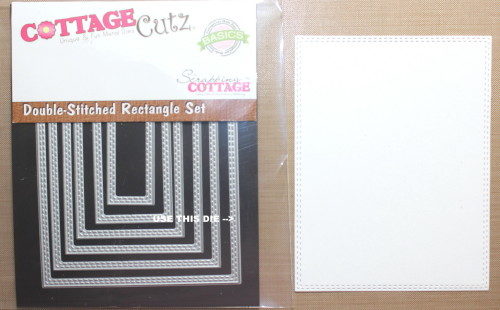
Step 1.  Cut out the flowers from white card stock using the CottageCutz Wildflowers 3 Die.Step 2.  Cut the largest rectangle from a piece of white card stock using the CottageCutz Double-Stitched Rectangle Set die.
Step 3.  Scrunch up a piece of saran wrap.
Step 4.  Put a drop or two of a white (e.g., Frost White) All-Purpose Ink onto a non-stick craft sheet.

Step 5.  Dab the saran wrap repeatedly into the ink to ensure all of the saran wrap folds are covered with ink.

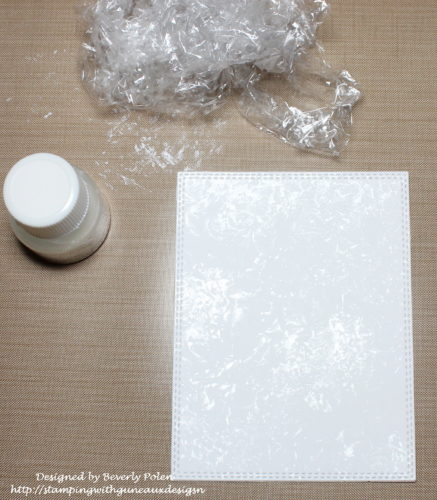
Step 6.  Transfer the ink by dabbing the inked saran wrap onto the CottageCutz double-stitched rectangle, leaving some white space.

Step 7.  After that dries, sponge on two or three different colors of distress ink (aqua and purple used for this card).
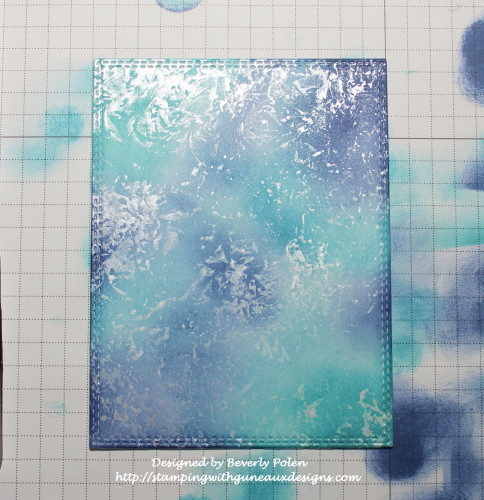
Step 8.  Choose a stencil of your liking (I used a Catherine Pooler stencil), and place it over the colored panel.
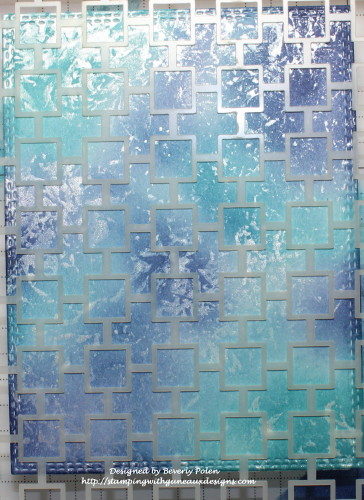
Step 9.  With a water spritzer, spritz three to four times a small amount of water onto the panel and over the stencil.

Step 10.  Remove the stencil right away and lay a dry piece of paper towel across the panel to remove excess water (no rubbing).
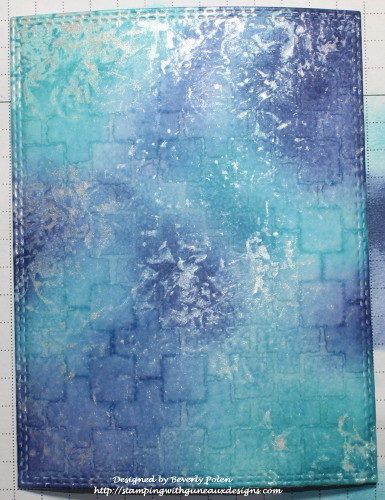
Step 11.  Watch a “ghost” of the stencil appear while allowing the panel to dry completely.

Step 12.  While that is drying, cut a 3-3/4″ x 4-3/4″ piece of white card stock.
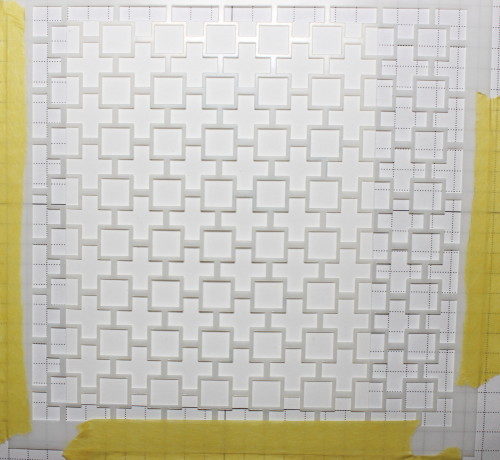
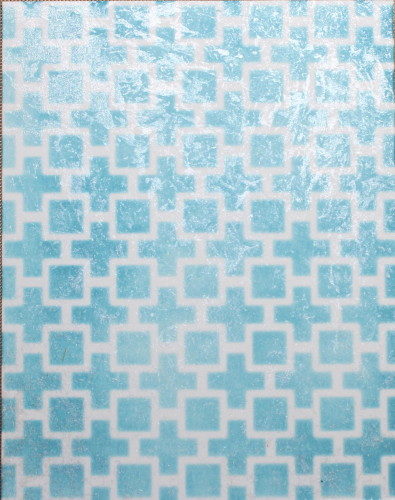
Step 13.  Using a temporary adhesive, attach the back side of the piece of white card stock to a craft sheet or grid paper.

Step 14.  Lay the stencil (the one used in Steps 8 and 9) over this piece of white card stock and use temporary tape to attach it to your coloring surface.

Step 15.  Sponge the lightest ink used in Step 7 over the stencil and onto the paper.

Step 16. Remove the stencil and let the ink dry.

Step 17.  Using the saran wrap and ink process, dab the white All-Purpose Ink onto the sponged card stock.  Let it dry and this is the result.

Step 18.  Select a piece of card stock that closely matches the lightest ink color used and cut out a rectangle frame using the two largest dies from the CottageCutz Double-Stitched Rectangle Set.  This creates the following frame.
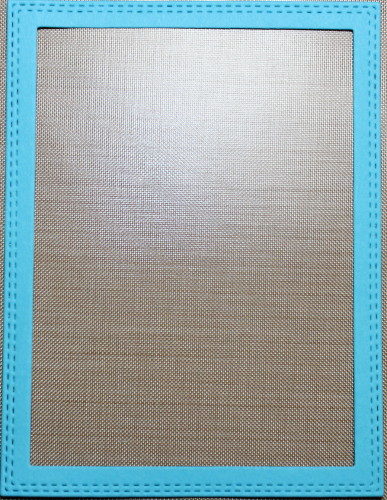
Step 19.  Turn over the frame and with an adhesive, attach the white wildflowers to the bottom of the frame.
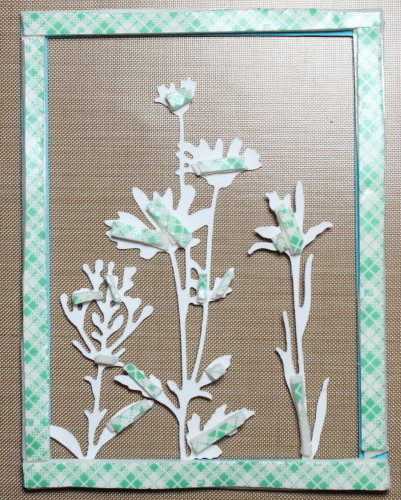
Step 20.  Add a double layer of double-sided foam tape around the frame and where needed on the flowers.

Step 21.  Remove the paper from the tape and attach the frame to the rectangle completed in Step 11.
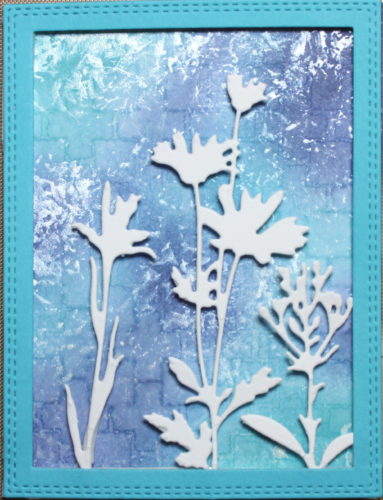
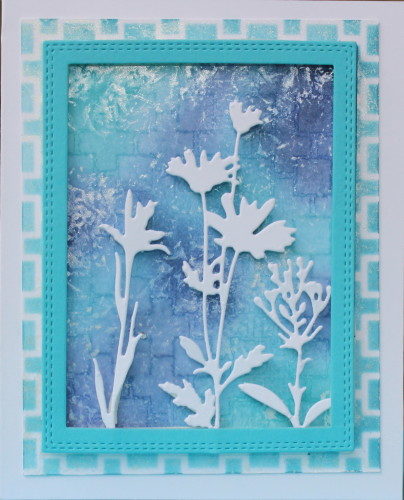
Step 22.  Attach the above frame to the panel created in Steps 12 – 17, and adhere to the card base.

Step 23.  Add a sentiment and embellishments as desired.

Cottage Cutz Dies Used:

CottageCutz Wildflowers 3

Before you leave, check out the new CottageCutz Dies on the Scrapping Cottage.  I am sure you will find one or more dies that you must have in your crafting toolbox.  Also I love hearing from you, so leave a comment on this or other projects!


Butterfly_1_1God’s Blessings!
Stamping With Guneaux Designs By Beverly Polen
Firm Reliance on Divine Providence!


 JOHN 7:37-39

“On the last and greatest day of the Feast, Jesus stood and said in a loud voice, “If anyone is thirsty, let him come to me and drink.  Whoever believes in me, as the Scripture has said, streams of living water will flow from within him.”  By this he meant the Spirit, whom those who believed in him were later to receive.  Up to that time the Spirit had not been given, since Jesus had not yet be glorified.”

Fifth Avenue Floral Birthday Card

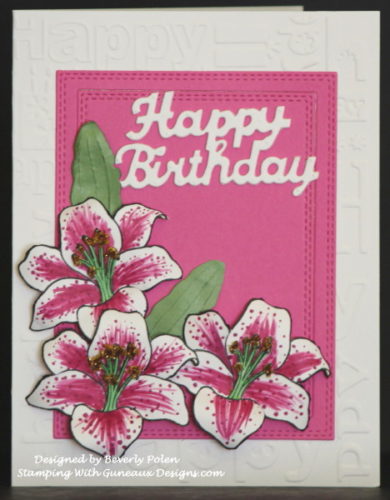
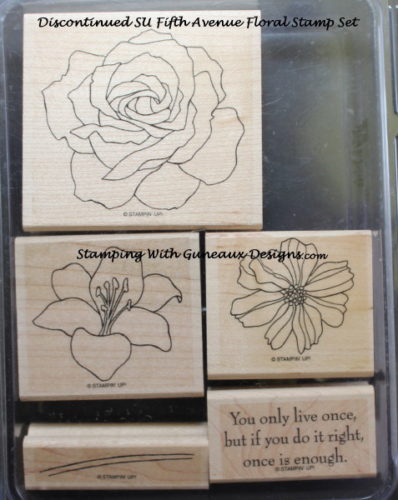
Hello my friends, and welcome to Guneaux Designs!  I am happy you stopped by to enjoy my Fifth Avenue Floral Birthday Card!  The long-retired Stampin’ Up! (SU) stamp set, Fifth Avenue Floral, is featured on this birthday card.  

To make the card, I:

  • used the Lily stamp from the Fifth Avenue Floral set,
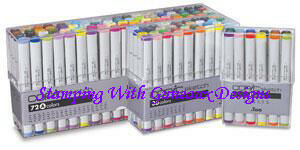
  • stamped several Lily images onto white card stock and colored them with copic sketch markers,
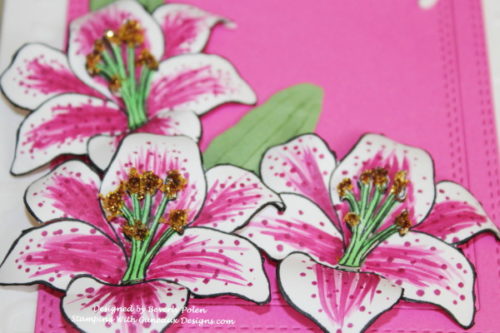
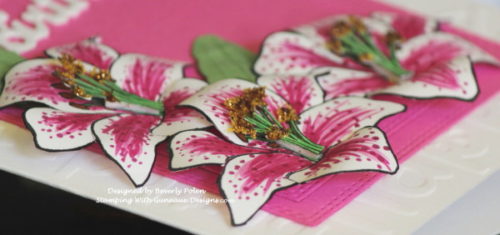
  • selected the best ones, fussy cut them, and cut between each petal on each Lily to curve (or roll) them,
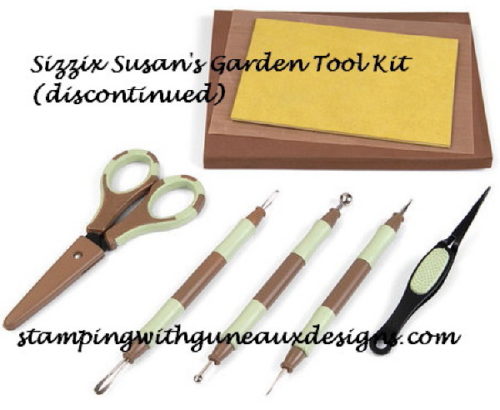
  • used Sizzix’s Susan Garden Tool Kit (discontinued) to curve the petals and add veins in the Lily leaves,
  • colored and fussy cut stamens from other stamped Lily images, added flower soft to the ends with glossy accents, and attached them to the Lilies with foam tape for dimension,

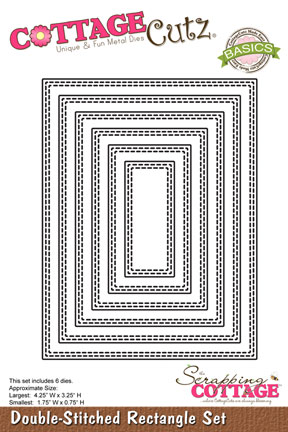
  • used CottageCutz Double-Stitched Rectangle Dies Set to cut two pink frames/panels,
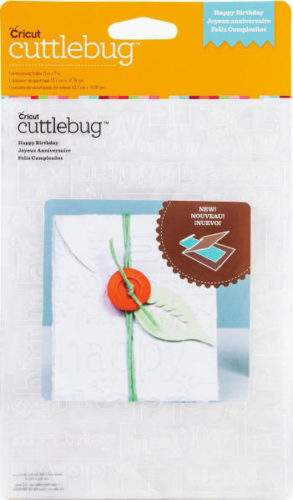
  • used a Cuttlebug Happy Birthday embossing folder to emboss the front side of my white card base, and
  • assembled the card.

My card is a birthday card for my youngest daughter whose birthday is today.  She will love the card as a Lily is her favorite flower.

Thanks for stopping by, and may you have a blessed weekend.


SUPPLIES:

https://www.ellenhutson.com/a-cardstock-neenah-classic-crest-solar-white-25-pk/            


Butterfly_1_1God’s Blessings!
Stamping With Guneaux Designs By Beverly Polen
Firm Reliance on Divine Providence!


2 CORINTHIANS 9:6-9

“Remember this:  Whoever sows sparingly will also reap sparingly, and whoever sows generously will also reap generously.  Each man should give what he has decided in his heart to give, not reluctantly or under compulsion, for God loves a cheerful giver.  And God is able to make all grace abound to you, so that in all things at all times, having all that you need, you will abound in every good work.  As it is written:  “He has scattered abroad his gifts to the poor; his righteousness endures forever.” 

CottageCutz Party Puppy

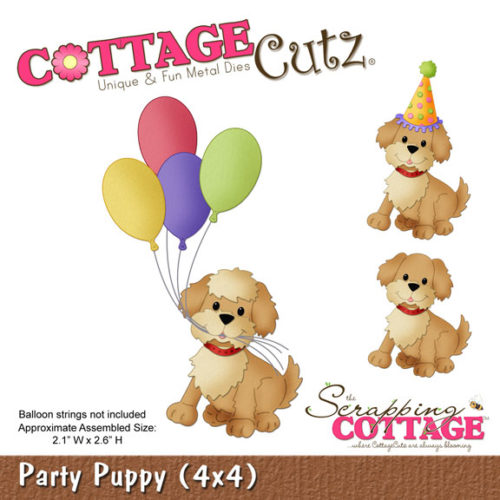
Welcome to Guneaux Designs!!  Today I have a quick post regarding a cute card I made several weeks ago and sent to the Tri-County Humane Society in Minnesota.  The card features the CottageCutz Party Puppy die, and it is a “Thank You” card for those who care for homeless animals and provide other great services for the area.

CottageCutz Puppy Party

I also submitted the card for a Splitcoaststampers challenge to make this type of card with a holiday theme.  I actually do not own a pet, but I sure get a lot of love from my daughters’ pets. They are very special to our family.

This photo is a closeup of the cute little puppy!  I added a bell on a piece of bakers twine around his neck.

CottageCutz Party Puppy

CottageCutz Party PuppyEnjoy, and I hope you are having a wonderful week!

PRODUCTS USED:

Stamps:  CP Butterfly Notes (sentiment)
Paper:  SU Baked Brown Sugar, Crumb Cake, Whisper White, and Pink Pirouette Card Stock; Reflections Card Stock
Ink:  SU Read Red
Accessories:  CottageCutz Party Puppy Die, Martha Stewart Punch, Spellbinders Conversation Bubble Three Dies, SU Jingle Bell, SU Cherry Cobbler Baker’s Twine, Black Gems, Foam Tape

Cottage Cutz Party Puppy


Butterfly_1_1

God’s Blessings!

Stamping With Guneaux Designs By Beverly Polen

Firm Reliance on Divine Providence!

The birth of Jesus (cont’d):  “When he [King Herod] had called together all the people’s chief priests and teachers of the law, he asked them where the Christ was to be born.  “In Bethlehem in Judea,” they replied, “for this is what the prophet has written:  ” ‘But you, Bethlehem, in the land of Judah, are by no means least among the rulers of Judah; for our of you will come a ruler who will be the shepherd of my people Israel.’ ”  Matthew 2:3-6