Spellbinders Victorian Arch

SPELLBINDERS VICTORIAN ARCH

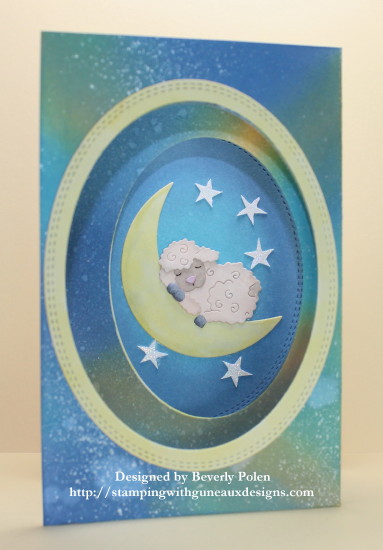
Hello, and welcome to Guneaux Designs.  Today’s card share features the Spellbinders Victorian Arch Dies.  I have had these dies for over a year but have not used them.  I decided to use them yesterday to respond to a Splitcoaststamper.com challenge related to hand fans.  When I read the challenge, I immediately thought of the Spellbinders Victorian Arch dies as they remind me of a hand fan.

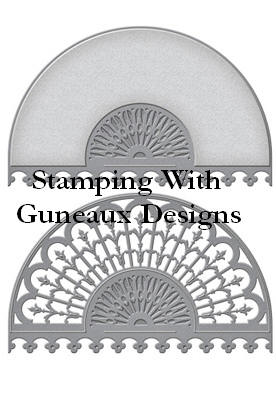
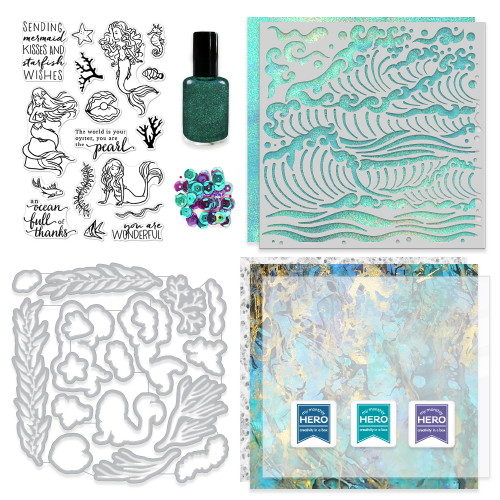
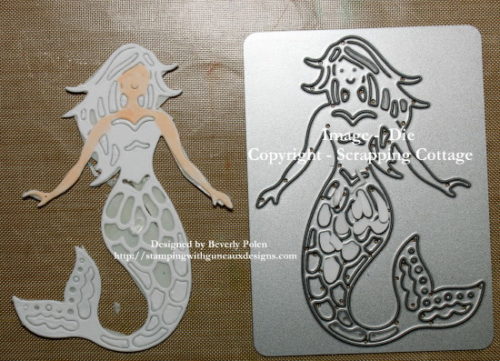
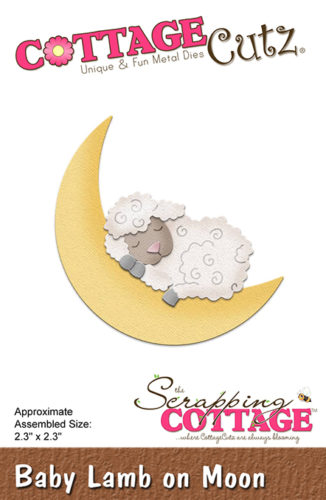
This is a photo of the Spellbinders Victorian Arch dies:

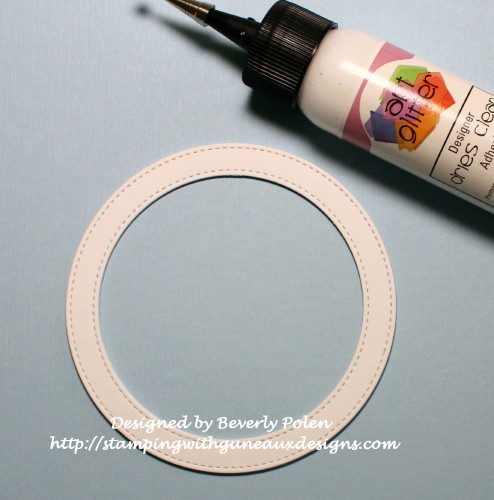
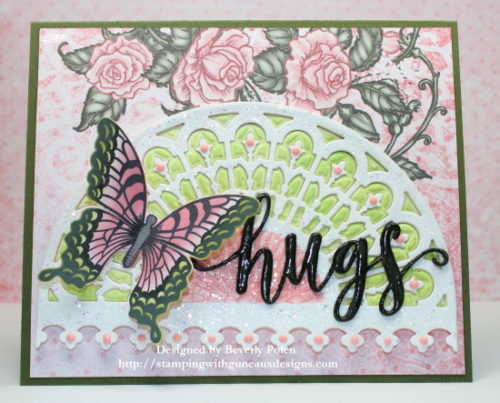
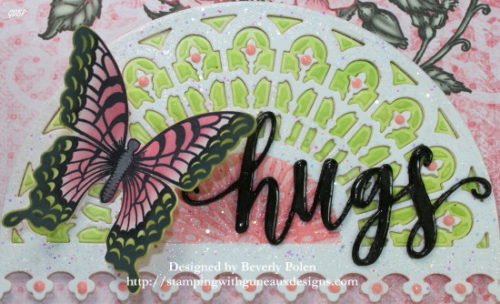
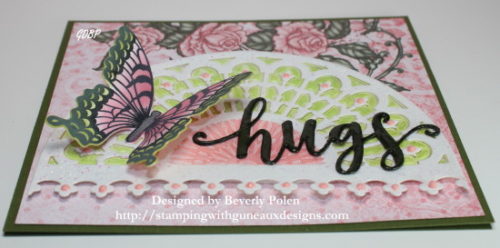
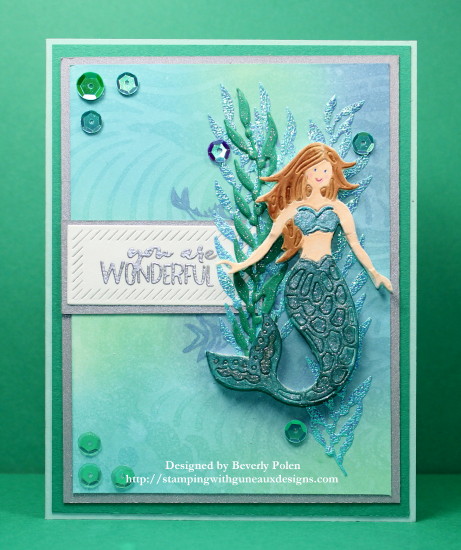
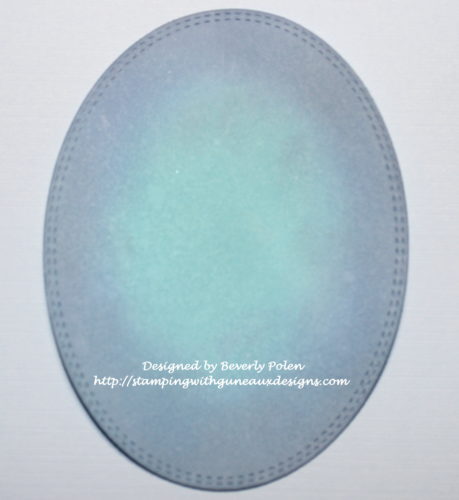
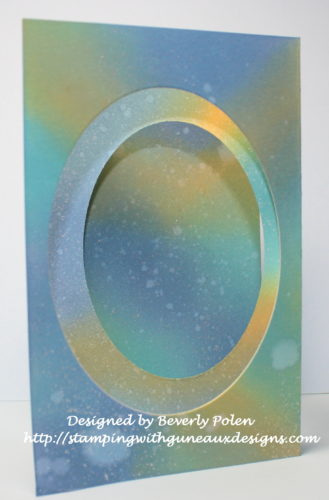
I used the dies and white card stock to cut out the arch.  I decorated the white arch with Nuvo Crystal Drops Bubblegum Blush drops and Heartfelt Creations Crystal Clear sparkly granules.  Subsequently, I cut a second Spellbinders Victorian Arch with white card stock on a foam sheet.  I did not want the small cutouts to come out of the die cut, and the adhesive foam sheet kept them in.  I colored the arch with a light green ink and adhered the first arch over top of the second one.

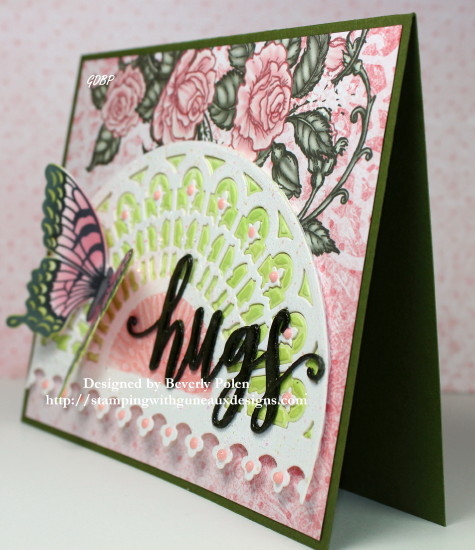
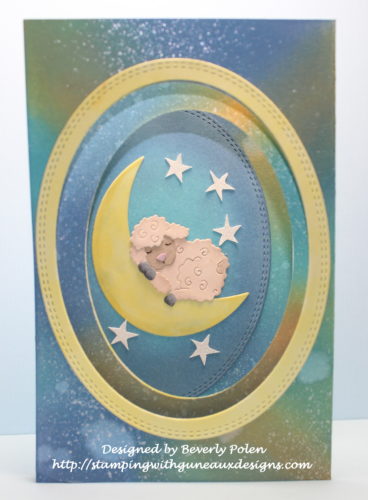
I cut a piece of designer paper from the Heartfelt Creations Classic Wedding Collection and attached it to my card base made from Stampin’ Up! Mossy Meadow card stock (retired).  I used a Stampin’ Up! Blushing Bride marker to outline the roses on the designer paper.  Then I attached the Spellbinders Victorian Arch onto the designer paper.

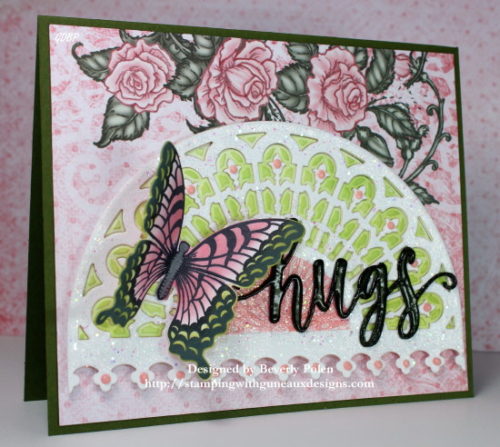
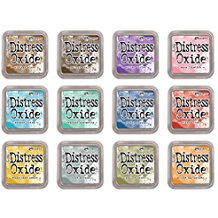
I wanted a butterfly to fill in the left side of the card.  Therefore, I used the Heartfelt Creations Botanical Wings Stamp Set and matching Die to create a butterfly.  Using green and pink Distress Oxide inks, I sponged the colors onto the butterfly and attached it to the arch with its wings raised.

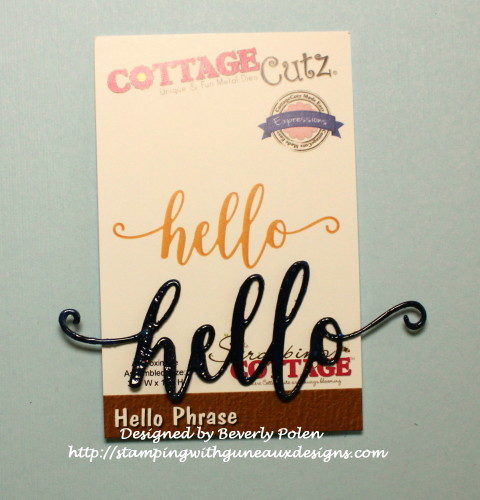
For my “hugs” sentiment, I used a CottageCutz Hugs Phase Die to cut three Mossy Meadow “hugs”.  I adhered the three together and covered them with VersaMark® Watermark Ink.  I added clear embossing powder on the sentiment, heat set it, and attached it to the card.

I would love for you to share your thoughts about the card.  Feel free to leave a comment(s).


Butterfly_1_1

God’s Blessings!
Stamping With Guneaux Designs By Beverly Polen
Firm Reliance on Divine Providence!


1 Corinthians 11:4 & 5

“Every man who prays or prophesies with his head covered dishonors his head.  And every woman who prays or prophesies with her head uncovered dishonors her head – it is as though her head were shaved.”

CottageCutz Mermaid (Elites) Die – Guneaux Designs

COTTAGECUTZ MERMAID (ELITES) DIE – GUNEAUX DESIGNS

Welcome to Guneaux Designs!  Today I am sharing a beautiful card I made featuring the CottageCutz Mermaid (Elites) Die.  I made this card to submit to two Splitcoastampers’ challenges; one is a color challenge and the other a sketch challenge.

Isn’t she beautiful?  I think so!!  She measures 2.2″W x 3″H; a perfect size for an A2 card.  I used products from the Hero Arts May 2017 Monthly Kit to create the background for the card.

The color challenge asked for use of SU Tranquil Tide, Silver, & Pool Party, with “Christmas in July” as dessert!  I passed on dessert to create an “underwater adventure” card.  Plus, I do not own SU’s Tranquil Tide; therefore, I substituted Emerald Envy.


The sketch challenge includes five panels plus a sentiment.  My card base is made from SU Pool Party card stock, the first panel is SU Emerald Envy, second is SU Brushed Silver, and third is a panel I created using Hero Arts supplies (from monthly kit) to develop an underwater scene. Panels four and five are the die cut seaweed and mermaid, on which I used the Inlay Technique. The seaweed was die cut from a sparkly paper included in the kit.

Here are the steps I followed to create the card:

I used the CottageCutz Mermaid (Elites) Die to cut out the mermaid.

I started coloring her with copic markers when I decided I wanted to use the Inlay Technique to create her.  Therefore, I attached a strong double-sided tape to the back of her and placed each of the tiny pieces from the cut out into the mermaid.  This is her after I finished.

I continued using copics to color the remaining of her body and her hair.

Notice the bottle of paint in the monthly kit in the picture above.  It looks like a bottle of nail polish.  I call the contents paint, but I am not sure of the composition as it is not described in the kit.  I used it to cover her top and tail (see above photo).  I also used Clear Wink of Stella over these sections.


Next I created the background by sponging a piece of white card stock with Hero Arts Oxide Inks.  After finishing, I spritzed water onto a stencil from the kit, laid it over the background, and covered it with a paper towel to quickly remove the excess water. This left the imprint of the stencil.  I added three fish to the panel using the stamps from the kit.

Then I started assembling the card.  I attached the background piece to my card that I had added a piece each of Stampin’ Up! Emerald Envy and Brushed Silver Card Stock.

Within the Hero Arts May Monthly Kit is a gorgeous shinny piece of light weight paper.   You can see it behind the mermaid in the second photo within the steps followed.

I used this paper and two dies from the kit to cut out strips of seaweed.  I added the seawead to the card front and then attached the mermaid on top of them using two layers of foam tape.

I finished the card by adding sequins from the kit and a sentiment.

Here is a tip for you regarding adding sequins to a card.

I typically use glue or glossy accents to attach sequins.  Sometimes this leaves glue or glossy accents on the card around the sequins.  Also, it does not take a lot of pressure to remove them.  This time I added them with glue dots.  They are securely attached, and removing them will be more difficult.  I think this method will allow the sequins to survive the snail mail process.  Try this tip and let me know what you think!


    This Kit is no longer available.


Butterfly_1_1God’s Blessings!
Stamping With Guneaux Designs By Beverly Polen
Firm Reliance on Divine Providence!


1 Timothy 5:8

“If anyone does not provide for his relatives, and especially for his immediate family, he has denied the faith and is worse than an unbeliever.”

Baby Lamb and Starry Night

Hello, my crafty friends.  Thanks for stopping by to see my card, Baby Lamb and Starry Night. 

The Ways To Use It Challenge on Splitcoaststampers today is to include stars on a creation.  This card will be submitted for the challenge.

The main feature on this card is the CottageCutz Baby Lamb on Moon Die.  The card design is a Z-Fold with ovals cut out from the first and second sections.  You can see through the ovals to the main feature on the back section of the card.   I have not seen before a Z-Fold card with the first two sections cut out for windows to see through to the main image on the back section.  If there is no such design in the crafting world, I guess I just created a new Z-Fold card design.  LOL!

To create my Z-Fold card, I cut from white card stock the pieces from the lovely CottageCutz Baby Lamb on the Moon Die.

I colored the pieces with Copic Sketch Markers, adding a touch of gray to the moon. Afterwards, I glued the pieces together.

Using the second and third to the largest CottageCutz Double-Stitched Oval Dies, I cut out an oval and frame from white card stock.  I later colored the frame with a yellow copic marker.  I also cut a second frame with the largest and second to the largest dies and colored it yellow.

I colored this oval with two of the new Tim Holtz Oxide Ink Pads (i.e., faded jeans, and broken china).  I used the lighter blue for the center of the oval for the moon’s glow.

Then, I cut a 10-13/16″ x 5-1/2″ piece of white card stock and, on the 10-13/16″ side, scored at the 3-5/8″ and 7-1/4″ measurements.  The 3-5/8″ score line is a mountain fold and the 7-1/4″ score line is a valley fold.  At this point, I did not fold the card stock on the score lines until I finished additional steps.

I wanted to create the appearance of a galaxy; therefore, I sponged three of the Tim Holtz Oxide Inks (i.e., fossilized amber, faded jeans, and broken china) onto the card stock and spritzed it lightly with water.  After drying, I used a toothbrush and diluted white acrylic paint to splatter paint onto the colored card stock.

After that dried, I turned the card stock over and colored the center section with the same inks, spritzed with water, and splattered with acrylic paint. When the card is finished, this section will be the inside center fold.

Before folding on the score lines, I placed the second largest Double-Stitched Oval Die on the first section of the card and the third largest die on the center section, centering them as much as possible.  I ran the card stock and dies through my die cutting machine.

I then folded the card on the score lines, and the following photo shows result.

Next, I assembled the card by attaching the baby lamb and moon onto the oval previously colored and adhered it to the last section of the card.  I used an old star stamp to stamp, emboss, fussy cut, and add to this piece.

Then I added the largest yellow frame to the first section of the card and the smaller yellow frame to the inside center section.

When the card is folded closed, the middle section that was inked on the back will show as the second section.  It does not have a yellow oval frame on it.

I did not add other embellishments to the card as I did not want to distract from the “galaxy” effect on the card.  A sentiment will be added when I know who is the recipient.

I hope you enjoyed my Baby Lamb and Starry Night card!


Butterfly_1_1God’s Blessings!
Stamping With Guneaux Designs By Beverly Polen
Firm Reliance on Divine Providence!


1 Timothy 2:5

“For there is one God and one mediator between God and men, the man Christ Jesus, who gave himself as a ransom for all men – the testimony given in its proper time.”

CottageCutz Mountain Lodge & Stair Step Card

Hello and thanks for stopping by to see my CottageCutz Mountain Lodge & Stair Step Card.

I made this card to submit to Splitcoaststampers Free For All Challenge (F4A383) last week that was hosted by the sweet Shirley (wannabcre8tive).  Her challenge was to “use something made of Old Wood”. This three, stair-step card is my submission to the challenge.

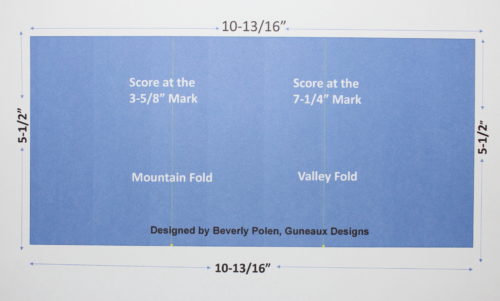
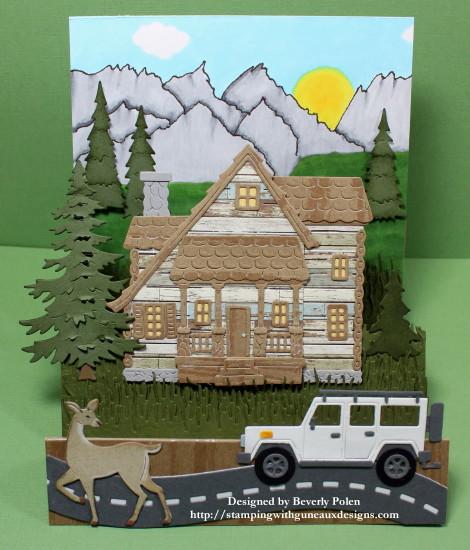
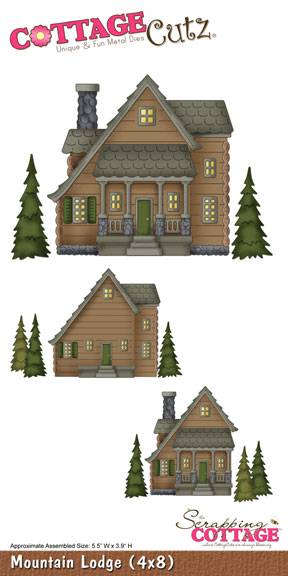
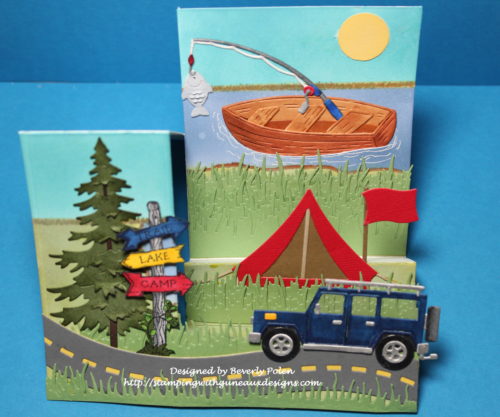
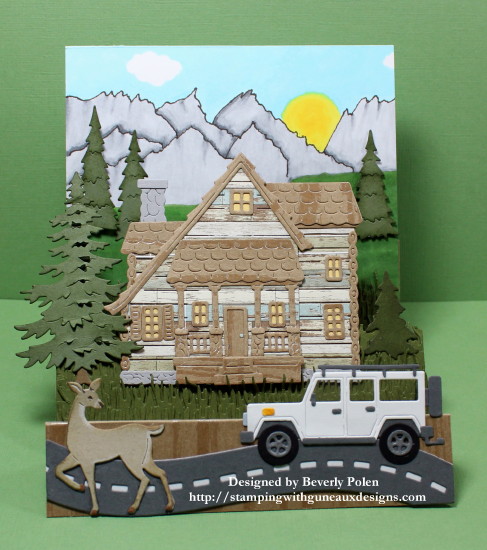
I used a 5-1/2″ x 10-1/2″ piece of SU paper that is a wood grain DSP to create the stair-step card base. The center step includes a mountain lodge made from “old wood”.  I found a photo of “old wood” on the Internet and down loaded it to modify and print onto card stock. This was used for the main pieces of the mountain lodge. The roof, porch, and steps were made with the SU wood grain DSP.

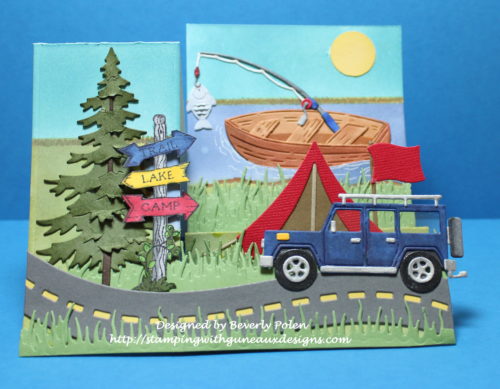
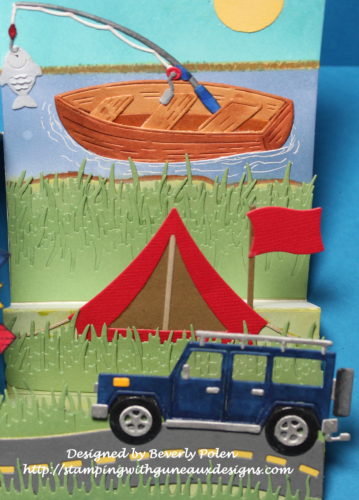
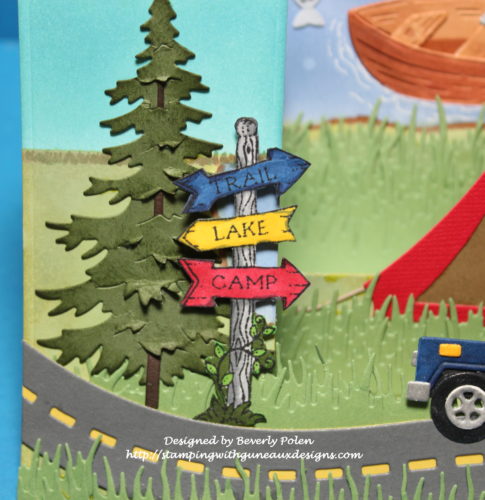
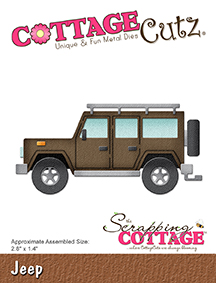
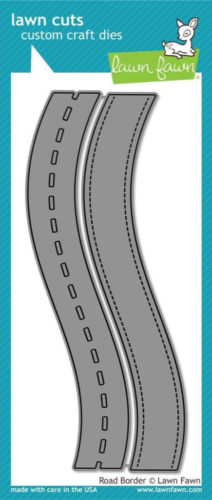
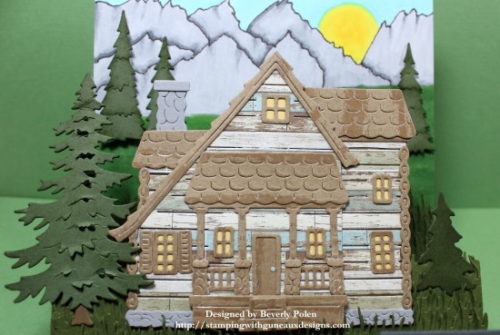
The back step includes a mountain range landscape that I drew, colored, and added to it three die cut trees. The front step obviously includes die cuts of a deer, jeep, and road.

I had so much fun creating this CottageCutz Mountain Lodge & Three Stair Step Card. The mountain lodge and Jeep took some time to assemble as there are a lot of tiny, tiny pieces to the items.  Regardless, it was worth it.

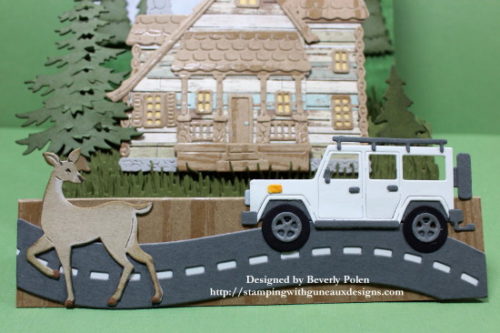
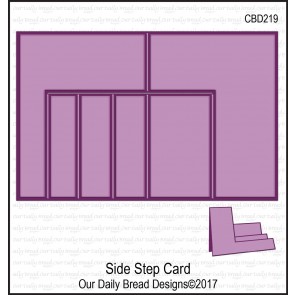
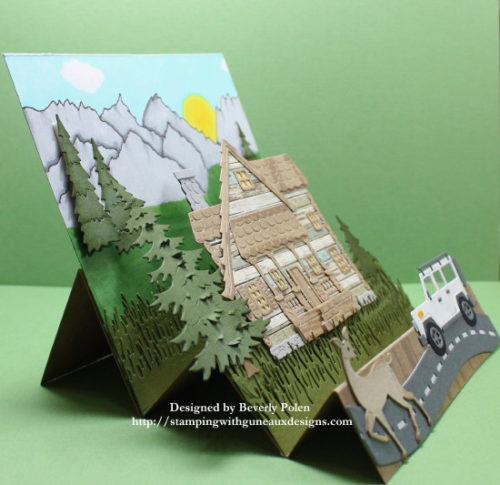
To create the stair-step card base,

  • Cut a 5-1/2″ x 10-1/2″ piece of card stock
  • Score the piece at the 1-1/4″, 2-1/2″, 4-1/4″, 6″, and 8-1/4″ marks
  • Fold according to the following:
    • 1-1/4″ score is a mountain fold
    • 2-1/2″ score is a valley fold
    • 4-1/4″ score is a mountain fold
    • 6″ score is a valley fold
    • 8-1/4″ score is a mountain fold
  • Decorate to your desire.

I hope you enjoy my CottageCutz Mountain Lodge & Stair Step Card, and will return to Guneaux Designs!


Paper:  White CS, Desert Storm CS, Old Wood CS (Digi), and SU Natural Composition Specialty DSP

Ink:  Copics

Accessories:  CottageCutz Mountain Lodge, Rustic Sign & Trees, Jeep, Spring Grass, and Deer Dies; and Lawn Fawn Road Border Dies


Butterfly_1_1

God’s Blessings!
Stamping With Guneaux Designs By Beverly Polen
Firm Reliance on Divine Providence!


Ezekiel 38:18-19

“This is what will happen in that day:  When Gog attacks the land of Israel, my hot anger will be aroused, declares the Sovereign Lord.  In my zeal and fiery wrath I declare that at that time there shall be a great earthquake in the land of Israel.” 

CottageCutz Happy Father’s Day Card

Are you looking for a design for a Father’s Day Card?   I suggest a side-step card with masculine elements.  That was my choice for my card, “CottageCutz Happy Father’s Day Card“.  Why did I title my card, CottageCutz Happy Father’s Day Card?  Because I used several CottageCutz masculine dies to create my card.  The Scrapping Cottage, the maker of CottageCutz dies, has so many wonderful dies from which to chose for any occasion.  Check out its on-line store and blog.

The CottageCutz dies I used to create my card are the Fishing Pole & Boat Die, Jeep Die, Campfire Clothesline Die, Woodlands Dies, Rustic Sign & Trees Die, and Spring Grass Die.  These and other dies used are listed near the end of this post.

I was feeling lazy when I made my card, so instead of cutting card stock and scoring it manually to form my card base, I used the Our Daily Bread Designs Side Step Card Die to create my side-step card base from white card stock.  Then I cut a 3-1/2″ x 4″ piece of white card stock to attach to the back step of the base.  Using various inks, I sponged the sky, water, and grass areas.

For the back step of the card, I die cut the fishing pole and boat from white card stock, colored the pieces with Copic Sketch Markers, glue together the pieces, and attached them to the step.

For the second step, I die cut the tent and flag with the Campfire Clothesline Die and from red, brown, and tan card stock; glued the pieces together; and attached them to the step.  For the first step, I die cut from white card stock the jeep, colored the pieces with Copic Sketch Markers, and set aside.  I used the Spring Grass die to cut from green card stock several pieces of grass and attached them to the three steps.  Using the Lawn Fawn Road Border Dies, I cut the road from gray and yellow card stock, glued them together, and attached onto the first step.  Then I attached the Jeep.

Using the Rustic Sign & Trees Die, I die cut the tree on the left side of the card with green and brown card stock, attached the pieces together, and added to the card base.  I then die cut the sign from the Woodlands Dies, colored it with Copic Sketch Markers, added foam tape to the back, and attached it in front of the tree.  That finished my card.

I love the card!  What do you think of it?


Butterfly_1_1

God’s Blessings!
Stamping With Guneaux Designs By Beverly Polen
Firm Reliance on Divine Providence!


James 1:19

“My dear brothers and sisters, take note of this: Everyone should be quick to listen, slow to speak and slow to become angry.”

Hello from the CottageCutz Lighthouse

HELLO FROM THE COTTAGECUTZ LIGHTHOUSE

Hello, friends, and welcome to Guneaux Designs!  Today I am a guest designer for the Scrapping Cottage Blog.  My “Hello form the CottageCutz Lighthouse” card share features the CottageCutz Hello Phrase die, which is a newly released word die from the CottageCutz Expressions Plus collection.

My card also features other CottageCutz dies: the CottageCutz Lighthouse die, Stitched Wide Circle Frame Set dies, CottageCutz Lighthouse w/ Clouds die, and CottageCutz Seagulls in Flight Die.

These are the steps I took to make this “Hello from the CottageCutz Lighthouse” card:

  • Using the CottageCutz Lighthouse die, I cut out the lighthouse in white, red, blue, green, gray, and yellow card stock and assembled the pieces.
  • I used the CottageCutz Stitched Wide Circle Frame Set dies to cut several circle frames and a circle from a 4-1/4″ x 5-1/2″ piece of white card stock.

  • I glued the circle frames together to create dimension.

  • Using the circle that was cut out from the 4-1/4″ x 5-1/2″ piece of white card stock, I colored a sky, rock cliff, and ocean on it.  I added Liquid Applique in selected areas and heat set it.

  • I cut out three “hello” sentiments using the CottageCutz Hello Phrase die and blue card stock.  I glued them together, covered the sentiment with VersaMark Ink and Clear Embossing Powder, and heat set it.

  • I cut out seagulls from the CottageCutz Lighthouse w/ Clouds Die and CottageCutz Seagulls in Flight Die, and added a touch of color to them.  I rolled the wings with my fingers.

  • I began assembling my card by cutting a 4-1/2″ x 5-3/4″ piece of blue card stock to which I glued the 4-1/4″ x 5-1/2″ piece of white card stock with the circle cut out.

  • To this piece, I attached both the circle frames and colored circle inside of the cut out circle.

  • Lastly, I added the lighthouse, seagulls, and hello sentiment to the above piece. Then I attached it to a 4-3/4″ x 6″ white card base.

I hope you enjoy the card and are inspired by it!


These are the CottageCutz dies used to create my Hello from the CottageCutz Lighthouse card.


Butterfly_1_1God’s Blessings!
Stamping With Guneaux Designs By Beverly Polen
Firm Reliance on Divine Providence!


John 14:23 & 24

Jesus replied, “If anyone loves me, he will obey my teaching.  My Father will love him, and we will come to him and make our home with him.  He who does not love me will not obey my teachings.  These words you hear are not my own; they belong to the Father who sent me.”