Fall Zentangle® Card

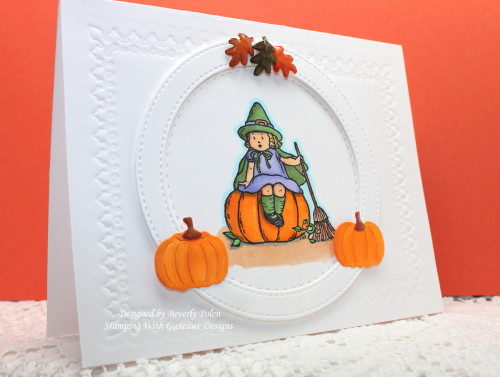
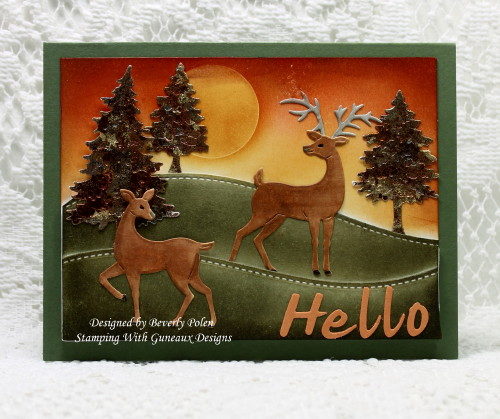
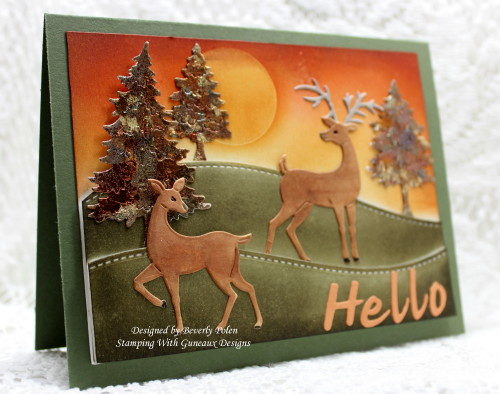
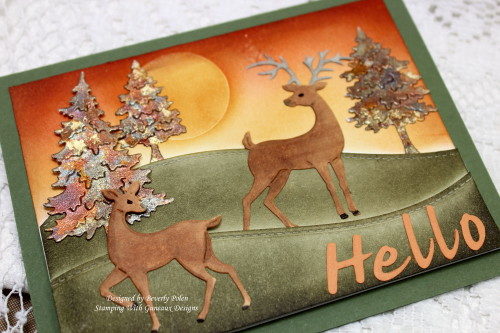
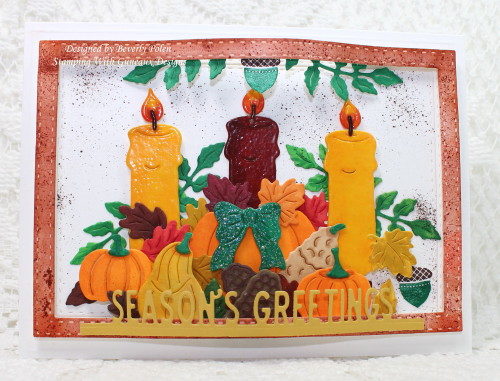
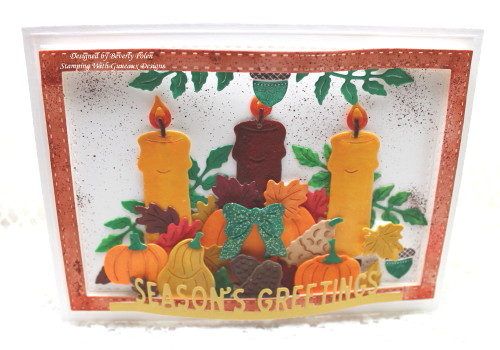
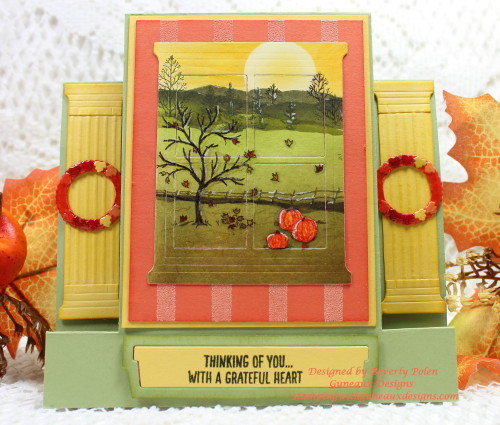
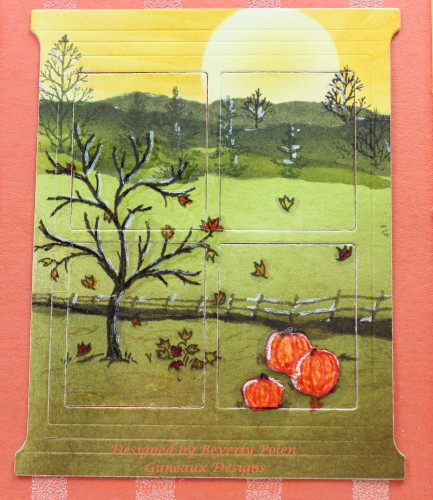
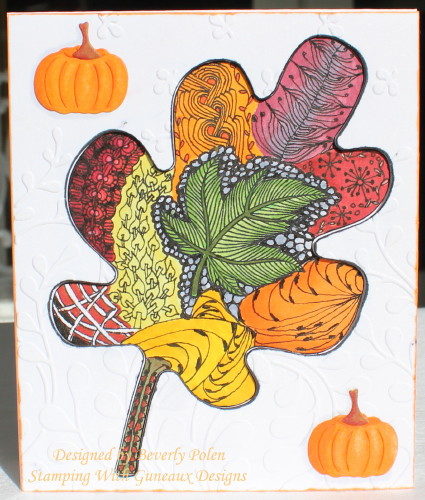
Are you having a good day?  I spent the morning mowing my grass in the hot sun.  But praise God I am able to do that!  Today I wanted to share with you a Fall Zentangle® Card I made.  I love the Zentangle® Art  Form and have wanted to create a Zentangle®  for a fall card, and here it is:

fall-zentangle_1

The fall season brings such beautiful colors and striking leaves.  It is such a pleasure to see God’s beauty when you are on a mountain top looking down at the valleys and soaking in all the glorious colors of leaves on trees.  But if you do not live in an area when you can enjoy this every Fall, you are missing a lot of beauty.  Actually, I live in Florida, having moved here from northern Virginia where it was fabulous every fall.  Florida never seems to get the memo announcing that it is fall, so I do not have to opportunity to share in God’s beauty unless I travel approximately 1,000 miles north!  It is so worth it when I do go north in the fall.

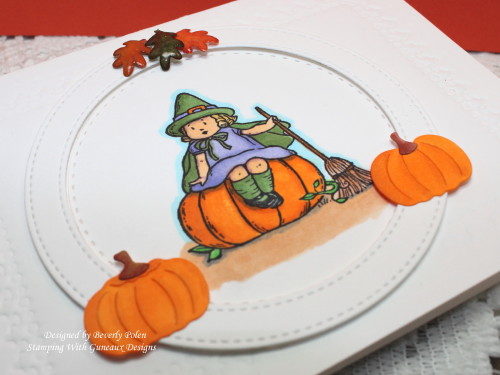
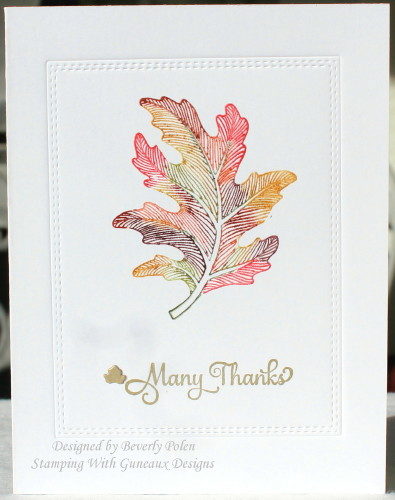
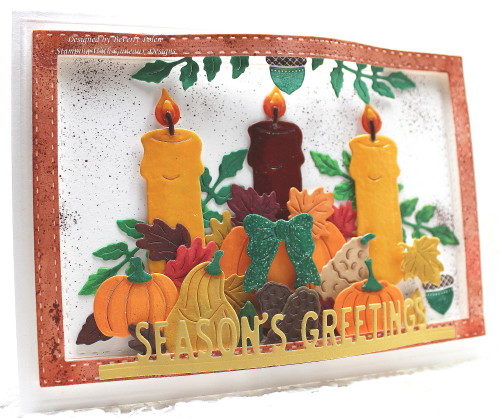
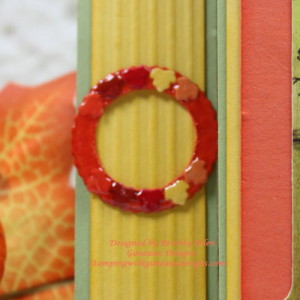
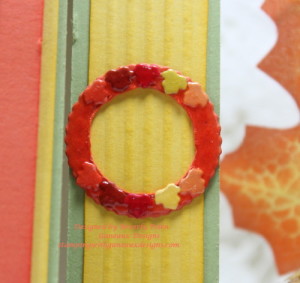
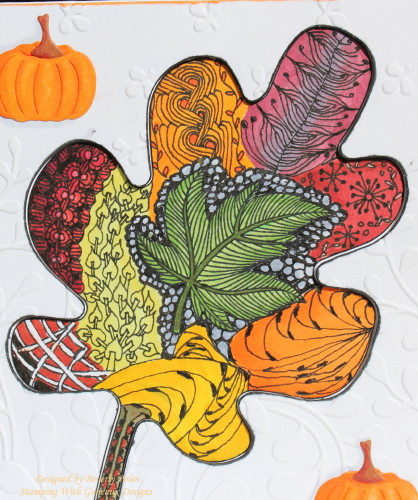
Back to the card.  The following picture is a close up of the Zentangle®.

fall-zentangle-2_1

What is a Zentangle?  You can get complete information HERE!

To create the card, I used an original Sizzix Leaf Die (no longer available) to cut out a leaf from Solar White card stock. I retained the negative to use for the card front. I began creating my Zentangle® art piece by stamping an autumn leaf in the center of the leaf cutout.

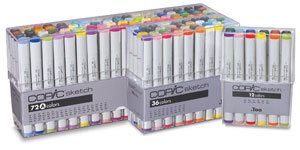
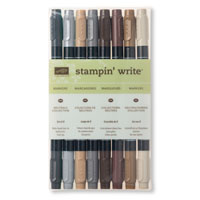
To create my tangles, I decided to not use an official string, which is the norm. I let the stamped leaf be my guide. I selected several official tangle patterns, got into a Zen frame of mind, and started tangling. After drawing my selected official tangles, I used Copic Sketch Markers to color the tangles that create my leaf.

fall-zentangle-3_1
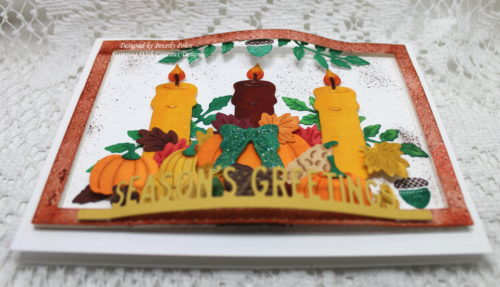
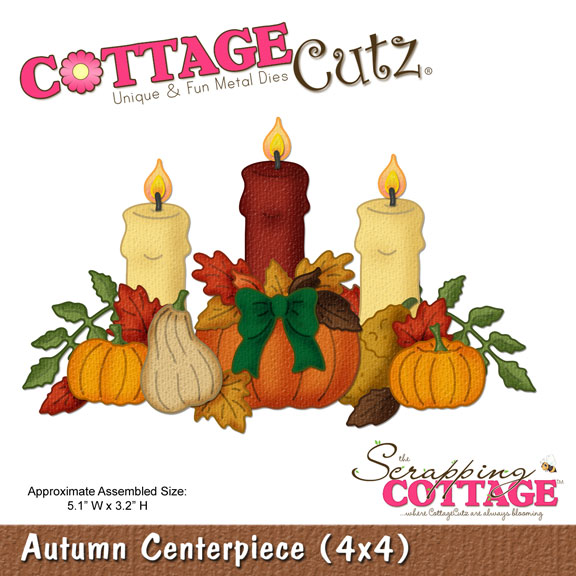
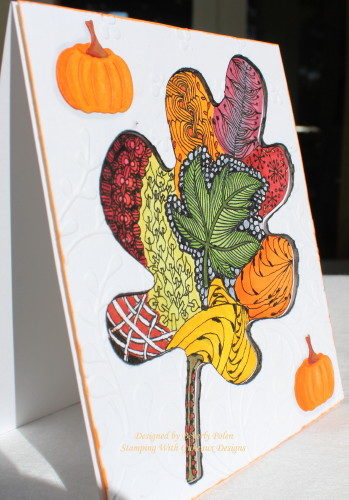
Remember the negative that I put to the side? I embossed it with a vines EF, attached it to the card front, inserted the Zentangle® art piece into the negative, and added two pumpkins to complete the card.  I hope you are inspired to create a Zentangle® art piece.


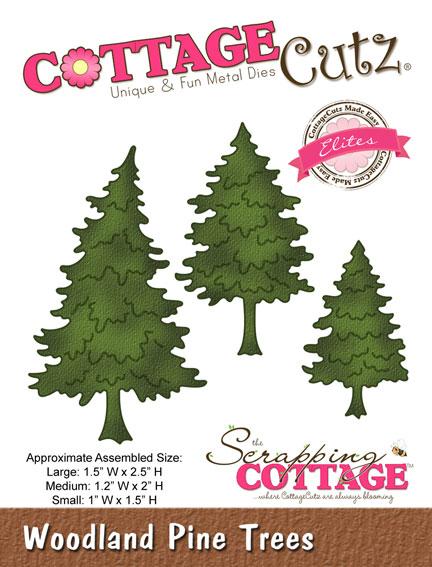
SUPPLIES USED THAT ARE AVAILABLE

a-cardstock-neenah-classic-crest-solar-white-25-pk-ncsw_image1__89431-1406030158-250-250   cottagecutz-autumn-centerpiece  Cuttlebug Anna Griffin Embossing Folder Setcopicsketchmarkers  micron-pens_1


Butterfly_1_1

God’s Blessings!

Stamping With Guneaux Designs By Beverly Polen


A man named Lazarus was sick.  His sisters sent word to Jesus of his illness. Jesus comforts Lazarus’ sisters:

“Jesus said to her, “Your brother will rise again.”  Martha answered, “I know he will rise again in the resurrection at the last day.” “Jesus said to her, “I am the resurrection and the life.  He who believes in me will live, even though he dies; and whoever lives and believes in me will never die.  Do you believe this?”  John 11:23-25

Greeting Card Kids

Happy Monday!!  Hope you had a great weekend!  For today, I created a card using the retired Stampin’ Up! Greeting Card Kids Stamp Set.  I love this stamp set, especially the image I used on this card.

Greeting Card Kids

To create the card, I cut a piece of Neenah White Card Stock at 8-1/2″ x 5-1/2″ and folded it in the middle for an A2 size card (5-1/2″ x 4-1/4).  I dry embossed the front of the card base with the largest rectangle die from the Our Daily Bread Designs Lavish Layers dies.

Using the second largest die from Our Daily Bread Designs Double Stitched Circles dies, I cut a circle from Neenah Solar White Card Stock (I used this card stock for all elements and where needed, colored them with Copic Sketch Markers.  I stamped the image onto the circle using Memento Tuxedo Black Ink, and colored it with Copics.

greeting-card-kids-3_1

After coloring the image, I cut out one circle frame using the Cottage Cutz Stitched Wide Circle Frame Dies, two pumpkins from the Cottage Cutz Autumn Centerpiece Die, and three leaves from an old punch I have.  I colored the pumpkins and leaves with copics, and used Stampin Up Clear Embossing Powder on the leaves.  I attached these elements to the card front.  I finished the card and submitted it for a Splitcoaststampers Clean and Simple Challenge to add pumpkins to a card.

greeting-card-kids-4_1


SUPPLIES USED

a-cardstock-neenah-classic-crest-solar-white-25-pk-ncsw_image1__89431-1406030158-250-250  lavish_layers_cbd149  odbd-double-stitched-circles  copicsketchmarkers  memento-ink-pad-tuxedo-black-tsme-900_image1__01192-1406041667-250-250

cottagecutz-stitched-wide-circle-dies  cottagecutz-autumn-centerpiece  suclearembossingpowder


Butterfly_1_1

God’s Blessings!

Stamping With Guneaux Designs By Beverly Polen


Jesus said to the disciples, “In that day you will no longer ask me anything.  I tell you the truth, my Father will give you whatever you ask in my name.  Until now you have not asked for anything in my name.  Ask and you will receive, and your joy will be complete.”  John 16:23-24

SU Autumn Splendor

Today I have a very clean and simple card for you!  It features a retired Stampin’ Up! (SU) stamp set, the SU Autumn Splendor.  autumn-leaf_1

This card took me about 5 minutes to create!  I probably should create more clean and simply cards.  I submitted the card for a “Clean and Simple” (CAS) challenge on Splitcoaststampers.  The challenge, CAS394, required a one layer card with a nature themed stamp.  I simply embossed a double-stitched rectangle on the card front and stamped an autumn leaf covered in various fall colors. I stamped the “many thanks” sentiment in metallic gold.  And that’s it!  How’s that for a CAS card?


SUPPLIES


MANY THANKS
        SU Autumn Splendor


Butterfly_1_1

God’s Blessings!

Stamping With Guneaux Designs By Beverly Polen


“For the wages of sin is death, but the gift of God is eternal life in Christ Jesus our Lord.”  Romans 6:23

Cottage Cutz Woodland Pine Trees

Hello, and thanks for stopping by.  I have a card for you today that features the Cottage Cutz Woodland Pine Trees Dies and Cottage Cutz Deer Die.  I created the card in response to today’s “Ways To Use It Challenge”, WT599, on Splitcoaststampers website. The hostess for the challenge is the very talented Lisa (Shoe Girl), and she gave us an easy challenge.  She asked that we create a HELLO card.

Cottage Cutz Woodland Pines

To create the card, I cut out the Cottage Cutz Woodland Pine Trees and covered them with FlitterGlu (i.e., a glue for gilding flakes and glitter), to which I added Cosmic Shimmer Mulled Wine Gilding Flakes.  Using a piece of Scoochy Foam, I rubbed the excess flakes from the trees.  This photo shows the aftereffects.

Cottage Cutz Woodland Pine Trees_1

Next, I cut a 3-3/4″ x 5″ piece of Solar White card stock and sponged a sunset scene using Stampin’ Up! orange and green inks. Then, I cut out two hills with the Lawn Fawn Borders Dies.  I sponged Stampin’ Up! Always Artichoke ink onto the two pieces and adhered them together with foam tape.  Using foam tape, I attached the hills to the sunset piece of card stock.

I used the Cottage Cutz Deer Dies to cut out the deer from Solar White Card Stock.  I used Copic Sketch Markers to color them and the antlers.  I then strategically added the trees and deer to the card.

Cottage Cutz Woodland Pine Trees_1 Cottage Cutz Woodland Pine Trees-2_1

I love the outcome of the card, and I hope you are inspired by it.


SUPPLIES

Stamps:  None

Paper:  Neenah Solar White Card Stock and Stampin’ Up! Always Artichoke Card Stock

Ink:  Stampin’ Up! Orange and Green Inks

Accessories:  Cottage Cutz Woodland Pine Trees Dies, Cottage Cutz Deer Dies, Lawn Fawn Borders Dies, Sizzix Alpha Dies (retired), IndigoBlu FlitterGlu, IndigoBlu Phat Foam, IndigoBlu Scoochy FoamGilding FlakesFoam Tape, and Sponge Daubers

Technique:  Sponging

  Always Artichoke 8-1/2 x 11 Cardstock  

    IndigoBlu FLITTERGLU 4oz Glue 271120 Preview Image                        Sponge Daubers


SU Fifth Avenue Floral

God’s Blessings!

Stamping With Guneaux Designs By Beverly Polen


The Lord appears to Solomon:  “When Solomon had finished the temple of the Lord and the royal palace, and had succeeded in carrying out all he had to do in the temple of the Lord and in his own palace, the Lord appeared to him at night and said:  “I have heard your prayer and have chosen this place for myself as a temple for sacrifices….if my people, who are called by my name, will humble themselves and pray and seek my face and turn from their wicked ways, then will I hear from heaven and will forgive their sin and will heal their land.””  2 Chronicles 7:11-12 & 14.

Cottage Cutz Autumn Centerpiece

Today is my last day as a guest designer for the Splitcoaststampers Color Challenge.  I thoroughly enjoyed the opportunity and am grateful for it!   I enjoyed working with such talented ladies!  Today’s Color Challenge is hosted by Mary Marsh (aka MaryR917), and she chose these gorgeous fall colors for the challenge:  Chocolate Chip, Cajun Craze, Crushed Curry, and Garden Green.  Her dessert (i.e., extra points) is “Fall”.  The card I designed for today’s challenge features the Cottage Cutz Autumn Centerpiece Die!  

Cottage Cutz Autumn Centerpiece_1

These are the colors for the challenge, and they are from Stampin’ Up (SU):

Chocolate Chip 8-1/2 x 11 Cardstock Cajun Craze 8-1/2 x 11 Cardstock Crushed Curry 8-1/2 x 11 Cardstock Garden Green 8-1/2 x 11 Cardstock

When using the Cottage Cutz Autumn Centerpiece Die, it does not cut out as one piece as the picture (see below) of the die may represent.  It cuts out 19 pieces, of which 6 need to be cut more than once.  Despite this, it’s a wonderful die!  Instead of using card stock of the colors for the Color Challenge, I used Neenah Solar White card stock and colored each piece with Copic Sketch Markers and a couple of SU Markers!  I did use card stock for the sentiment, though.  The sentiment is from an Impression Obsession Die – Holiday Top Word Edgers.

I assembled the card using Kittie Caracciolo’s Bendi Frame technique.  Here’s the tutorial for the technique.  Can you see in the following photos that the top frame is bent?  This allows for more dimension on a card.  Once you’ve checked out the tutorial, you’ll understand.

Cottage Cutz Autumn Centerpiece-4_1 Cottage Cutz Autumn Centerpiece-5

When the card is stood up and under a light, the light shines through the bend on the frame and gives a nice presentation.  Cottage Cutz Autumn Centerpiece-3_1

To include more of the Chocolate Chip ink, I used an old SU tool, the Color Spritzer Tool (retired) and spritzed the ink onto the white panel.  I did the same on the frame but didn’t like it so I sponged on Cajun Craze ink. I attached the frame with two layers of foam tape in order to raise the frame higher to get more pieces attached.  To finish the card, I added foam tape to the ends of the sentiment and attached it to the frame.

I hope you’ve enjoyed my card and are inspired!   Come back soon!!


SUPPLIES

Paper:  Neenah Solar White Card Stock and SU Crushed Curry Card Stock (sentiment)

Ink:  Copic Sketch Markers, SU Chocolate Chip Marker, SU Crushed Curry Marker

Accessories:  Cottage Cutz Autumn Centerpiece Die, Impression Obsession Holiday Top Word Edgers Dies, ODBD Double Stitched Rectangles Dies, ODBD Pine Cones Dies, and Foam Tape

 Copic Sketch Markers  Neutrals Stampin' Write Markers Regals Stampin' Write Markers

   DOUBLE STITCHED RECTANGLES DIES  PINECONES DIES


SU Fifth Avenue Floral

God’s Blessings!

Stamping With Guneaux Designs By Beverly Polen


“For the message of the cross is foolishness to those who are perishing, but to us who are being saved it is the power of God.  For it is written:  “I will destroy the wisdom of the wise; the intelligence of the intelligent I will frustrate.”  Where is the wise man? Where is the scholar?  Where is the philosopher of this age?  Has not God made foolish the wisdom of the world?”  1 Corinthians 18-20

Hearth & Home Framelits Dies & Happy Scenes

Thanks for stopping by!  🙂  My share for you today is a Center Step Card that features Stampin’ Up!’s Hearth & Home Framelits Dies and Happy Scenes Stamp Set.  I refer to my card as a Window Frame Wall Mural.  The reason for that is the complete window and frame are a scene instead of a scene outside the window.

Hearth & Home Framelits Dies & Happy Scenes

This card is the first one that I created with the Stampin’ Up! Hearth & Home Framelits Dies.  I ordered the dies many weeks ago and just received them recently.  BTW, if you have this set of dies, notice on the package they arrive in that the dies are called Framelits. However, in the on-line store and the mini catalog the dies are called Thinlits. I don’t know which they are, and it really doesn’t matter to me.  Just a tidbit!

The two columns on the sides of the Center Step Card are enhanced by a wreath that is covered with tiny leaves.  I made the leaves with the Spellbinders Leafy Squares Dies (S4-332). Stampin Up Happy Scenes-Bohemian DSP5 and Spellbinders Leafy Squares  The pictures below give you a closeup of the wreaths which I covered with Stampin’ Up! Crystal Effects.

Hearth & Home Framelits Dies & Happy ScenesHearth & Home framelits Dies & Happy Scenes

The picture below is a closeup of the window that I created with the Stampin’ Up! Hearth & Home Framelits Dies and Happy Scenes Stamp Set. It gives you a better idea why I call the card, Window Frame Wall Mural.  🙂
Hearth & Home Framelits Dies & Happy Scenes Stamp Set

 Hearth & Home Framelits Dies & Happy Scenes Stamp Set

 I hope you enjoyed the card.  Have a wonderful, blessed week.


Swallowtail Butterfly

God’s Blessings!

Stamping With Guneaux Designs by Beverly Polen

Hearth & Home Framelits Dies & Happy Scenes Stamp Set You can see in the above picture the inside of the card.  It includes a stamped image from the Stampin’ Up! Happy Scenes Stamp Set.

HEARTH & HOME FRAMELITS DIES & HAPPY SCENES STAMP SET