SU Polka Dots & Paisley & Paisley Prints

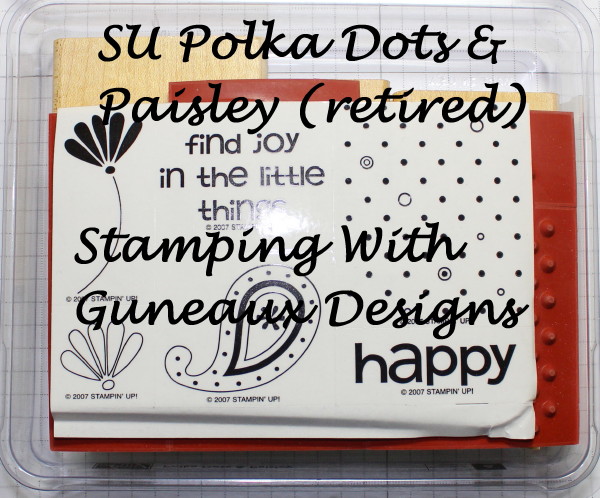
I enjoyed last week’s Splitcoaststampers Color Challenge so much that I made a second card using the color combination.  This card features two retired stamp sets; SU Polka Dots & Paisley & Paisley Prints.  The card can serve as a thank you or valentine card.  I added a “thanks” sentiment; however, that can be removed and a valentine sentiment added.
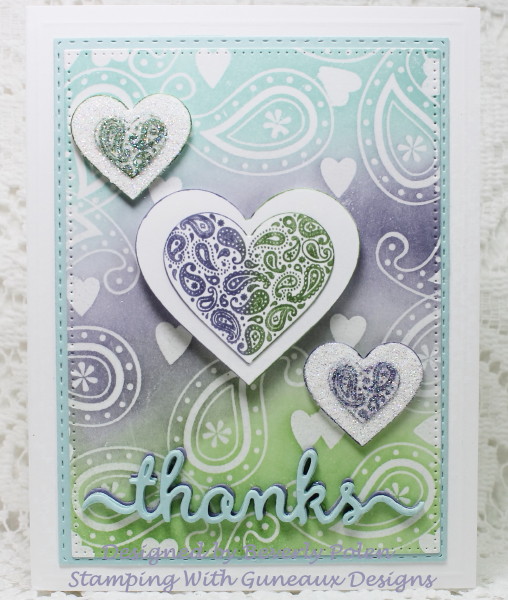
I used the Stamping Color Resist Technique to create the front panel on the card. Using VersaMark Ink, I stamped the paisley stamp from the SU Polka Dots & Paisley Stamp Set around the piece of Neenah Solar White card stock.  I also used VersaMark Ink to stamp a heart around the card.  The heart stamp is from Catherine Pooler’s Candy Cane Stamp Collection.

I then added SU Clear Embossing Powder onto this panel and heat set it.  Using the colors of the Color Challenge (i.e., SU Soft Sky, Wisteria Wonder, and Wild Wasabi), I sponged the ink around the white card stock panel and rubbed off the ink on the embossing. I think it is amazing how the clear embossing powder turns white!  This process is the Color Resist Technique.
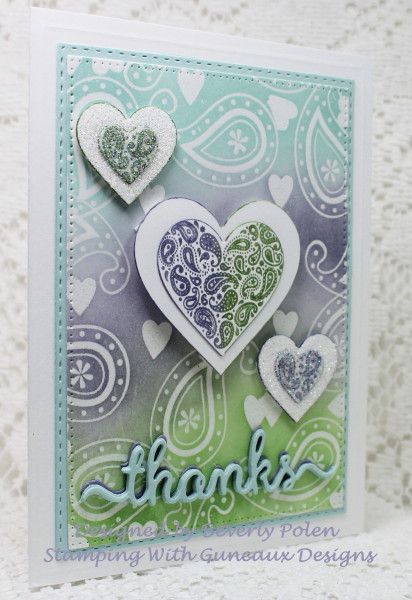
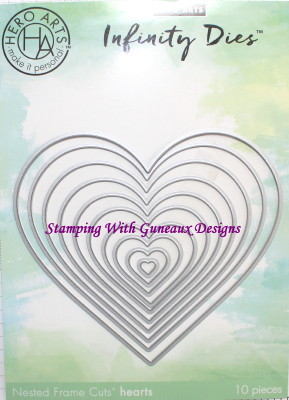
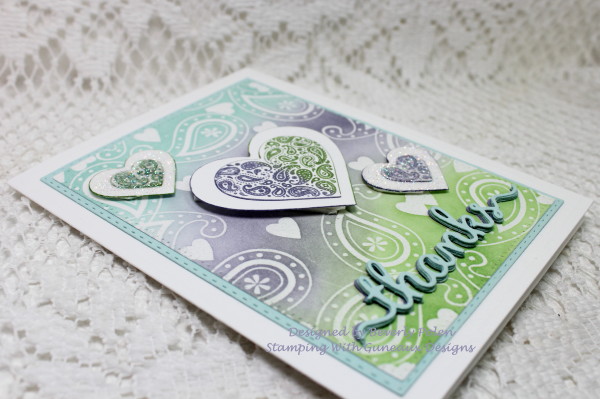
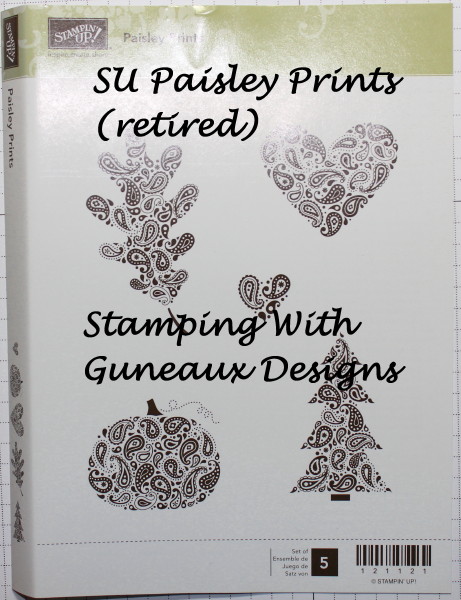
I then used two paisley heart stamps from the SU Paisley Prints stamp set, inked them with Wisteria Wonder and Wild Wasabi, and stamped them onto white card stock.  I cut out the hearts using the Hero Arts Hearts Infinity Dies.  I embossed the two small hearts with Dazzling Diamonds Glitter and adhered the three hearts onto the panel with double-sided foam tape.  I used the ODBD Thanks Die to cut out my “thanks” sentiment and finished the card.
Feedback I received from Splitcoastampers members is located HERE!


      THANKS DIE


Butterfly_1_1God’s Blessings!
Stamping With Guneaux Designs By Beverly Polen
Firm Reliance on Divine Providence!


 REVELATION 22:12-13 (NIV)

The writer of Revelations, St. John The Divine, shared the Word of God through Jesus Christ:  “Behold, I am coming soon!  My reward is with me, and I will give to everyone according to what he has done.  I am the  Alpha and the Omega, the First and the Last, the Beginning and the End.” 

Honey Bee Little Pickup Stamp Set

HONEY BEE LITTLE PICKUP STAMP SET

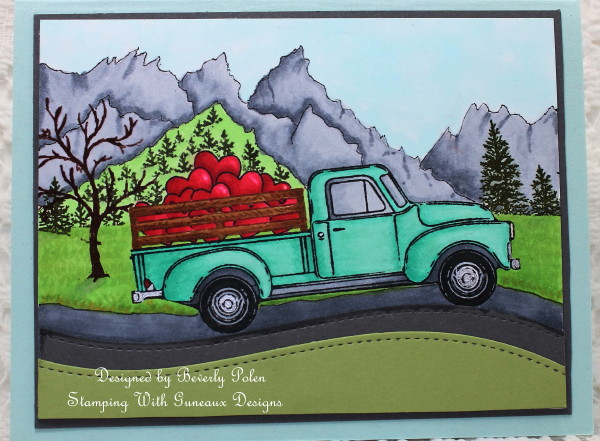
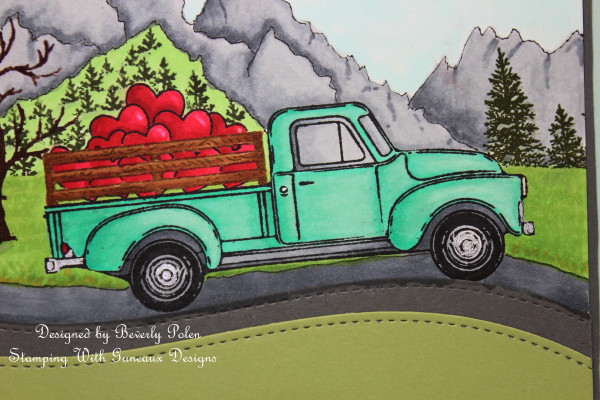
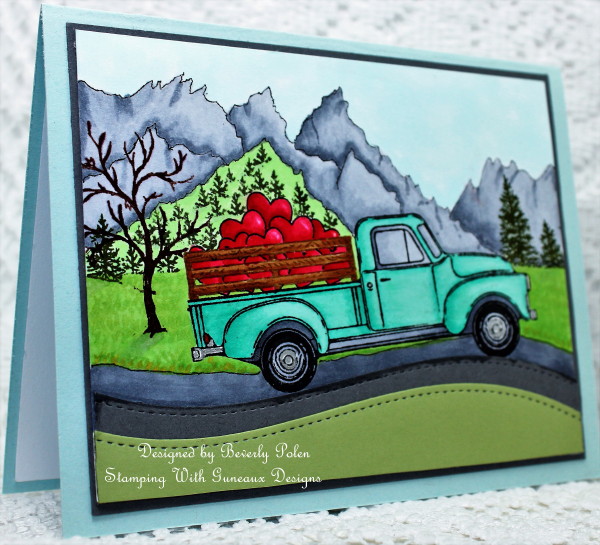
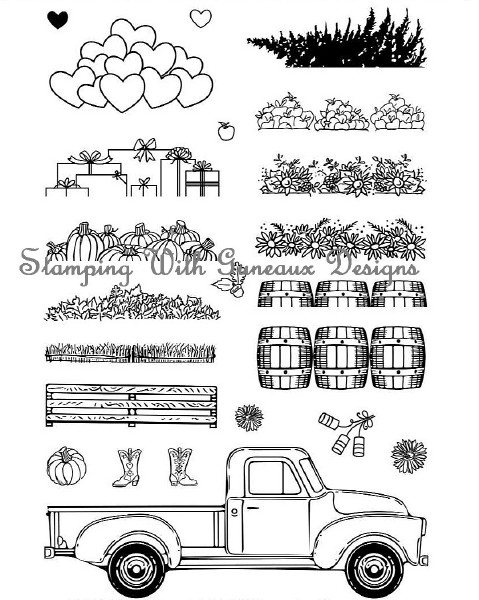
Have you seen the Honey Bee Little Pickup Stamp Set?  I think it is adorable!  The stamp set has matching dies as well.  My card share today features three stamps from the set: 1) the pickup, 2) wooden rails for the truck bed, and 3) hearts.

Before explaining the card, let me share why I have not posted any artwork for several days.  My precious sister passed away on January 10th, and that has occupied my mind and time.  It has been a very emotional time for me so I decided I needed to create a card to get my mind refocused.  Thus, I created this card that I’m sharing.

Honey Bee Little Truck Stamp Set

The card does not include a sentiment; however, it will be a get well card / valentine card for my brother-in-law who just had major surgery and ended up in the ICU.  Yes, there has been a lot of emotional things going on in my life, but I am trying to get back to creating and posting.

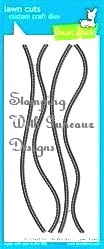
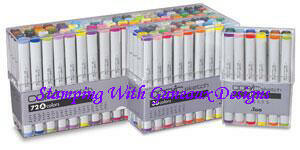
On to the card.  I decided to create a scene for the pickup.  I used Neenah Solar White Card Stock on which I created the scene.  After stamping and coloring the truck with various Copic Sketch Markers (i.e., BG10, BG11, and GB23), I masked it to include the wooden rails in a brown ink.  I then masked the rails to include the hearts and colored them with Copic Sketch Markers (i.e., R27, R29, and RV25).  I added two pieces of card stock, one green and the other gray.  The green is for a grassy, sloped  berm, and the gray for a road on which the truck is traveling.  I used the Lawn Fawn Stitched Hillside Borders Dies for the two pieces.

Honey Bee Little Truck Stamp Set

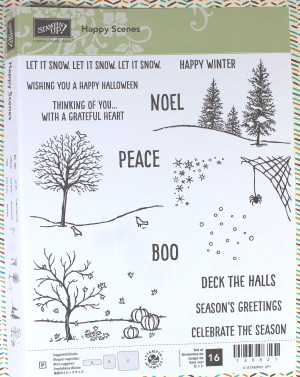
I created the tree in the foreground with a tree stamp from the retired Stampin’ Up! (SU) Happy Scenes Stamp Set.  I used the same stamp set to create the pine trees in the background of the scene.  I hand drew the mountains in the background and colored them with grayish Copic Sketch Markers.

Honey Bee Little Truck Stamp Set

Creating this card featuring the Honey Bee Little Pickup Stamp Set was a lot of fun!  I hope you are inspired!  I am submitting the card for the Splitcoaststampers Featured Stamper Challenge.  Carolyn (snowmanqueen) on SCS is the featured stamper.  She has a wonderful gallery of cards.  You can check them out here.


Honey Bee Little Pickup Stamp Set  Honey Bee Little Truck Stamp Set   Honey Bee Little Pickup Stamp Set   Stampin Up Happy Scenes Stamp Set     Honey Bee Little Pickup Stamp Set


Butterfly_1_1God’s Blessings!
Stamping With Guneaux Designs By Beverly Polen
Firm Reliance on Divine Providence!


ROMANS 1:18-20 (NIV)

“The wrath of God is being revealed from heaven against all the godlessness and wickedness of men who suppress the truth by their wickedness since what may be known about God is plain to them, because God has made it plain to them.  For since the creation of the world God’s invisible qualities—his eternal power and divine nature—have been clearly seen, being understood from what has been made, so that men are without excuse.”
Thinking Of You With A Grateful Heart

THINKING OF YOU WITH A GRATEFUL HEART

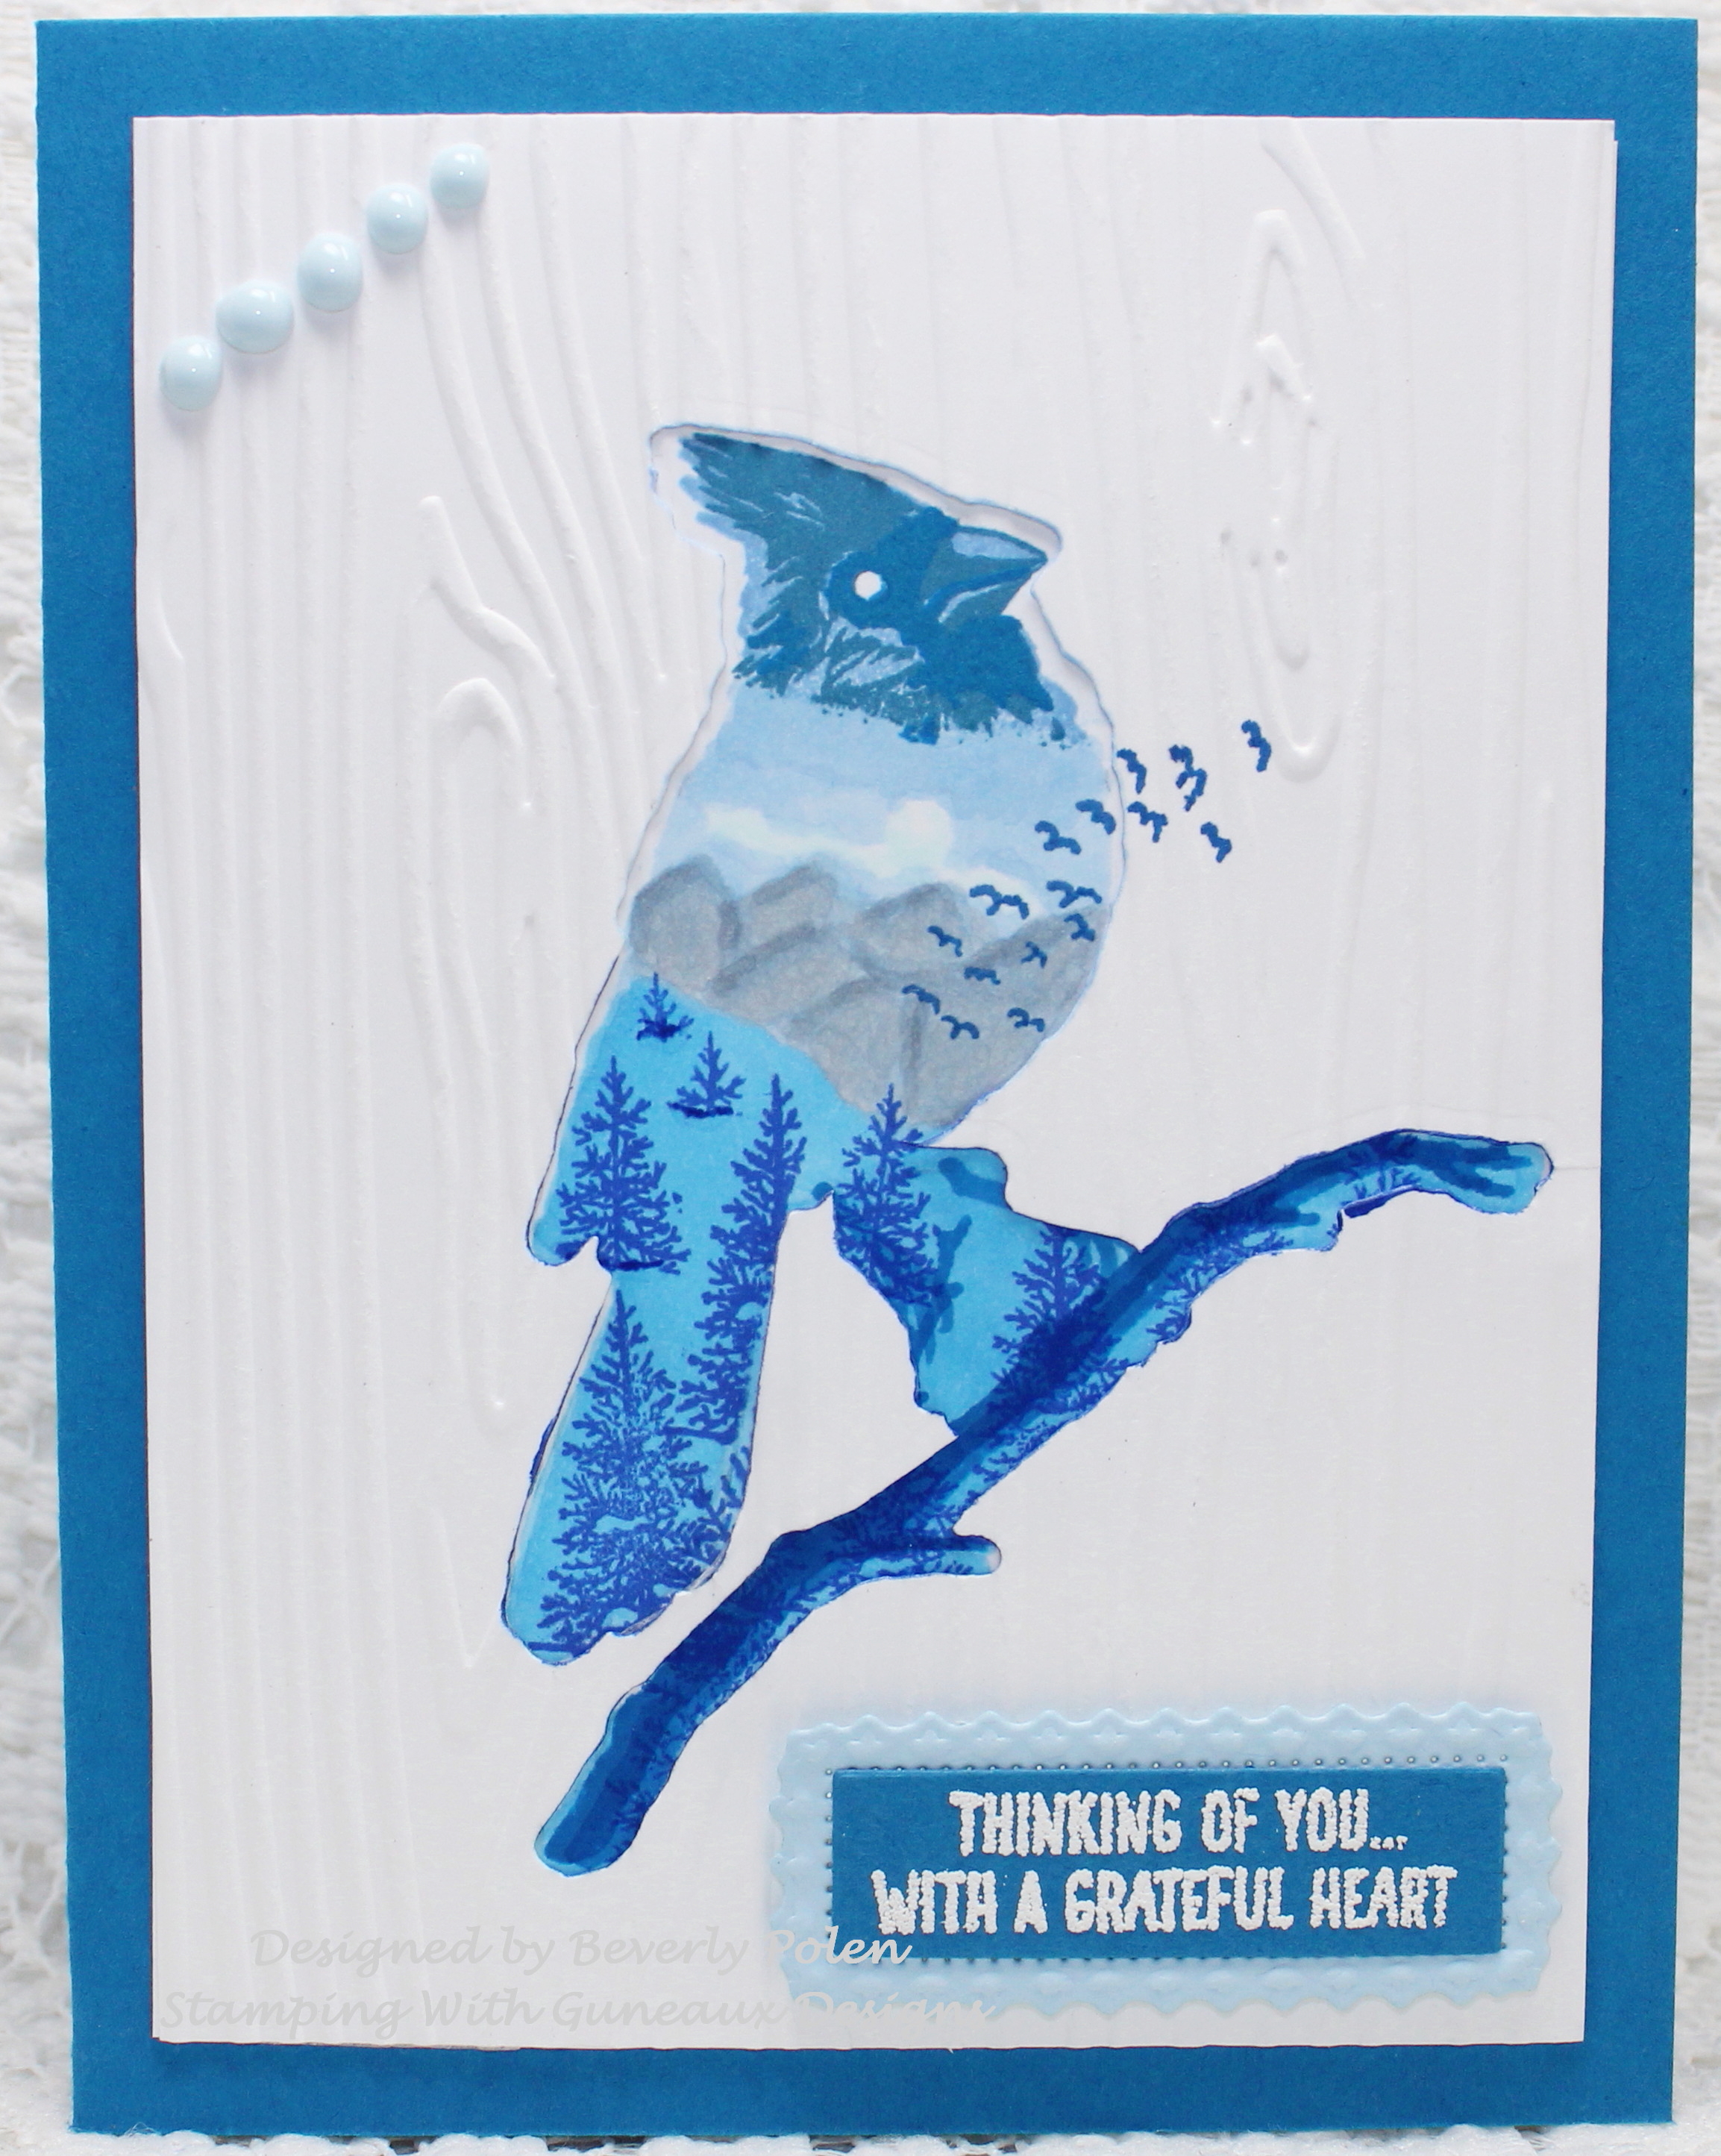
Do you have someone who you think of with a grateful heart?  Is it a family member?  I often think how very grateful I am for my son-in-law.  He is so good to me and looks out for me regularly.  If I have something in my home that has broken, he is right there to make repairs.  I am so grateful for him, and I want to share my feelings with a card!  My card share today is a “Thinking Of You With A Grateful Heart” greeting card that I will drop in the mail to him!
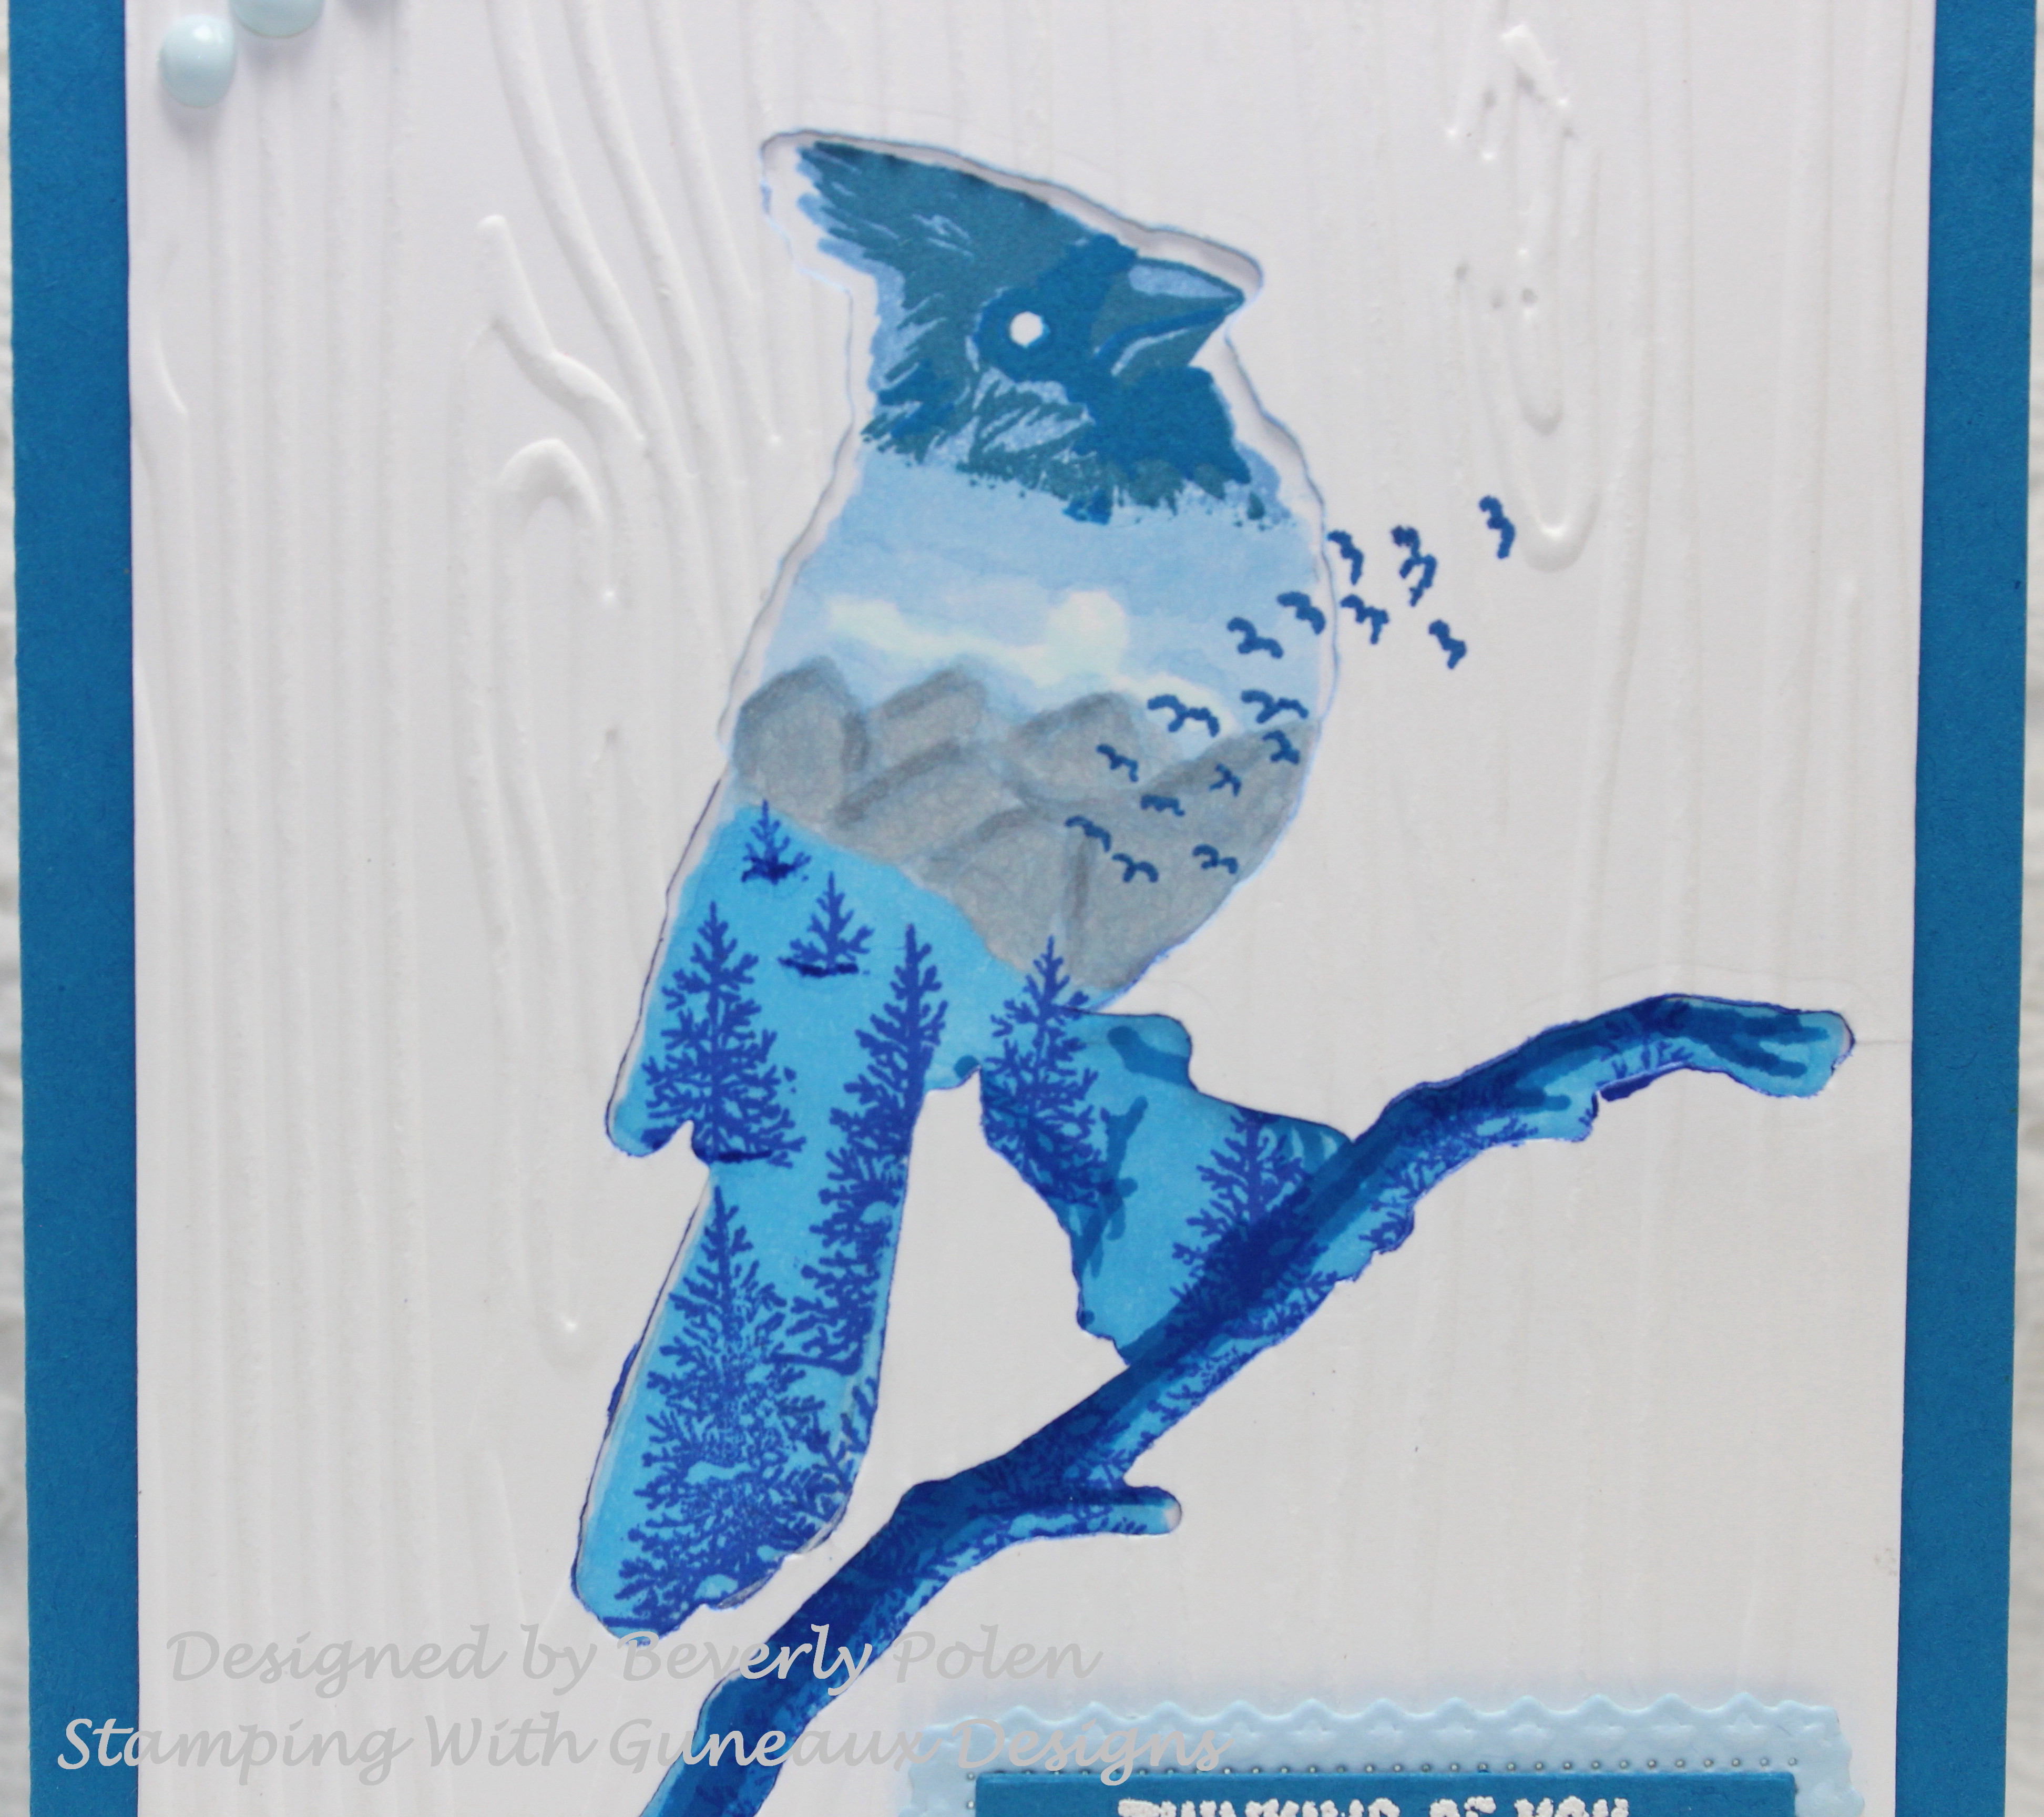
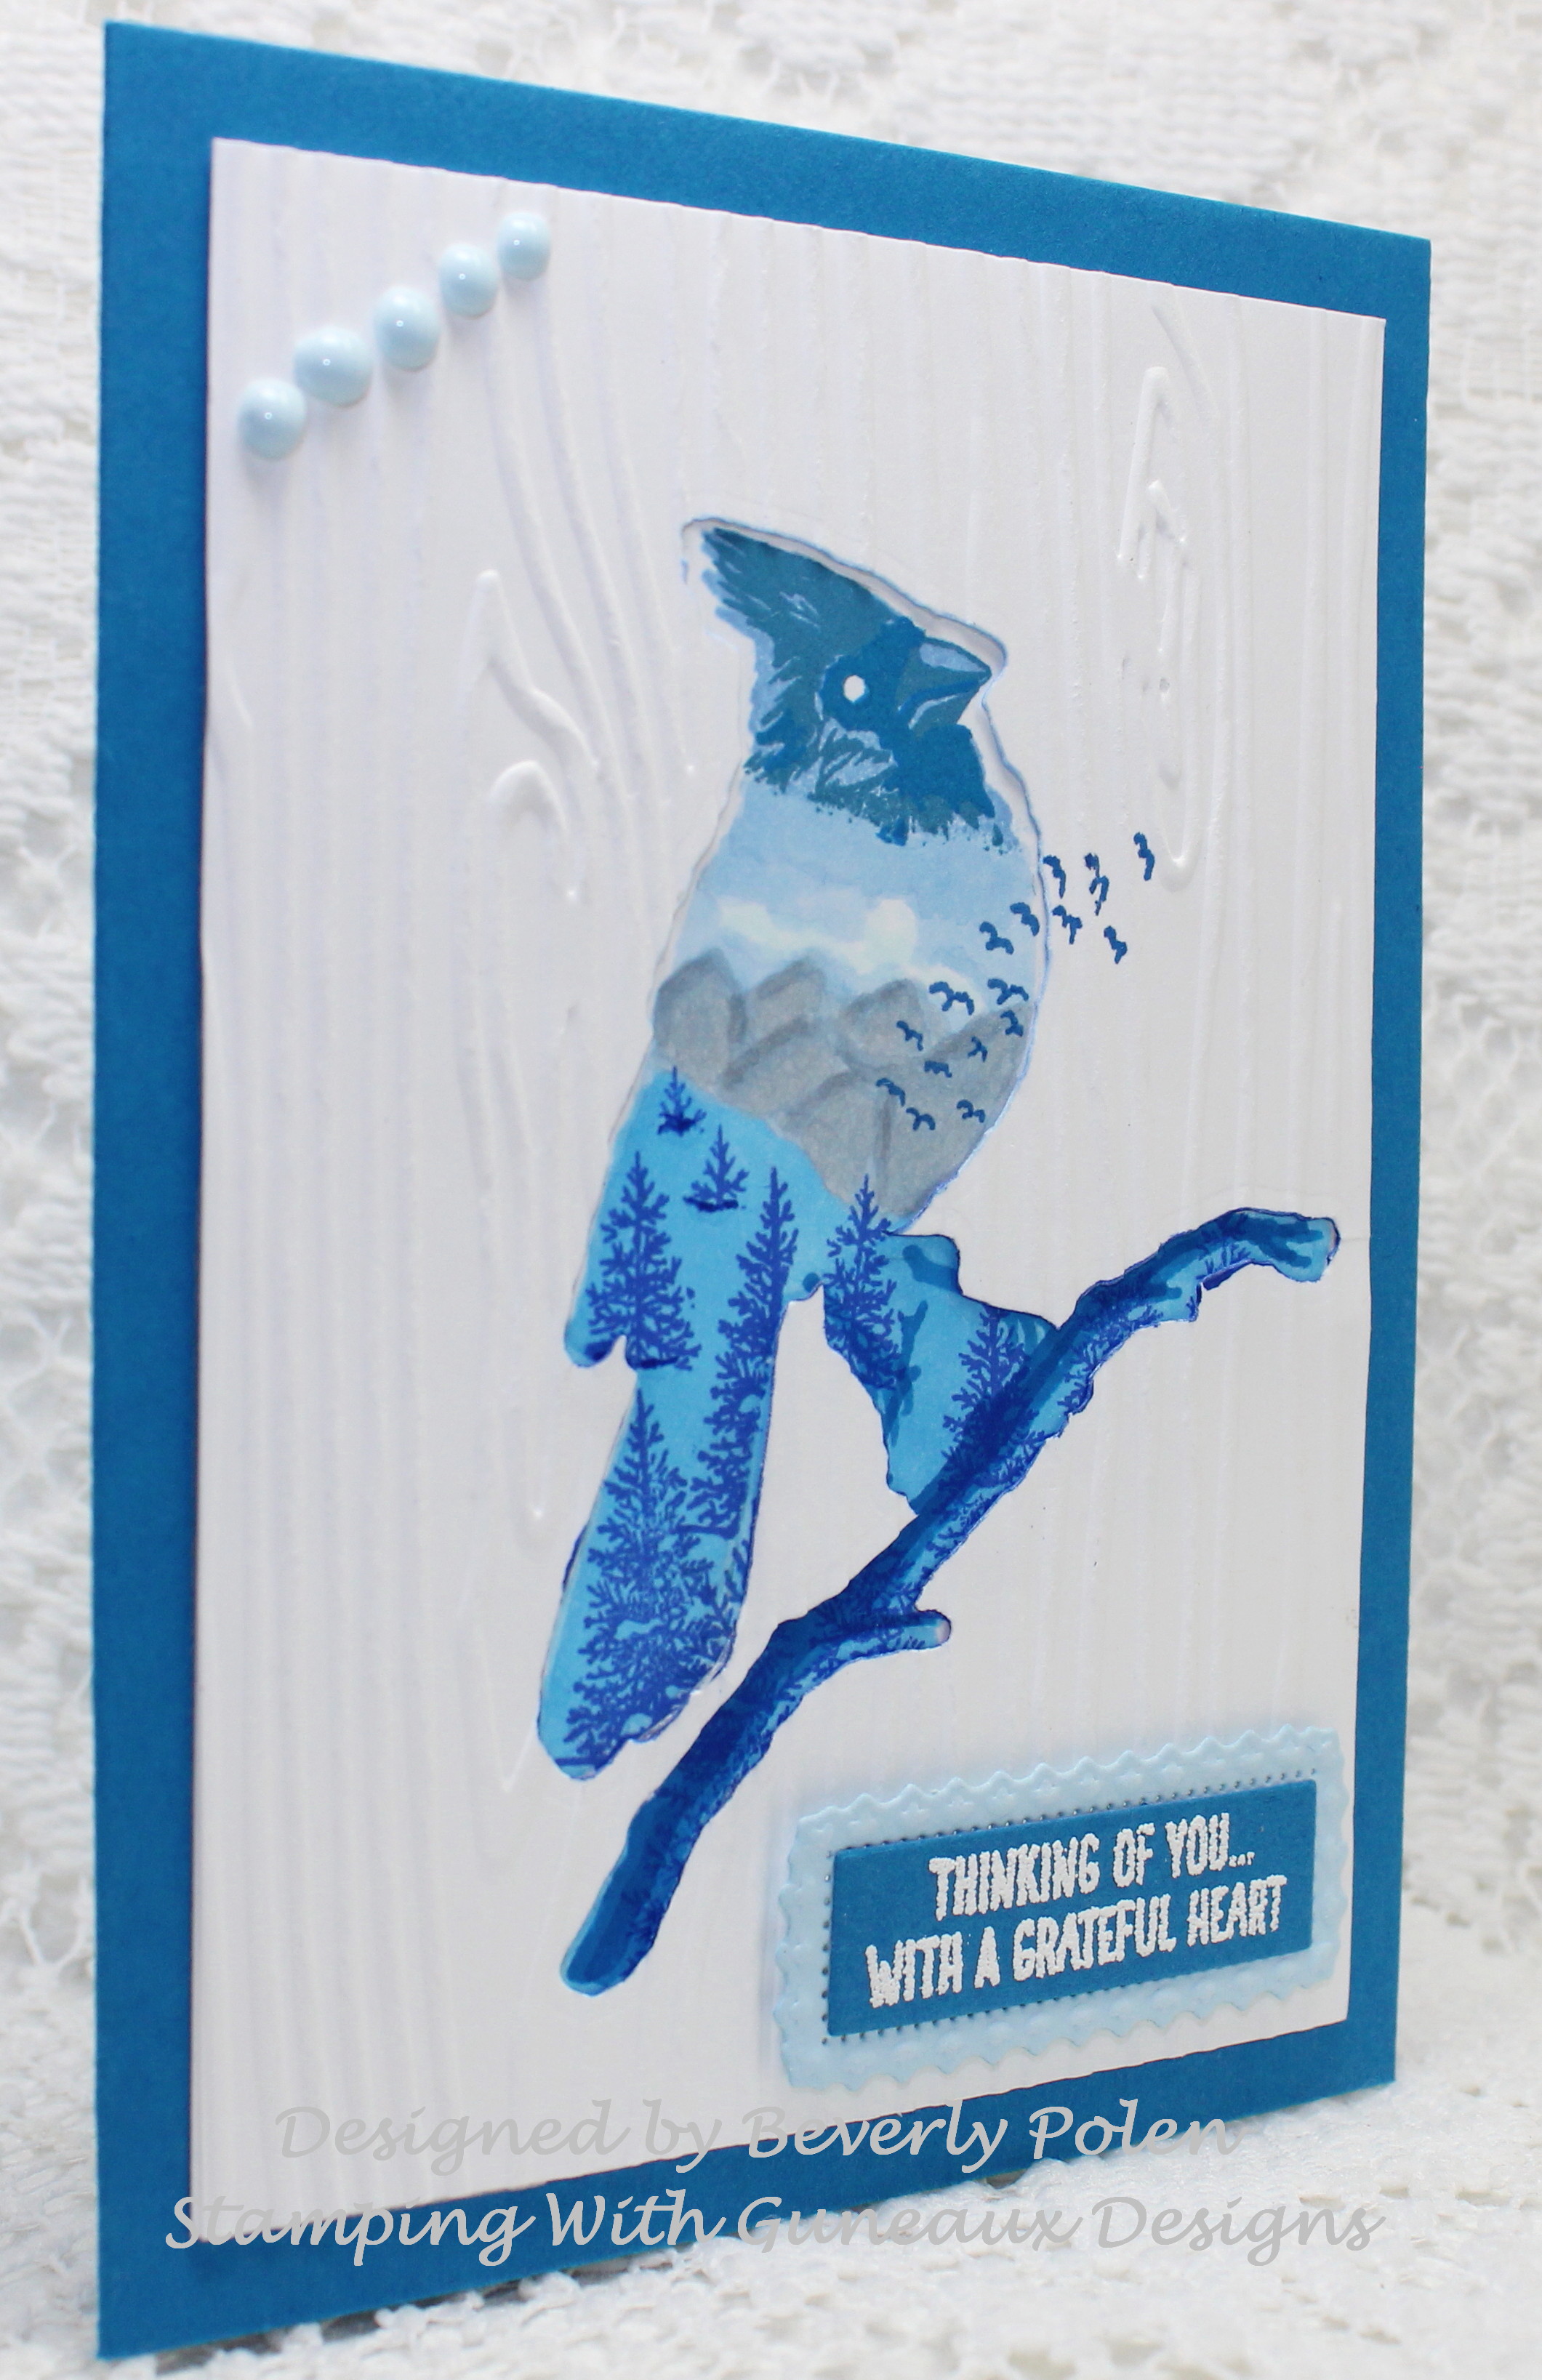
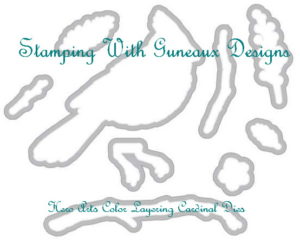
The card features Hero Arts Color Layering Cardinal stamp set and matching dies. My inspiration for this card is this tee shirt on this Website.  The website was selected by Stef (SmilynStef) from Splitcoaststampers.com who hosted today’s Inspiration Challenge.

To create the card, I cut two 3-3/4″ x 5″ pieces of white card  stock.  Using the matching dies, I cut out the bird and branch with the first piece of card stock.  I ran that piece through the Big Shot to emboss it with the Stampin’ Up! Wood Grain Embossing Folder. I then laid this piece over the second piece of white card stock, and traced around the cut out with a pencil to provide an outline of the bird and branch which I would color.

After tracing, I used the Hero Arts Color Layering Cardinal Stamps to layer three blue inks on the head of the bird.  (BTW, it is no longer a cardinal – it’s a Blue Jay!)  I only wanted the head of the bird stamped because I would create a scene similar to the one on the tee shirt, my inspiration piece.

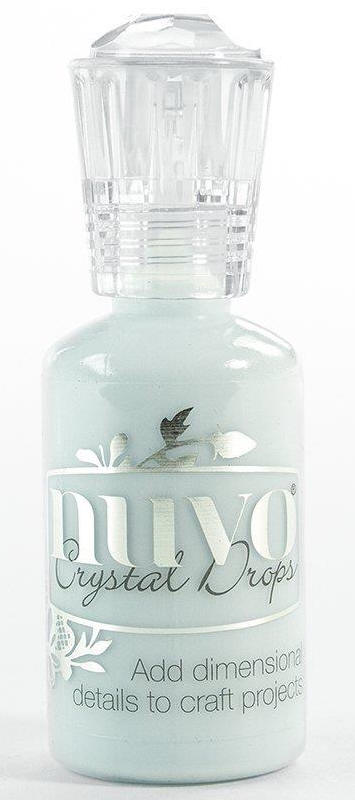
To create the scene, I used several Copic Sketch Markers in blue shades.  I added the mountains with shades of gray, and the trees in Stampin’ Up! Brilliant Blue Classic Ink.  I hand drew the flying birds on the Blue Jay as well as on the top panel.  After adhering the pieces together, I added some Nuvo Duck Egg Blue Crystal Drops across the top-left of the card.

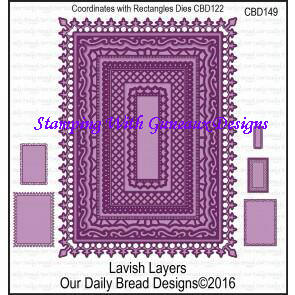
My sentiment, “Thinking of You With A Grateful Heart”, is from the retired Stampin’ Up! Happy Scenes Stamp Set.  I stamped it with VersaMark and embossed it with WOW! White Puff Embossing Powder.  I used two sets of die cuts (ODBD Lavish Layers Dies, and Hero Arts Rectangle Infinity Dies) to cut out the sentiment and a mat for it.

Enjoy the card, and I would love to get your feedback!  Leave me some happy notes in the comment section!  I hope you are having a wonderful weekend!


Thinking Of You With A Grateful Heart   Thinking of You With A Grateful Heart  Stampin Up Happy Scenes Stamp Set         


1 Corinthians 11:23 – 26 (NIV)

Apostle Paul was writing to the church of Corinth:  “For I received from the Lord what I also passed on to you:  The Lord Jesus, on the night he was betrayed, took bread, and when he had given thanks, he broke it and said, “This is my body, which is for you; do this in remembrance of me.”  In the same way, after supper he took the cup, saying, “This cup is the new covenant in my blood; do this, whenever you drink it, in remembrance of me.”  For whenever you eat this bread and drink this cup, you proclaim the Lord’s death until he comes.”

Step Ladder Center Cut Card Fold

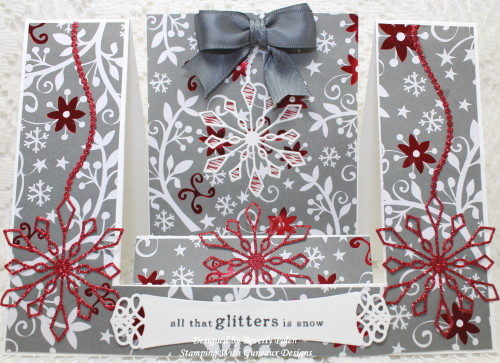
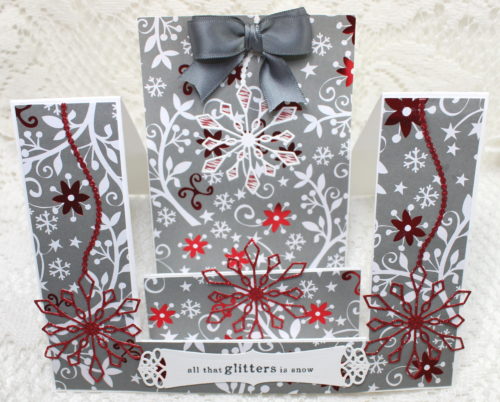
Have you searched for instructions on how to make a Step Ladder Center Cut Card Fold?  I have searched and searched for a tutorial or video for this card fold, and I have found so many different measurements and names given for the fold.  I do not know what is correct.  However, I wanted to make a card with the fold, thus, I did a lot of guessing.  Here is my creation, and I will share a tutorial below about the card fold.

Step Ladder Center Cut Card

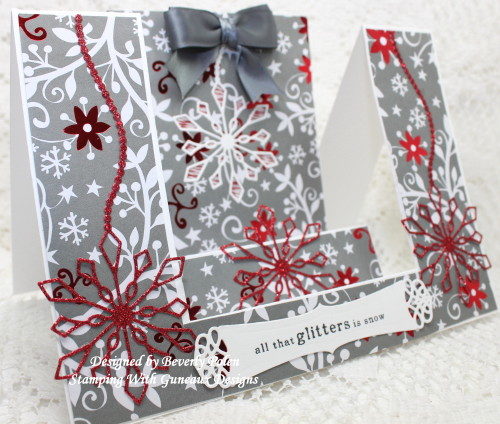
But first, I want to share a little information about the card.  There are three “steps” in the center of the card with each one higher than the other.  The third step in the back is the highest and includes an additional piece of card stock for the main feature of the card.

Step Ladder Center Cut Card Fold

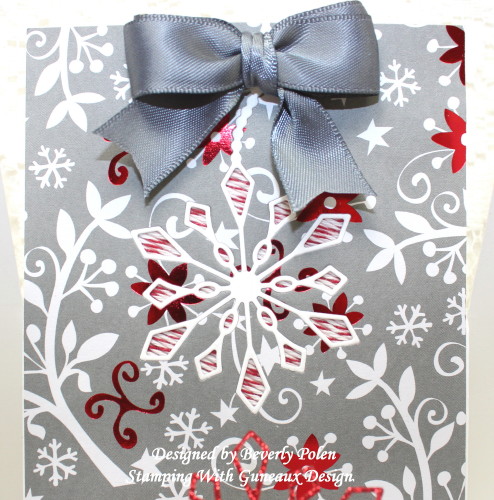
The measurements I used for the card resulted in a 5″ x 7″ card, or an A7 size card.  I want to draw your attention to the third step that I mentioned includes an additional piece of card stock.  Look closely, and you will see an inlaid snowflake in white.  Look even closer and you will see twine behind the snowflake.  This technique is called the Twine Inlay Technique.  Here is a tutorial for this technique.  The following photo is a closeup of the results of using the technique.

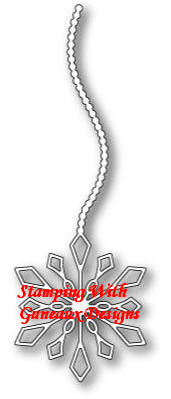
I prepared this card for submission to a Splitcoaststampers “Technique Lovers Challenge”, which involved using the Twine Inlay Technique. I created this main feature of the card with the Memory Box Alpine Snowflake Die.

Enjoy the card, and leave a comment about it!


STEP LADDER CENTER CUT CARD FOLD TUTORIAL

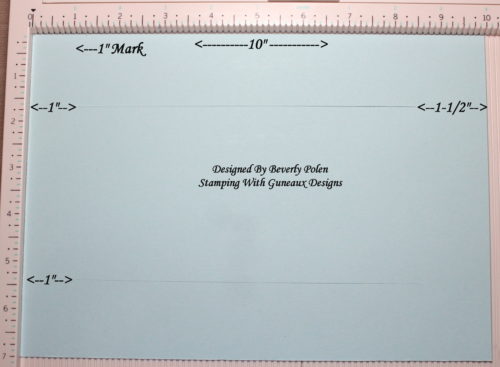
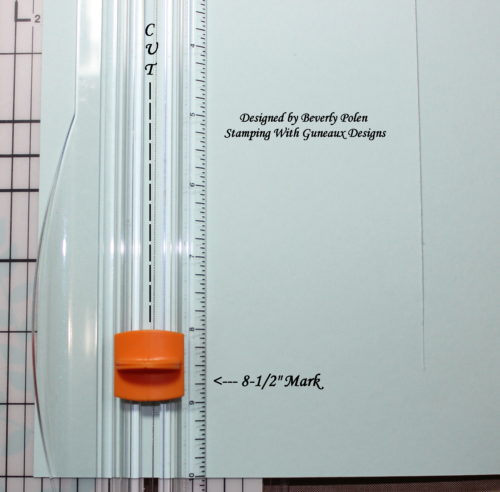
  • Cut a 7″ x 10″ piece of card stock,
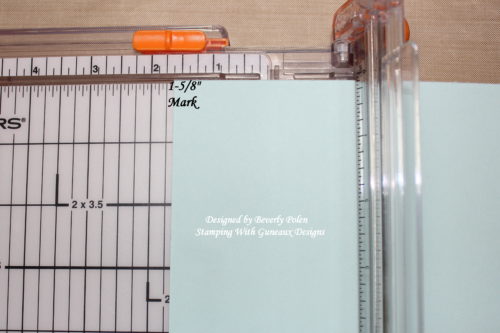
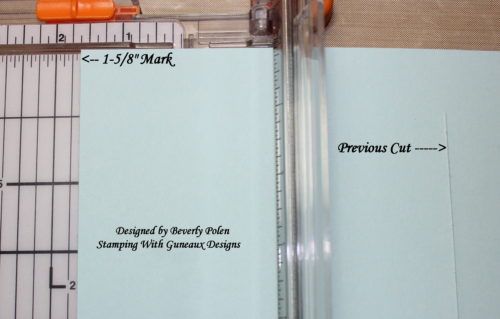
  • With the 7″ side at the top of a cutting tool (henceforth, trimmer) move the card stock to the left to the 1-5/8″ mark,
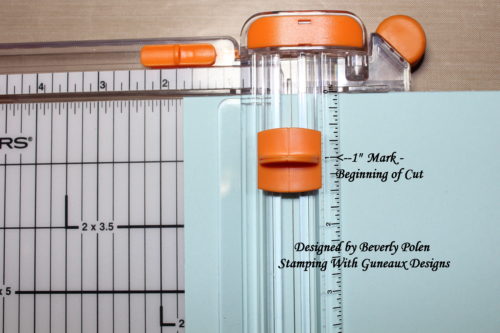
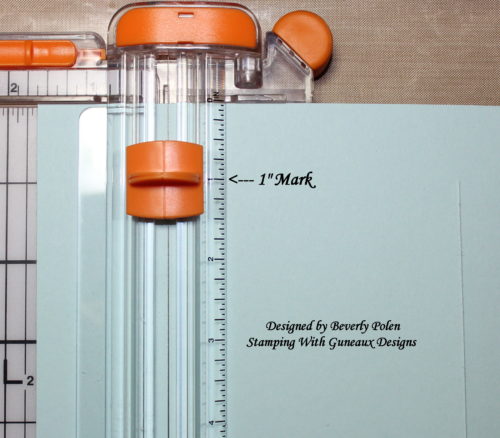
  • Move the cutting blade of your trimmer down to the 1″ mark,

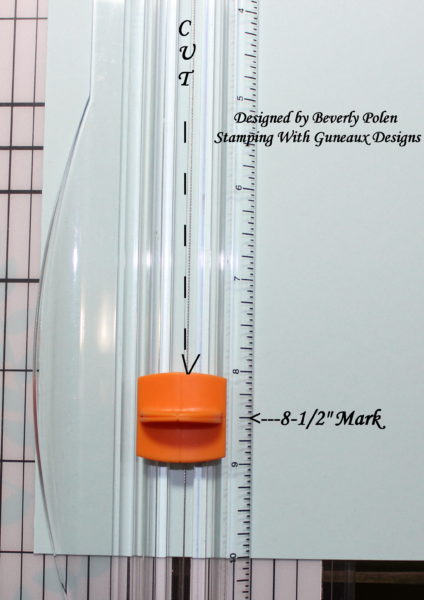
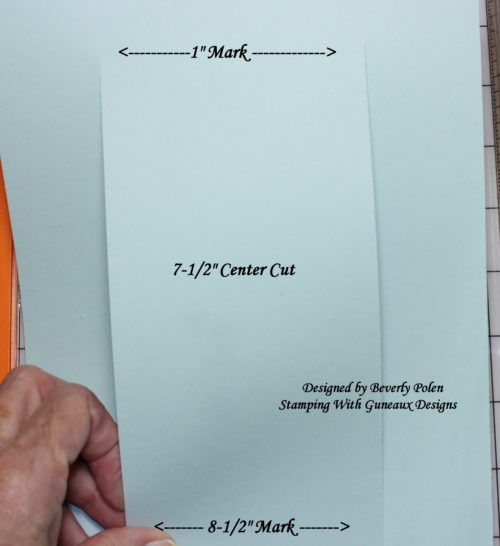
  • Cut the card stock from the 1″ mark down to the 8-1/2″ mark,

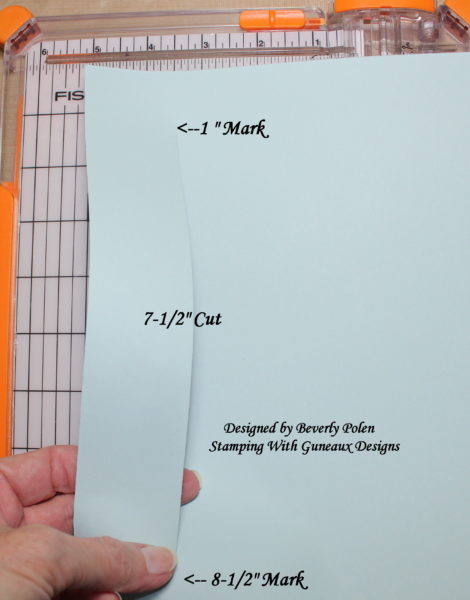
  • The result is a 7-1/2″ cut,

  • Flip the card stock over, not around, so that the BACK that was face down is now face up (if you turn the card stock around 90 degrees instead, the cuts will not line up),
  • With the 7″ side at the top of the trimmer, move the card stock to the left to the 1-5/8″ mark,

  • Move the cutting blade of your trimmer down to the 1″ mark,

  • Cut the card stock from the 1″ mark down to the 8-1/2″ mark, resulting in the cuts on both sides lining up evenly,

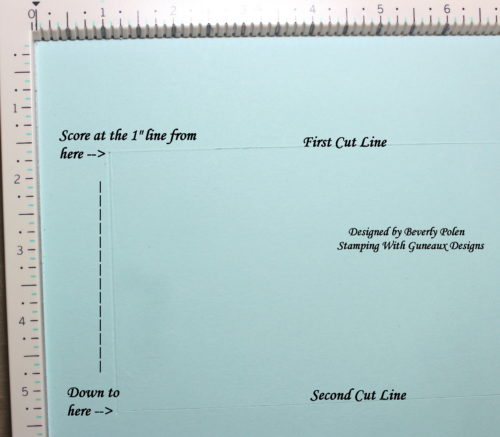
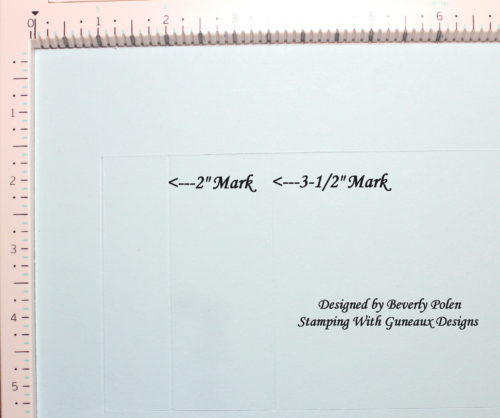
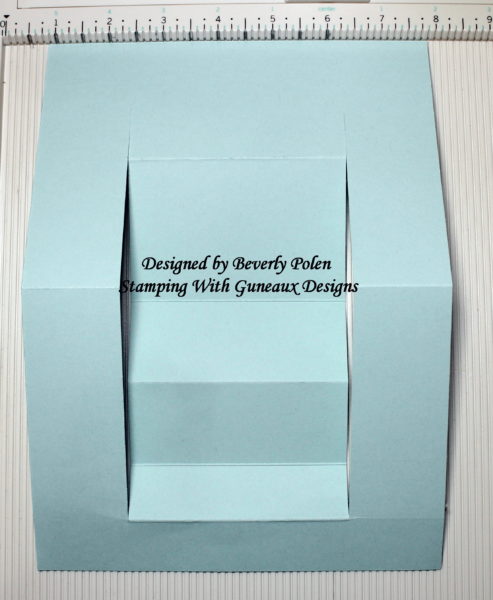
  • Place the card stock onto a scoring tool with the 10″ side at the top and the cuts beginning at the 1″ mark against the left of the tool,

  • Beginning at the 1″ mark and at the first cut line, score down to the second cut line,

  • Score at the 2″ and 3-1/2″ within the two cut lines,

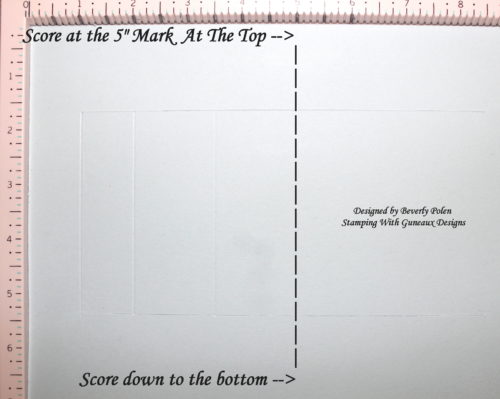
  • Score at the 5″ mark from the top of the card stock to the bottom,

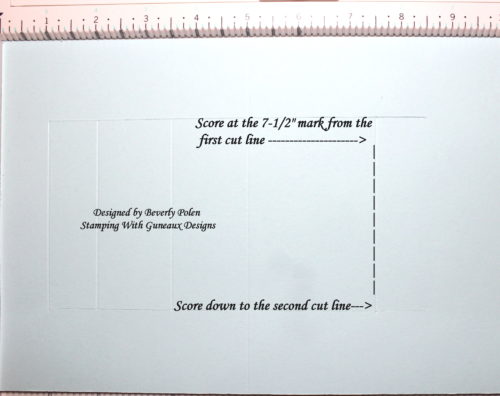
  • Score at the 7-1/2″ mark within the two cut lines,

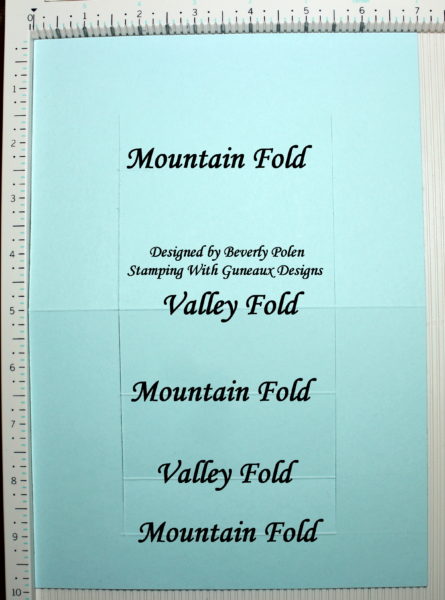
  • With the card stock cut and scored, begin folding the score lines as shown in this photo,

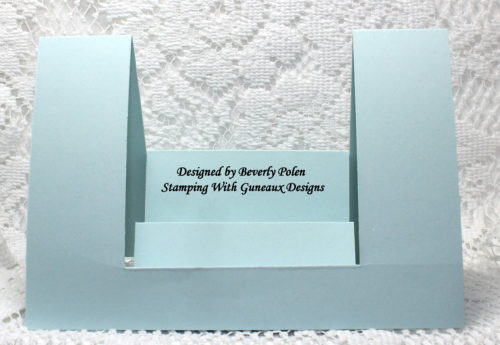
  • The Step Ladder Center Cut Card Fold will look like the following after folding.

  • With the card stock standing after the folding, it will look like this:

  • Decorate the card as desired.  If a piece of card stock with the main feature is added to the third step of the step ladder card, cut the piece at 3-11/16″ x 4-7/8″ so it will fit horizontally and vertically.   Of course die cuts or other elements can be added on the third step as a main feature.  Enjoy your creation.

Butterfly_1_1God’s Blessings!
Stamping With Guneaux Designs By Beverly Polen
Firm Reliance on Divine Providence!


 1 PETER 3:12-15 (NIV)

“For the eyes of the Lord are on the righteous and his ears are attentive to their prayer, but the face of the Lord is against those who do evil.  Who is going to harm you if you are eager to do good?  But even if you should suffer for what is right, you are blessed. Do not fear what they fear; do not be frightened.  But in your hearts set apart Christ as Lord.  Always be prepared to give an answer to everyone who asks you to give the reason for the hope that you have.”

Spellbinders Astoria Decorative Accents and Labels

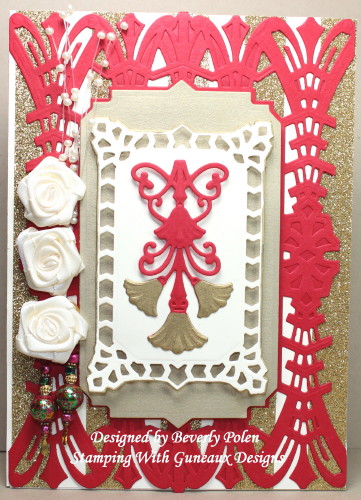
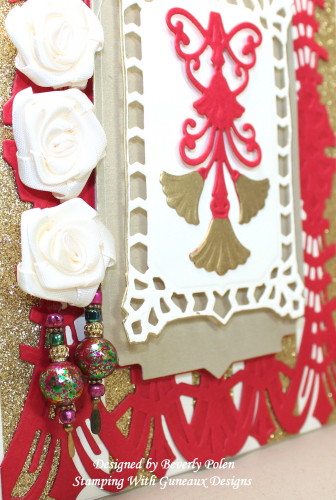
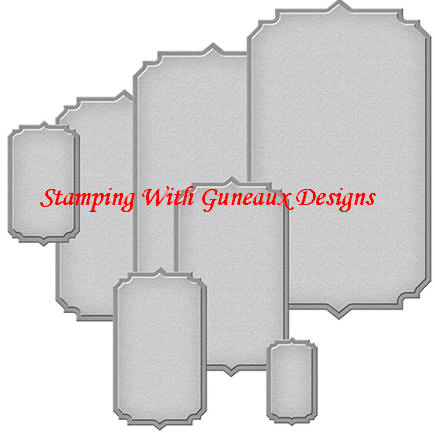
I have a card share today that is not my normal type of card.  It is an Art Deco card featuring the Spellbinders Astoria Decorative Accents and Labels Dies.

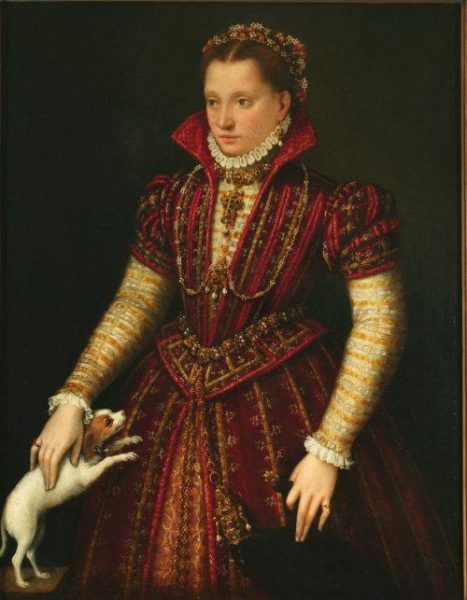
I created the card for Splitcoaststampers’ Inspiration Challenge hosted by Steph (SmilynStef).  She picked this great site, “I don’t wear dresses”, from which to draw inspiration when creating. This photo on the site was my inspiration for the card.  It is a portrait of a noblewoman, ca. 1580.  You can read about the portrait HERE and see a larger picture of her HERE.

I love the red and gold in the woman’s dress and its high collar. I thought the red die cut panel would be a good representation of the high collar as well as reflecting the color of her dress. I used SU Brush Gold Card Stock to reflect the gold in the dress. I also used SU Gold Metallic Tape behind the red panel. To the left of the card, I added ribbon flowers and some beads above and below the flowers.


I enjoyed making the card, and I hope you enjoy viewing it.


THE PRIMARY PRODUCTS USED FOR THIS PROJECT


Butterfly_1_1God’s Blessings!
Stamping With Guneaux Designs By Beverly Polen
Firm Reliance on Divine Providence!


ISAIAH 45:22-25

“Turn to me and be saved, all you ends of the earth; for I am God and there is no other. By myself I have sworn, my mouth has uttered in all integrity a word that will not be revoked; Before me every knee will bow; by me every tongue will swear.  They will say of me, ‘In the Lord alone are righteousness and strength.’  All who have raged against him will come to him and be put to shame.  But in the Lord all the descendants of Israel will be found righteous and will exult.”

Greeting Card Kids

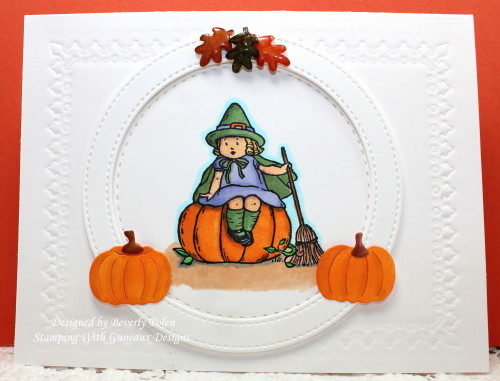
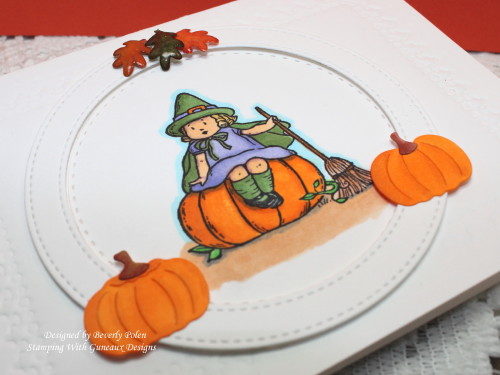
Happy Monday!!  Hope you had a great weekend!  For today, I created a card using the retired Stampin’ Up! Greeting Card Kids Stamp Set.  I love this stamp set, especially the image I used on this card.

Greeting Card Kids

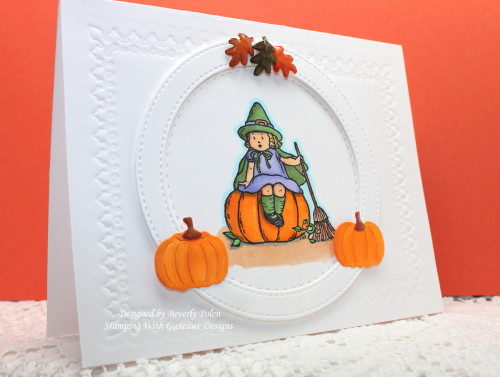
To create the card, I cut a piece of Neenah White Card Stock at 8-1/2″ x 5-1/2″ and folded it in the middle for an A2 size card (5-1/2″ x 4-1/4).  I dry embossed the front of the card base with the largest rectangle die from the Our Daily Bread Designs Lavish Layers dies.

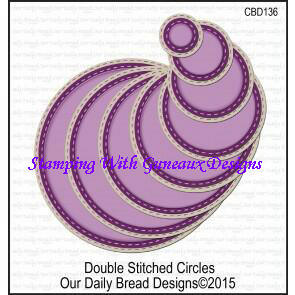
Using the second largest die from Our Daily Bread Designs Double Stitched Circles dies, I cut a circle from Neenah Solar White Card Stock (I used this card stock for all elements and where needed, colored them with Copic Sketch Markers.  I stamped the image onto the circle using Memento Tuxedo Black Ink, and colored it with Copics.

greeting-card-kids-3_1

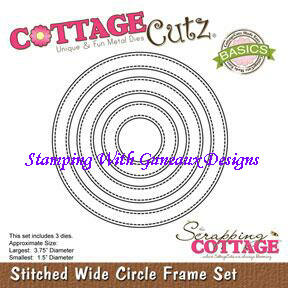
After coloring the image, I cut out one circle frame using the Cottage Cutz Stitched Wide Circle Frame Dies, two pumpkins from the Cottage Cutz Autumn Centerpiece Die, and three leaves from an old punch I have.  I colored the pumpkins and leaves with copics, and used Stampin Up Clear Embossing Powder on the leaves.  I attached these elements to the card front.  I finished the card and submitted it for a Splitcoaststampers Clean and Simple Challenge to add pumpkins to a card.

greeting-card-kids-4_1


SUPPLIES USED

a-cardstock-neenah-classic-crest-solar-white-25-pk-ncsw_image1__89431-1406030158-250-250  lavish_layers_cbd149  odbd-double-stitched-circles  copicsketchmarkers  memento-ink-pad-tuxedo-black-tsme-900_image1__01192-1406041667-250-250

cottagecutz-stitched-wide-circle-dies  cottagecutz-autumn-centerpiece  suclearembossingpowder


Butterfly_1_1

God’s Blessings!

Stamping With Guneaux Designs By Beverly Polen


Jesus said to the disciples, “In that day you will no longer ask me anything.  I tell you the truth, my Father will give you whatever you ask in my name.  Until now you have not asked for anything in my name.  Ask and you will receive, and your joy will be complete.”  John 16:23-24