Ornament Keepsakes Stamp Set and Be of Good Cheer DSP Christmas Card

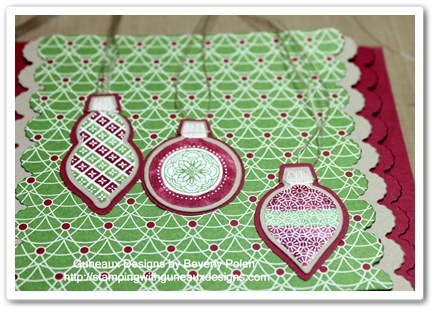
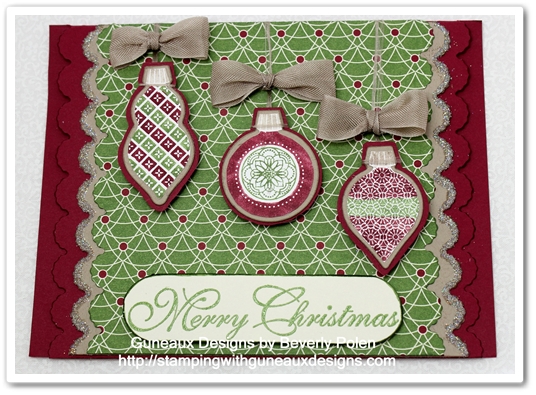
I cannot get enough of making cards with the Ornament Keepsakes Stamp Set (128051) from Stampin’ Up! (SU)!  My opinion is that this set is one of SU’s best sets for the season.  For today’s card share, I have coupled the Ornament Keepsakes Stamp Set with the Stampin’ Up! Be of Good Cheer DSP (126896).
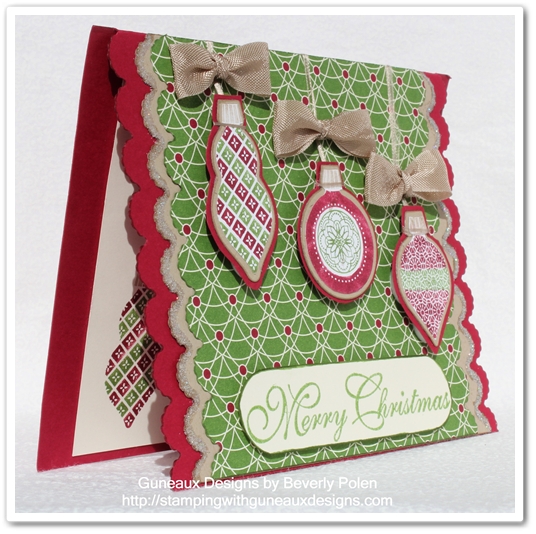
The picture below provides a side view, including the inside, of the card.
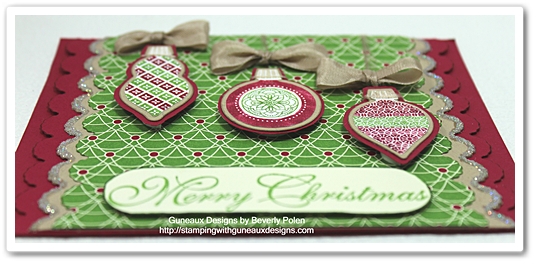
This picture shows the dimensions of the card.
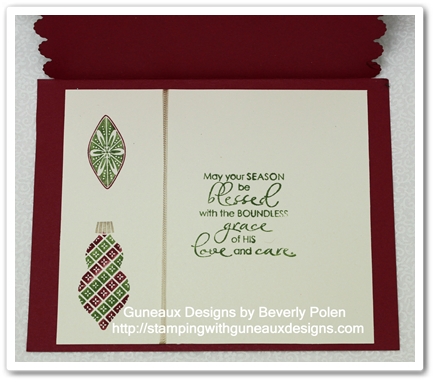
This picture is of the card’s inside.
Stampin’ Up! Supplies (including catalog item numbers) Used to Create the Ornament Keepsakes Christmas Card:

Stamp Sets:  Ornament Keepsakes Stamp Set (128051), Greetings of the Season (128033), and Christmas Blessings (123809)

Paper:  Raspberry Ripple Card Stock (126842), Crumb Cake Card Stock (120953), Whisper White Card Stock (100730), and Be of Good Cheer Designer Series Paper(126896)

Ink (Stampin’ Write Markers): Raspberry Ripple (126856 – comes in a pack of 5 different colors),  Gumball Green (same as above), Crumb Cake (120967), and a VersaMark Ink Pen

Accessories:  Adorning Accents Edgelits (125595), Holiday Ornaments Framelits (127816), Crumb Cake  1/2″ Seam Binding Ribbon (122332), Heat Tool, Heat and Stick Powder (100625), Dazzling Diamonds Glitter (102023), and Foam Adhesive Circles

Instructions for Creating the Ornament Keepsakes Christmas Card:

You will:

  • Cut an 8-1/2″ x 5-1/2″ piece of Raspberry Ripple Card Stock and fold it in the middle to form the card base.
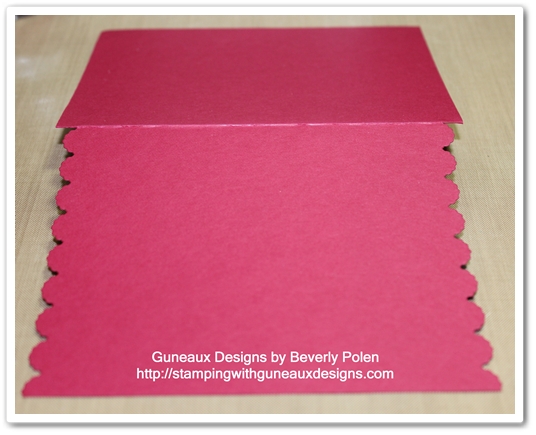
  • Cut along both 5-1/2″ sides of the card front using the scalloped Adorning Accents Edgelit.
  • Cut a 4-1/4″ x 4-7/8″ piece of Crumb Cake Card Stock and a 4-1/4″ x 4-5/8″ piece of the Be of Good Cheer Designer Series Paper.
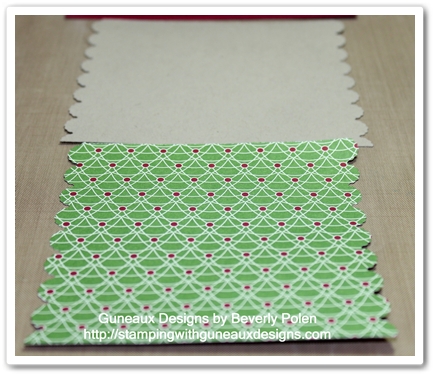
  • Cut along both 4-7/8″ sides of the Crumb Cake Card Stock and the 4-5/8″ sides of the piece of Be of Good Cheer DSP using the scalloped Adorning Accents Edgelit.
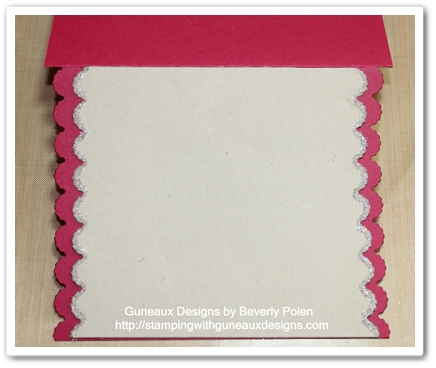
  •  Apply VersaMark Ink around the scalloped edges of the Crumb Cake Card Stock, cover with Heat and Stick Powder, heat set, cover with Dazzling Diamonds Glitter, and heat set.
  • Attach to the front of the card front.
  • Cover the three Ornament Keepsakes stamps with Gumball Green, Raspberry Ripple, and Crumb Cake ink using the Stampin’ Write Markers (see first picture).
  • Stamp the images onto Whisper White or Very Vanilla Card Stock.
  • Cut the images out with the appropriate Holiday Ornaments Framelits.
  • OPTIONAL ORNAMENT MATS:
    • Cut off the white border of each ornament.
    • Cut out the same ornaments using the framelits and Crumb Cake Card Stock.
    • Trace around each Crumb Cake ornament onto Raspberry Ripple Card Stock and cut them out about 1/16″ outside the tracings.
    • Adhere the Crumb Cake ornaments to the stamped ornaments, and the Raspberry Ripple ornaments to the Crumb Cake ornaments.
  • Attach thread, twine, cord, etc., around the top of each ornament…Attach foam adhesive circles onto the back of each ornament.
  • Attach each ornament onto the piece of the Be of Good Cheer DSP.  Wrap the thread (or whatever you choose to use) over the top of the DSP and adhere to the back side.
  • Tie three bows using the Crumb Cake1/2″ Seam Binding Ribbon and attach them to the card front (see first picture).
  • Cover with Gumball Green Ink the “Merry Christmas” stamp from the Christmas Blessings stamp set and stamp the image onto a piece of Very Vanilla Card Stock.
  • Cut out the sentiment and adhere to the bottom of the piece of DSP.
  • Adhere the DSP over the Crumb Cake Card Stock that was previously adhered to the card front.
  • Decorate the card’s inside as desired.
God’s Blessings!
Stamping With Guneaux Designs
by
Beverly Polen

 Enjoy making Christmas cards with your Ornament Keepsakes Stamp Set!

Scentsational Season Stamp Set – Christmas Card

I don’t drink coffee or hot chocolate but I love the steaming cup stamp image from the Scentsational Season stamp set (121190).  And the snowflake on the cup goes perfectly with a Christmas card featuring snowflakes! 

Scentsational Season Stamp Set

The card’s snowflakes were punched out with a non-Stampin’ Up! punch.  I thought it matched so perfectly the snowflake on the stamp image.  The miniature snowflakes from the punch outs were used for the steam coming up from the cup. 

Also featured on the Christmas card is the “Merry Christmas” stamp image from the Stampin’ Up! Greetings of the Season stamp set.  The following are additional pictures of the card.

 Scentsational Season Christmas Card

 Scentsational Season Christmas Card

Supplies (and Stampin’ Up! item numbers) used to make the Scentsational Season  Christmas Card:

 Stamp Sets:  Scentsational Season (121190) and Greetings of the Season (128033)

Paper: Whisper White Card Stock (100730) and Bashful Blue Card Stock (105120)

Ink:  Bashful Blue Classic Ink (126961), Soft Suede Stampin’ Write Marker (comes in a group 8 different colors – 119703), and VersaMark Ink or Pen

Accessories:  Snow Burst Embossing Folder (retired), Crystal Effects (101055), Heat and Stick Powder (100625), Dazzling Diamonds Stampin’ Glitter (102023), VersaMark Ink Pad or Pen, Heat Tool, Dimensionals Adhesive (104430) (or other foam adhesive circles), and 3/16″ Corner Punch (119871)

The Scentsational Season Christmas card is very easy to make and you can make it too by following these instructions:

  • Cut an 8-1/2″ x 5-1/2″ piece of Whisper White Card Stock (or other white card stock) and fold in the center to form a card base.
  • Cut another piece at  2-1/4″ x 4-1/2″.
  • Cut two 4″ x 5-1/4″ pieces of Bashful Blue Card Stock.
  • Using a snowflake punch, cut out three snowflakes on the left side of both Bashful Blue Card Stock pieces.
  • On one Bashful Blue Card Stock piece, apply VersaMark Ink on the snowflakes and cover them with the Heat and Stick Powder.  Heat set.
  • Cover the snowflakes with Dazzling Diamonds Glitter and heat set.
  • Slip the right side of this piece into the Snow Burst Embossing Folder and run through a die-cutting machine.
  • Cover with Bashful Blue Classic Ink the cup image from the Scentsational Season Stamp Set and stamp it onto the lower part of the 2-1/4″ x 4-1/2″ piece of Whisper White Card Stock.  **Before stamping the image, remove the ink around the rim and cover with Soft Suede ink (Stampin’ Write Marker). 
  • Apply Crystal Effects and let dry.
  • After drying, cover with Bashful Blue ink the “Merry Christmas” sentiment from the Greetings of the Season set and stamp onto the card stock (use a Stamp-a-ma-jig for proper placement).
  • Using foam adhesive circles, adhere onto the Bashful Blue card stock (see picture).
  • Attach to the Whisper White card front.
  • Attach the second Bashful Blue snowflake punched piece of card stock to the inside of the card.
  • Finished!
God’s Blessings!
Stamping With Guneaux Designs
by
Beverly Polen 

Enjoy making your Scentsational Season Christmas Card! 

Stampin Up Christmas Blessings Card – Pink Poinsettias

When I saw the Stampin Up Christmas Blessings Stamp Set in the new annual catalog, I knew I had to have it (as well as many other new sets).  Well, I’m embarrassed to admit that I got caught up with creating with other stamp sets and…..forgot I have this one!  I’m quite sure it’s called “Old Age” or maybe “Chemo Brain”!

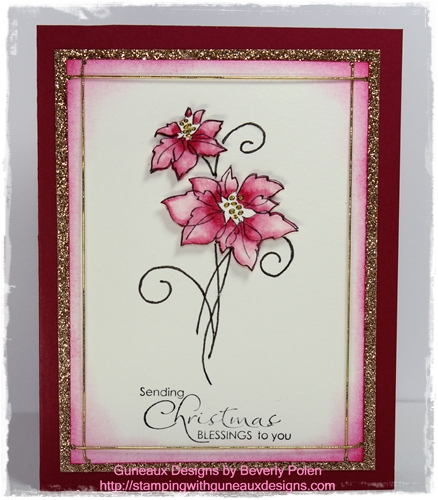
Regardless, today’s post focuses on the Stampin Up Christmas Blessings stamp set.  I decided that I wanted pink poinsettias, therefore, I created them.  I love how the card pops with the Glimmer Paper and Gold Cord!

Supplies used to create this Stampin Up Christmas Blessings card:

Stamps:  Stampin Up Christmas Blessings Stamp Set (123809)

Paper:  Watercolor Paper (122959), Champagne Glimmer Paper (127885), and Raspberry Ripple Card Stock (126842)

Ink:  Melon Mambo Classic Ink (126948), Melon Mambo Stampin Write Marker (119702), and Blender Pen (102845)

Accessories:  Gold Elastic Cord (can pick up at a craft store or, if you’re lucky, you’ll have some of Stampin Up’s retired cord), Paper Snips (103579), Stampin’ Dimensionals (104430) or Foam Adhesive, Sticky Strip (104294) or other strong adhesive, and Stamping Sponges (101610)

Instructions for creating this Stampin Up Christmas Blessings card:

  • Cut a 3-1/2″ x 4-3/4″ piece of Stampin Up Watercolor Paper.
  • Cover with Black StazOn Ink the poinsettias stamp from the Christmas Blessings stamp set.
  • Stamp the image on the piece of Watercolor Paper.
  • Using a Melon Mambo Stampin Write Marker and a Blender Pen, color the poinsettias.

When coloring the poinsettias, think of each petal as being in thirds.

  • The bottom of a petal is 1/3 of the petal and is near the stamen.
  • The next 1/3 is the middle of the petal, and the next at the top.
  • The bottom 1/3 is darker than the middle 1/3.
  • The middle 1/3 is lighter than the bottom 1/3, but darker than the top 1/3.
  • The top 1/3 is lighter than the middle 1/3.
  • Using the Melon Mambo marker (brush end), color in the bottom of the petal.
  • Swipe the Blender Pen’s brush end back and forth on scrap paper until there is no ink spreading on the paper.
  • Using the clean Blender Pen, color the middle 1/3 of the petal by picking up some of the Melon Mambo ink at the very edge of where the bottom and middle thirds meet.
  • Swipe the Blender Pen’s brush end back and forth on scrap paper until there is no ink spreading on the paper.
  • Using the clean Blender Pen, pull color from the middle 1/3 to color the top 1/3 of the petal.
  • Repeat until all petals are colored.
  • Using the marker, slightly darken the portions of each petal that the natural light would not hit.
  • OPTIONAL:
    • Except for the size of the Watercolor Paper, repeat all of the above to provide a second layer of poinsettias.  The paper size should be small enough for the poinsettias image to just fit.
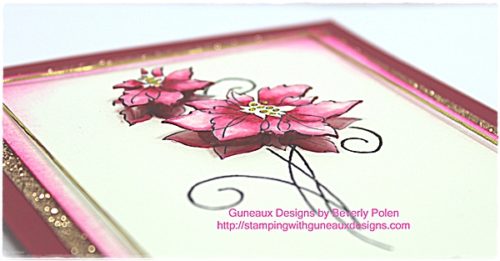
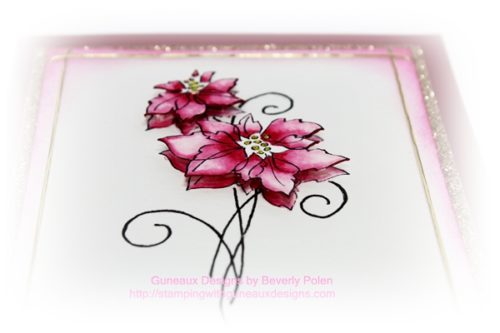
    • Cut out the second set of poinsettias, attach dimensionals, and adhere on top of the first poinsettias.
  • Stamp the sentiment, “Sending Christmas Blessings To You”, at the bottom of the Water Color Paper (see picture).
  • Sponge Melon Mambo Classic Ink around the edge of the Watercolor Paper.
  • Snip the corners (see picture) and wrap the Gold Elastic Cord around the Watercolor Paper and adhere it to the back side of the paper.
  • Cut a 3-3/4″ x 5″ piece of Champagne Glimmer Paper and adhere to it the Watercolor Paper.
  • Cut an 8-1/2″ x 5-1/2″ piece of Raspberry Ripple Card Stock and fold it in the center for the card base.
  • Attach the decorated Watercolor Paper and Glimmer Paper to the Raspberry Ripple card base.
  • Finished!  Enjoy!
God’s Blessings!
Stamping With Guneaux Designs
by
Beverly Polen


Now it’s your turn to make a beautiful card using the Stampin Up Christmas Blessings stamp set!

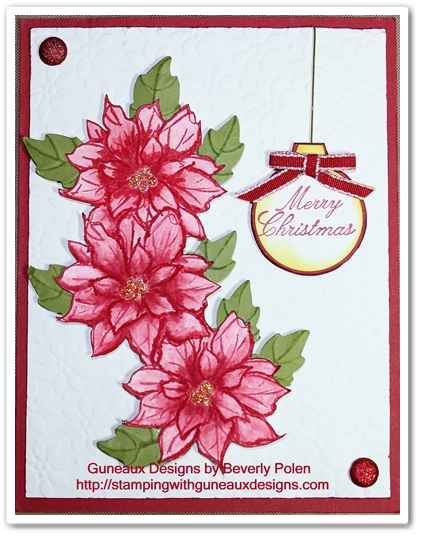
Stampin Up Watercolor Winter – Cascading Poinsettia Christmas Card

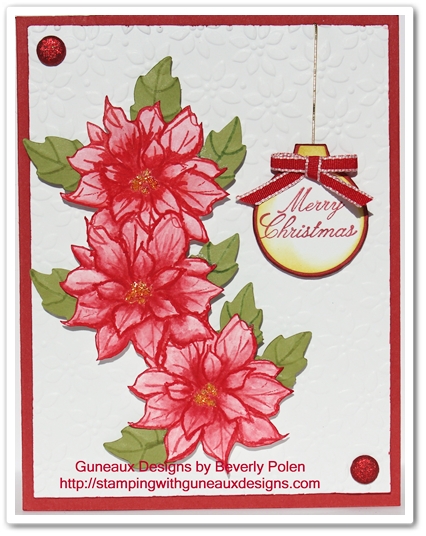
Today I am using the Stampin Up Watercolor Winter Stamp Set to instruct you on a technique called Cascading Images.  This technique is wonderful for adding a series of connecting images over the top of a background to create a focal point.  The poinsettia stamp in the Stampin Up Watercolor Winter Stamp Set is great for this technique.

Stampin Up Supplies (and catalog item numbers) used for the Stampin Up Watercolor Winter card:

Stamps:  Stampin Up Watercolor Winter Stamp Set (129727) and Come to Bethlehem Stamp Set (120591)

Paper:  Riding Hood Red Card Stock (111348), Whisper White Card Stock (100730), and Lucky Limeade Card Stock (122926)

Ink:  Real Red Classic Ink (126949), Real Red Stampin Write Marker (199952), and Riding Hood Red Write Marker (119701)

Accessories:  Big Shot Die-Cutting Machine (113439), Blender Pen (102845), Petals-A-Plenty Embossing Folder (116824), Dimensionals (104430), and Post-it Note

Instructions for creating the cascading poinsettia:

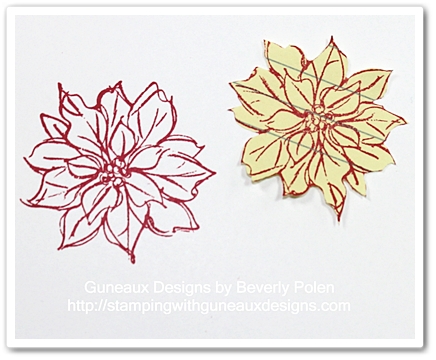
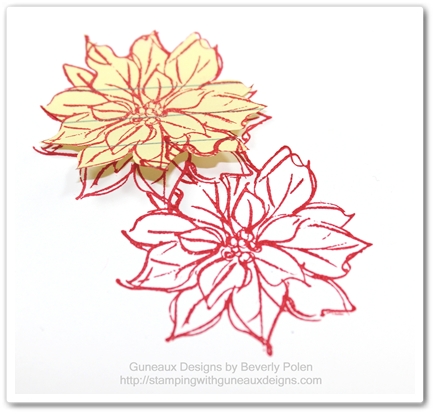
  • Cover in Real Red Classic Ink the poinsettia outline stamp and stamp onto a Post-it Note (henceforth called sticky note) and a 4″ x 5-1/4″ piece of Whisper White Card Stock (when stamping on the sticky note, ensure you stamp on the portion that contains the stickiness on the back side), 
  • Cut out the poinsettia on the sticky note, cutting right on or just inside the lines,

  • Place the sticky note over the stamped poinsettia on the Whisper White Card Stock,
  • Ensure the sticky note does not cover any outside lines of the poinsettia,
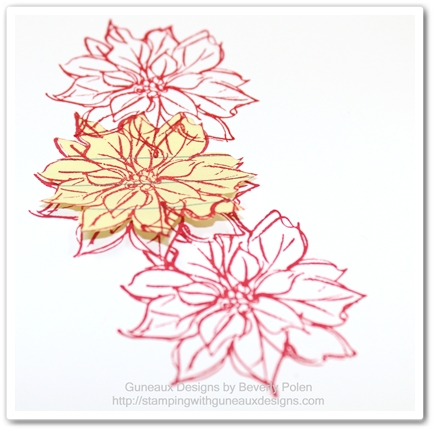
  • Cover the poinsettia stamp with Real Red Classic Ink and stamp the image just below the first poinsettia, ensuring you stamp on the bottom of the sticky note,
  • When stamping the second poinsetta, stamp it slightly to the right of the first one,

  • Cover the poinsettia stamp again with Real Red Classic Ink and, leaving the sticky note in place, stamp the poinsettia above the center one in the same manner as that done for the second poinsettia, and
  • Remove the sticky note.

  • If you got out your crafting tools and followed along in creating this image, you have just learned about and created a Cascading Image.

Let’s move on to finishing the Stampin Up Watercolor Winter Christmas card.

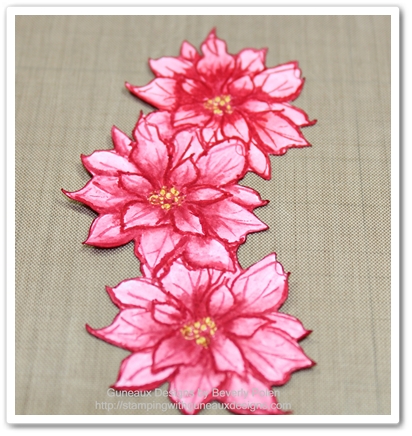
  • Color the poinsettias using a Real Red Stampin Marker and Stampin Up Blender Pen (use the marker around the center of each poinsettia and then spread the ink with the Blender Pen),
  • Add some yellow glitter glue in the center of the flowers and let dry,
  • Cut out the cascading poinsettias, 

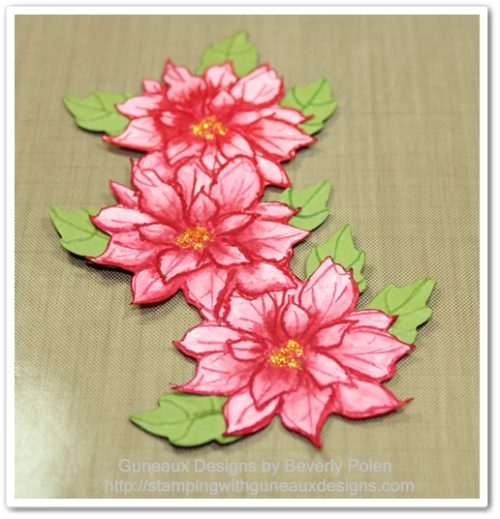
  • (OPTIONAL) Punch or die cut leaves to adhere to the underside of the poinsettias,
  • Attach dimensions (double layer) on the back of the piece,
  • Place a 4″ x 5-1/4″ piece of Whisper White Card Stock inside the Petals-A-Plenty Embossing Folder and run through the Big Shot,
  • Cut an 8-1/2″ x 5-1/2″ piece of Riding Hood Red Card Stock and fold (or score) in half to create a card base,
  • Attach the embossed Whisper White Card Stock to the card base,
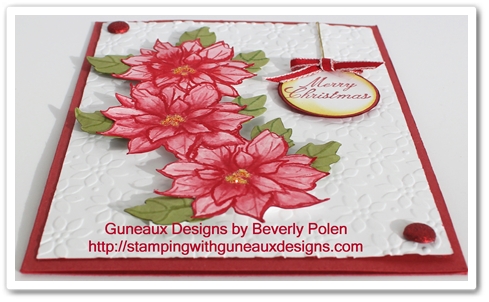
  • Attach the cascading poinsettias onto the left side of the Whisper White Card Stock (see picture),
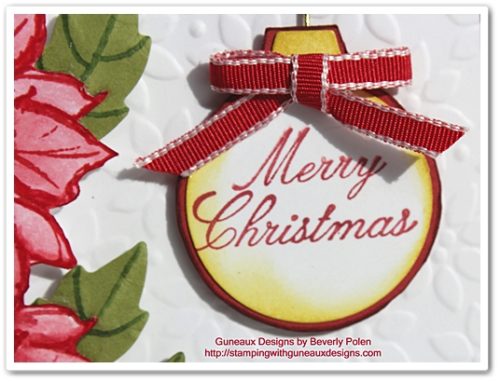
  • Add a sentiment (I used the “Merry Christmas” sentiment from the Come to Bethlehem stamp set),
  • Finish decorating as desired.

 God’s Blessings!
Stamping With Guneaux Designs
by
Beverly Polen

Enjoy using your Stampin Up Watercolor Winter Stamp Set!

Peace on Earth Christmas Card 2012 – Stamping With Guneaux Designs

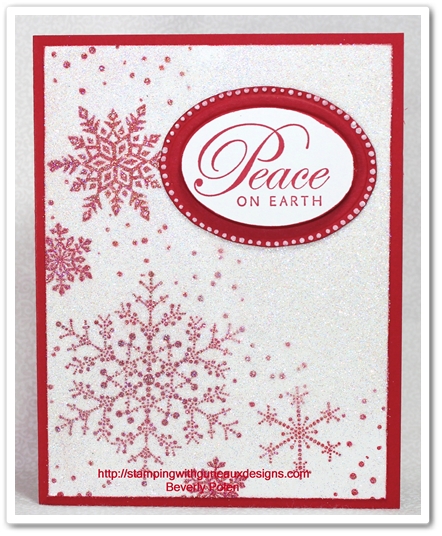
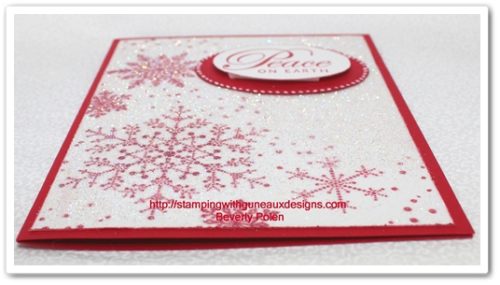
Have you finished making your Christmas cards for this year?  If not, I have a Peace on Earth Christmas Card for you that is an extremely easy Christmas card to make.

Snowflakes are so beautiful on Christmas cards, don’t you think so?  I have two retired Stampin’ Up! snowflakes stamp sets so I didn’t purchase the beautiful Snowflake Soiree stamp set in the current Holiday Catalog.  I decided to use the two sets that I have to create this card.  You can use any snowflake stamp set to create the same card.

Are you thinking that snowflakes are not red?  That’s the beauty of paper crafting.  You can create artwork the way you want it and it doesn’t have to reflect reality.

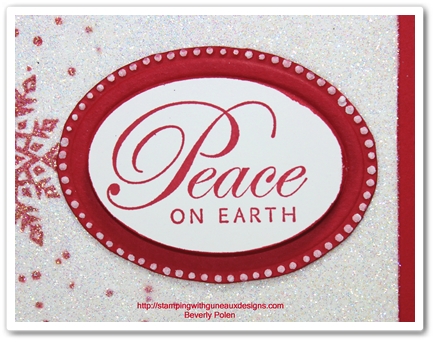
This is a closeup of the sentiment on the Peace on Earth Christmas Card.

Supplies used to make the Peace on Earth Christmas Card:

Stamp Sets:  Snowflake Spot (retired), Snowflakes (retired), and Greetings of the Season

 Ink:  Real Red Classic (126949)

Paper:  Whisper White Card Stock (100730) and Real Red Card Stock (102482)

Accessories:  VersaMark (102283), Heat and Stick Powder (100625), Dazzling Diamonds (102023), Heat Tool of your choice, Oval Designer Frames Embossing Folder (123130), Extra Large Oval Punch (119859), Stampin’ Dimensionals (104430), and White Gel Pen (105021)

Instructions for making the Peace on Earth Christmas Card:

  • Cut a 4″ x 5-1/4″ piece of Whisper White Card Stock,
  • Randomly stamp snowflakes in Real Red Classic Ink onto the Whisper White Card Stock (see picture),
  • Cover the card stock with VersaMark,
  • Cover the card stock with the Heat and Stick Powder and heat set,
  • Cover the card stock with Dazzling Diamonds and heat set,
  • Using the Oval Designer Frame Embossing Folder, emboss the frame onto a piece of Real Read Card Stock,
  • Cut out the embossed frame,
  • Using the White Gel Pen, apply ink on the dots around the frame (see picture),
  • Stamp the sentiment in Real Red Ink onto a piece of Whisper White Card Stock,
  • Cut out the sentiment with the Extra Large Oval Punch,
  • Attach the sentiment onto the embossed frame with Dimensionals,
  • Adhere the sentiment onto the upper-right of the Whisper White Card Stock (see picture), and
  • Cut a 8-1/2″ x 5-1/2″ piece of Real Red Card Stock, fold in half, and adhere the decorated Whisper White Card Stock.

God’s Blessings!
Stamping With Guneaux Designs
by
Beverly Polen
Enjoy the Peace on Earth Christmas Card!

Stampin Up Single Stamps

I am so excited to share with you an opportunity to buy Stampin Up single stamps!  What do I mean by Stampin Up single stamps?  I mean single stamps from Stampin’ Up! stamp sets.  That’s right – from stamp sets {jumping up and down}.  This is a new Stampin’ Up! pilot program that last from now until January 2, 2013.  

These are the THREE stamp sets from which you can buy single stamps:   

(UPDATE:  TEN NEW STAMPS HAVE BEEN ADDED {10-29} – SEE BELOW) 

  Stampin' Up! Single Stamps Word Play

Stampin' Up! Single Stamps from Word Play

Stampin’ Up! Single Stamps – Word Play

           Price                              Item Number             Stamp            Clear Block Needed

$4.95 US

$6.25 CA

132294

Sick

Block C

$4.95 US

$6.25 CA

132295

I Do

Block C

$5.95 US

$7.50 CA

132296

Laughter

Block D

$4.95 US

$6.25 CA

132297

Wish Big

Block C

$6.95 US

$8.95 CA

132298

In My Thoughts

Block H

$5.95 US

$7.50 CA

132299

You Mean the World

Block D

$4.95 US

$6.25 CA

132300

Worth the Wait

Block C

$4.95 US

$6.25 CA

132301

Imagine

Block D

$6.95 US

$8.95 CA

132302

Remember When

Block I

$4.95 US

$6.25 CA

132303

Joy

Block C

$6.95US

$8.95 CA

132304

Dreams

Block E

$4.95 US

$6.25 CA

132305

Thanks a Million

Block D

Stampin' Up! Single Stamps Perfectly Penned

Stampin' Up! Single Stamps from Perfectly Penned

Stampin’ Up! Single Stamps – Perfectly Penned

          Price                         Item Number             Stamp          Clear Block Needed

$4.95 US 

$6.25 CA

132306

Thank You

Block D

$4.95 US

$6.25 CA

132308

Get Well

Block C 

$5.95 US

$7.50CA

132307

Celebrate Today

Block H 

$5.95 US

$7.50 CA

132309

Happy Birthday

Block H

Stampin' Up! Single Stamps - Seasonal Sayings


 Stampin' Up! Single Stamps - Seasonal Sayings


$5.95 US

 $7.50 CA

132310

Christmas

Block H

 $5.95US

 $7.50CA

132311

Halloween

Block H

 $5.95US

 $7.50 CA

132312 

Thanks

Block H

 $4.95US

 $6.25CA

132313

Love

Block D

 $5.95US

 $7.50CA

132314

Celebrate

Block H

 DETAILS:

  • To be taken directly to the individual stamps, click on any of the above relative pictures.
  • This offer is available for clear-mount stamps only.These stamps are available on any order type – customer, demonstrator, workshop, or online.
  • The Stampin’ Up! single stamps will be packaged in cello bags. If you’d like a case for your stamp, you can buy the Clear-Mount Stamp Cases  (119105) that come in packs of four.
  • The stamps will NOT come with a Clear-Mount Block, and you’ll need to buy a block separately if you don’t already have one. The recommended block sizes in the above charts.
  • There is no limit on how many single stamps you can buy from the selected stamp sets.

10-29-2012 UPDATE:  TEN NEW STAMPS HAVE BEEN ADDED TO THE LIST OF SINGLE STAMPS THAT YOU CAN PURCHASE.  THREE OF THE STAMPS HAVE NEVER BEEN SEEN BEFORE (click on below links to see them)! 

Assortment 1 (includes 5 new stamps)

Assortment 2 (includes 5 stamps including the three never-been-seen-before stamps)

Click to Buy Stampin' Up! Products

 God’s Blessings!
Stamping With Guneaux Designs
by
Beverly Polen
 

Remember this is a pilot program, so take advantage of it while you can.