
When I saw the Stampin Up Christmas Blessings Stamp Set in the new annual catalog, I knew I had to have it (as well as many other new sets). Well, I’m embarrassed to admit that I got caught up with creating with other stamp sets and…..forgot I have this one! I’m quite sure it’s called “Old Age” or maybe “Chemo Brain”!
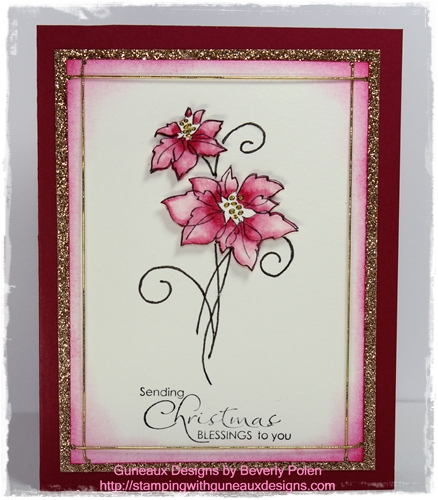
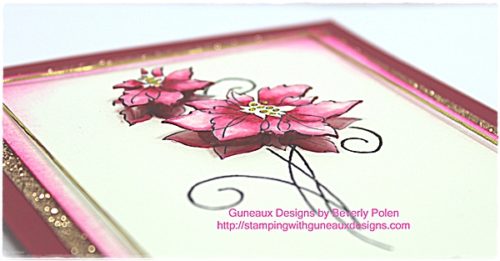
Regardless, today’s post focuses on the Stampin Up Christmas Blessings stamp set. I decided that I wanted pink poinsettias, therefore, I created them. I love how the card pops with the Glimmer Paper and Gold Cord!
Supplies used to create this Stampin Up Christmas Blessings card:
Stamps: Stampin Up Christmas Blessings Stamp Set (123809)
Paper: Watercolor Paper (122959), Champagne Glimmer Paper (127885), and Raspberry Ripple Card Stock (126842)
Ink: Melon Mambo Classic Ink (126948), Melon Mambo Stampin Write Marker (119702), and Blender Pen (102845)
Accessories: Gold Elastic Cord (can pick up at a craft store or, if you’re lucky, you’ll have some of Stampin Up’s retired cord), Paper Snips (103579), Stampin’ Dimensionals (104430) or Foam Adhesive, Sticky Strip (104294) or other strong adhesive, and Stamping Sponges (101610)
Instructions for creating this Stampin Up Christmas Blessings card:
- Cut a 3-1/2″ x 4-3/4″ piece of Stampin Up Watercolor Paper.
- Cover with Black StazOn Ink the poinsettias stamp from the Christmas Blessings stamp set.
- Stamp the image on the piece of Watercolor Paper.
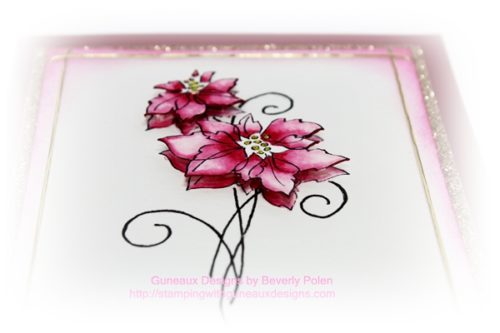
- Using a Melon Mambo Stampin Write Marker and a Blender Pen, color the poinsettias.
When coloring the poinsettias, think of each petal as being in thirds.
- The bottom of a petal is 1/3 of the petal and is near the stamen.
- The next 1/3 is the middle of the petal, and the next at the top.
-
The bottom 1/3 is darker than the middle 1/3.
-
The middle 1/3 is lighter than the bottom 1/3, but darker than the top 1/3.
-
The top 1/3 is lighter than the middle 1/3.
- Using the Melon Mambo marker (brush end), color in the bottom of the petal.
- Swipe the Blender Pen’s brush end back and forth on scrap paper until there is no ink spreading on the paper.
- Using the clean Blender Pen, color the middle 1/3 of the petal by picking up some of the Melon Mambo ink at the very edge of where the bottom and middle thirds meet.
- Swipe the Blender Pen’s brush end back and forth on scrap paper until there is no ink spreading on the paper.
- Using the clean Blender Pen, pull color from the middle 1/3 to color the top 1/3 of the petal.
- Repeat until all petals are colored.
- Using the marker, slightly darken the portions of each petal that the natural light would not hit.
- OPTIONAL:
- Except for the size of the Watercolor Paper, repeat all of the above to provide a second layer of poinsettias. The paper size should be small enough for the poinsettias image to just fit.
- Cut out the second set of poinsettias, attach dimensionals, and adhere on top of the first poinsettias.
- Stamp the sentiment, “Sending Christmas Blessings To You”, at the bottom of the Water Color Paper (see picture).
- Sponge Melon Mambo Classic Ink around the edge of the Watercolor Paper.
- Snip the corners (see picture) and wrap the Gold Elastic Cord around the Watercolor Paper and adhere it to the back side of the paper.
- Cut a 3-3/4″ x 5″ piece of Champagne Glimmer Paper and adhere to it the Watercolor Paper.
- Cut an 8-1/2″ x 5-1/2″ piece of Raspberry Ripple Card Stock and fold it in the center for the card base.
- Attach the decorated Watercolor Paper and Glimmer Paper to the Raspberry Ripple card base.
- Finished! Enjoy!
God’s Blessings!
Stamping With Guneaux Designs
by
Beverly Polen