Happy 4th of July – Zentangle

HAPPY 4TH OF JULY – ZENTANGLE

Happy 4th of July, everyone!!  I hope your day is filled with blessings!  May those of us who live in the wonderful USA be grateful as we celebrate our country’s birthday.  God bless the USA!

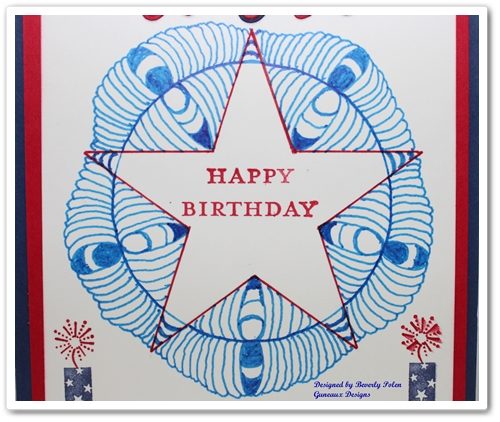
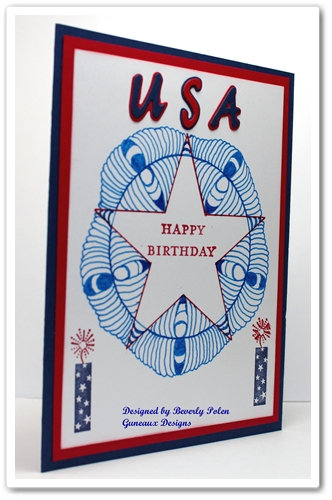
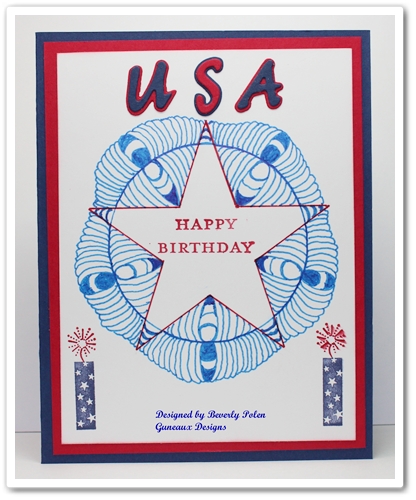
My Happy 4th of July card features tangling.  I created the design, therefore, there is no official name for the tangle.

The Happy Birthday sentiment is from the current Stampin’ Up! Hostess stamp set, the Morning Meadow.  The sparkles are from the Stampin’ Up! retired July Fourth stamp set. The “USA” is from an old Sizzix alphabet set that I have.  I have had this set of dies for years, and I foresee keeping and using it for many more.

The picture to the right shows more clearly the tangling I designed.  It is very simple and easily duplicable.


 ENJOY YOUR DAY!

God’s Blessings!
Stamping With Guneaux Designs
by
Beverly Polen

HAPPY 4TH OF JULY – ZENTANGLE

Stampin Up Courage Stamp Set – 4th of July 3-D Card

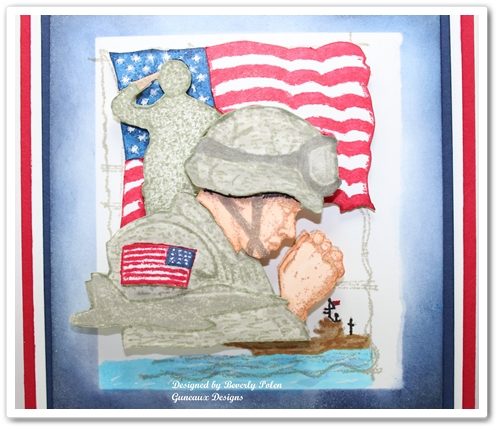
As I shared in my last post, I love the Stampin Up Courage stamp set that retired recently.  Having family members who were in the military and a Dad who loved the American Flag, I especially like this stamp set.  Personally, I think it was a mistake to retire the Stampin Up Courage stamp set.  Regardless, it’s retired, but I am featuring it on my card share for today.  This is my Stampin Up Courage Stamp Set – 4th of July 3-D Card.
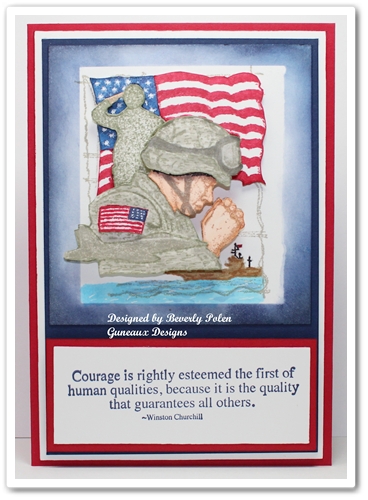
Actually, I CASEd (i.e., copy and share everything) myself when making this card.  I made a similar card in 2010 for a special son-in-law who at the time was on active duty with the Army.  God took him home a year ago last month and I really miss him.

As for the card, it is a three-dimensional card.  It may not appear to be based on the photo, so let me share why it is.

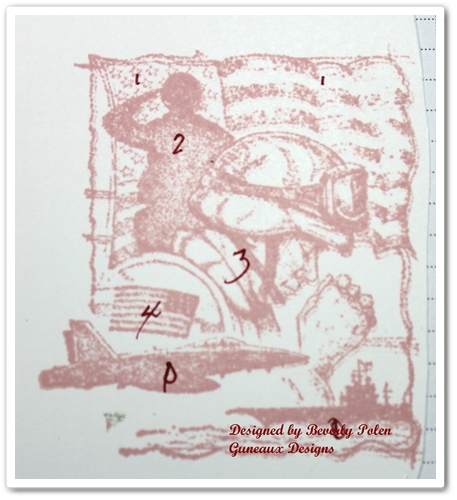
I decided that I wanted each piece on the military-related image to be raised at varying levels.  So I stamped the image onto scrap paper and numbered what part of the image that I wanted at what level.

The picture to the right explains.  I numbered as “1” the item I wanted raised with one layer of Stampin Up Dimensionals (i.e., adhesive foam), “2” for those with two layers of dimensionals, and so on.  I re-stamped the image, applied various ink colors, and cut out the pieces.  I then attached the pieces according to the “map” in the photo.
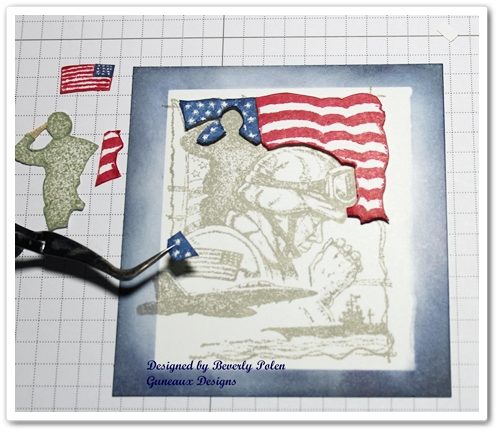
The following picture shows the process of attaching the pieces for the first level, which is the American Flag in the background.
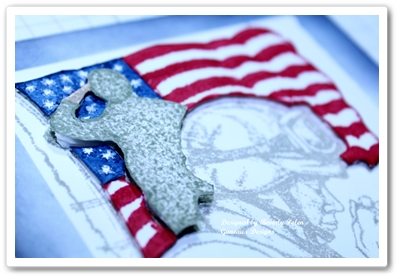
Moving to the 2nd level, I attached the saluting soldier using two layers of dimensionals.  That is shown in the picture to the right.
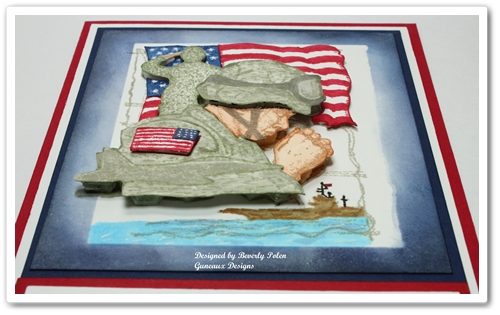
Moving to the 3rd level, I attached the praying soldier with three layers of dimensionals.  However, I did make one change.  I wanted the helmet and the American Flag on the soldier’s uniform to be raised a level above the soldier.  Therefore, I added four layers of dimensionals to the helmet and one to the flag. The following picture reflects this and the completed image.

 The following pictures provide a better view of the dimensional elements.
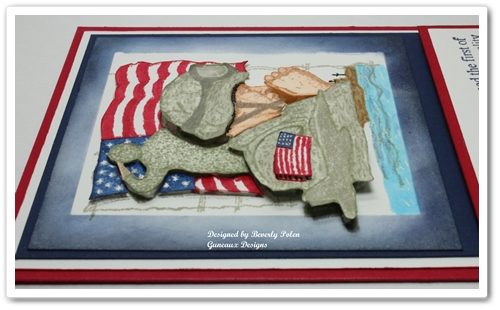
The final product of the Stampin Up Courage card includes Real Red Card Stock as the base, Whisper White Card Stock for the 1st layer, and Night of Navy Card Stock as the 2nd layer.  Included is the sentiment from the Stampin Up Courage stamp set.

If you enjoyed the card and tutorial, please let me know by leaving a comment.


God’s Blessings!
Stamping With Guneaux Designs
by
Beverly Polen

STAMPIN UP COURAGE STAMP SET – 4TH OF JULY CARD
Stampin Up Morning Meadow Hostess Stamp Set

I have for you a quick and simple Thank You card that you can create in about ten minutes. The card features the new Stampin’ Up! Morning Meadow Hostess Stamp Set that can be purchased for $10 with a qualifying order.

Stampin Up Morning Meadow Hostess Stamp Set

Supplies for the Stampin Up Morning Meadow Hostess Stamp Set Thank You Card:

Stamp Set: Stampin Up Morning Meadow Hostess Stamp Set (129678)

Stampin Up Morning Meadow Hostess Stamp Set

Paper: Crisp Cantaloupe Card Stock (131298), Baked Brown Sugar Card Stock (131296), and Whisper White Card Stock (100730)

Ink: Crisp Cantaloupe Classic Ink (131176) and Baked Brown Sugar Classic Ink (131174)

Accessories: Apothecary Accents Framelits (127003), Pearl Basic Jewels (119247), Stamping Sponges (101610), and Adhesive of your choice

Stampin Up Morning Meadow Hostess Stamp Set

Instructions for the Stampin Up Morning Meadow Hostess Stamp Set Thank You Card:

1. Cut an 8-1/2″ x 5-1/2″ piece of Crisp Cantaloupe card stock and fold in the middle for the card base.

2. Cut a 5-1/4″ x 4″ piece of Baked Brown Sugar card stock and sponge the edges with matching ink.

3. With the small rectangle accent from the Apothecary Accents Framelits, cut an accent from Crisp Cantaloupe Card Stock. Sponge the edges with matching ink.

4. Lay the rectangle accent on a small piece of Whisper White Card Stock and trace along the INSIDE of the accent. Cut out the accent and stamp on it the sentiment, “Thank You”, in Baked Brown Sugar Classic Ink (the sentiment is also from the Morning Meadow Hostess Stamp Set). Sponge the edges with Crisp Cantaloupe Classic Ink.

5. Lay the rectangle accent onto a small piece of Baked Brown Sugar Card Stock and trace along the OUTSIDE of the accent. Cut out the accent and sponge it with matching ink.

6. Cut a 5″ x 3-3/4″ piece of Whisper White Card Stock. Ink the floral stamp from the Morning Meadow Hostess Stamp Set with Crisp Cantaloupe Classic Ink. Randomly stamp the image around the edges of the card stock (I stamped the image twice before re-inking). Sponge the edges with Crisp Cantaloupe Classic Ink.

7. Adhere the Baked Brown Sugar Card Stock to the card base.

8. Adhere the Whisper White Card Stock to the Baked Brown Sugar Card Stock.

9. Adhere the Baked Brown Sugar Card Stock accent onto the center of the Whisper White stamped card stock.

10. Adhere the Whisper White accent with the sentiment onto the Crisp Cantaloupe accent.

11. Add foam adhesive to the back of the of the sentiment and mat, and adhere it to the Baked Brown Sugar accent.

12. Use a permanent peach marker to color two pearls and add them to the sentiment.

13. Randomly adhere the smallest pearls in the center of some of the flowers.

There is so much more that could be added to this card, and the colors certainly can be substituted. You may want to change the center piece with the sentiment by using other framelits and sentiments. Regardless, ENJOY!

God’s Blessings!
Stamping With Guneaux Designs
by
Beverly Polen 

Morning Meadow Hostess Stamp Set

STAMPIN UP MORNING MEADOW HOSTESS STAMP SET

Papillon Potpourri Stamp Set – Stampin’ Up!

Papillon Potpourri Stamp Set – Stampin’ Up!

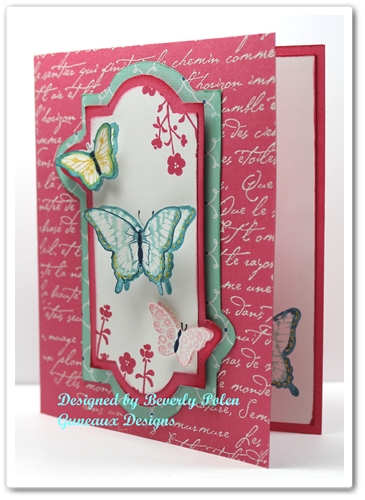
Today’s greeting card features the Papillon Potpourri Stamp Set – Stampin’ Up!(123759 – catalog item number – clear mount).  I love butterflies, so the Papillon Potpourri is one of my favorite stamp sets.

The card base is made with a piece of the new In-Color Strawberry Slush Card Stock.  Using VersaMark Ink (102283), I stamped a background stamp onto the card front.  It was  covered with White Embossing Powder  (109132 – catalog item number) and heat set. (I love any kind of embossing).
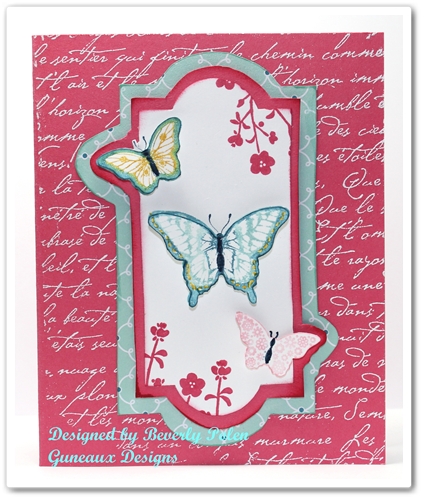
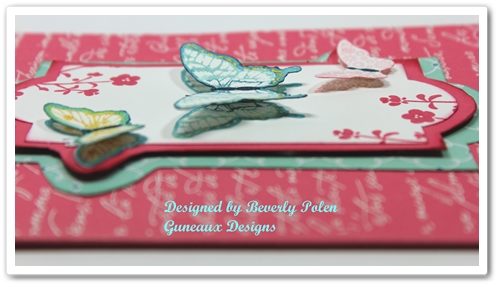
I think the butterflies in the above picture of the card appear to be hovering over the card with their shadow showing underneath.  I have to give the credit for the effect to my camera (lol).  Oh, wait….maybe it was the person behind the camera creating the effect.  Regardless, I think those wonderful Stampin’  Dimensionals (104430 – catalog item number) played a role as well!  Don’t you just love the 3-D effect on greeting cards?

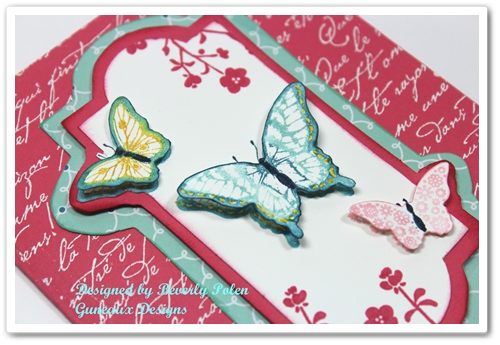
Look closely at the layers on the card.  You also may want to look at the card front in the picture below.  It appears as though I cut out the pieces using a framelit from the Apothecary Accents Framelits (127003 – catalog item number).  Well, my framelit doesn’t have the two “bump outs” on it, does yours?

I did use the framelit from the Apothecary Accents, but I did not use it to cut out the paper that forms the layers.

How often do you start making a card with one intent and then the card ends up being completely different?  That’s what happened on my card.

I first stamped the butterflies from the Papillon Potpourri Stamp Set onto a 3-1/2″ x 4-3/4″ piece of Whisper White Card Stock.  I had planned to add some other elements to that piece of card stock, but then I wasn’t happy with it.

I wondered if I had a framelit that would fit around the butterflies, and if so, I would use that to cut out the piece.  Well, the framelits that I have are either too big or small.  As usual, I didn’t let that defeat me.  I wanted to use the Apothecary Accents framelit, so I decided to lay it around the butterflies and trace around the inside with a pencil.  I couldn’t trace across the two small butterflies, so I decided to go around them.  I “fussy cut” out the framelit, which resulted in the two bump outs.  You needed to know all of this, right?

I then traced the outside of the framelit onto a piece of Strawberry Slush Card Stock, allowing for the bump outs.  As for the bottom layer that is the Pool Party design from the Quatrefancy Specialty Designer Series Paper (130141), I free-handed it.

Notice the little flowers at the top right and bottom left of the Whisper White Card Stock.  They are from a stamp in the Hostess Morning Meadow Stamp Set.

I hope you enjoyed the card and my rambling.  You can leave a comment by clicking on the “chat bubble” at the right of the post’s title.  I love to get comments! 


God’s Blessings!
Stamping With Guneaux Designs
by
Beverly Polen

 PAPILLON POTPOURRI STAMP SET – STAMPIN’ UP!

Trust God Stamp Set

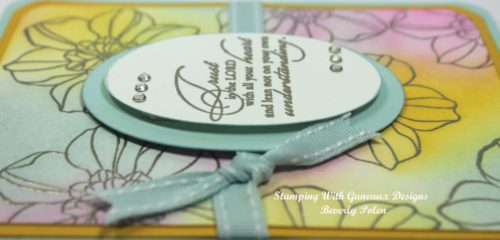
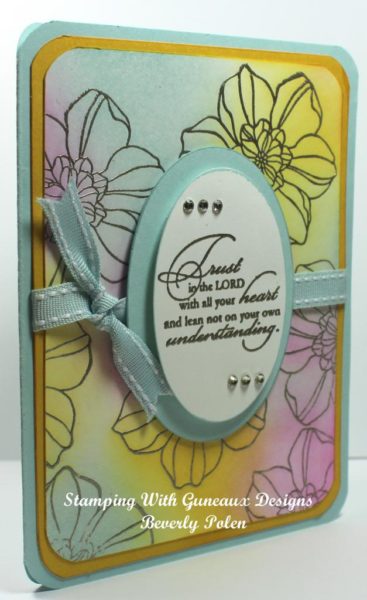
Trust God Stamp SetHope you are having a good weekend!  Today’s card features the Stampin’ Up! Trust God Stamp Set, as well as the Secret Garden Stamp Set.  I think the card is very pretty and soothing.
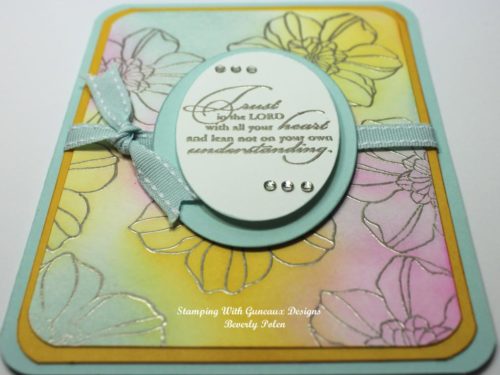
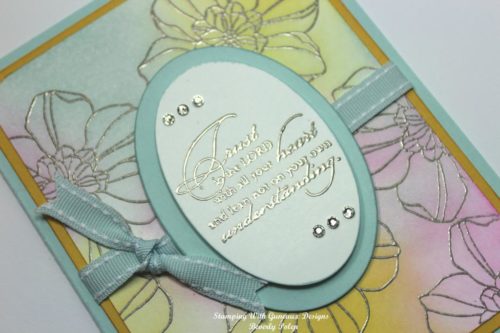
The Trust God Stamp Set is one of my favorites, and I am thankful it is not on Stampin’ Up!’s retiring products list.  My opinion is that the stamp set is great for cards of encouragement and to let friends and loved ones know you are thinking of them.

To make the card, I used VersaMark to randomly stamp the large flower from the Secret Garden Stamp Set onto a piece of Whisper White Card Stock.  The flowers were covered with Pewter Stampin’ Embossing Powder and heat set.

Then I randomly sponged three classic inks around the card stock. I used the returning Soft Sky and Crushed Curry, and the current Melon Mambo classic inks.  I really like the look of blending inks.

Using VersaMark, I stamped the sentiment from the Trust God Stamp Set onto a small piece of Whisper White Card Stock, covered it with the Pewter Stampin’ Embossing Powder and heat set it.  I used the Stampin’ Up! Oval Framelits to cut out the sentiment and a Soft Sky Mat for it.  I added six Basic Rhinestones to give the card a little bling.  Before attaching the sentiment and mat to the card, I attached a piece of Soft Sky Ribbon to the center of the card.  (So glad I still have some of the Stampin’ Up products in the returning colors!)
SUPPLIES USED FOR THE CARD:

Stamp Sets:  Trust God Stamp Set (126702 – c) and Secret Garden Stamp Set (129144 – c)

Paper:  Whisper White Card Stock, Crushed Curry Card Stock, and Soft Sky Card Stock

Ink:  Crushed Curry Classic Ink, Soft Sky Classic Ink, Melon Mambo Classic Ink, and VersaMark Ink

Accessories: Pewter  Embossing Powder, Stampin’ Sponges, Soft Sky Ribbon, Ovals Collection Framelits (129381), Corner Punch, and Basic Rhinestones


 God’s Blessings!

Stamping With Guneaux Designs
by
Beverly Polen

TRUST GOD STAMP SET AND SECRET GARDEN STAMP SET

Secret Garden and Fabulous Florets – Stampin’ Up!

Secret Garden and Fabulous Florets - Stampin' Up!

I love this card that I made!  It features the Stampin’ Up! Secret Garden and Fabulous Florets Stamp Sets.  This card also features the Masking Technique.  I had to do a lot of masking to get the effect I wanted, especially for the floral stems.

Do you get the correlation between the card’s sentiment and the stamped images?  There are multiple pinkish flowers and one turquoise flower on the card.  Thus, the “There’s Only One You” sentiment is quite fitting.  Don’t you agree?  The sentiment is from the recent Sale-a-bration Vintage Verses Stamp Set. Secret Garden and Fabulous Florets - Stampin' Up!

As it relates to the positioning of the card stock layers, the design for this card is quite similar to the card I shared yesterday. 

The card base is made with Regal Rose Card Stock.  The Basic Black Card Stock and Tempting Turquoise Card Stock are the same size as the Real Red and Basic Black Card Stock on yesterday’s card.

I typically do not show the envelope I make for my cards; however, I have recently.  I think a matching envelope is necessary for a complete package.

 Secret Garden and Fabulous Florets - Stampin' Up!Secret Garden and Fabulous Florets - Stampin' Up!

Can you see the very light gray around the flowers and stems?  The purpose of this is to create shadows that would be cast if the light were coming from the top-right side.  This technique also creates dimension for the objects.  

Stampin’ Up! Supplies Used for the Card:

Stamp Sets:  Secret Garden and Fabulous Florets (129144 and 123027 – c) 

Paper:  Regal Rose Card Stock, Basic Black Card Stock, Tempting Turquoise Card Stock, and Whisper White Card Stock

Ink:  Various Markers

Accessories:  Basics Glimmer Brad (Basic Black – 121003) and Brights Glimmer Brad (Tempting Turquoise – 121006)  

God’s Blessings!
Stamping With Guneaux Designs
by
Beverly Polen 

Secret Garden and Fabulous Florets

 SECRET GARDEN AND FABULOUS FLORETS