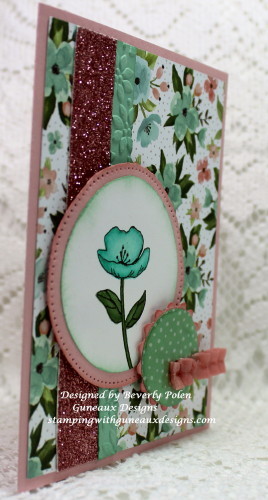
Rose Overlay Card – SU Rose Wonder

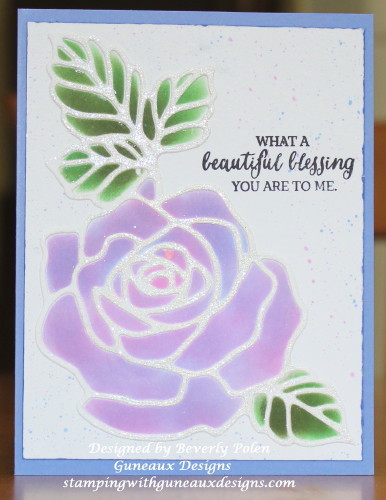
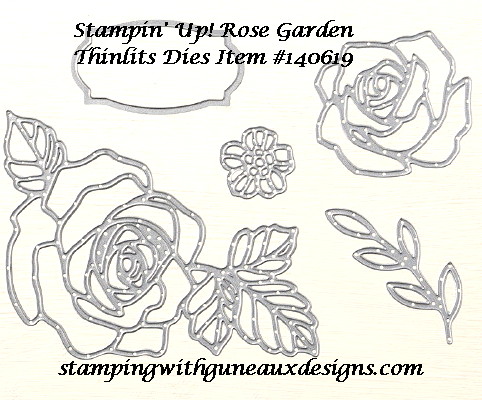
I have for you today a beautiful card created with the Stampin’ Up! Rose Garden Thinlits Dies and Stampin’ Up! Rose Wonder Stamp Set.  I created this card in honor of the Splitcoastampers Featured Stamper, Michele Greenwood (aka: Whimsey).

Each Sunday the Splitcoastampers website selects a stamper from among its members to honor and the other members can chose to view the stamper’s gallery and CASE one piece of artwork.  I chose this piece of artwork to CASE.  Here is my card:

Rose Overlay Card - SU Rose Wonder

My card will be a Happy Birthday card for a relative.

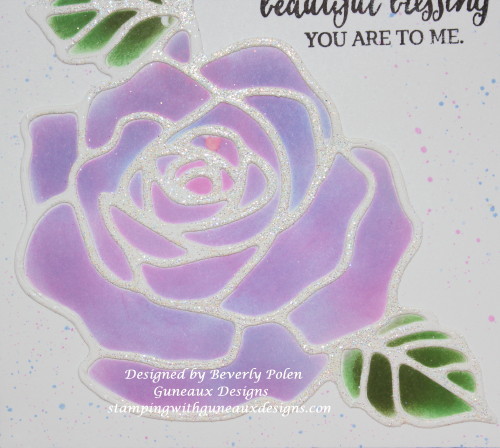
Rose Overlay Card - SU Rose Wonder

BlogDivider_zpsed339ea1

SUPPLIES USED FOR THE ROSE OVERLAY CARD

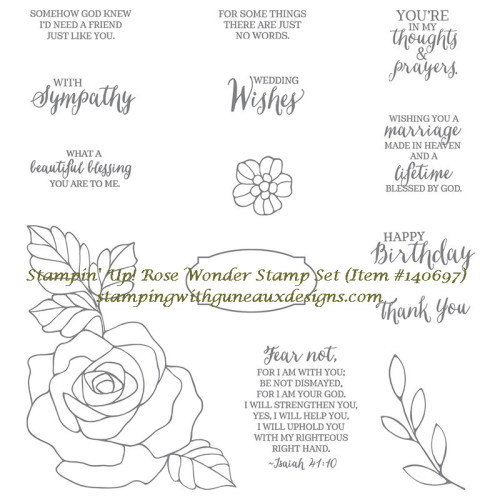
Stamps:  Stampin’ Up! Rose Wonder Stamp Set (item #140697)

Paper:  Stampin’ Up! Whisper White Card Stock (item #100730) and Blue Ballot Card Stock (retired)

Ink:  Stampin’ Up! Pixie Pink (retired), Ballet Blue (retired), Cucumber Crush (item #138324), Mossy Meadow (item # 133645), and Basic Black (item #140931)

Accessories:  Stampin’ Up! Rose Garden Thinlits Dies (item #140619), Tombow Multi Liquid Glue  (item #110755), Stampin’ Up! Embossing Powders, Stampin’ Up! Crystal Effects (item #101055 – used as a glue)

Rose Wonder Stamp SetStampin' Up! Rose Wonder Stamp Set

BlogDivider_zpsed339ea1

HERE IS HOW TO MAKE THE CARD

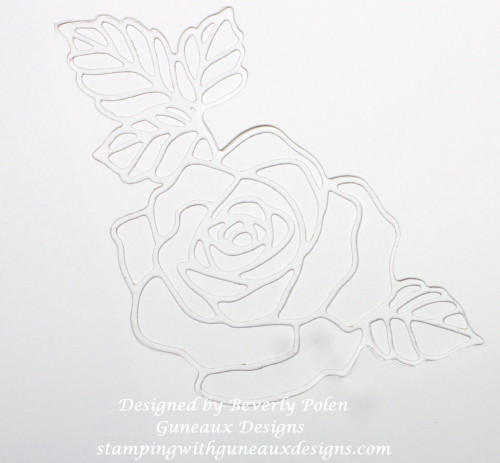
  1.  Use the largest floral die from the Rose Garden Thinlits Dies and Stampin’ Up! (SU) Whisper White Card Stock to cut out the rose and leaves.
  2. Apply a temporary adhesive to the rose and leaves cutout and adhere it to a piece of Stampin’ Up! Whisper White Card Stock measuring 4″ x 5-1/4″.
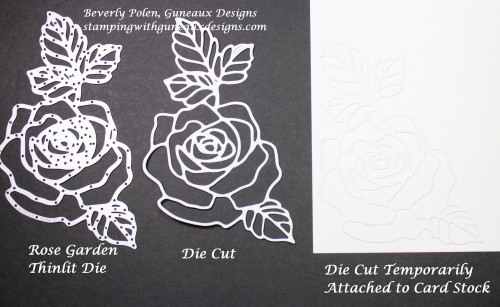
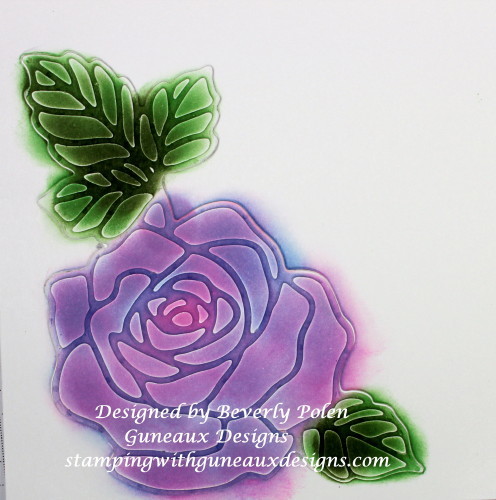
Rose Garden Thinlits Dies3.  Lay over the cutout that is temporarily adhered to the card stock the negative of the cutout for a mask.  This protects the white space while you sponge color onto the cutout and card stock.

rose-overlay-card-su-rose-wonder

4.  Use a sponge or dauber to sponge your choice of ink onto the rose and leaves.  Once your inks dry well, the colors will be lighter.

http://stampingwithguneauxdesigns.com/rose-overlay-card-su-rose-wonder

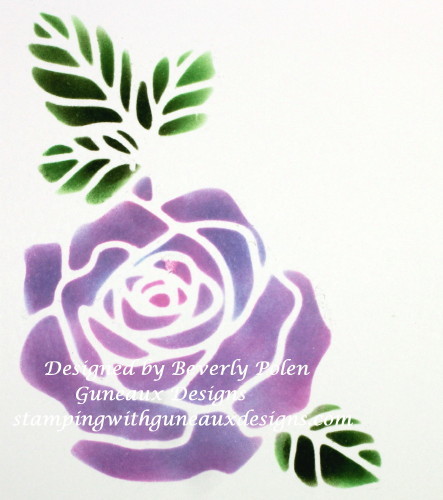
5.  Upon completion of coloring, remove the negative mask from your piece of artwork (i.e., the mask you place over the roses and leaves in Step 3).
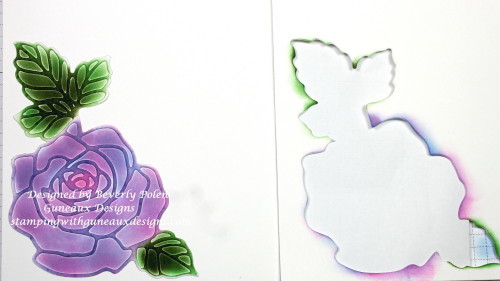
rose-overlay-card-su-rose-wonder6.  Remove the cutout that was temporarily adhered to your cardstock, and admire your beautiful rose and leaves piece of artwork.

rose-overlay-card-su-rose-wonder

7.  Decide on adding embellishments to your card.  I cut out another rose and leaves cutout in Whisper White Card Stock and covered it with VersaMark ink and embossing powder.  Then I adhered that over the colored rose and leaves to provide dimension.

8.  Select a sentiment to stamp onto your card and finish making it as desired.

IF YOU HAVE COMMENTS OR QUESTIONS, PLEASE FEEL FREE TO LEAVE THEM IN THE COMMENTS SECTION!

 BlogDivider_zpsed339ea1Swallowtail Butterfly

GOD’S BLESSINGS!

Stamping With Guneaux Designs By Beverly Polen

Gate Fold Card Using An Intricate Die Tutorial

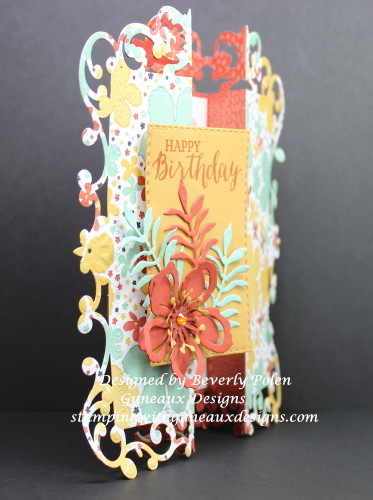
In August 2013, I posted two tutorials on how to make a Gate Fold Card using Stampin’ Up! framelits to form a card into the shape of one framelit.  One Tutorial was for using the Stampin’ Up!  Window Frames Framelits, and the Second Tutorial was for using the Stampin’ Up! Deco Frames Framelits. Today’s tutorial is for making a Gate Fold Card Using An Intricate Die.

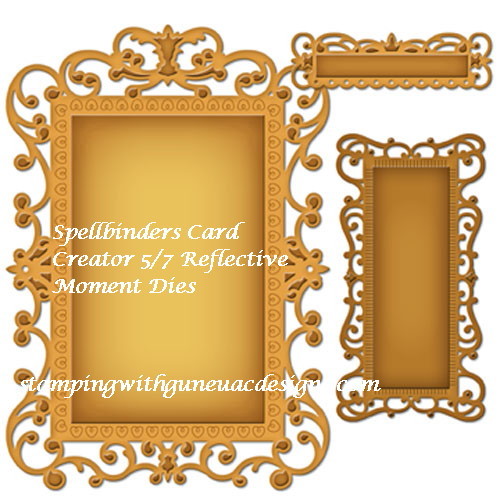
Creating a gate fold card using an intricate die to form the shape of the card can be difficult and a little rough on your die-cutting machine.  However, if you are willing to take the risk, you can create a beautiful gate fold card.  The gate fold card that is the subject of this tutorial was created with the largest die from the Spellbinders Card Creator 5/7 Reflective Moment Dies.

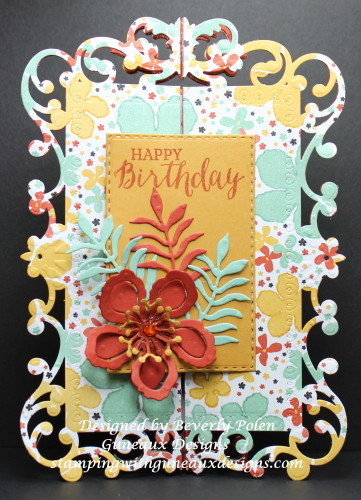
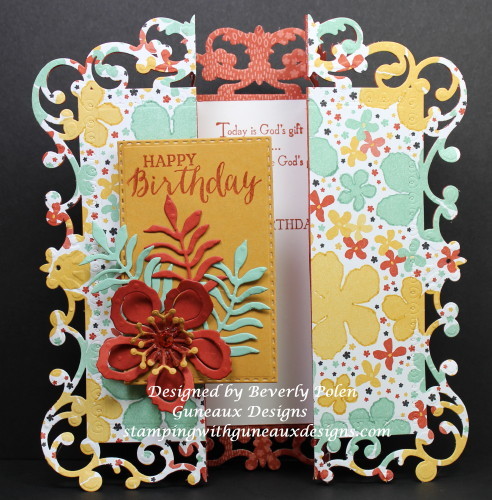
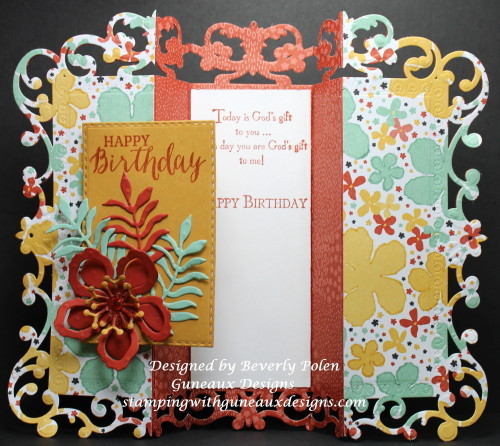
These photos are of the card I created for this tutorial.

Gate Fold Card Using An Intricate Die

Gate Fold Card Using An Intricate Die Tutorial

Gate Fold Card Using An Intricate Die Tutorial

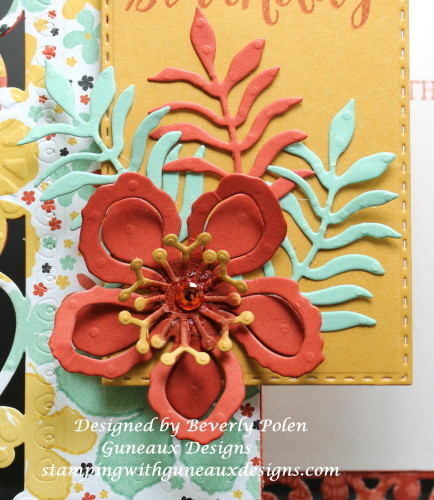
Gate Fold Card Using An Intricate Die Tutorial

BlogDivider_zpsed339ea1

UPDATE:  This card was selected as a favorite on Splitcoaststampers for the week ending January 24, 2016.

BlogDivider_zpsed339ea1

TUTORIAL FOR MAKING A GATE FOLD CARD USING AN INTRICATE DIE

Step 1.  Select a die that you want to use to form the shape of your card (I recommend selecting one that is no wider than 5″ and longer than 7″, or you’ll need 12″ card stock).

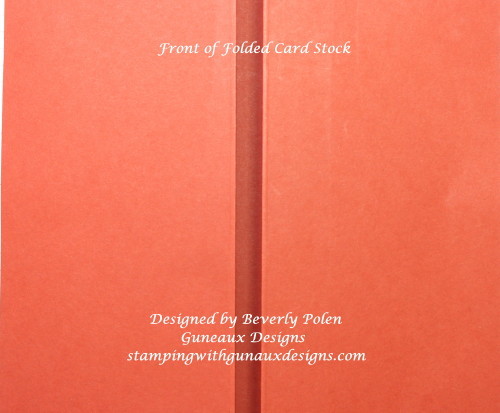
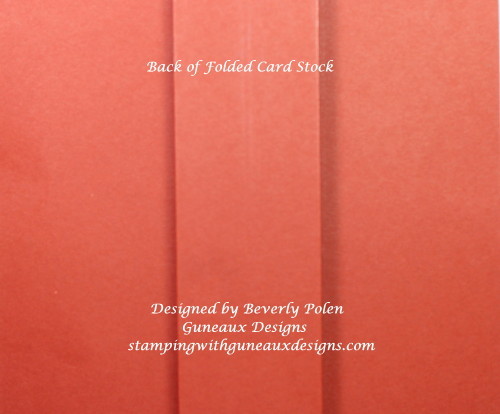
Step 2.  Score an 8-1/2″ x 11″ piece of card stock on the 11″ side at the 3-1/2″, 4-1/2″, 6-1/2″, and 7-1/2″ measurements.

Step 3.  Fold the 3-1/2″ score line into a mountain fold, 4-1/2″ into a valley fold, 6-1/2″ into a valley fold, and 7-1/2″ into a mountain fold.

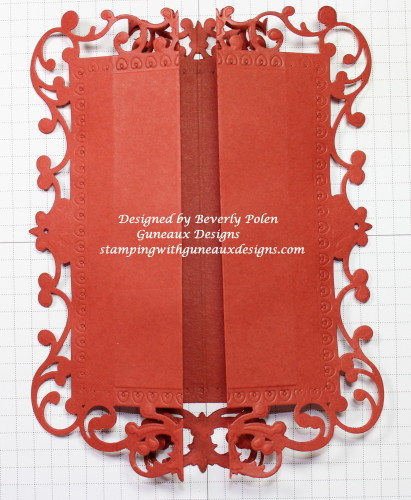
Step 4.  Crease well the score lines with a bone folder.  The two photos below show the front and back of the folded card stock.

Gate Fold Card Using An Intricate Die TutorialGate Fold Card Using An Intricate Die Tutorial

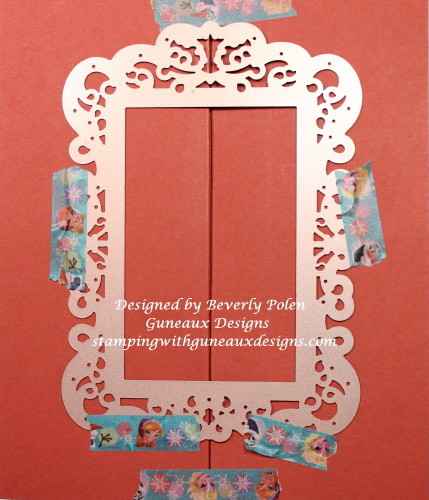
Step 5.  Lay your selected die onto the front of the folded card stock and use temporary tape to hold the folds and die in place.

(NOTE:  I selected the largest die from Spellbinders Card Creator 5″ x 7″ Reflective Moment Dies (S6-011). 

Gate Fold Card Using Dies & Framelits-3_1Step 6.  Using your die-cutting machine’s recommendation for the correct die-cutting sandwich, run the card stock and die through the machine.

(NOTE:   Because you are using an intricate die, you will need to run the sandwich through your machine at least four to five times.)

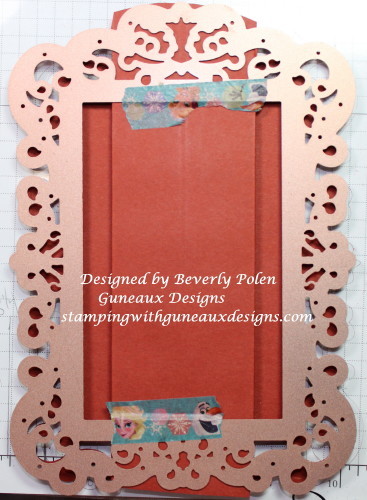
Step 7. Remove the die from the front of the cut card stock and re-position it onto the back of the cut out. Carefully line up the die with the cutout. Run though your die-cutting machine approximately three to four times.  There will be some pieces remaining in the cutout that can be removed by hand.

Gate Fold Card Using An Intricate Die Tutorial

The photo below shows the front of the cutout.

Gate Fold Card Using An Intricate Die Tutorial

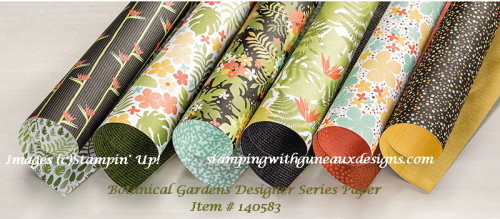
Step 8.  Decorate your card as desired.   I used Stampin’ Up! Botanical Gardens Designer Series Paper to decorate mine.

Enjoy your beautifully created gate fold card!

BlogDivider_zpsed339ea1

SUPPLIES USED

Stamps:  Stampin’ Up Rose Wonder Stamp Set (item # 140697) and God’s Blessings (retired)

Paper:  Stampin’ Up! Botonical Gardens Designer Series Paper; and Whisper White, Cajun Craze, Mint Macaron, and Hello Honey Card Stock

Ink: Stampin’ Up! Cajun Craze Classic Ink

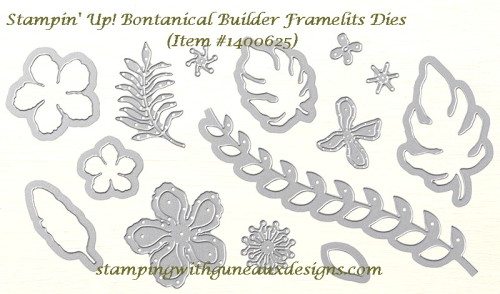
AccessoriesSpellbinders Card Creator 5/7 Reflective Moment Dies, Our Daily Bread Designs Double Stitched Rectangles Dies, Stampin’ Up! Botanical Builder Framelits Dies, Swarovski Crystal Gem (center of flower),

Gate Fold Card Using An Intricate Die TutorialGate Fold Card Using An Intricate Die Tutorial

Spellbinders Card Creator 5x7 Reflective Moment Dies_1

Gate Fold Card Using An Intricate Die Tutorial

BlogDivider_zpsed339ea1


Swallowtail Butterfly

God’s Blessings!

Stamping With Guneaux Designs By Beverly Polen

Gate Fold Card Using An Intricate Die TutorialGATE FOLD CARD USING AN INTRICATE DIE TUTORIAL

Gate Fold Card Using A Framelit Tutorial

In August 2013, I posted two tutorials on how to make a Gate Fold Card using a framelit to form the shape of a card.  One Tutorial was for using the Stampin’ Up!  Window Frames Framelits, and the Second Tutorial was for using the Stampin’ Up! Deco Frames Framelits.   

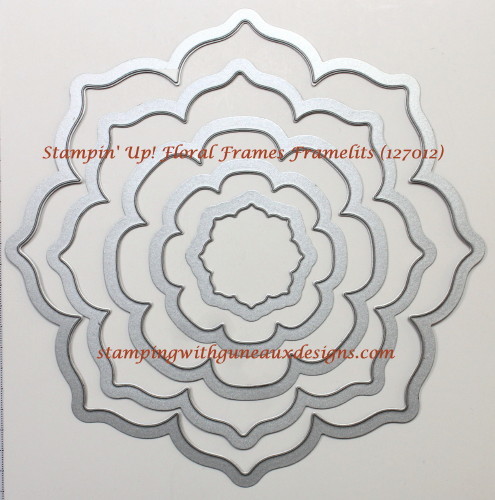
Recently, I was asked by a viewer, Eileen, to provide another tutorial for making a Gate-Fold Card Using a Framelit from the Stampin’ Up! Floral Frames Framelits.  This post provides the requested tutorial. (Sorry, Eileen that it has taken some time!)

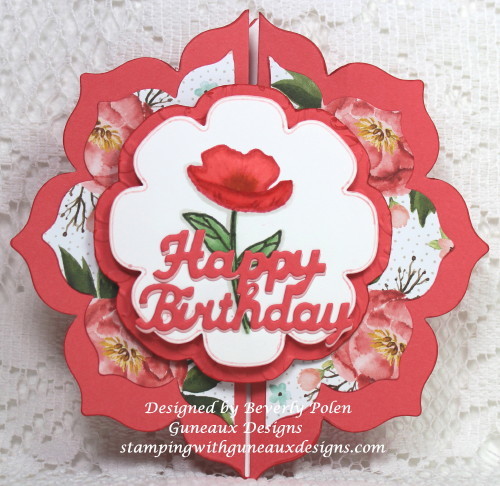
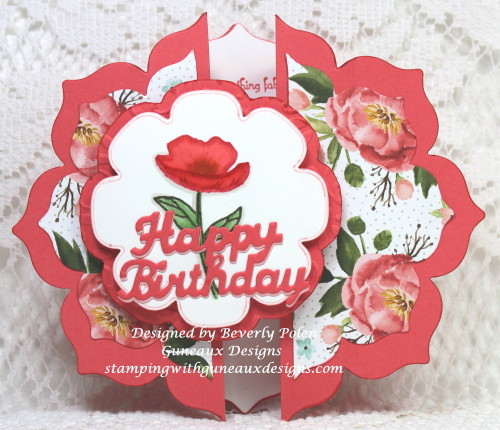
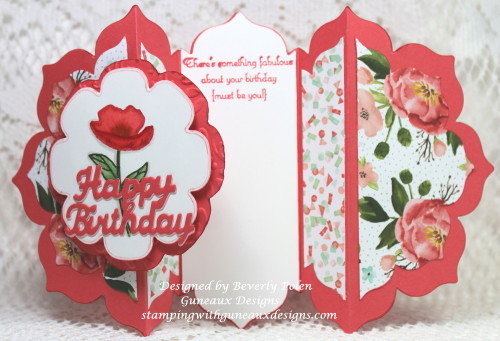
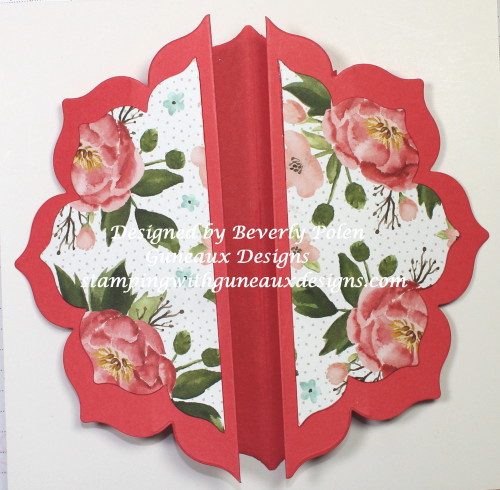
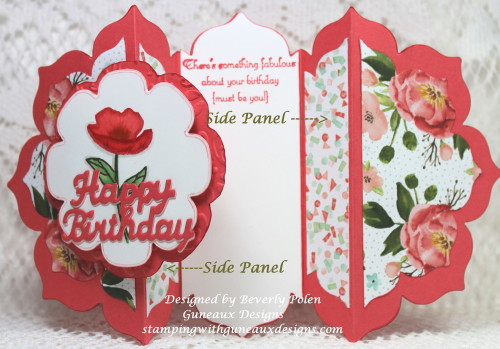
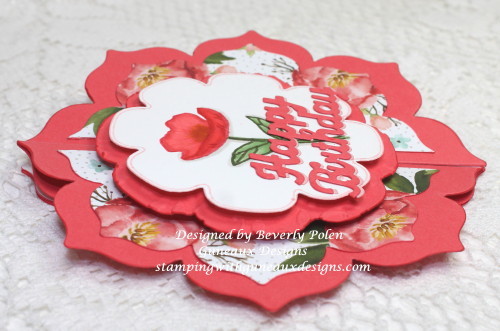
But first, let me show you photos of the Happy Birthday card I created using the featured framelits:

Gate Fold Card Using A Framelit

Gate Fold Card Using A Framelit

Gate Fold Card Using A Framelit

You can see in the above picture that I used another design from the Stampin’ Up! Birthday Bouquet DSP to cover both side panels on the inside of the card.  Now, on to the tutorial.

BlogDivider_zpsed339ea1

UPDATE:  This card was selected as a favorite on Splitcoaststampers for the week ending January 24, 2016.

BlogDivider_zpsed339ea1

TUTORIAL FOR MAKING A GATE FOLD CARD USING A FRAMELIT

Step 1.  Select a framelit that you want to use to form the shape of your card.

(NOTE:  I recommend selecting one that is no wider than 5″ and longer than 7″, otherwise, you’ll need 12″ card stock).

Step 2.  Score an 8-1/2″ x 11″ piece of card stock on the 11″ side at the 3-1/2″, 4-1/2″, 6-1/2″, and 7-1/2″ measurements.

Step 3.  Fold the 3-1/2″ score line into a mountain fold, 4-1/2″ into a valley fold, 6-1/2″ into a valley fold, and 7-1/2″ into a mountain fold.

Step 4.  Crease the score lines well using a bone folder.  

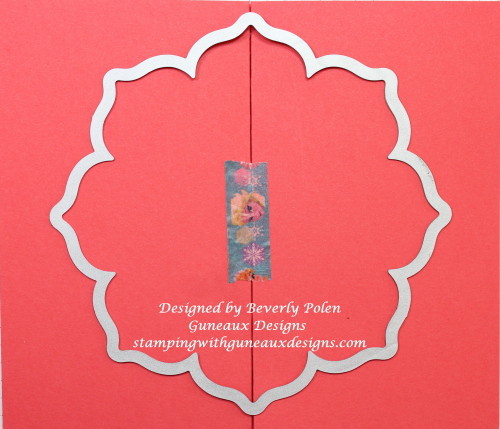
Step 5.  Lay your selected framelit onto the front of the folded card stock, centering the framelit.  Use temporary tape to hold the folds and framelit in place. (I used the largest framelit from the Floral Frames Framelits.)

Gate-Fold Card Using Framelits

Step 6.  Using your die-cutting machine’s recommendation for the correct die-cutting sandwich, run the card stock and framelit through the machine.

(NOTE:  If using a Stampin’ Up! framelit, run the sandwich through your machine at least two times to get all layers cut.)

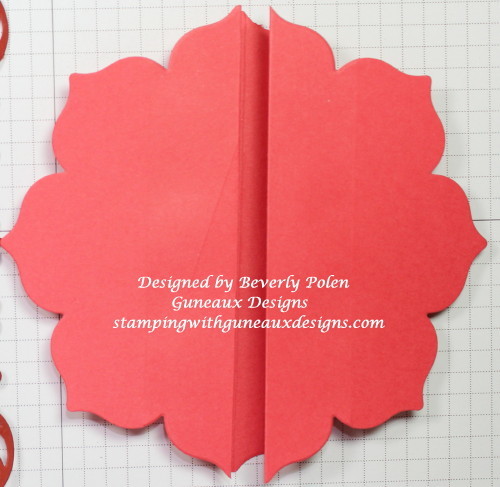
Your cutout will look like the one in this photo if you use the featured framelits.

Gate Fold Card Using A Framelit Tutorial

Step 7.  Using the remaining framelits of your selected set to cut designer series paper to decorate your card.

STOP AT THIS STEP OF THE TUTORIAL UNLESS:

Step 8.  IF you are using the Stampin’ Up! Floral Frames Framelits, follow the remaining steps.

  • a.  If you decide to use designer series paper as I did, use the next to the largest framelit from the Stampin’ Up! Floral Frames Framelits to cut out a framelit design.
  • b.  Cut the design piece in half from the top to the bottom.
  • c.  Attach the pieces onto the left and right sides of the card.Gate Fold Card Using a Framelit Tutorial
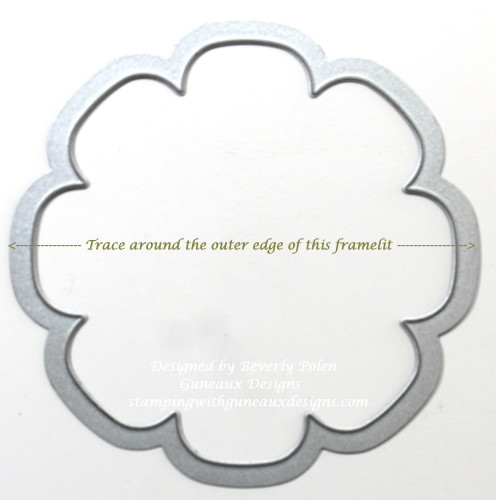
  • d.  Cut a piece of card stock that matches the base card color.  Lay the third largest framelit onto the card stock and trace around the outer edge of the framelit.  Fussy cut the design (i.e., use scissors).

Gate Fold Card Using A Framelit Tutorial

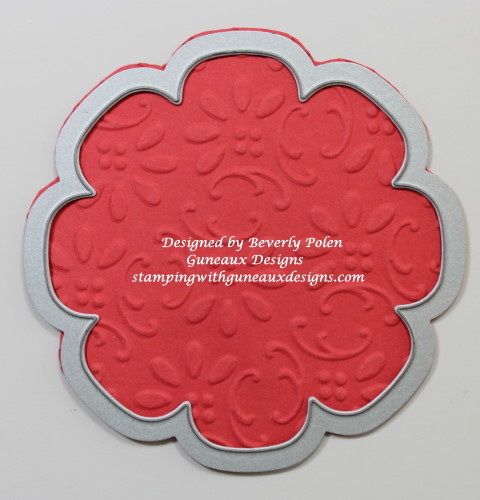
  • e.  Using an embossing folder, emboss this piece of card stock to achieve texture.

Gate Fold Card Using A Framelit Tutorial

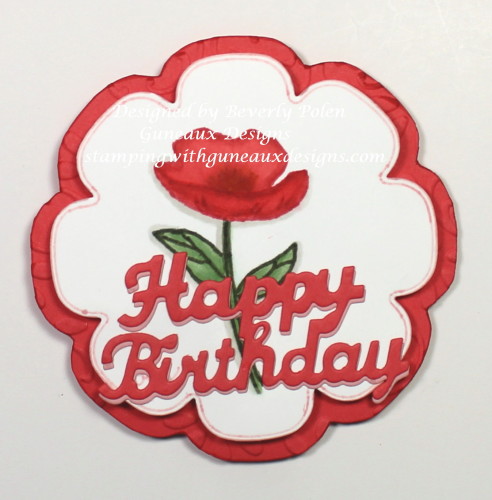
  • f.  Select a design for the top layer of your card with the same framelit, but cutting it with your die-cutting machine (no need to fussy cut).  I used Whisper White Card Stock on which I cut the framelit and stamped a floral image from the Stampin’ Up! Birthday Blooms Stamp Set.  I used copic markers to color the image.  I used foam dots to attach it to the embossed piece of card stock.  Lastly, I added a Happy Birthday sentiment.

Gate Fold Card Using A Framelit-5

  • g.  Place foam dots onto the left side of the embossed card stock (right side when turned over),
  • h.  Adhere this piece to the left side of the card, allowing it to overlap, but not adhere, to the right side of the card.
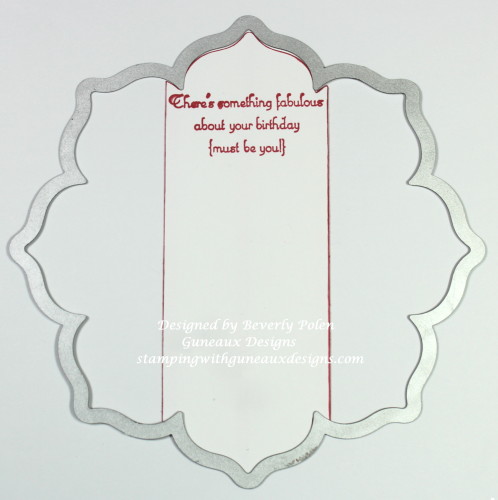
  • i.  For the inside of the card, cut a 1-15/16″ x 5-1/2″ piece of Whisper White Card Stock.
  • j.  Center the largest framelit onto the card stock and run it through your die-cutting machine.

Gate Fold Card Using A Framelit-6

  • k.  If desired, stamp a sentiment onto the card stock.  Adhere it to the inside center of the card.
  • l.  Use the same framelit (i.e., largest one) to cut another piece of DSP.
  • J. Measure the left and right inside panels of the card base (i.e. those on each side of the center piece).  Use the measurements to cut the sides of the DSP from top to bottom and adhere them to the panels.

Gate Fold Card Using A Framelit

Enjoy your beautiful gate fold card in the shape of your selected framelit!

BlogDivider_zpsed339ea1

SUPPLIES USED

Stamps:  Stampin’ Up! Birthday Blooms Stamp Set and Retired Stampin’ Up! Create a Cupcake Stamp Set (inside sentiment)

Paper:  Stampin’ Up! Birthday Bouquet Designer Series Paper, Watermelon Wonder, and Whisper White Card Stock

Ink:  Stampin’ Up! Watermelon Wonder and Mossy Meadow Classic Ink, Copic Markers

Accessories: Stampin’ Up! Floral Frames Framelits, North Coast Creations Happy Birthday Die, Retired Stampin’ Up! Finial Press Embossing Folder

Gate Fold Card Using a Framelit Tutorial

Gate Fold Card Using A Framelit Tutorial

Gate-Fold Card Using A Framelit Tutorial

If you have questions or comments, please feel free to leave them in the comment section of this post.


Swallowtail Butterfly

God’s Blessings!

Stamping With Guneaux Designs By Beverly Polen

Gate Fold Card Using A Framelit

GATE FOLD CARD USING A FRAMELIT

Build a Bird Punch White on White Card

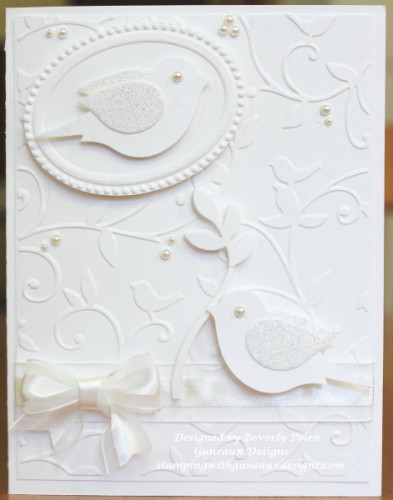
I love textured white on white cards!  The Splitcoastampers website has a white on white card challenge, CS359, this week for its members.  The gallery for the cards created for this challenge contains many beautiful white on white cards.  I have never seen so many beautiful white on white cards on one website. I participated in this challenge, and the card that a made is my card share today.  It features the Stampin’ Up! Build a Bird Punch and Cuttlebug Birds and Vines Embossing Folder.

UPDATE:  My card is included in the Splitcoastampers Favorites of the Week ending today, January 17, 2016!  

White on White Cards; Build a Bird Punch

Because it is easy to refer to the photo of the card to create a similar card, I am not including instructions on this post.


CARD SIZE:  A2

SUPPLIES USED

Stampin’ Up! Whisper White Card Stock
Cuttlebug Bird and Vines Embossing Folder
Build a Bird Punch
Stampin’ Up! SU Designer Frames Textured Impressions (Retired)
SU Basic Pearls
SU Iridescent Ice Embossing Powder
SU Whisper White Organza Ribbon


Swallowtail Butterfly

God’s Blessings!
Stamping With Guneaux Designs By Beverly Polen

Happy Scenes Snowy Scenes

I think that one of the most beautiful scenes in the Northern United States is a beautiful snowy scene that is untouched by tire tracks, foot prints, animal hoof/paw prints, road slush, and more.  The quietness of a landscape with trees that are covered with freshly fallen white snow is a gift from heaven and it certainly is a happy scene.  You can see things in the landscape that you have not noticed before.  If there is a red cardinal in the landscape, that pop of red upon the glistening white snow is breathtaking.

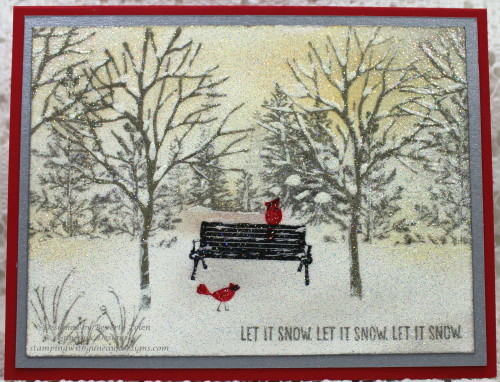
Last week I created a similar scene for my card that I am sharing today.  I created the card in response to a Splitcoastampers.com  Inspirational Challenge, IC527.  The challenge involved picking a picture from a particular Pinterest board that inspired you, and then creating a card based on that inspiration.  This is the beautiful picture I chose as my inspiration:

 And this is my inspirational card that I created

Happy Scene Snowy Scene

I was excited to hear that my card was selected for one of the Splitcoaststampers FAVORITES for the week ending January 10.  

To create the scene, I used Stampin’ Up! stamp sets that included trees and one that included the bench in the scene.  The stamp sets are:

  1. Lovely as a Tree (Item #128655)
  2. Happy Scenes (retired)
  3. Branch Out (retired)
  4. Plant Hope (retired)
  5. Pendant Park (retired)

I began by stamping the large tree from the Branch Out Stamp Set into VersaMark Ink and stamping it in four places on the Whisper White Card Stock.  I then embossed these trees (including the branches at the top left and right) with Stampin’ Up! Pewter Embossing Powder (retired).

Using light gray inks, I stamped the remaining trees in the background.  Because the inspirational picture has yellow and orange in the sky portion of the background, I sponged Stampin’ Up! So Saffron and Peach Parfait Ink onto the snowy scene background.  I added a bench into the foreground with red birds (from other stamp sets) on and around the bench.  I added the sentiment from the Happy Scenes Stamp Set.

Once I was satisfied with the scene, I added white acrylic paint to place “snow” within the trees.  I covered the complete scene with VersaMark Ink and heat embossed with Stampin’ Up! Iridescent Ice Embossing Powder.

I attached the scene to a piece of Brushed Silver Card Stock which was attached to the Real Red card base.

Enjoy my snowy scene greeting card!


Swallowtail Butterfly

God’s Blessings!

Stamping With Guneaux Designs

Stampin’ Up! Birthday Blooms & Birthday Bouquet DSP

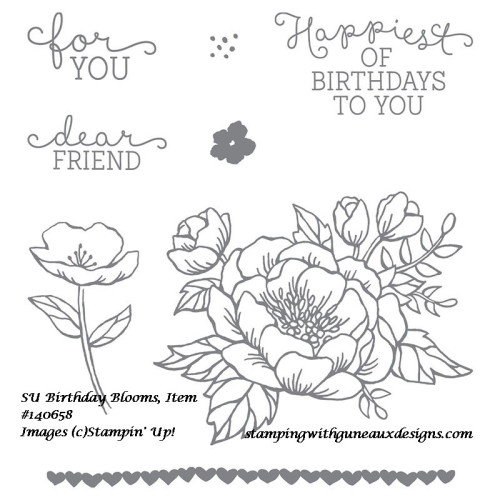
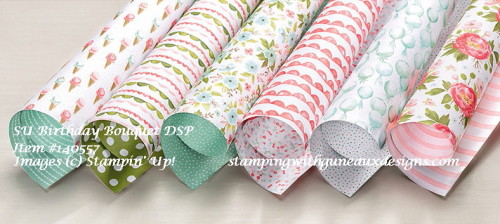
Hello and thanks for stopping in to browse.  Have you seen in person the new Stampin’ Up! Birthday Blooms Stamp Set and Birthday Bouquet Designer Series Paper (DSP)?  If not, the stamp set is gorgeous and the DSP contains some beautiful designs.  Before I show you my greeting card that I made with these two products, let me show you the products first.

This is the gorgeous stamp set:

Stampin Up Birthday Blooms Stamp Set

I am anxious to create a card using the gorgeous large flower stamp!  Here is a photo of the Birthday Bouquet DSP:

Birthday Bouquet DSP

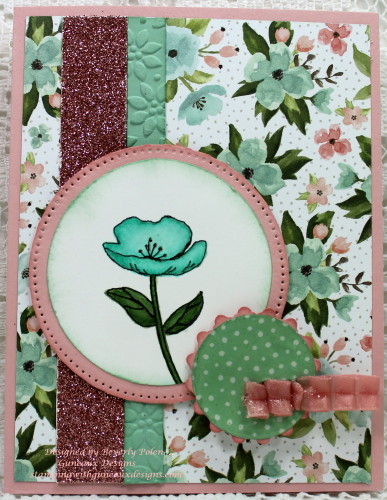
Here is my card, which I made for a Splitcoaststampers Sketch Challenge:

Stampin' Up! Birthday Blooms & Birthday Bouquet DSP

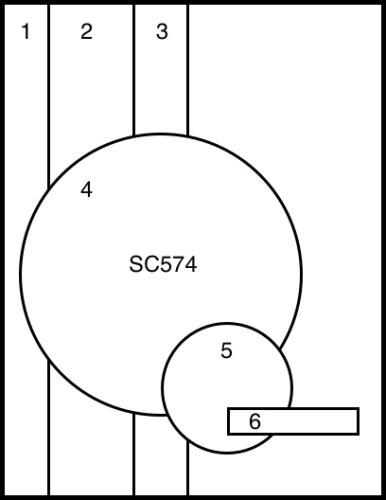
This is the Splitcoaststampers sketch for SC574 that I followed.

Splitcoastampers Sketch 574

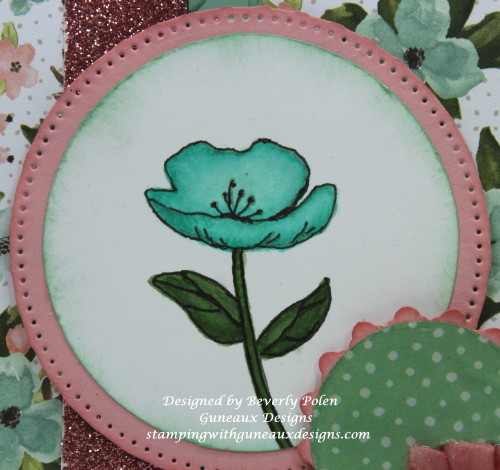
To make the card, I used the SU 2-1/2″ circle punch to cut out a Whisper White circle on which I stamped the small flower from the Stampin’ Up! Birthday Blooms Stamp Set.  I used copic markers to color the flower as close to Mint Macaron as possible.  I attached the colored flower to a circular mat made with Blushing Bride Card Stock.  I cut out the mat with a Spellbinders Splendid Circles Die, and then modified it to remove the outer layer.

Here’s a closeup of the flower:

Stampin' Up! Birthday Blooms and Birthday Bouquet DSP

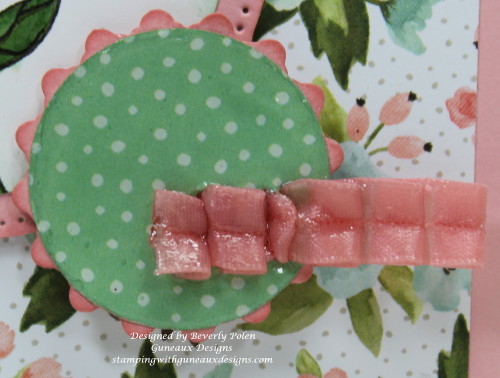
Next I used I cut the Stampin’ Up! 1-3/8″ Circle Punch to cut a Mint Macaron circle from a design of the Birthday Bouquet DSP.  Using a smaller die from the Spellbinders Splendid Circles Dies, I cut a Blushing Bride Card Stock mat upon which the Mint Macaron circle rests.  Finally, I added a piece of Blushing Bride Ribbon covered with Crystal Effects.

Stampin' Up! Birthday Blooms and Birthday Bouquet DSP

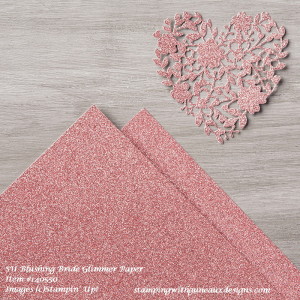
To assemble the card, I attached a piece of the DSP to an A-2 Blushing Bride card base. To adhere to the Splitcoaststampers sketch, I added a strip of the Stampin’ Up! Blushing Bride Glimmer Paper and an embossed strip of Mint Macaron Card Stock.  Finally, the two circle elements were attached in place.

Blushing Bride Glimmer Paper

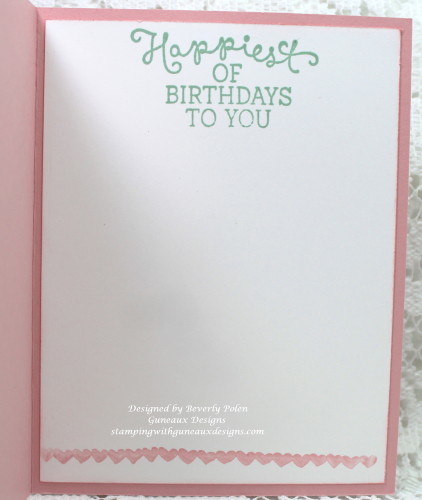
I did not add a sentiment to the card’s front; however, I know it will be a Happy Birthday Greeting Card as you can see from the card’s inside:

Stampin' Up! Birthday Blooms and Birthday Bouquet DSP

Enjoy the card and feel free to leave comments or questions.  You never know when I’ll select  your comment and ask for your address to send you the card!


Swallowtail Butterfly

God’s Blessings!

Stamping With Guneaux Designs

Stampin' Up! Birthday Blooms and Birthday Bouquet DSP

STAMPIN’ UP! BIRTHDAY BLOOMS AND BIRTHDAY BOUQUET DSP