
I have for you today a beautiful card created with the Stampin’ Up! Rose Garden Thinlits Dies and Stampin’ Up! Rose Wonder Stamp Set. I created this card in honor of the Splitcoastampers Featured Stamper, Michele Greenwood (aka: Whimsey).
Each Sunday the Splitcoastampers website selects a stamper from among its members to honor and the other members can chose to view the stamper’s gallery and CASE one piece of artwork. I chose this piece of artwork to CASE. Here is my card:
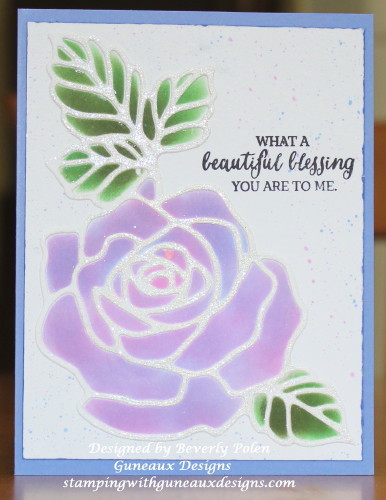
My card will be a Happy Birthday card for a relative.
![]()
SUPPLIES USED FOR THE ROSE OVERLAY CARD
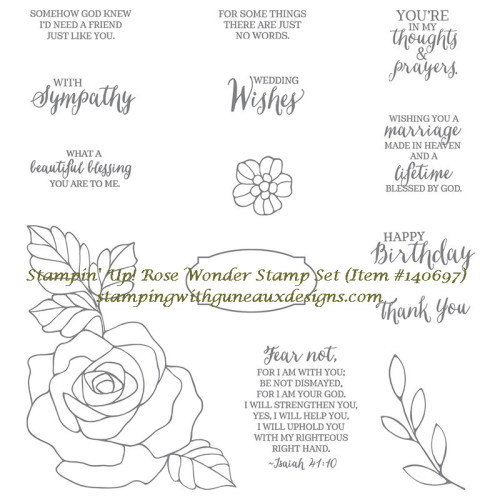
Stamps: Stampin’ Up! Rose Wonder Stamp Set (item #140697)
Paper: Stampin’ Up! Whisper White Card Stock (item #100730) and Blue Ballot Card Stock (retired)
Ink: Stampin’ Up! Pixie Pink (retired), Ballet Blue (retired), Cucumber Crush (item #138324), Mossy Meadow (item # 133645), and Basic Black (item #140931)
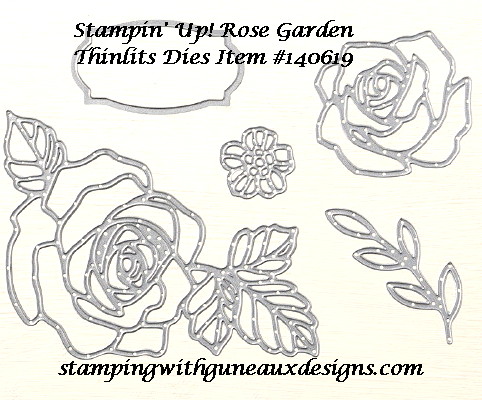
Accessories: Stampin’ Up! Rose Garden Thinlits Dies (item #140619), Tombow Multi Liquid Glue (item #110755), Stampin’ Up! Embossing Powders, Stampin’ Up! Crystal Effects (item #101055 – used as a glue)
![]()
HERE IS HOW TO MAKE THE CARD
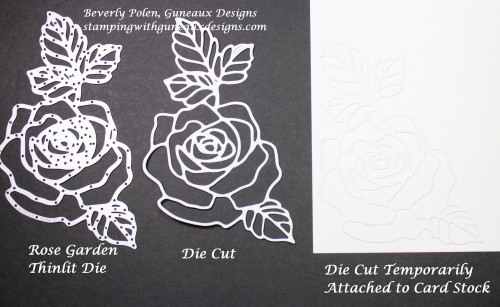
- Use the largest floral die from the Rose Garden Thinlits Dies and Stampin’ Up! (SU) Whisper White Card Stock to cut out the rose and leaves.
- Apply a temporary adhesive to the rose and leaves cutout and adhere it to a piece of Stampin’ Up! Whisper White Card Stock measuring 4″ x 5-1/4″.
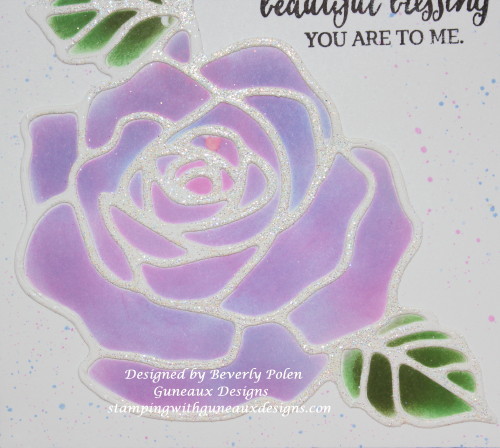
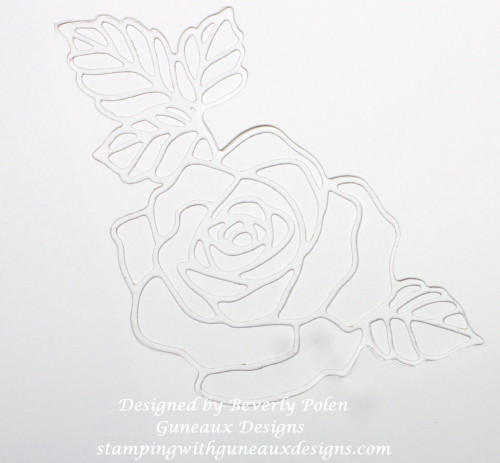
 3. Lay over the cutout that is temporarily adhered to the card stock the negative of the cutout for a mask. This protects the white space while you sponge color onto the cutout and card stock.
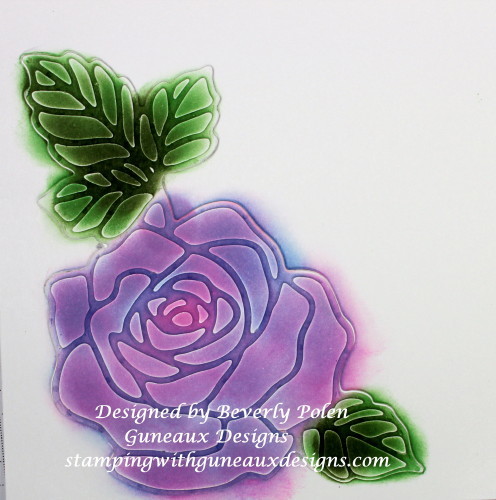
4. Use a sponge or dauber to sponge your choice of ink onto the rose and leaves. Once your inks dry well, the colors will be lighter.
5. Upon completion of coloring, remove the negative mask from your piece of artwork (i.e., the mask you place over the roses and leaves in Step 3).
 6. Remove the cutout that was temporarily adhered to your cardstock, and admire your beautiful rose and leaves piece of artwork.
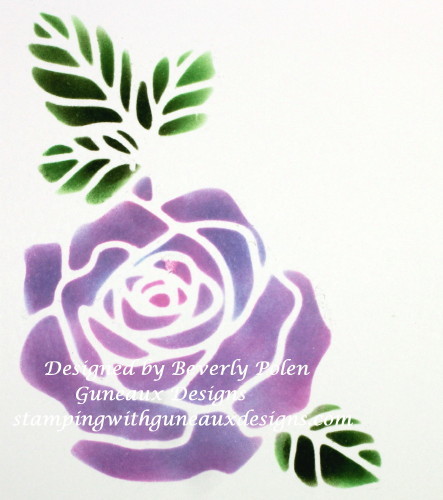
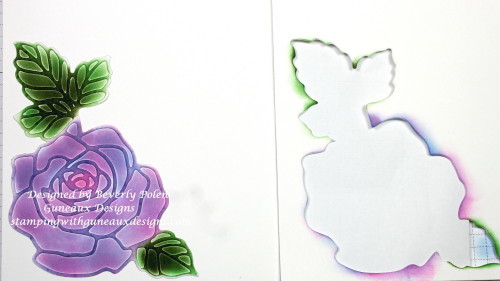
7. Decide on adding embellishments to your card. I cut out another rose and leaves cutout in Whisper White Card Stock and covered it with VersaMark ink and embossing powder. Then I adhered that over the colored rose and leaves to provide dimension.
8. Select a sentiment to stamp onto your card and finish making it as desired.
IF YOU HAVE COMMENTS OR QUESTIONS, PLEASE FEEL FREE TO LEAVE THEM IN THE COMMENTS SECTION!
![]()

Beautiful card Bev. Loved your color choices.
Thanks for sharing the instructions with pictures.
Thank you so much for your comment. Glad you like the instructions!