Iris Folding Hot-Air Balloon

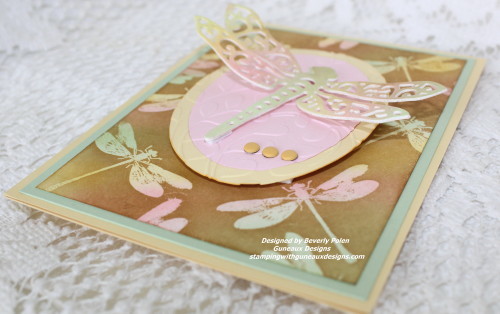
Hello, crafters!  When was the last time you used the Iris Folding Technique?  It has been a while for me, but I have an example for you today.  This technique was featured as a Technique Lovers’ Challenge on Splitcoaststampers on Monday.  I went through my iris folding designs and selected an Iris Folding Hot-Air Balloon.  This design was more difficult from one’s I’ve tried before.

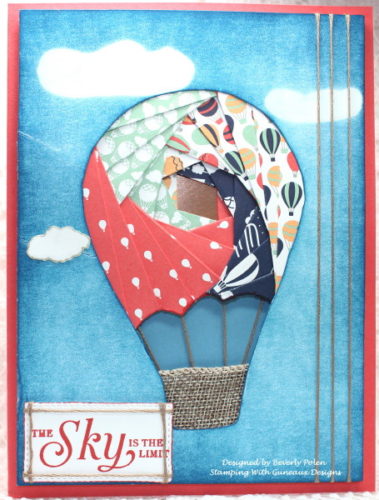
The iris folding on this card  is the upper part of the balloon.  I wish I could show you the actual design; however, it is copyrighted.  But you can get a sense of the design by the flow of the folded pieces of designer series paper.  An iris folding design includes lines, which represent where the folds go, and numbers (e.g., 1 – 26) within the shape.  Each number represents a fold.

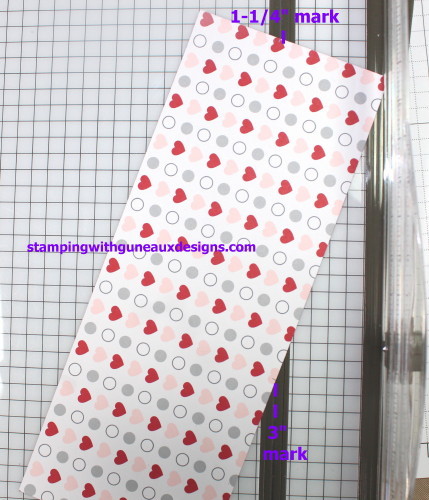
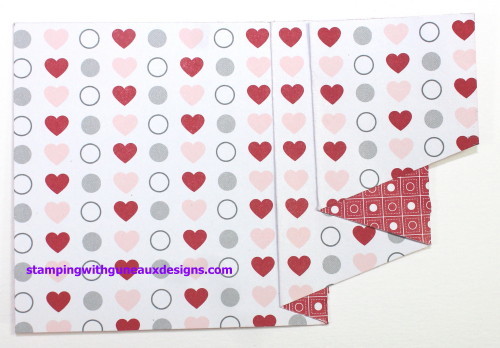
There are four different “patterns” of numbers for this design.  A pattern is the designer paper, specialty paper, card stock, etc., that you chose to use to fold and adhere to the card stock where numbers are located.  For example, Pattern A of this design included the numbers 1, 3, 7, 11, 15, 19 and 23.  I selected a pattern from the Stampin Up Carried Away Designer Series Paper (i.e., the colorful hot-air balloons), cut 1-1/2″ strips of the pattern, folded them in half, placed them over the numbers for Pattern A, and attached them to my card stock that has the outline cutout of the design.  The right side of the balloon is where Pattern A is located.

Pattern B is located where the folds of Mint Macaron paper is located, Pattern C is where the Watermelon Wonder (orange) folds are located, and Pattern D is where the Night of Navy folds are located.  To get a better sense of a design, numbers, and patterns, you can go HERE for numerous pictures.

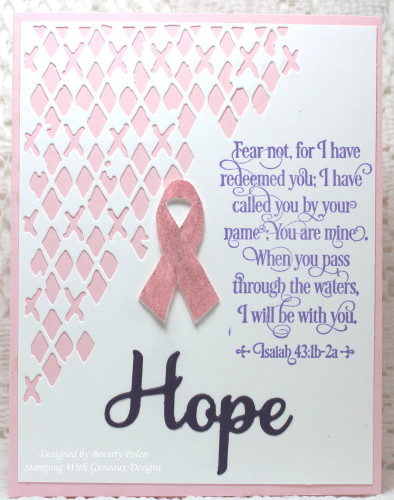
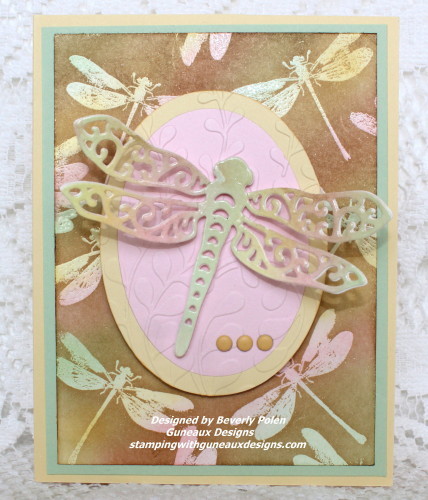
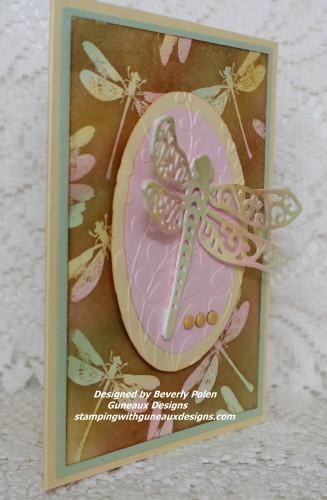
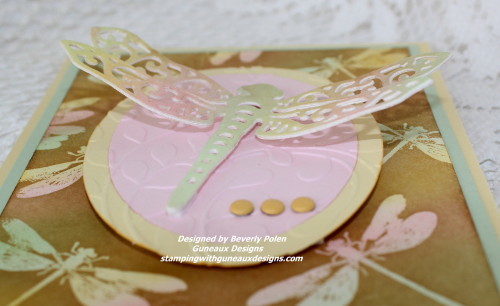
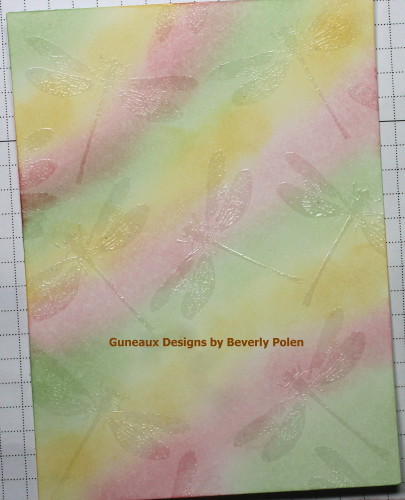
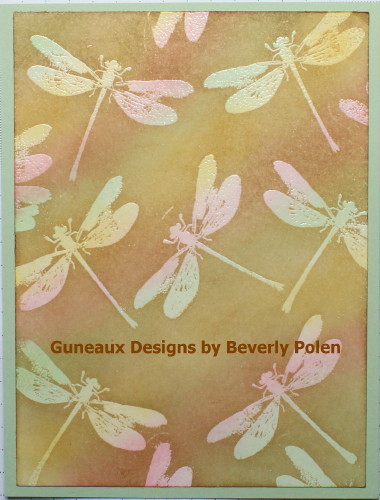
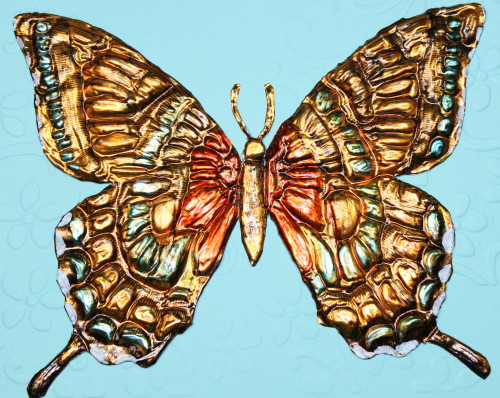
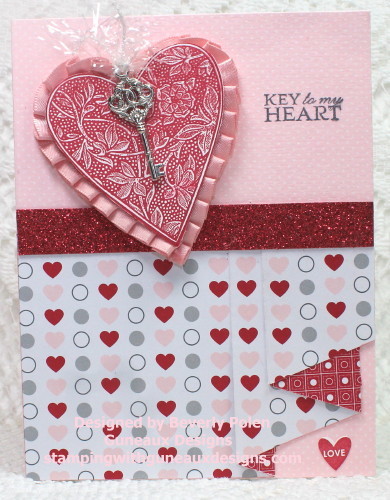
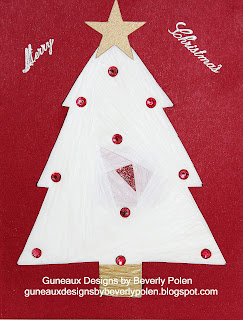
These are examples of other cards I have created featuring Iris Folding:       


If you have not tried this technique, I encourage you to try it.  It is a lot of fun.  Thanks for stopping in, and I hope you enjoyed your visit!


Butterfly_1_1God’s Blessings!
Stamping With Guneaux Designs By Beverly Polen
Firm Reliance on Divine Providence!


PROVERBS 30:5 & 6 (NIV)
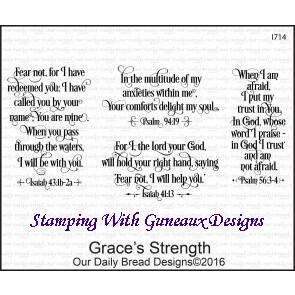
Every word of God is flawless; he is a shield to those who take refuge in him.  Do not add to his words, or he will rebuke you and prove you a liar.”

Glittering Glass Santa Digital Stamp

Hello, and thanks for stopping by!  Today my card share features the Power Poppy Glittering Glass Santa Digital Stamp.  I love this image, which was inspired by old fashioned glass ornaments from Germany.  I decided to color the ornament in non-traditional Christmas colors, and I love how it turned out!

I created my card in response to a Splitcoaststamper Sketch Challenge.  This is the sketch.

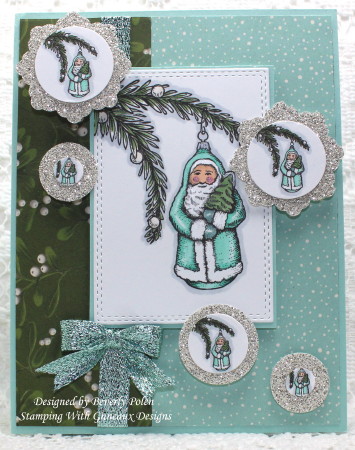
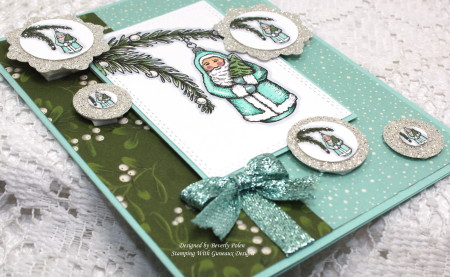
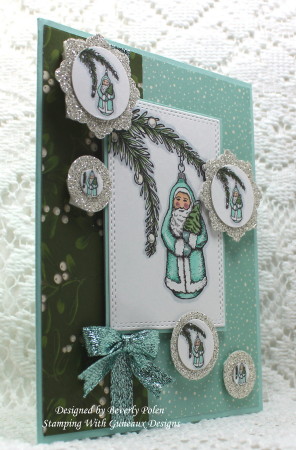
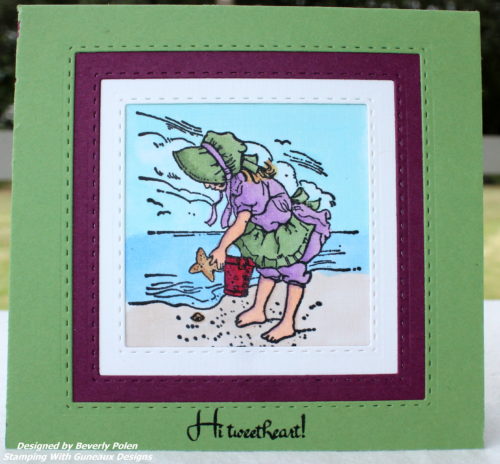
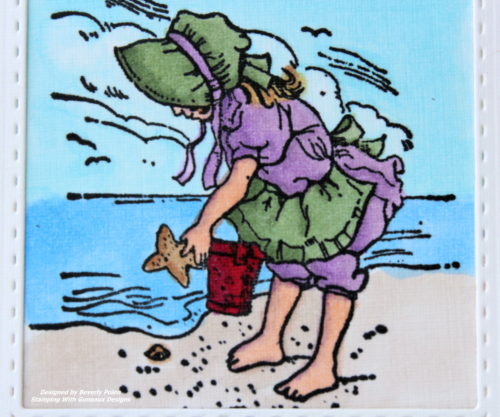
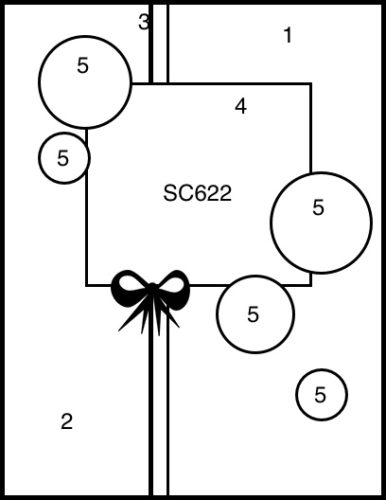
Because the image is digital, I resized it six times; one for the main image, and five for the #5 pieces of the sketch. I colored all six images with Copic Markers that closely match the SU Pool Party color, the primary color of the card.

After adhering the ribbon, designer series paper pieces, and main image to the card base, I used four different punches to cut Silver Glimmer Paper to mat the five miniature Santa images. I attached these at different levels using foam tape.  This gives the effect of the Russian Nesting Dolls.


Stamps: Power Poppy Glittering Glass Santa Digital Stamp
Paper: SU Pool Party Card Stock, Silver Glimmer Card Stock, Home For Christmas DSP, and Solar White Card Stock
Ink: Copic Markers
Accessories: CottageCutz Double-Stitched Rectangle Dies, SU Punches, Pool Party Glitter Ribbon, and Foam Tape

Gladioli Digital Stamp Set      

NOTE:  I typically do not create links to Stampin’ Up! products as they expire quickly and that results in having a lot of broken links on my site.  Thanks for viewing and leaving comments!  Your comments are greatly appreciated and inspire me!


Butterfly_1_1

God’s Blessings!

Stamping With Guneaux Designs By Beverly Polen

Firm Reliance on Divine Providence! 

Jesus said, “But I tell you who hear me:  Love your enemies, do good to those who hate you, bless those who curse you, pray for those who mistreat you.  Luke 6:15 

SU Ribbon of Hope Card

Hello, crafters!!  Today is the Clean and Simple Challenge, CAS397, on Splitcoaststampers.  Because Breast Cancer Awareness Month is October, the challenge is to include a pink ribbon on a project.  I used the retired Stampin’ Up! (SU) Ribbon of Hope stamp on my card.

SU Ribbon of Hope Card

The card is simple to make and can be replicated just by viewing it.  I used a Tim Holtz Thinlits Die to cut the corner of the front panel.  I used the Our Daily Bread Designs (ODBD) Grace’s Strength stamp for the sentiment, which I stamped in the retired SU Lavender Lace Classic Ink (I love this color).   Using SU Elegant Eggplant card stock, I cut out the word, “Hope”, from ODBD Faith, Hope & Love Dies.

If you are or have dealt with breast cancer, this card is in honor of you!  God bless you!!  I was on this journey several years back and can relate to the evil disease and its treatment.


SUPPLIES USED

grace's strengthSU Ribbon of Hope Card     SU Ribbon of Hope Card   SU Ribbon of Hope Card   eleganteggplantinkfaith_hope_love_csbd97   timholtzmixedmediachristmas


Butterfly_1_1

God’s Blessings!

Stamping With Guneaux Designs By Beverly Polen


“Gray hair is a crown of splendor: it is attained by a righteous life.”  Proverbs 16:31

Sweet Seasons

I have a card to share that features the old Stampin’ Up! Sweet Seasons Stamp Set that was released in 2004!  I’ve had this set for ten years and never used it until I was searching for a stamp to create a beach scene.  I had forgotten about the Sweet Seasons Stamp Set, and glad I stumbled upon it!

Sweet Seasons Stamp Set

The reason I was searching for a beach scene stamp was to participate in yesterday’s Splitcoaststampers Clean And Simple (CAS) Challenge to “Hit the Beach”, CAS385.  This challenge is hosted by Kathleen Curry, who wanted to “see a beachy card from everyone” who chose to participate in the challenge.

I chose the little girl image from the Sweet Seasons Stamp Set because it reminds me of my very precious granddaughter who loves the beach.  Needless to say who will receive this card!!

This photo provides a closeup of the image.  Because I live on the west coast of Florida and the sand on the beaches are more white, my sand in the image is Brick White (Copic Sketch Marker E40).

Sweet Seasons2

I designed the card with four layers of card stock, of which three are frames.  The white frame is smaller than the Rich Razzleberry (Stampin’ Up! card stock) frame, and the Wild Wasabi (Stampin’ Up! card stock) frame is larger than the Rich Razzleberry frame.  To create the frames, I used Our Daily Bread Designs (ODBD) Double Stitched Squares Dies.

I like the card, and I’m sure so will my granddaughter!


SUPPLIES:

Stamps:  Stampin’ Up! Retired Sweet Seasons Stamp Set and ODBD North Coast Creations Little Birdies (for the sentiment)

Paper:  White Linen Card Stock (Essentials by Ellen),  Neenah Solar White Card Stock, Stampin’ Up! Rich Razzleberry Card Stock, and Stampin’ Up! Wild Wasabi Card Stock (Stampin’ Up! Store)

Card Size:  4-1/2″ Square

Ink:  Various Copic Sketch Markers

Accessories:  Our Daily Bread Designs Double Stitched Squares Dies

Sweet SeasonsLITTLE BIRDIESDOUBLE STITCHED SQUARES DIES


SU Fifth Avenue Floral

God’s Blessings!

Stamping With Guneaux Designs

“I am the vine; you are the branches.  If a man remains in me and I in him, he will bear much fruit; apart from me you can do nothing.  If anyone does not remain in me, he is like a branch that is thrown away and withers; such branches are picked up, thrown into the fire and burned.”  John 15:5-6

Color on Color Emboss Resist Technique

Sponging and blending inks onto card stock is one of my favorite forms of art.  I have made many cards in this manner; however, I have only used the Color on Color Emboss Resist Technique for very few cards.  This technique requires sponging and blending inks as well.

Color-On-Color-Emboss-Resist-Technique-2

I have been thinking for a while that I wanted to create a card featuring the Color on Color Emboss Resist Technique.  Splitcoaststamper.com gave me the nudge to do so as it posted today a Technique Challenge for using the emboss resist technique.  I have included a tutorial in this post if you should want to try it too.  Here are additional pictures of my card.

Color-on-Color-Emboss-Resist-Technique_8_1Color-on-Color-Emboss-Resist-Technique-2Color-on-Color-Emboss-Resist-TechniqueColor-on-Color-Emboss-Resist-Technique

I did not add a sentiment on the card, but I will when an occasion arises that will dictate the type of sentiment needed. It will most likely be a “Thinking Of You” or “For You” sentiment.

BlogDivider_zpsed339ea1

SUPPLIES USED FOR THIS COLOR ON COLOR RESIST TECHNIQUE CARD:  

Stamps:  Stampin’ Up! Awesomely Artistic Stamp Set

Paper:  Stampin’ Up! Whisper White, Pink Pirouette, Barely Banana (retired), and Pistachio Pudding (retired) Card Stock

Ink: Stampin’ Up! Pistachio Pudding (retired), Barely Banana (retired), Pink Pirouette, and Baked Brown Sugar Classic Inks, and a VersaMark Watermark Stamp Pad

Accessories:  Stampin’ Up! Embossing Buddy, Clear Embossing PowderSponge Daubers, a heat gun, Stampin’ Up! Subtles Candy Dots, and Spellbinders Dragonfly Die – S2-157

Card Size: A2 – 5-1/2″ x 4-1/4″

I hope you enjoyed the card and plan to use the technique.  Now on to the tutorial.


BlogDivider_zpsed339ea1

COLOR ON COLOR RESIST TECHNIQUE TUTORIAL

A.  SUPPLIES NEEDED FOR USING THE COLOR ON COLOR EMBOSS RESIST TECHNIQUE:

Stamp:  Select a solid stamp that you want featured as the primary element.

Paper:  A white piece of card stock for sponging on ink and other card stock of your choice for your card.

Ink: You will need three light colors and one darker color and a watermark stamp pad

Accessories:  Talcum powder for rubbing across card stock before applying embossing powder; clear embossing powder, sponge daubers or sponges, and heat gun

B.  INSTRUCTIONS FOR THE COLOR ON COLOR EMBOSS RESIST TECHNIQUE:

1. Cut card stock accordingly:

  • 8-1/2″ x 5-1/2″ for card base
  • 5-1/4″ x 4″ for 1st layer
  • 5″ x 3-3/4″ for white card stock

2. Select a stamp that you want to be the main feature of the card.

3. Select three colors of ink that are light shades.

4. Using a sponge dauber, swirl your first light color onto the white card stock.

Color-on-Color-Emboss-Resist-Technique
5. Swirl your second light color onto the Whisper White Card Stock, and don’t worry about overlapping the colors.

Color-on-Color-Emboss-Resist-Technique

6. Swirl your third light color onto the Whisper White Card Stock, and then look for places where you want to blend the colors and do that with the daubers. Don’t worry about the look too much as it will completely change when you add the darker color.

Color-on-Color-Emboss-Resist-Technique

7. AFTER the ink dries (make sure the ink is dry), rub the talcum powder over the complete piece of card stock.

8. Cover your selected stamp with a watermark ink and stamp the image randomly on the card stock.

9. Cover with the clear embossing powder and heat set. Let it cool.Color-on-Color-Emboss-Resist-Technique

10. Swirl you dark color of ink all over the piece of card stock. You may need to do this a couple times or more.Color-on-Color-Emboss-Resist-Technique

11. Using a paper towel, rub the excess dark ink from the embossed images. Isn’t it cool how the clear embossing takes on the colors?

12. After reaching the desired colors on the colored piece of card stock, use a stamp image (can be the same that was used for the embossing) to create a center piece for the card.

13. Adhere the pieces together and add your desired embellishments.

14. If desired, add a sentiment to the card.

Enjoy!!

BlogDivider_zpsed339ea1Swallowtail Butterfly
God’s Blessings!

Stamping With Guneaux Designs

by

Beverly Polen

Pleated Skirt Fold Technique Tutorial

Hello, and thanks for stopping by!  I hope you had a great weekend!  It’s Monday, and I have for you a tutorial for the Pleated Skirt Fold Technique.  The card I prepared for this tutorial is a response to the two challenges on Splitcoaststamper.com (SCS) as described below.

  1. Technique Lovers Challenge (TLC572) – create a card using the Pleated Skirt Fold Technique, and
  2. Clean and Simple Challenge (CAS362 – Won’t You Call Me Sweetheart) – create a card that includes a heart.

I combined the two challenges and this is the result:

Pleated Skirt Fold Technique

The following two photos provide a closeup of the upper and bottom portions of the card.

Pleated Skirt Fold Technique Tutorial

Pleated Skirt Fold Technique Tutorial

This photo is a side view of the card.

Pleated Skirt Fold Technique Tutorial

Becky Roberts, a long-time Stampin’ Up! Demonstrator, provided a tutorial for the first challenge, Pleated Skirt Fold Technique, on SCS.  However, I am not sure if there is access to the tutorial if you are not a member of the Splitcoaststampers.com site.  I just don’t know.  Therefore, I decided to include a tutorial for you today.

BlogDivider_zpsed339ea1

PLEATED SKIRT FOLD TECHNIQUE TUTORIAL

General Supplies Needed:

  • Two-sided paper (I used Stampin’ Up! Love Impressions Specialty Designer Series Paper);
  • Stamp(s) ( I used Stampin’ Up! Gentler Times, I {Heart} Hearts, and You’re A Gem Stamp Sets);
  • Paper Trimmer;
  • Scissors;
  • Adhesive; and
  • Additional supplies needed to decorate a card.  I used:
    • Red Glimmer Paper;
    • Stampin’ Up! Real Red and Basic Gray Classic Ink;
    • Stampin’ Up! Blushing Bride Satin Pleated Ribbon and Clear Trim Tinsel; and
    • Stampin’ Up! Key Trinket.

INSTRUCTIONS:

1.  Cut a 7-3/4″ x 3″ piece of two-sided designer paper.

Pleated Skirt Fold Technique Tutorial

2.  Measure at the top of the upper-right corner of the paper down to the 1-1/4″ point and make a mark.

3.  Measure from the bottom-left side of the paper over to the 3″ point and make a mark.

Pleated Skirt Fold Technique Tutorial

4.  Align these marks in the cutting channel of your paper trimmer

Pleated Skirt Fold Technique Tutorial

5.  Trim this piece off and put to the side.

Pleated Skirt Fold Technique Tutorial

6.  Place the other piece onto your scoring tool, and score at the 3″, 3-1/2″, 5″, and 6-1/8″ marks.

Pleated Skirt Fold Technique Tutorial

7.  Fold a valley fold at the 3″ score line, mountain fold at the 3-1/2″ score line, valley fold at the 5″, and mountain at 6-1/8″.

Pleated Skirt Fold Technique

8.  Crease the fold lines with a bone folder.  Add adhesive to the back of the pleats so they will remain flat.  The piece of paper will look like this after folding and adhering it together.
Pleated Skirt Fold Technique Tutorial

9.  Adhere this to the bottom portion of a 5-1/2″ x 4-1/4″ card base.  You’ll need to use scissors to trim off a small piece of the pleated skirt that will overhang on the right side of the card base.

10.  Decorate the remaining portion of your card as desired.

ENJOY!

BlogDivider_zpsed339ea1

Swallowtail Butterfly

God’s Blessings!

Stamping With Guneaux Designs By Beverly Polen