Hello, and thanks for stopping by! I hope you had a great weekend! It’s Monday, and I have for you a tutorial for the Pleated Skirt Fold Technique. The card I prepared for this tutorial is a response to the two challenges on Splitcoaststamper.com (SCS) as described below.
- Technique Lovers Challenge (TLC572) – create a card using the Pleated Skirt Fold Technique, and
- Clean and Simple Challenge (CAS362 – Won’t You Call Me Sweetheart) – create a card that includes a heart.
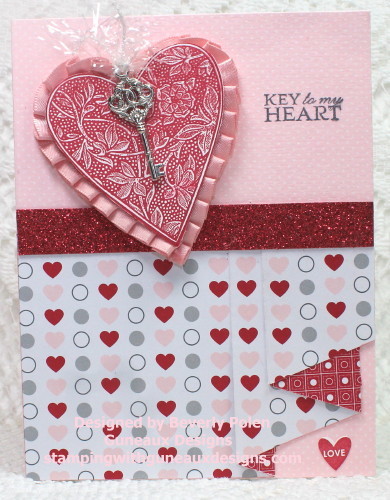
I combined the two challenges and this is the result:
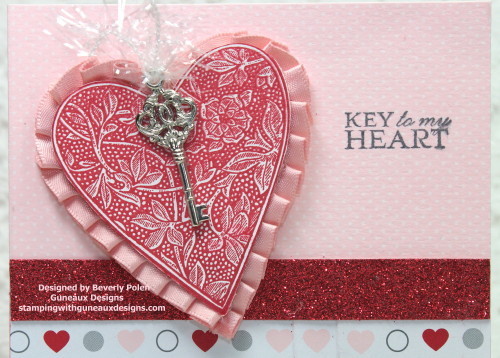
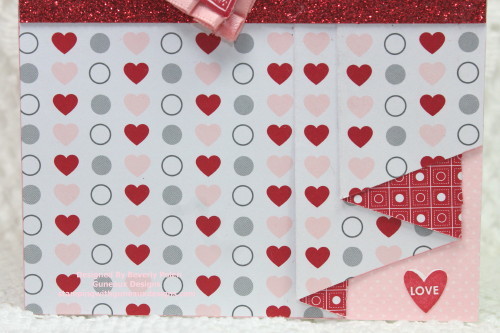
The following two photos provide a closeup of the upper and bottom portions of the card.
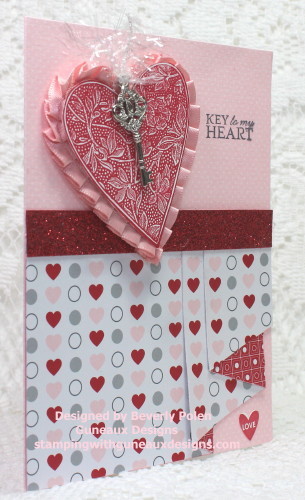
This photo is a side view of the card.
Becky Roberts, a long-time Stampin’ Up! Demonstrator, provided a tutorial for the first challenge, Pleated Skirt Fold Technique, on SCS. However, I am not sure if there is access to the tutorial if you are not a member of the Splitcoaststampers.com site. I just don’t know. Therefore, I decided to include a tutorial for you today.
![]()
PLEATED SKIRT FOLD TECHNIQUE TUTORIAL
General Supplies Needed:
- Two-sided paper (I used Stampin’ Up! Love Impressions Specialty Designer Series Paper);
- Stamp(s) ( I used Stampin’ Up! Gentler Times, I {Heart} Hearts, and You’re A Gem Stamp Sets);
- Paper Trimmer;
- Scissors;
- Adhesive; and
- Additional supplies needed to decorate a card. I used:
- Red Glimmer Paper;
- Stampin’ Up! Real Red and Basic Gray Classic Ink;
- Stampin’ Up! Blushing Bride Satin Pleated Ribbon and Clear Trim Tinsel; and
- Stampin’ Up! Key Trinket.
INSTRUCTIONS:
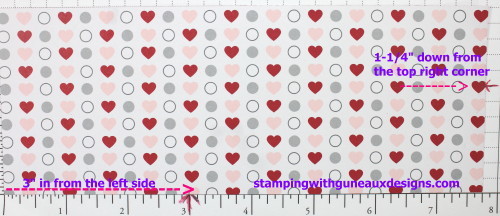
1. Cut a 7-3/4″ x 3″ piece of two-sided designer paper.
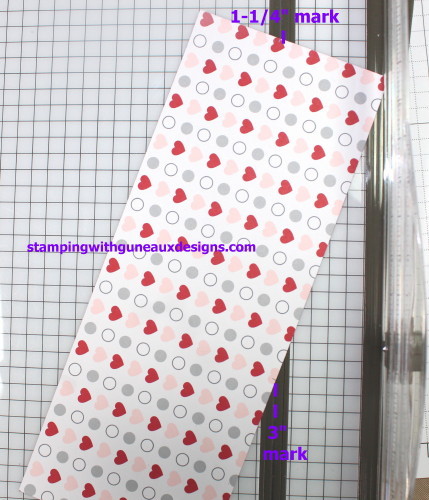
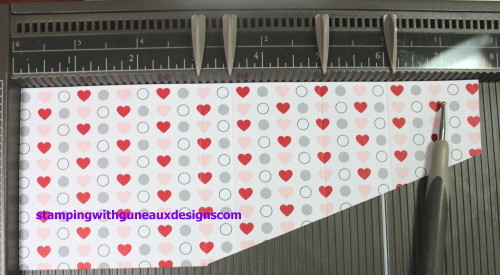
2. Measure at the top of the upper-right corner of the paper down to the 1-1/4″ point and make a mark.
3. Measure from the bottom-left side of the paper over to the 3″ point and make a mark.
4. Align these marks in the cutting channel of your paper trimmer
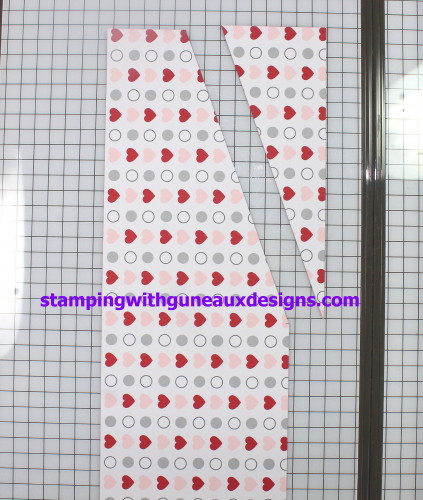
5. Trim this piece off and put to the side.
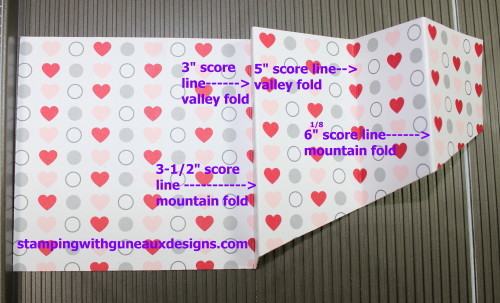
6. Place the other piece onto your scoring tool, and score at the 3″, 3-1/2″, 5″, and 6-1/8″ marks.
7. Fold a valley fold at the 3″ score line, mountain fold at the 3-1/2″ score line, valley fold at the 5″, and mountain at 6-1/8″.
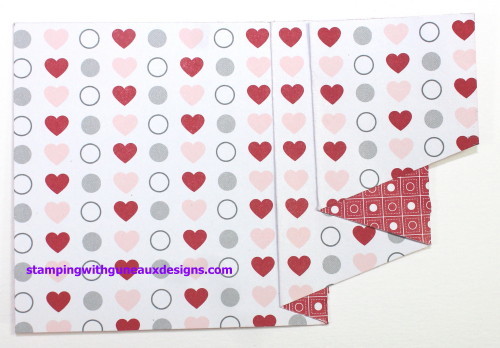
8. Crease the fold lines with a bone folder. Add adhesive to the back of the pleats so they will remain flat. The piece of paper will look like this after folding and adhering it together.
9. Adhere this to the bottom portion of a 5-1/2″ x 4-1/4″ card base. You’ll need to use scissors to trim off a small piece of the pleated skirt that will overhang on the right side of the card base.
10. Decorate the remaining portion of your card as desired.
ENJOY!
![]()