Sympathy Card – Trust God

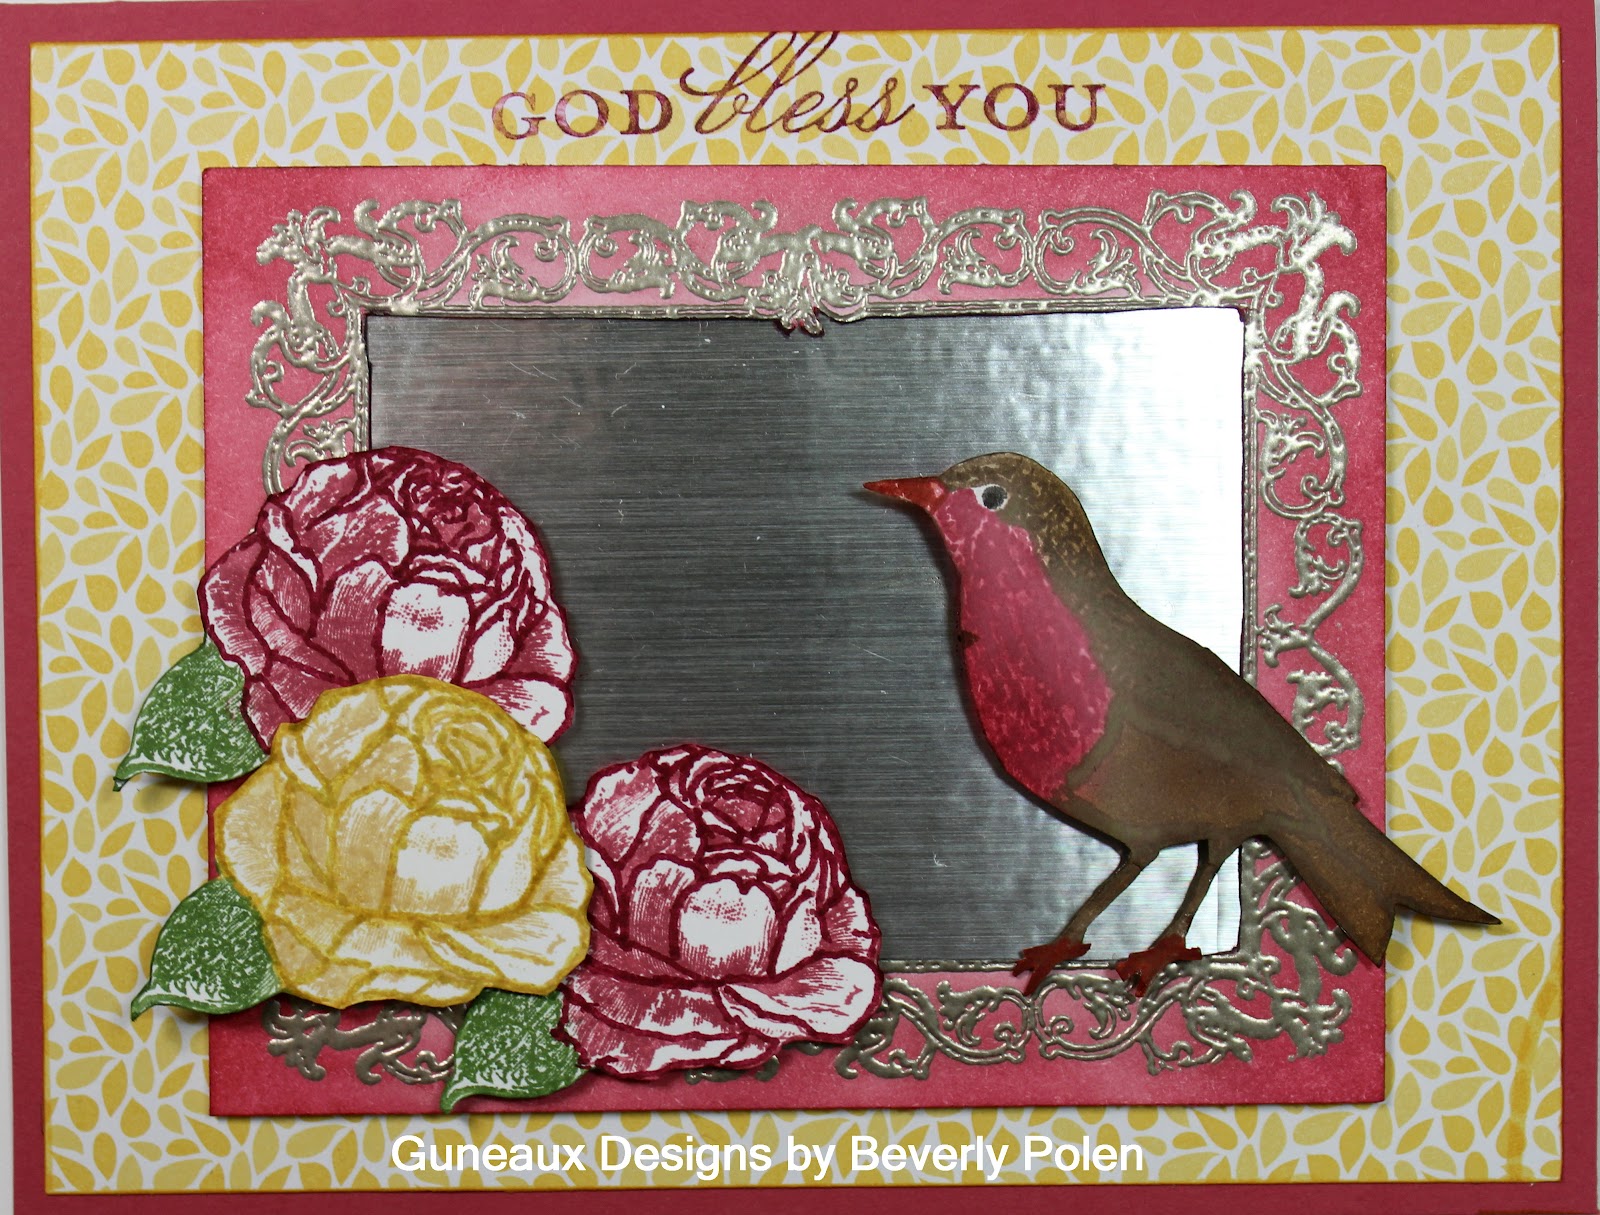
Sympathy Cards are some of the most difficult cards to make from an emotional standpoint.  It seems as though sorrow is being experienced by so many people around me, including my family. Thus, I made this sympathy card in dedication to those going through the journey of grief (Melissa, Melody, Gwen, Jennifer, and many more). Trust God!!

Trust God Stamp Set

This sympathy card features the Stampin’ Up! Floral District Designer Series Paper and the Trust God Stamp Set. If you cannot see the sentiment, it says, “Trust in the Lord with all your heart and lean not on your own understand.” How very appropriate in times of sorrow. Trust God Stamp Set

STAMPIN’ UP! SUPPLIES AND ITEM NUMBERS:

STAMP SET:  Trust God (126702)

PAPER:  Floral District Designer Series Paper (DSP) (126919), Baja Breeze Cardstock (111352), Rose Red Cardstock (102544), and Whisper White Cardstock (100730)

INK: Rose Red Classic Stampin’ Pad (102109)

ACCESSORIES: Daffodil Delight 1/2″ Seam Binding (125583), Whisper White Baker’s Twine (124262), Vintage Faceted Designer Buttons (127555), and Sticky Strip (104294)

INSTRUCTIONS FOR HANDMADE CARD:

  • Place two 2″ pieces of White Baker’s Twine in a water and Rose Red ink combination (3-4 drops of ink into a small amount of water). (I use an 8 oz. plastic container that is 1/4″ full with water.) 
  • Allow the white twine pieces to turn Rose Red, remove from the water, and let dry.
  • Create card base (5-1/2″ x 8-1/2″) from Baja Breeze Cardstock, folding in the center.
  • Cut a 5-1/4″ x 4″ piece of DSP series paper (your choice) and adhere it to the card front (my piece is the daffodil delight DSP).
  • Cut a 5-1/2″ x 4″ piece of another design from DSP (my piece if the floral DSP).
  • Along the 5-1/2″ side of the DSP, mark the 2″ point down from the top on both sides.
  • Mark the center of the DSP on the 5-1/2″ side.
  • Using a pencil and ruler, draw a line from the left 2″ mark to the center mark as well as the right 2″ mark to the center mark.
  • Using a trimmer, cut on the drawn lines.
  • Cut a 2-1/4″ square from Rose Red Cardstock.
  • Cut a 2″ square from Baja Breeze Cardstock.
  • Cut a 1-3/4″ square from Whisper White Cardstock.
  • Adhere the Baja Breeze Cardstock to the Rose Red Cardstock.
  • Stamp your sentiment onto the 1-3/4″ square of Whisper White Cardstock using Rose Red Ink.
  • Adhere the Whisper White Cardstock to the Baja Breeze Cardstock.
  • Cut a 6-1/2″ strip of the Daffodil Delight Seam Binding, add adhesive to the back side of both ends, and adhere it to the triangle piece of DSP, wrapping the ends onto the back side.
  • Adhere the sentiment and mats onto the triangle piece of DSP, placing it onto the center of the paper (see pic).
  • Adhere the DSP onto the top portion of the daffodil delight DSP (see pic).
  • Using the Rose Red twine, thread a piece underneath the Seam Binding on the left side, threading a Vintage Faceted Designer Button and creating a bow. Repeat for the right side.

Sympathy Card - Trust God

On-Line Store Button

God’s Blessings!

Stamping With Guneaux Designs

A Cherry on Top Stamp Set, Floral District DSP, Labels Collection Framelits – Happy Birthday

Don’t you love making Stampin’ Up! greeting cards for people who are very special to you?  I sure do.  This card is just that ~ a happy birthday card for a very special friend.  It features the new Hostess Stamp Set, A Cherry On Top (125971).  Also featured are the beautiful Floral District Designer Series Paper (126919) and Labels Collection Framelits(125598).

INSTRUCTIONS:
  • Cut a 6″ x 12″ piece from a 12″ x 12″ piece of Rich Razzleberry Card Stock, folding it in a 6″ square so it opens from the bottom up.
  • Cut a 5-3/4″ square of Floral District DSP, round the edges with the  Stampin’ Up! Corner Punch(119871), and adhere to the card base.
  • Using the two largest Labels Collection Framelits, cut two frames; the largest with Rich Razzleberry Cardstock and second one with Lucky Limeade Card Stock.
  • Cover the cake dish top stamp image from the A Cherry On Top Stamp Set with VersaMark ink and stamp onto Whisper White Card Stock.
  • Emboss it with White Embossing Powder(109132).
  • Using Rich Razzleberry and Lucky Limeade inks, stamp the cake dish pedestal and cupcake bottom and top images on the Whisper White Card Stock in appropriate location (see pics).
  • Using Real Red ink, stamp the cherry on top of the cupcake.
  • Cover only the cake dish top with Crystal Effects (101055) and let dry.
  • Cut out the images as one piece and adhere it the Lucy Limeade Card Stock.
  • If desired, place a ribbon bow onto the pedestal.
  • Place foam dimensionals on the back of the Lucky Limeade frame.
  • Adhere it to the Rich Razzleberry frame.
  • Adhere that to the Floral District DSP.

The following pictures are of the recipient of this beautiful card!  Happy Birthday, Lin!

God’s Blessings!
 
Stamping With Guneaux Designs

Papaya Collage Stamp Set and Floral District DSP

Isn’t he so cute; the bird that is?  He’s looking at himself in the mirror!  This card features a Stampin’ Up! stamp set that debuts on June 1!  It is called Papaya Collage Stamp Set (126612).  All of the stamp images are from this set.  The designer series paper (DSP) used is the beautiful Floral District DSP (126919) that also debuts on June 1!

I used faux metal peel and stick easy liner (from Home Depot) to create the mirror.  I think it worked quite well.  What do you think?  The below picture is a closeup of the bird.  The following picture shows a slight reflection of him in the mirror.
 
I really like how the frame turned out.  I used the Pewter Embossing Powder (124114) on the frame, cut it out, and covered it with a new ink color from the 2012-2014 In Colors, the Primrose Petals (126858).  This same color in card stock forms the card base.  Enjoy!
 
God’s Blessings!
 
Stamping With Guneaux Designs 
by
Beverly Polen
 
Papaya Collage Stamp Set and Floral District DSP