Cottage Cutz Autumn Centerpiece

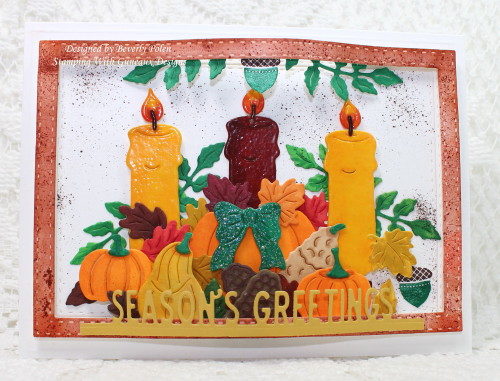
Today is my last day as a guest designer for the Splitcoaststampers Color Challenge.  I thoroughly enjoyed the opportunity and am grateful for it!   I enjoyed working with such talented ladies!  Today’s Color Challenge is hosted by Mary Marsh (aka MaryR917), and she chose these gorgeous fall colors for the challenge:  Chocolate Chip, Cajun Craze, Crushed Curry, and Garden Green.  Her dessert (i.e., extra points) is “Fall”.  The card I designed for today’s challenge features the Cottage Cutz Autumn Centerpiece Die!  

Cottage Cutz Autumn Centerpiece_1

These are the colors for the challenge, and they are from Stampin’ Up (SU):
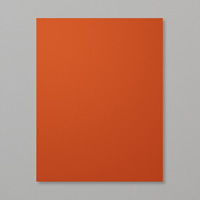
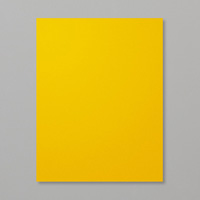
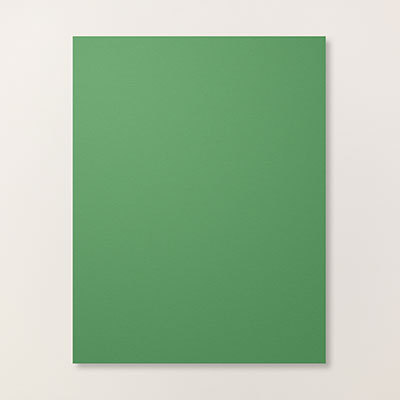
Chocolate Chip 8-1/2 x 11 Cardstock Cajun Craze 8-1/2 x 11 Cardstock Crushed Curry 8-1/2 x 11 Cardstock Garden Green 8-1/2 x 11 Cardstock

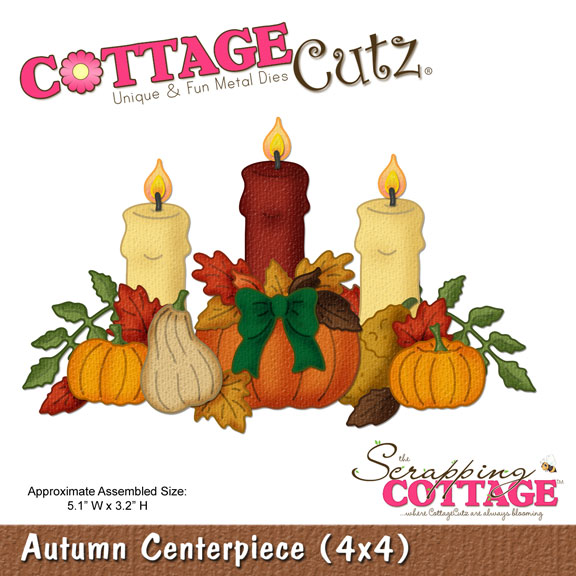
When using the Cottage Cutz Autumn Centerpiece Die, it does not cut out as one piece as the picture (see below) of the die may represent.  It cuts out 19 pieces, of which 6 need to be cut more than once.  Despite this, it’s a wonderful die!  Instead of using card stock of the colors for the Color Challenge, I used Neenah Solar White card stock and colored each piece with Copic Sketch Markers and a couple of SU Markers!  I did use card stock for the sentiment, though.  The sentiment is from an Impression Obsession Die – Holiday Top Word Edgers.

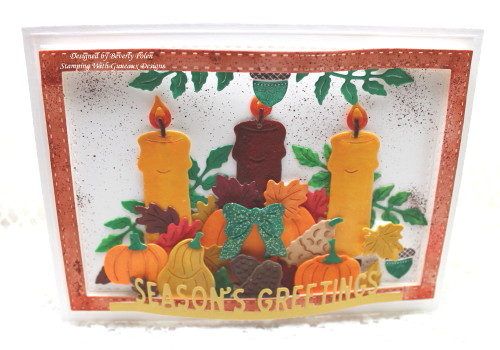
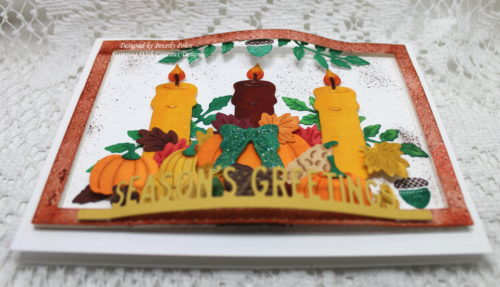
I assembled the card using Kittie Caracciolo’s Bendi Frame technique.  Here’s the tutorial for the technique.  Can you see in the following photos that the top frame is bent?  This allows for more dimension on a card.  Once you’ve checked out the tutorial, you’ll understand.

Cottage Cutz Autumn Centerpiece-4_1 Cottage Cutz Autumn Centerpiece-5

When the card is stood up and under a light, the light shines through the bend on the frame and gives a nice presentation.  Cottage Cutz Autumn Centerpiece-3_1
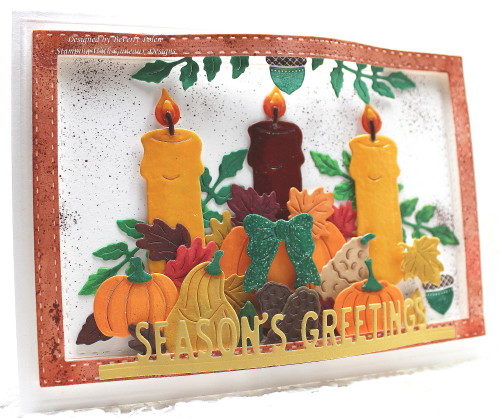
To include more of the Chocolate Chip ink, I used an old SU tool, the Color Spritzer Tool (retired) and spritzed the ink onto the white panel.  I did the same on the frame but didn’t like it so I sponged on Cajun Craze ink. I attached the frame with two layers of foam tape in order to raise the frame higher to get more pieces attached.  To finish the card, I added foam tape to the ends of the sentiment and attached it to the frame.

I hope you’ve enjoyed my card and are inspired!   Come back soon!!


SUPPLIES

Paper:  Neenah Solar White Card Stock and SU Crushed Curry Card Stock (sentiment)

Ink:  Copic Sketch Markers, SU Chocolate Chip Marker, SU Crushed Curry Marker

Accessories:  Cottage Cutz Autumn Centerpiece Die, Impression Obsession Holiday Top Word Edgers Dies, ODBD Double Stitched Rectangles Dies, ODBD Pine Cones Dies, and Foam Tape

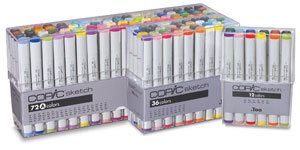
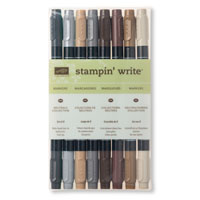
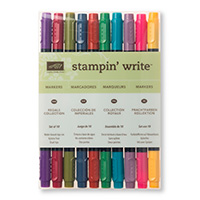
 Copic Sketch Markers  Neutrals Stampin' Write Markers Regals Stampin' Write Markers

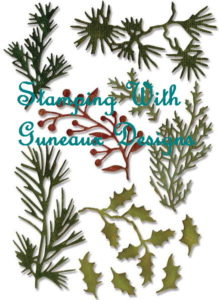
   DOUBLE STITCHED RECTANGLES DIES  PINECONES DIES


SU Fifth Avenue Floral

God’s Blessings!

Stamping With Guneaux Designs By Beverly Polen


“For the message of the cross is foolishness to those who are perishing, but to us who are being saved it is the power of God.  For it is written:  “I will destroy the wisdom of the wise; the intelligence of the intelligent I will frustrate.”  Where is the wise man? Where is the scholar?  Where is the philosopher of this age?  Has not God made foolish the wisdom of the world?”  1 Corinthians 18-20

Paper Casting Technique

Have you ever tried the Paper Casting Technique?  It’s fun but challenging!

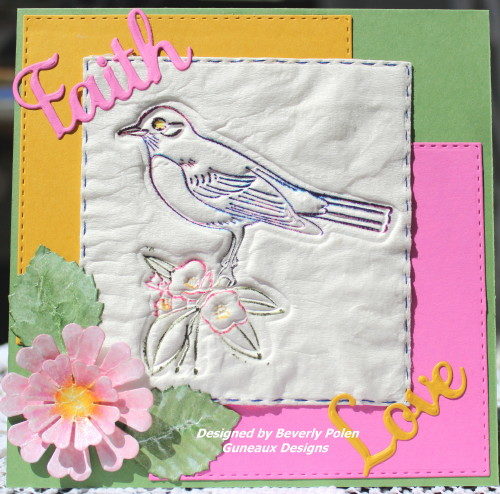
I used the technique to create this card for a Splitcoaststampers Technique Lovers Challenge, TLC582, hosted by Sabrina, aka Cook22.  This challenge includes a video on paper casting using bathroom tissue.   Check it out and create a card with the technique.

Paper Casting Technique

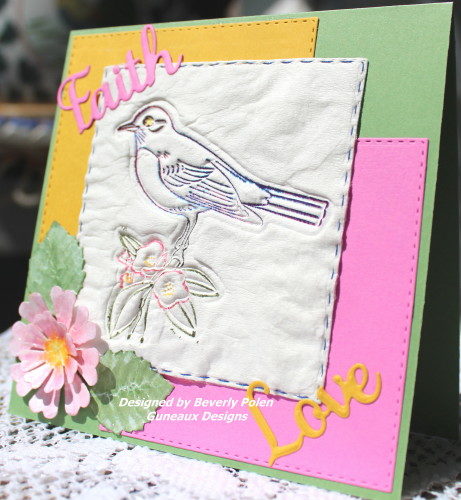
I made this card Monday, using the same bird stamp that is on yesterday’s Purple Starling card.  I have been hesitant to upload the card as my bathroom tissue is so wrinkled (of course, I wet it!), that I didn’t like it.  I saw so many beautiful cards in the Splitcoaststampers gallery that were made with this technique that were not wrinkled! Quite frankly, I thought this card is not about to be worthy of the challenge.

After some soul-searching, I decided that I would go ahead and post it since I took the time to create it, and let the chips fall where they may!

Using the technique, I wet (or soaked) 6-double panel pieces of tissue.  Then I stamped the bird into the wet tissue to create an impression.

When the tissue dried, I used all of the below listed inks to stamp the bird image. I first stamped the bird only with turquoise but it didn’t show well. Therefore, I kept adding different colors of ink to the bird portion of the stamp and re-stamping it, until I decided, enough is enough. Then I inked the remainder of the stamp to color the floral portion of the image.


UPDATE:  This card was listed in Splitcoaststampers Favorites for the week ending on April 24!  ” Congratulations! In the General Stamping forum, you’re in the FAVORITES for the week ending April 24.


Wrinkled-2_1

Then I thought, this tissue paper will not stick together, so I got out a needle and thread and stitched around the square. That was all for naught as it will still separate. Regardless, I die cut the paper flower and leaves, colored them with Copics, and spritzed them with Glimmer Mist. There was an interesting reaction to the mist and alcohol inks together.  It started fizzing!  At first I thought I had made some champagne! LOL

That’s all folks!  Thanks for viewing and leaving comments!  Don’t forget to check out the technique video!

BlogDivider_zpsed339ea1

Stamps: Martha Stewart Bird Stamp  Paper: SU Whisper White, Hello Honey, Pixie Pink, and Unknown Green  Card Size: 5-1/2″ Sq  Ink: SU Tempting Turquoise, Melon Mambo, Wisteria Wonder, and Rich Razzleberry; Copic Markers  Accessories: ODBD Pretty Posies Dies; ODBD Faith, Hope, & Love Dies; Sewing Needle; Blue Thread; ODBD Stitched Squares Dies; Tattered Angels Glimmer Mist; Water; Bathroom Tissue; and Heat Gun  Techniques: Paper Casting

BlogDivider_zpsed339ea1

SU Fifth Avenue Floral

God’s Blessings!

Stamping With Guneaux Designs

“And without faith it is impossible to please God, because anyone who comes to Him must believe that He exists and that He rewards those who earnestly seek Him.”  Hebrews 11:6

Hot Wax Painting Technique

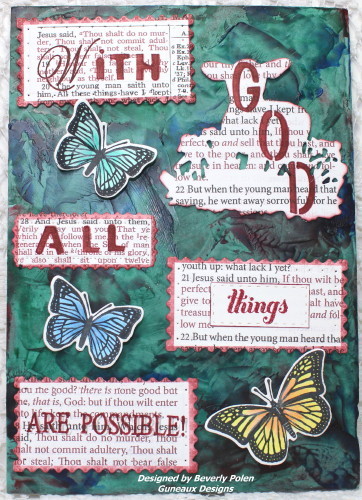
Hello, crafters!  I have for you a piece of art featuring the hot wax painting technique.

Last weekend Splitcoaststampers, namely Audrie (girlgeek 101), hosted an “Inspiration Challenge”, IC539 – Seaweed Kisses.   Audrie provides two options for this Challenge.  I chose Audrie’s Challenge #1 – “Select any picture, or journal, on the Seaweed Kisses site, and create something brand new, totally unique, and reflecting your own personal style using it as your inspiration.” Seaweed Kisses is the WEBSITE chosen for the challenge.

I chose THIS as my inspiration piece.  As soon as I saw the page, I immediately thought of hot wax painting. On the site, the lady is creating wrapping paper with craft paper (not card stock) and paint. The tubes of paint brought to mind hot wax painting. Can’t explain the connection; just was inspiring.

Hot Wax Painting Technique

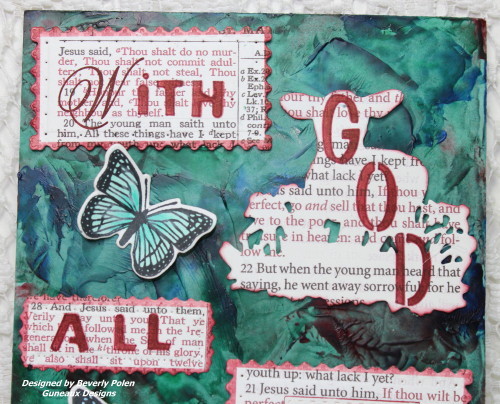
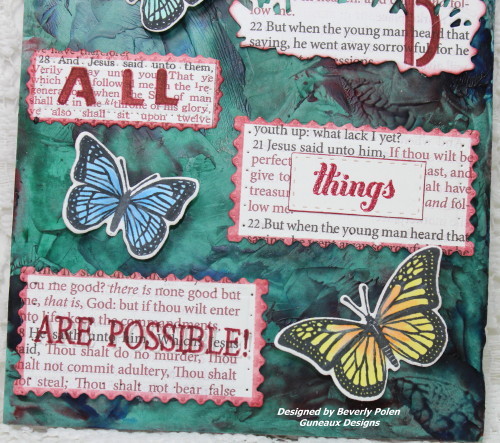
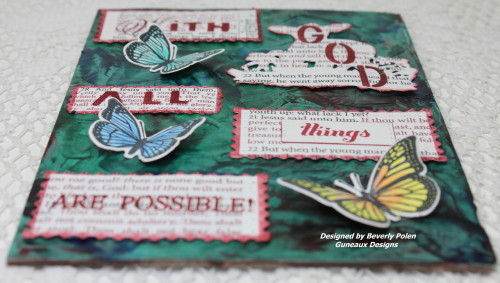
For the journal item, I cut a 5″ x 7″ piece of chipboard and glued to it a piece of DSP.  I heated my mini craft iron, placed it into the containers of three colors of wax paint to melt them (selecting one color at a time), and applied the hot wax over the DSP.  It took many, many times of dipping into the wax and applying it to the paper to get my “somewhat” desired result. I would let the wax dry and then reapply over and over.

Hot Wax Painting Technique I then copied pages of my Bible that I wanted to use as my journal. After cutting each piece, I used Cherry Cobbler ink for the edges and the words I wanted on the pieces – With God All Things Are Possible!  To add some extras, I colored and die cut three butterflies.  BTW, this is only the second time I’ve used hot wax paint, so I may have used it incorrectly, but it is what it is.

Hot WaxPainting2_1 Hot WaxPainting3_1

Hope you enjoy my piece of art!  I sure had fun creating it!

BlogDivider_zpsed339ea1

Stamps: ODBD Trois Jolies Papillons;  Paper: SU Whisper White Thick Card Stock and a 5″ x 7″ piece of Perfectly Artistic DSP;  Size: 5″ x 7″;  Ink: Copics and SU Cherry Cobbler;  Accessories: Encaustic Wax Paint; Mini Craft Iron; Hot Glue Gun; Alpha Stencils; ODBD Little Lamb Die; ODBD Tres Papillons, Lavish Layers, and Filigree Frames Dies; Copies of Selected Scriptures; Coping Machine; and Chipboard;  Techniques: Hot Wax Painting

BlogDivider_zpsed339ea1

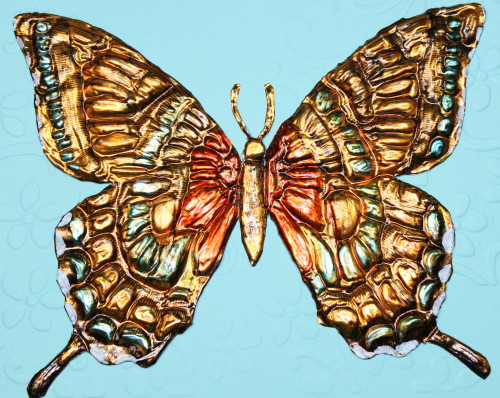
Butterfly_1_1

God’s Blessings!!

Stamping With Guneaux Designs by Beverly Polen

“Then [Jesus] said to Thomas, ‘…Stop doubting and believe’ “  John 20:27

Smackin’ Acetate Technique

Splitcoaststampers’ Try A New Technique Challenge, TLC577, Smackin’ Acetate Technique

On Monday, Splitcoaststampers’ Try A New Technique Challenge, TLC577, is to create using the “Smackin’ Acetate” Technique.  This technique is similar to that of coloring on acrylic blocks and transferring the color to paper.  Have you tried the Smackin’ Acetate Technique before?  I had not heard of it until Monday.  LOL

Splitcoaststamper’ Clean and Simple Challenge, CAS368, Spring Critters

Also on Monday, Splitcoastampers’ Clean and Simple Challenge,  CAS368, Spring Critters, is to create in celebration of spring!  Seeing more signs that spring is here and to celebrate the springing forward of our clocks, the challenge is to bring out our spring critters.

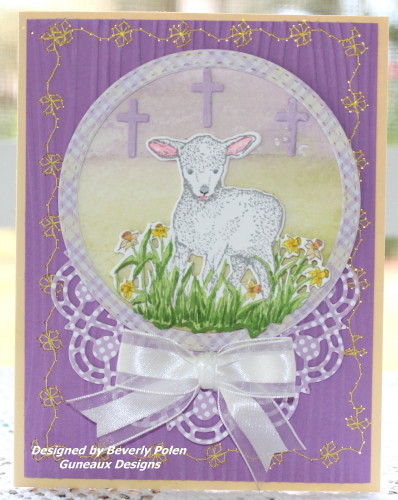
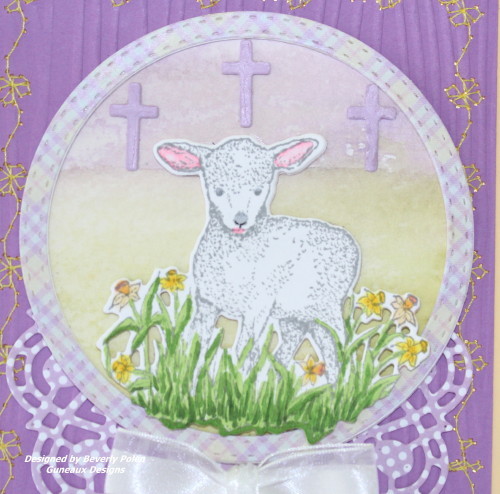
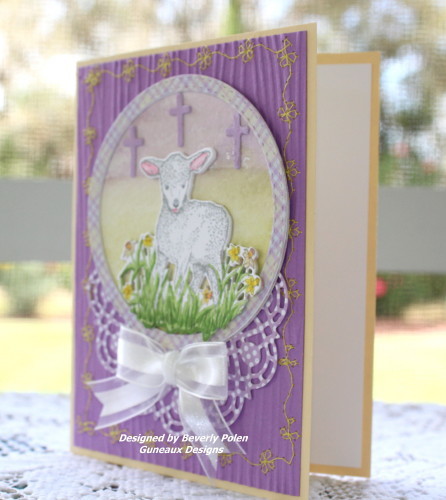
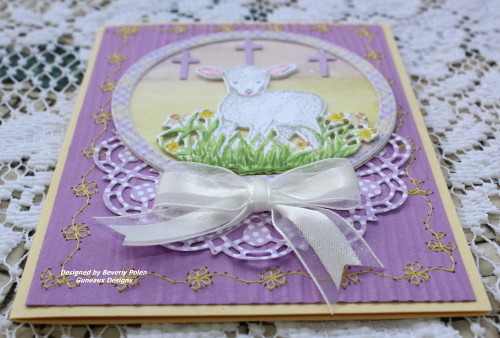
I combined the challenges and created this card.

(Update:  This card was in the Splitcoaststampers favorites for the week ending on March 20, 2016.)

(Update #2:  I am so honored that this card was picked today, March 31, 2016 as the Customer Card of the Day by Our Daily Bread Designs (ODBD)!  I am so blessed and grateful for this recognition!  You can read about it on ODBD Blog.)

Smackin' Acetate Technique

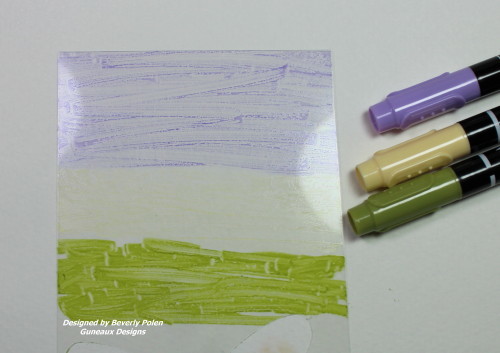
I used the Smackin’ Acetate Technique for the land behind the lamb.  The following explains the technique.

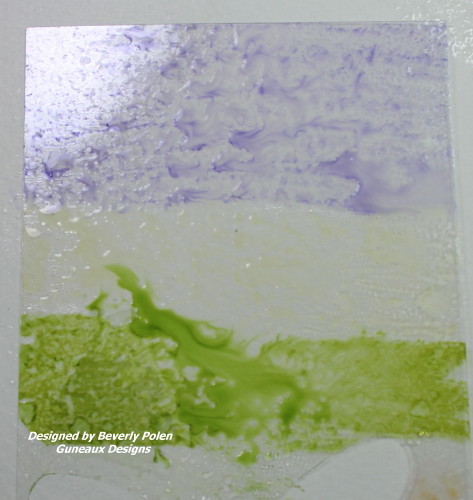
  1.  I used the Stampin’ Up! Lavender Lace Marker to color the top of the acetate, Barely Banana to color the middle, and Old Olive to color the bottom.

Smackin' Acetate Technique

2.  I spritzed water on the acetate next.  The water moves the ink around.

Smackin' Acetate Technique

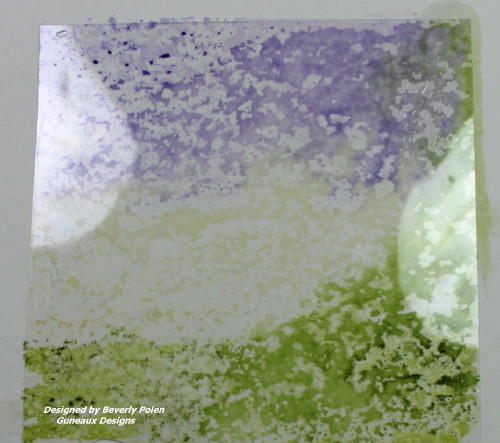
3.  I placed the inked and spritzed side of the acetate down onto watercolor paper and used my fingers to push the ink on the paper.

Smackin' Acetate Technique

4.  I removed the acetate and used a slightly wet watercolor brush to spread the inks.

Clean and Simple Challenge, CAS368, Spring Critters

The part of my card that incorporates the CAS368, Spring Critters, is the Lamb.  Having been raised on a small farm, every spring we looked forward to the births our little “spring critters”; lambs, chicks, calves, piglets, foals, etc.

Also Easter is in the spring time.  Therefore, my Lamb represents more than a critter.  It is the Lamb of God, Jesus.  The three crosses in the background represent the cross upon which Jesus was hung, and the crosses upon which the prisoners hung beside Jesus.

Smackin' Acetate Technique

As for the rest of the design, I sewed (or tried to) yellow flowers around the border of the card to replicate the yellow flowers around the lamb, which I colored with copics.  I embossed the lavender paper with a wood grain embossing folder which represents the wooden cross upon which Jesus hung.  I added a cut out from Our Daily Bread Designs (ODBD) doily die that lies underneath the lamb and topped it off with a white bow made with Stampin’ Up! Whisper White Organza Ribbon.  The circle encompassing the lamb and the doily were made with ODBD Pastel Paper, ODBD Double Stitched Circles Dies, and ODBD Doily Die .  Here are additional photos:

Smackin Acetate Technique Smackin' Acetate Technique

I hope you try the technique and join in on the Splitcoaststampers.com challenges!

CCOD Button

BlogDivider_zpsed339ea1

SUPPLIES:

STAMPS:  ODBD Sheep

PAPER:  Watercolor Paper, ODBD Pastel Paper, and Stampin’ Up! Barely Banana and a Lavender Card Stock

INK:  Stampin’ Up! Lavender Lace, Barely Banana, and Old Olive Markers, and Copics

ACCESSORIES:  ODBD Little Lamb Die, ODBD Ornamental Crosses Dies, ODBD Doily Dies, ODBD Double Stitched Circles Dies, Stampin’ Up! Whisper White Organza Ribbonand Stampin’ Up Wood Grain Embossing Folder

CARD SIZE: A2 

TECHNIQUES: Smackin’ Acetate Technique

BlogDivider_zpsed339ea1

Swallowtail Butterfly

GOD’S BLESSINGS!

STAMPING WITH GUNEAUX DESIGNS BY BEVERLY POLEN

“Be anxious for nothing, but in everything by prayer and supplication, with thanksgiving, let your requests be made known to God; and the peace of God, which surpasses all understanding, will guard your hearts and minds through Christ Jesus”.  Philippians 4:6 

Color on Color Emboss Resist Technique

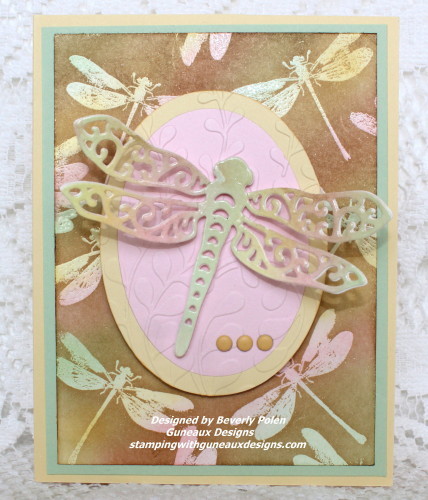
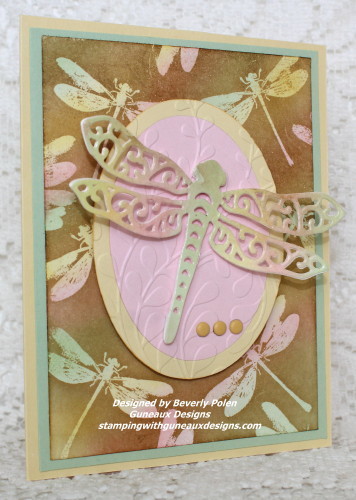
Sponging and blending inks onto card stock is one of my favorite forms of art.  I have made many cards in this manner; however, I have only used the Color on Color Emboss Resist Technique for very few cards.  This technique requires sponging and blending inks as well.

Color-On-Color-Emboss-Resist-Technique-2

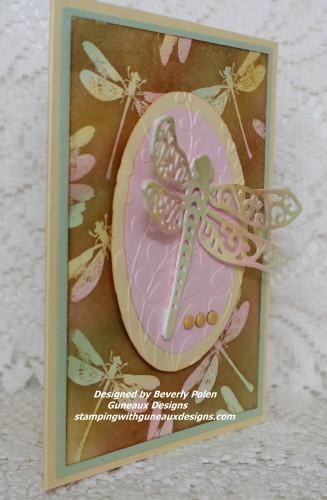
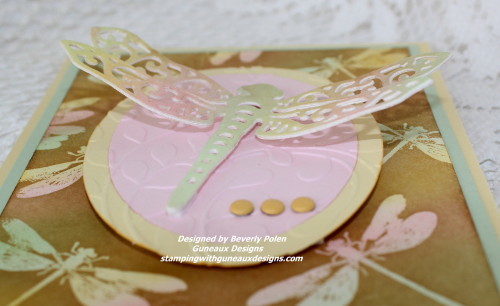
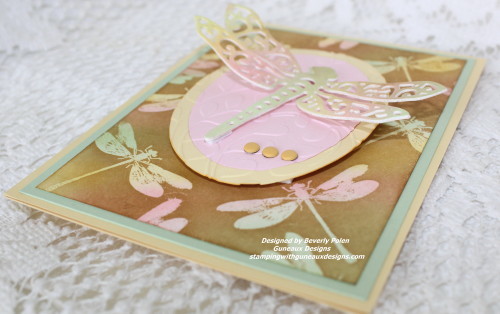
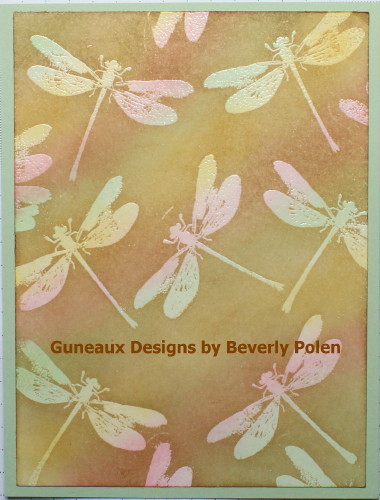
I have been thinking for a while that I wanted to create a card featuring the Color on Color Emboss Resist Technique.  Splitcoaststamper.com gave me the nudge to do so as it posted today a Technique Challenge for using the emboss resist technique.  I have included a tutorial in this post if you should want to try it too.  Here are additional pictures of my card.

Color-on-Color-Emboss-Resist-Technique_8_1Color-on-Color-Emboss-Resist-Technique-2Color-on-Color-Emboss-Resist-TechniqueColor-on-Color-Emboss-Resist-Technique

I did not add a sentiment on the card, but I will when an occasion arises that will dictate the type of sentiment needed. It will most likely be a “Thinking Of You” or “For You” sentiment.

BlogDivider_zpsed339ea1

SUPPLIES USED FOR THIS COLOR ON COLOR RESIST TECHNIQUE CARD:  

Stamps:  Stampin’ Up! Awesomely Artistic Stamp Set

Paper:  Stampin’ Up! Whisper White, Pink Pirouette, Barely Banana (retired), and Pistachio Pudding (retired) Card Stock

Ink: Stampin’ Up! Pistachio Pudding (retired), Barely Banana (retired), Pink Pirouette, and Baked Brown Sugar Classic Inks, and a VersaMark Watermark Stamp Pad

Accessories:  Stampin’ Up! Embossing Buddy, Clear Embossing PowderSponge Daubers, a heat gun, Stampin’ Up! Subtles Candy Dots, and Spellbinders Dragonfly Die – S2-157

Card Size: A2 – 5-1/2″ x 4-1/4″

I hope you enjoyed the card and plan to use the technique.  Now on to the tutorial.


BlogDivider_zpsed339ea1

COLOR ON COLOR RESIST TECHNIQUE TUTORIAL

A.  SUPPLIES NEEDED FOR USING THE COLOR ON COLOR EMBOSS RESIST TECHNIQUE:

Stamp:  Select a solid stamp that you want featured as the primary element.

Paper:  A white piece of card stock for sponging on ink and other card stock of your choice for your card.

Ink: You will need three light colors and one darker color and a watermark stamp pad

Accessories:  Talcum powder for rubbing across card stock before applying embossing powder; clear embossing powder, sponge daubers or sponges, and heat gun

B.  INSTRUCTIONS FOR THE COLOR ON COLOR EMBOSS RESIST TECHNIQUE:

1. Cut card stock accordingly:

  • 8-1/2″ x 5-1/2″ for card base
  • 5-1/4″ x 4″ for 1st layer
  • 5″ x 3-3/4″ for white card stock

2. Select a stamp that you want to be the main feature of the card.

3. Select three colors of ink that are light shades.

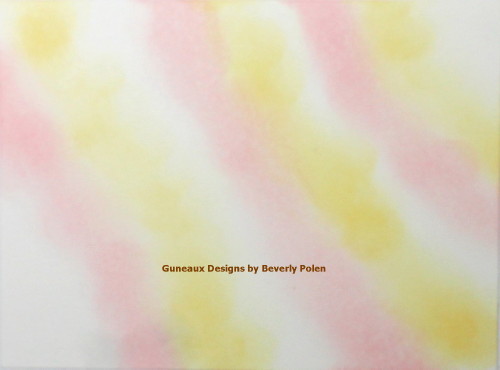
4. Using a sponge dauber, swirl your first light color onto the white card stock.

Color-on-Color-Emboss-Resist-Technique
5. Swirl your second light color onto the Whisper White Card Stock, and don’t worry about overlapping the colors.

Color-on-Color-Emboss-Resist-Technique

6. Swirl your third light color onto the Whisper White Card Stock, and then look for places where you want to blend the colors and do that with the daubers. Don’t worry about the look too much as it will completely change when you add the darker color.

Color-on-Color-Emboss-Resist-Technique

7. AFTER the ink dries (make sure the ink is dry), rub the talcum powder over the complete piece of card stock.

8. Cover your selected stamp with a watermark ink and stamp the image randomly on the card stock.

9. Cover with the clear embossing powder and heat set. Let it cool.Color-on-Color-Emboss-Resist-Technique

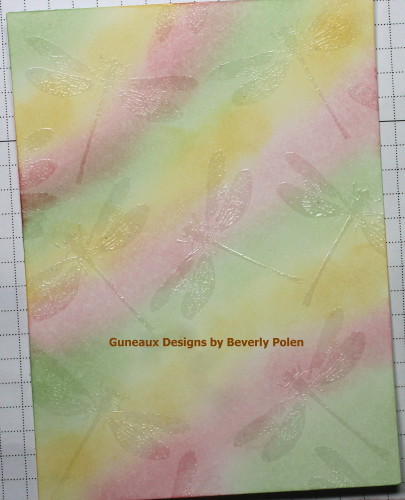
10. Swirl you dark color of ink all over the piece of card stock. You may need to do this a couple times or more.Color-on-Color-Emboss-Resist-Technique

11. Using a paper towel, rub the excess dark ink from the embossed images. Isn’t it cool how the clear embossing takes on the colors?

12. After reaching the desired colors on the colored piece of card stock, use a stamp image (can be the same that was used for the embossing) to create a center piece for the card.

13. Adhere the pieces together and add your desired embellishments.

14. If desired, add a sentiment to the card.

Enjoy!!

BlogDivider_zpsed339ea1Swallowtail Butterfly
God’s Blessings!

Stamping With Guneaux Designs

by

Beverly Polen

Pleated Skirt Fold Technique Tutorial

Hello, and thanks for stopping by!  I hope you had a great weekend!  It’s Monday, and I have for you a tutorial for the Pleated Skirt Fold Technique.  The card I prepared for this tutorial is a response to the two challenges on Splitcoaststamper.com (SCS) as described below.

  1. Technique Lovers Challenge (TLC572) – create a card using the Pleated Skirt Fold Technique, and
  2. Clean and Simple Challenge (CAS362 – Won’t You Call Me Sweetheart) – create a card that includes a heart.

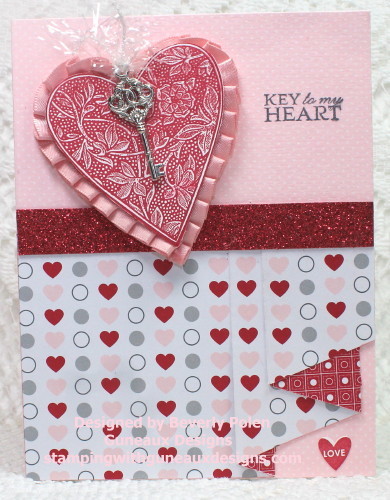
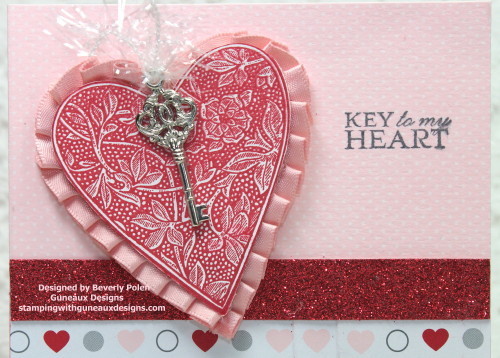
I combined the two challenges and this is the result:

Pleated Skirt Fold Technique

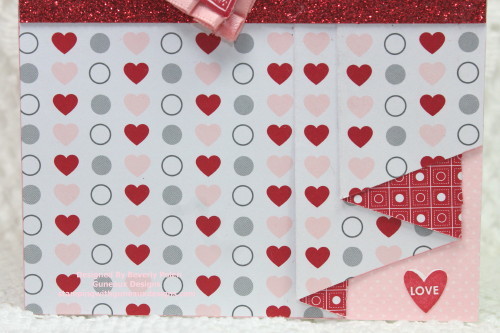
The following two photos provide a closeup of the upper and bottom portions of the card.

Pleated Skirt Fold Technique Tutorial

Pleated Skirt Fold Technique Tutorial

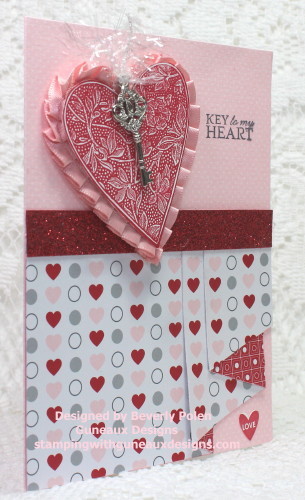
This photo is a side view of the card.

Pleated Skirt Fold Technique Tutorial

Becky Roberts, a long-time Stampin’ Up! Demonstrator, provided a tutorial for the first challenge, Pleated Skirt Fold Technique, on SCS.  However, I am not sure if there is access to the tutorial if you are not a member of the Splitcoaststampers.com site.  I just don’t know.  Therefore, I decided to include a tutorial for you today.

BlogDivider_zpsed339ea1

PLEATED SKIRT FOLD TECHNIQUE TUTORIAL

General Supplies Needed:

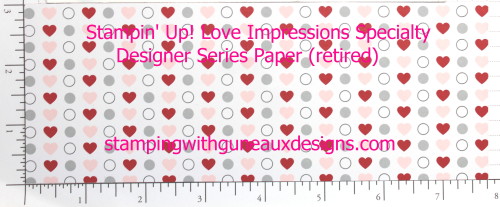
  • Two-sided paper (I used Stampin’ Up! Love Impressions Specialty Designer Series Paper);
  • Stamp(s) ( I used Stampin’ Up! Gentler Times, I {Heart} Hearts, and You’re A Gem Stamp Sets);
  • Paper Trimmer;
  • Scissors;
  • Adhesive; and
  • Additional supplies needed to decorate a card.  I used:
    • Red Glimmer Paper;
    • Stampin’ Up! Real Red and Basic Gray Classic Ink;
    • Stampin’ Up! Blushing Bride Satin Pleated Ribbon and Clear Trim Tinsel; and
    • Stampin’ Up! Key Trinket.

INSTRUCTIONS:

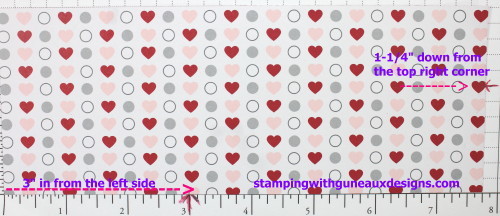
1.  Cut a 7-3/4″ x 3″ piece of two-sided designer paper.

Pleated Skirt Fold Technique Tutorial

2.  Measure at the top of the upper-right corner of the paper down to the 1-1/4″ point and make a mark.

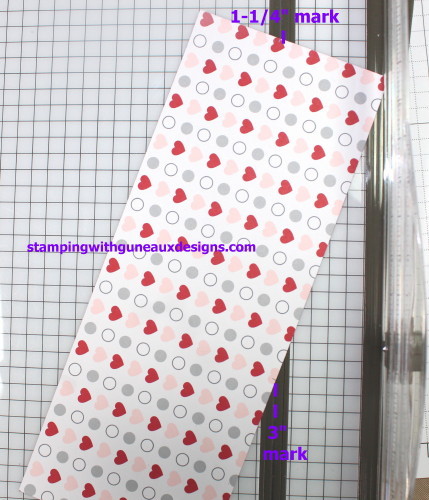
3.  Measure from the bottom-left side of the paper over to the 3″ point and make a mark.

Pleated Skirt Fold Technique Tutorial

4.  Align these marks in the cutting channel of your paper trimmer

Pleated Skirt Fold Technique Tutorial

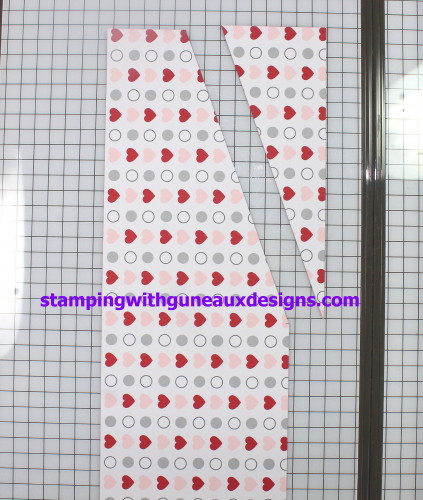
5.  Trim this piece off and put to the side.

Pleated Skirt Fold Technique Tutorial

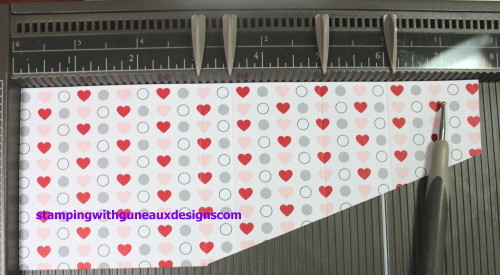
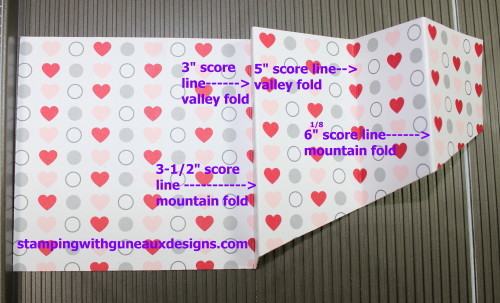
6.  Place the other piece onto your scoring tool, and score at the 3″, 3-1/2″, 5″, and 6-1/8″ marks.

Pleated Skirt Fold Technique Tutorial

7.  Fold a valley fold at the 3″ score line, mountain fold at the 3-1/2″ score line, valley fold at the 5″, and mountain at 6-1/8″.

Pleated Skirt Fold Technique

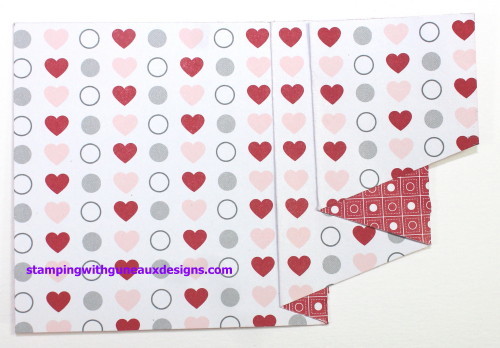
8.  Crease the fold lines with a bone folder.  Add adhesive to the back of the pleats so they will remain flat.  The piece of paper will look like this after folding and adhering it together.
Pleated Skirt Fold Technique Tutorial

9.  Adhere this to the bottom portion of a 5-1/2″ x 4-1/4″ card base.  You’ll need to use scissors to trim off a small piece of the pleated skirt that will overhang on the right side of the card base.

10.  Decorate the remaining portion of your card as desired.

ENJOY!

BlogDivider_zpsed339ea1

Swallowtail Butterfly

God’s Blessings!

Stamping With Guneaux Designs By Beverly Polen