Happy Birthday Cards – Stampin’ Up!

For me, the month of February requires several Happy Birthday Cards  as several relatives’ birthdays are during this month.  Happy Birthday Cards are greeting cards that you cannot have enough of.  Today’s share is a Happy Birthday Card for my daughter who turns 41.  (Gee, I’m really feeling old!)

Happy Birthday Cards

I thought that some rosettes would look good with this design of Stampin’ Up!’s Floral District Designer Series Paper.  The following picture is a closeup of the rosettes.

Happy Birthday Cards

Did you notice the thread in each button that is on top of the rosettes?  The thread is from three different colors of Stampin’ Up! Ribbon that I unraveled and inserted into the buttons.   This is a good substitute for Baker’s Twine if you do not have any.

STAMPIN’ UP! SUPPLIES USED TO MAKE THIS HAPPY BIRTHDAY CARD:

Stamps:  Create a Cupcake Stamp Set (121982) and Bring On The Cake Stamp Set (121958)


Paper:  Floral District Designer Series Paper (126919), Rich Razzleberry Card Stock, Daffodil Delight Card Stock, and Whisper White Card Stock

Floral District Designer Series Paper

Ink:  Rich Razzleberry Classic Ink, Daffodil Delight Classic Ink, and Baja Breeze Classic Ink

AccessoriesOvals Collection Framelits (129381), Sycamore Street Ribbon & Button Pack (130812 – Sale-a-bration Item), and Simply Scored Scoring Tool (122334),  Bigz XL Designer Rosette Die (125594), Daffodil Delight Seam Binding Ribbon (125583), Baja Breeze Seam Binding Ribbon (122331), and Rich Razzleberry Stitched Grosgrain Ribbon (126876)

Happy Birthday Cards

 Happy Birthday Cards

 Stamping With Guneaux Designs

God’s Blessings!
Stamping With Guneaux Designs
by
Beverly Polen

Happy Birthday Cards

Stampin Up Happy Birthday Cards

Stampin Up Owl Punch – Happy Valentine’s Day – Guneaux Designs

It has been a while since I used the famous Stampin Up Owl Punch, so I decided for today’s post I would use it to create a Happy Valentine’s Day Card.   This card is one I made for my grandchildren, and it is a gate fold card.

I pray that you have a blessed day with your Sweet Valentine!

Stampin Up Owl Punch Happy Valentine's Day

 This is a closeup of the owl.  Isn’t he a cutie?  I love his eyes!

Stampin Up Owl Punch

I used a retired stamp from the Stampin’ Up! Forever Friends to create a tree branch. The stamp image is of a bird on a branch. It took some careful maneuvering to extend the branch and not include the bird (lol).

This picture is of the inside of the card.  I used Stampin’ Up!’s My Digital Studio to create the sentiment.  I think my grandchildren, who are young, will laugh at the sentiment.

Stampin Up Owl Punch

SUPPLIES USED TO MAKE THE STAMPIN UP OWL PUNCH VALENTINE CARD

Stamps: Retired Stampin Up Forever Friends Stamp Set

Paper: Stampin Up More Amore DSP (129309), Real Red Card Stock, and Very Vanilla Card Stock

Ink: Pool Party Classic Ink, Gumball Green Classic Ink, Primrose Petals Classic Ink, Soft Suede Stampin’ Write Marker, Sahara Sand Stampin’ Write Marker, and non-SU markers

Accessories: Stampin Up Owl Punch (118074), Hearts Collection Framelits (125599), Itty Bitty Shapes Punch Pack (Circle Punch) (118309), Bigz Scallop Squares Duo Die (120903), 2-1/2″ Circle Punch (120906), Stampin’ Up!’s My Digital Studio (130647 – for sentiment), and Sponge Dauber (102892)

Stampin' Up Owl Builder Punch Happy Valentine's Day

Stampin’ Up! Owl Builder Punch

Stampin Up Owl Punch


This card would be an easy one to CASE, and I hope you try!  Again, have a wonderful and Happy Valentine’s Day with your special someone!

 Stamping With Guneaux Designs

 God’s Blessings!
Stamping With Guneaux Designs
by
Beverly Polen

Stampin Up Owl Punch

STAMPIN UP OWL PUNCH HAPPY VALENTINE’S DAY

Stampin Up More Amore DSP Valentine Purse

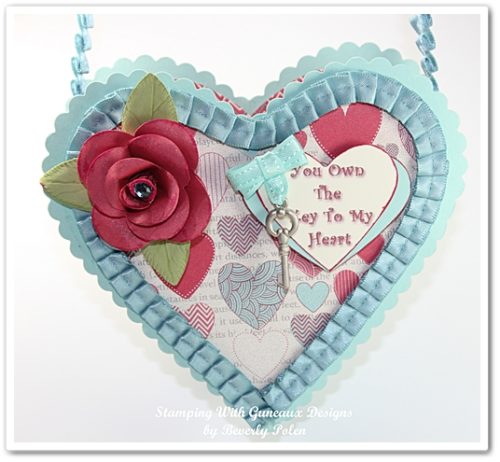
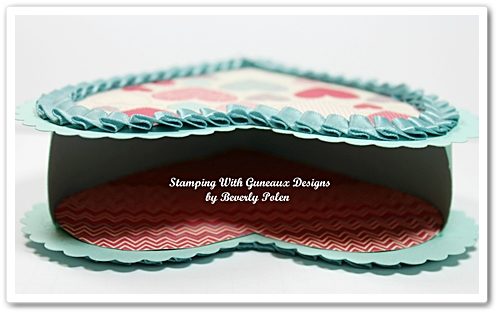
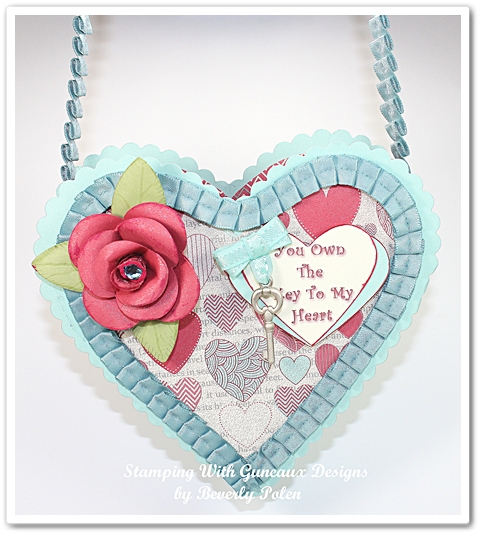
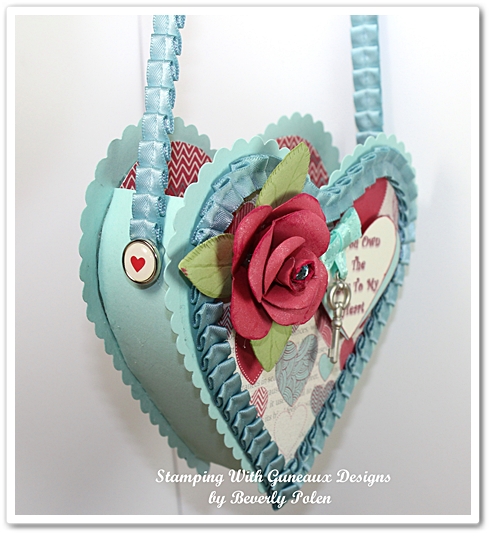
Today I am sharing how to make this beautiful Stampin Up More Amore DSP Valentine Purse!  I made this for my granddaughter, and I am sure she will be delighted when she receives it on Valentine’s Day!


SUPPLIES USED TO MAKE THE STAMPIN UP MORE AMORE DSP VALENTINE PURSE

Paper:  Stampin Up More Amore DSP (129309), Pool Party Card Stock, Primrose Petals Card Ctock, and Certainly Celery Card Stock

Ink:  Primrose Petals Classic Ink

Accessories:  Hearts Collection Framelits (125599); Big Shot, Platform, and Cutting Plates; Sticky Strip or Adhesive of your choice; Ribbon of your choice, and Brads of your choice


INSTRUCTIONS FOR MAKING THE STAMPIN UP MORE AMORE DSP VALENTINE PURSE

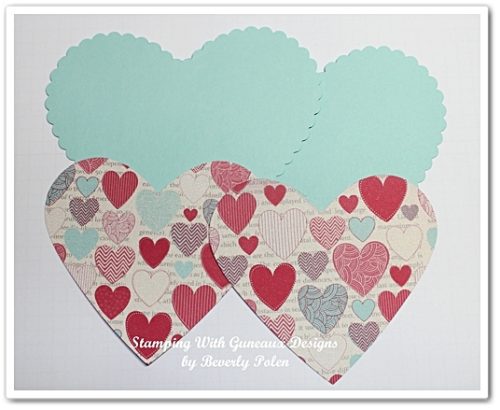
  • Using the Big Shot and Hearts Collection Framelit (Scalloped), cut out two Pool Party hearts.
  • Cut out two hearts from the Stampin Up More Amore DSP with the next to the largest heart framelit

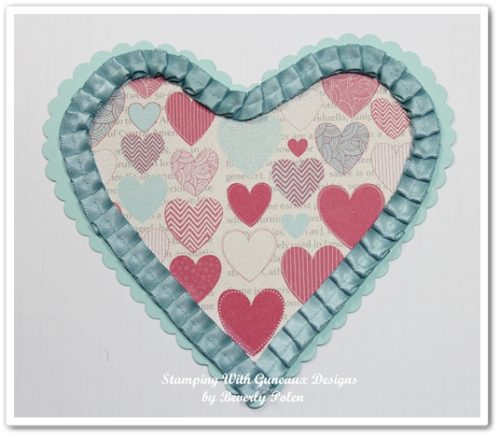
  • Attach the DSP hearts to the Pool Party hearts and add ribbon around the edges of each.

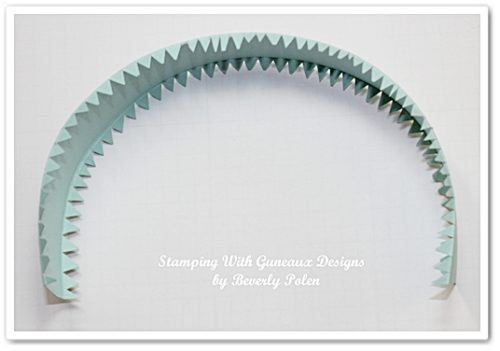
  • Cut an 8-1/4″ x 2″ piece of Pool Party Card Stock and score it along the 8-1/4″ side at the 1/4″ and 1-1/2″ marks.
  • Place one end of the card stock between your thumb and index finger and hold it.  Now place the card stock between your opposite thumb and index finger and begin to curl the card stock by repeatedly moving your thumb and finger down the 8-1/4″ length of the card stock.  This will make the card stock more pliable and it will curl up into a half-circle.
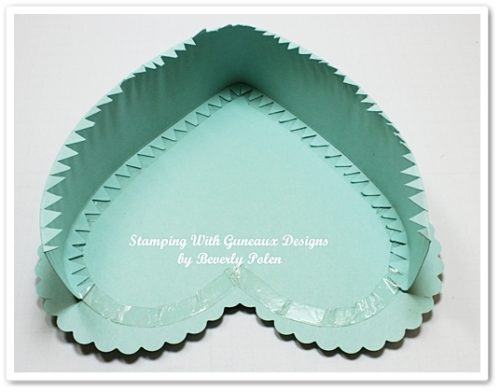
  • Cut notches along the 1/4″ and 1-1/2″ scored sides of the card stock.

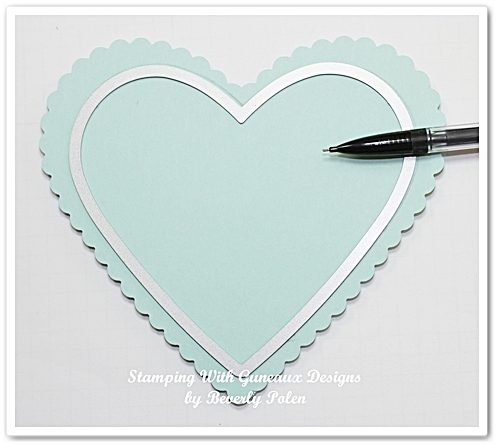
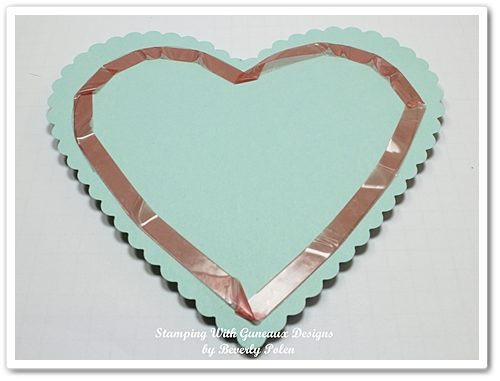
  • Use the next to the largest heart framelit and trace around it with a pencil on the back side of both heart pieces.  Make sure the heart framelit is placed on both hearts at the same spot.

  •  Attach Sticky Strip to each heart along the pencil tracing.

  • Remove the red liner from the Sticky Strip and begin attaching one side of the 8-1/4″ notched piece of Pool Party Card Stock to one of the hearts.  Assure both ends will line up evenly.

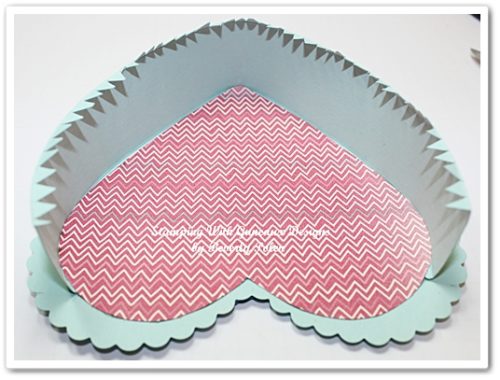
  • Select a DSP design that you want to be the purse liner and trace the outer rim of the next- to-the-largest-heart framelit onto this DSP twice.
  • Cut out both hearts and insert one into the purse and press it down to adhere it, as shown in the below picture.  At this point you may be thinking, “Wouldn’t it have being easier to add this before the purse side piece was added?”  Yes, however, the notched portion of the 8-1/4″ piece of card stock would not be covered up if the heart were added first.

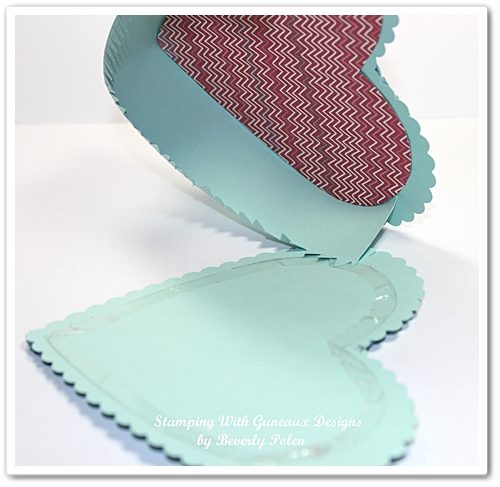
  • Begin attaching the second heart to the first heart by lining it up with the edge of the other notched side of the heart and begin adhering it..

  •  Just as before, Insert the second DSP heart inside  and press it down to adhere it.  You now have the bottom of the purse made.

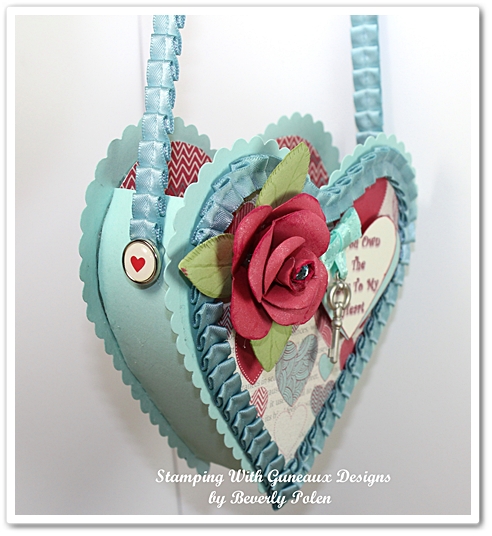
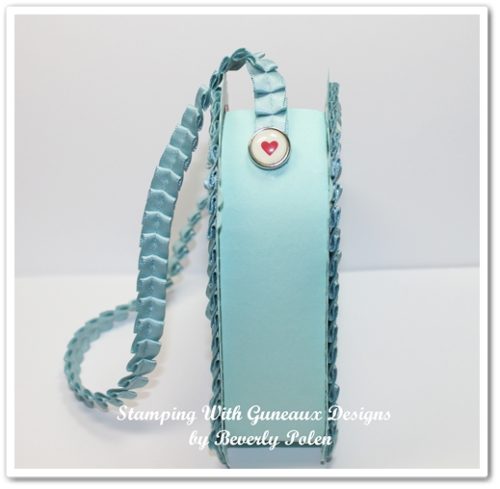
  • Attach to the purse sides a handle made of the ribbon that was used around the front and back of the purse.  Use hot glue to attach.
  • Select two medium to large brads, remove their prongs, and attach to the ends of the ribbon with hot glue.  I used two of Stampin Up epoxy brads from long ago.

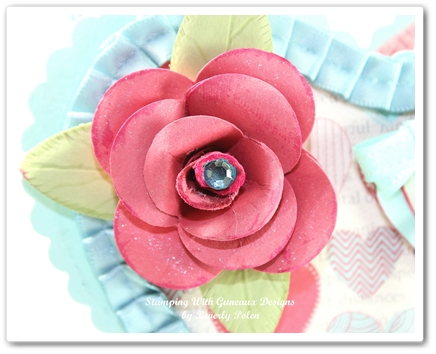
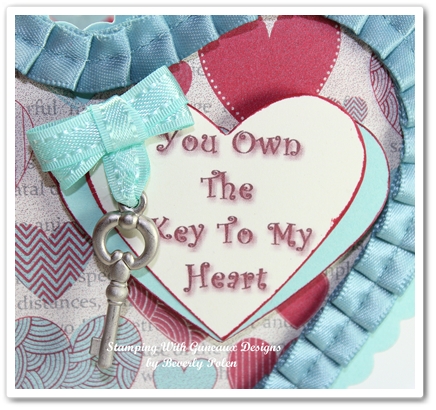
  •   Decorate the purse front as desired.

 God’s Blessings!
Stamping With Guneaux Designs
by
Beverly Polen

 STAMPIN UP MORE AMORE DSP VALENTINE PURSE

Stampin Up 25-Year Anniversary Celebration – “Best Of”

Stampin Up 25-Year Anniversary Celebration

As part of the Stampin Up 25-year anniversary celebration, it is bringing back some of our favorite stamp images from the last quarter century and combining them into 12 sets, which will be released one set per month during 2013. Even better, along with some great classic images, each “Best of” set will also include a never-before-seen image!

Some things to remember about the Stampin Up 25-year anniversy celebration:

  • All “Best of” stamp sets will include 3-5 stamp images, including a never-before- seen image, and the sets will be priced at $14.95 (US).
  • While a “Best of” stamp set will be released one per month (with a new theme each month), all of the “Best of” sets will be available until March 31, 2014.
  • All “Best of” stamp sets are available in Clear-Mount only.

As part of the Stampin Up 25-year anniversary celebration, there is a 25-year proof of purchase sticker with every “Best of” stamp set you purchase.  The sticker is to be placed onto a Collector’s Card.  The Collector’s Card will be shipped with the February Stamp Set when purchased.  Purchase six “Best” of stamp sets and collect six stickers.  Place the stickers on the Collector’s Card and redeem it for a FREE set of your choice valued up to $14.95 (US)!  Free sets must be redeemed no later than April 30, 2014.  If you have not seen the Collector’s Card, you can view and print it here.

The February “Best of” stamp set that was released is the Best of Love (132987) stamp set. 

Best Of Love Stamp Set

Here is a card I made with the heart stamp image within the set.  

 Stampin Up Best of Love

To take full advantage of the Stampin Up 25-year anniversary celebration, don’t forget to hang onto your 25-year proof of purchase stickers!


God’s Blessings!
Stamping With Guneaux Designs
by
Beverly Polen 

Stampin Up You Are Loved, More Amore, and Hearts Collection Framelits

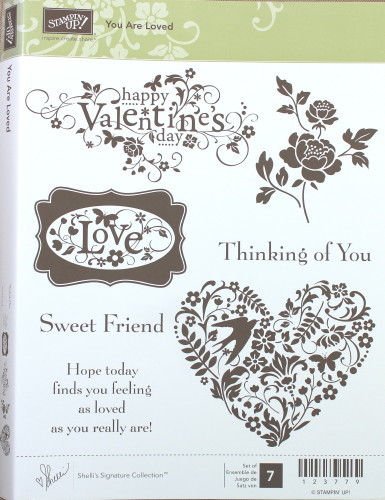
The Stampin Up You Are Loved stamp set is one of my favorites of all of Stampin Up’s valentine stamps.  The stamp set is featured today with the More Amore DSP and Hearts Collection Framelits.

Stampin Up You Are Loved

Stampin Up You Are Loved

SUPPLIES USED TO MAKE THE STAMPIN UP YOU ARE LOVED CARD

Stamps:  Stampin Up You Are Loved Stamp Set (123779)

You Are Loved

Stampin’ Up! You Are Loved Stamp Set

Paper:  Stampin Up More Amore DSP (129309), Real Red Card Stock, Pool Party Card Stock, and Very Vanilla Card Stock


 Ink:  Real Red Classic Ink and Pool Party Classic Ink

Accessories:  Pool Party Sycamore Street Ribbon (130812 – Sale-a-bration product), Hearts Collection Framelits (125599), Hearts Adorning Accents Embossing Folder (125601), Crystal Effects (101055), Big Shot (113439), and Stampin’ Dimensionals (104430)

INSTRUCTIONS ON MAKING THE STAMPIN UP YOU ARE LOVED CARD

  • Cut a 4″ x 5-1/4″ piece of the Stampin Up More Amore DSP.
  • Cut a 4-1/2″ piece of the Pool Party Sycamore Ribbon and adhere it to the middle of the More Amore DSP.

Stampin Up You Are Loved

  • Adhere the DSP to a Real Red card base.

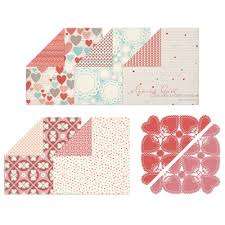
Stampin Up More Amore DSP

  • Place the 4-3/16″ Heart Framelit onto a piece of Real Red Card Stock and then the 3-3/8″ Heart Framelit inside of it.  Make sure they are lined up evenly and run them and the paper through the Big Shot.
  • Place the 13/16″ Heart Framelit onto a piece of Real Red Card Stock and run through the Big Shot.  Place the heart into the Hearts Adorning Accents Embossing Folder and run through the Big Shot.
  • Cut a slit on the bottom-right side of one heart and join the other heart through the slit.  Adhere them together.
  • Adhere the small heart to the center-right of the second heart.
  • Add Crystal Effects to all of the hearts and let dry.  Tie a small Pool Party Sycamore Street bow and adhere to the joined hearts.  This picture shows how the hearts are to be joined and where to add the bow.

Hearts Collection Framelits

  • Cut out two hearts, one from Very Vanilla Card Stock and the other from Pool Party Card Stock with the 2-1/2″ Heart Framelit.
  • Cover the heart stamp image from the Stampin Up You Are Loved Stamp Set with Pool Party Classic Ink and Real Red Classic Ink (see picture).  Stamp the image onto the Very Vanilla heart.
  • Choose a sentiment and stamp it onto the Pool Party heart.
  • Adhere both hearts to the back of the joined hearts.

Stampin Up You Are Loved

  • Add dimensionals to the back and adhere to the card front.

   Stampin Up You Are Loved

 God’s Blessings!
Stamping With Guneaux Designs
by
Beverly Polen

  STAMPIN UP YOU ARE LOVED

Stampin Up Feel Goods Stamp Set and Borders Scoring Plate

Don’t you just love the new Stampin Up Feel Goods Stamp Set?  I certainly do.  I used the set for the sentiment on my card as well as the new Simply Scored Borders Scoring Plate. 

 Stampin Up Feel Goods

This picture provides a closer view of the Feel Goods stamp image (the sentiment). Stampin Up Feel Goods

I used the Stampin Up Simply Scored Borders Scoring Plate for the bottom-front of the card.  I think it adds a nice touch.  This picture gives you a better view of that portion of the card. 

Stampin Up Borders Scoring Plate

This picture shows the inside of the card, which gives you a better view of the scoring done with the Borders Scoring Plate.  After scoring the card stock, I cut around the scoring.

 Borders Scoring Plate

The Stampin Up video at the end of this post gives good directions on how to use the Borders Scoring Plate.


SUPPLIES USED FOR THE STAMPIN UP FEEL GOODS CARD:

Stamps:  Stampin Up Feel Goods Stamp Set (129684 -c), Stampin Up Secret Garden (129144 – c)

Feel Goods Clear-Mount Stamp Set

Stampin Up Feel Goods Stamp Set (129684 – c)

Paper:  Sycamore Street Designer Series Paper (127540) Island Indigo Card Stock, and Tangerine Tango Card Stock

Sycamore Street Designer Series Paper

Sycamore Street Designer Series Paper (127540)

 Ink:  Island Indigo Classic Ink

Accessories:  Simply Scored Borders Scoring Plate (126192), Window Frame Collection Framelits (129021), Designer Builder Brads (129329), Summer Starfruit 3/8″ Stitched Satin Ribbon (126846), Pool Party Designer Printed Brad (122940)

Borders Scoring Plate Simply Scored

Borders Scoring Plate Simply Scored (126192)

 Stamping With Guneaux Designs

 God’s Blessings!
Stamping With Guneaux Designs
by
Beverly Polen