Awesomely Artistic Stamp Set CAS358 CC564

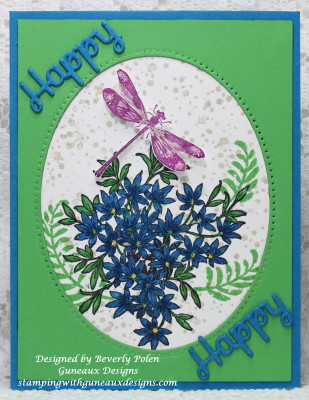
Hello, my friends!  Do you have the Awesomely Artistic Stamp Set from Stampin’ Up!? It has wonderful Spring images.  The floral image makes me want Spring to not tarry!  LOL

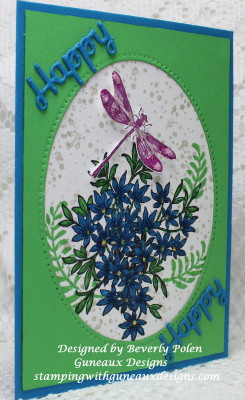
I created my Awesomely Artistic card below for two challenges with Splitcoaststampers.com.  If you are not familiar with this website, I recommend you look at it as there are many galleries of artwork to see.  Another reason for creating my card is I plan to send it to my sister for her birthday.

Awesomely Artistic Stamp Set

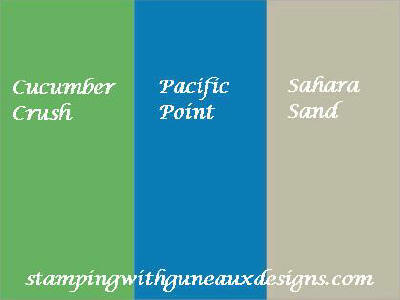
The first Splitcoaststampers challenge, CAS358, is to create a card with the word, “happy” on it.  That was easy enough!  The second challenge, CC564, is a Color Challenge featuring the following colors.

Awesomely Artistic Stamp Set

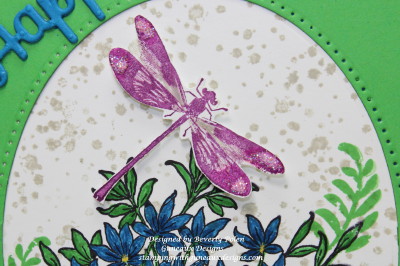
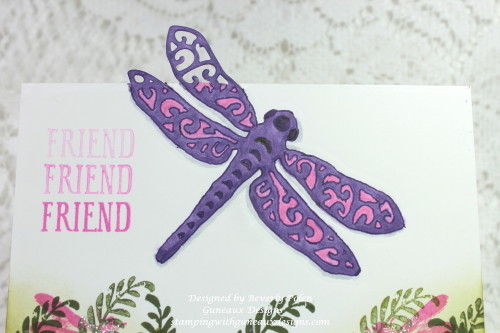
This photo is a closeup of the dragonfly from the Awesomely Artistic Stamp Set.  I stamped it in Blackberry Bliss Ink, fuzzy cut it, and enhanced the end of its wings with Stampin’ Up! Dazzling Details and Dazzling Diamonds Glitter.  Also in this closeup you can see the color, Sahara Sand, in the background.

Awesomely Artistic Stamp Set CAS358 CC564

Enjoy my card and have a blessed day!


SUPPLIES

Card Size: A2

Stamps:   SU Awesomely Artistic Stamp SetAwesomely Artistic Stamp Set
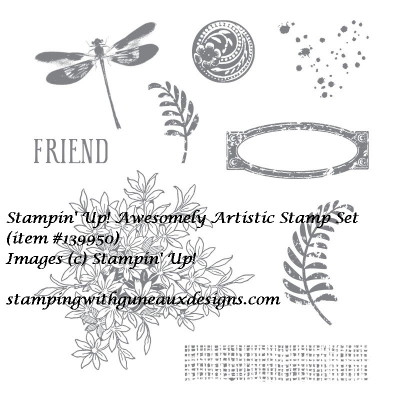
Paper: SU Whisper White, Cucumber Crush, and Pacific Point Card Stock

Ink: SU Cucumber Crush, Pacific Point, Sahara Sand, and Blackberry Bliss

Accessories: Spellbinders Sentiments Die (S2-118), SU Dazzling Details, and Dazzling Diamonds Glitter 

SU = Stampin’ Up!


Swallowtail Butterfly

God’s Blessings!

Stamping With Guneaux Designs By Beverly Polen


Awesomely Artistic Stamp Set

AWESOMELY ARTISTIC STAMP SET

Water Coloring Technique – Stampin’ Up! Bold Butterfly Framelits

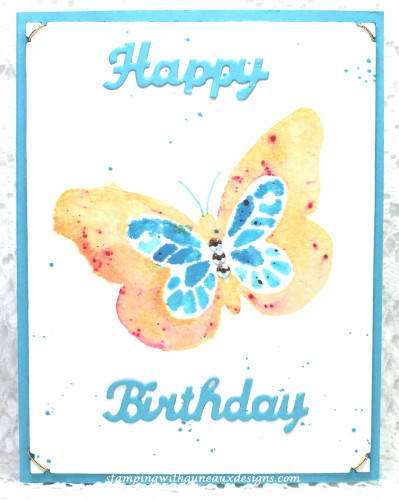
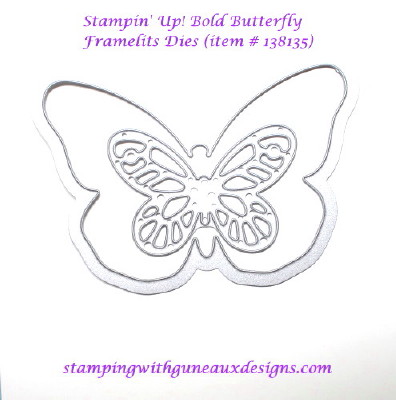
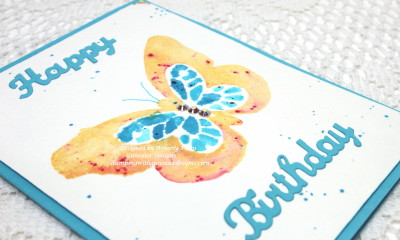
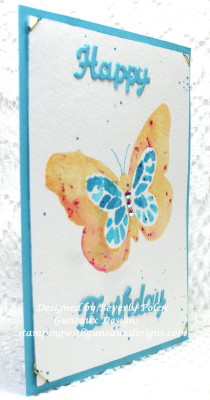
I hope everyone had a blessed and safe New Year!  Mine was uneventful, which is just what I wanted.  Today’s card features a water coloring technique and is a Happy Birthday Card that features the Stampin’ Up! Bold Butterfly Framelits Dies.

http://stampingwithguneauxdesigns.com/water-coloring-technique-su-bold-butterfly-framelits

http://stampingwithguneauxdesigns.com/water-coloring-technique-su-bold-butterfly-framelits

Have you ever been inspired to create a piece of artwork based on something you saw on a website (e.g., websites featuring jewelry, clothes, shoes, purses, etc.)?  It is a fun process, and that process was used for creating this card.

Yesterday’s (1/2/15) Inspirational Challenge on the Splitcoaststampers.com website involved using punches or die cuts for a basic shape, and then picking a favorite medium and several colors to get a beautiful confetti effect. The Etsy.com website, The Wildlands, was to be viewed for inspiration.  This item inspired me to use the Stampin’ Up! Bold Butterfly Framelits Dies (item #138135) to create my project.  Check out the site as you will find such beautiful artwork featured there.

Water Coloring Technique SU Bold Butterfly Framelits4_1The Water Coloring Technique required using an adhesive tape (e.g., Frog Tape, a Painters’ Tape) from which to punch or die cut an image.  After cutting out an image, what is left (i.e., the tape’s negative cutout)  became a “mask” that is attached to a piece of water color paper.  After attaching the mask, the image is to be water colored.

A better explanation of the technique can be found in this YouTube video by Lydia (aka; Understand Blue) who was the wonderful hostess for this challenge.  Her video provides a wonderful tutorial on the technique.  Stop by and watch it.

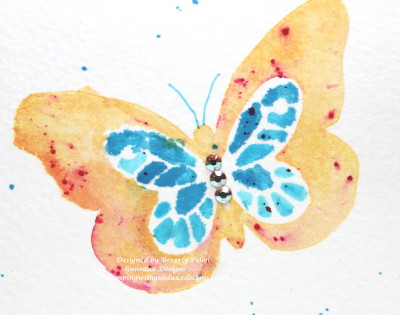
This is a closeup of the water colored butterflies.  Unfortunately, I didn’t have my tape adhered correctly to my piece of water color paper, so the colors bled.  🙁  But, I gave it my best shot as water coloring is not my forta.

Water Coloring Technique SU Bold Butterfly Framelits3_1I added three Swarovski® crystals to the butterfly body to give it some dimension.

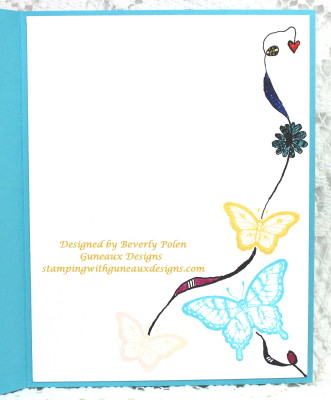
The photo below is one of the inside of the card.  I added some doodling along with stamp images from Stampin’ Up! Papillon Potpourri Stamp Set (item # 123759).

water-coloring-technique-su-bold-butterfly-framelits

Don’t forget to watch Lydia’s video and try the technique!


http://stampingwithguneauxdesigns.com/water-coloring-technique-su-bold-butterfly-framelits

God’s Blessings!

Stamping With Guneaux Designs By Beverly Polen
Water Coloring Technique - SU Bold Butterfly Framelits

Happy New Year 2016 – Cracked Glass Technique

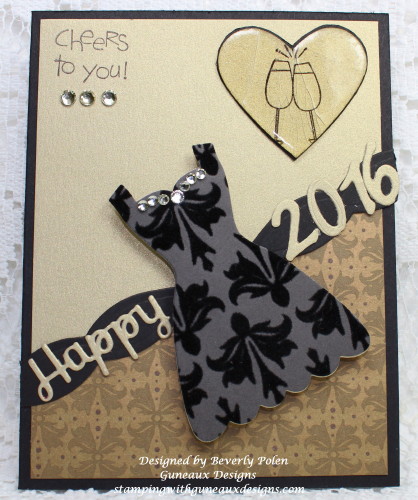
Happy New Year 2016, everyone!!  May you be blessed with a wonderful 2016 year!  
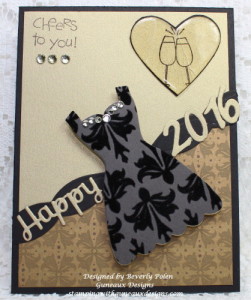
Happy New Year 2016I made this card for two Splitcoastampers.com challenges: 1) the Wednesday (12/30) Sketch Challenge, SC573, and 2) today’s (Thursday – 12/31) Cracked Glass Technique Challenge, WT564.    The following is the sketch to be used in the challenge.

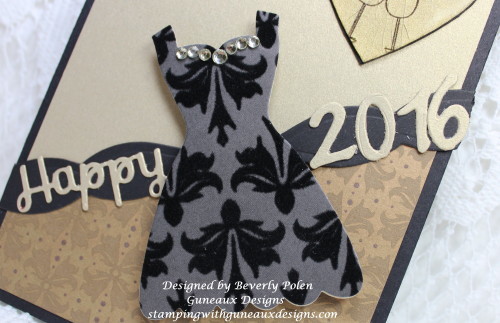
The challenge included adding a tag to my card. Therefore, I used a black “Evening Gown/Dress” for my tag that I made with the lovely retired Stampin’ Up! Dress Up Framelits.

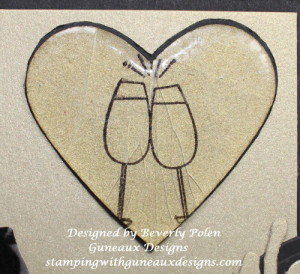
Creating a card using the Cracked Glass Technique was the challenge for the WT564. I remembered I had the retired Stampin’ Up! Cheers to You Stamp Set that would be perfect for the challenge.  You will note that as the glasses clang in celebration of the New Year, they cracked!!! LOL. The glasses in the embossed heart was created for the Cracked Glass Technique. (If you need information on this technique, please let me know by leaving a comment.)

Happy New Year 2016, Cracked Glass Technique

Happy New Year 2016, Cracked Glass Technique

SUPPLIES USED:

Stamps: SU Cheers to You (retired)

Paper: SU Mocha Morning DSP (retired), Brushed Gold, and Basic Black Card Stock

Accessories: SU Dress Up Framelits (retired), SU Heart Punch (retired), SB Holiday Sentiments Dies, SB Happy Days Dies, Sizzix Numbers Dies, SU Rhinestones, VersaMark, and Ultra Thick Embossing Enamel


Happy New Year 2016, Cracked Glass Technique

God’s Blessings!

Stamping With Guneaux Designs by Beverly Polen


Happy New Year 2016, Cracked Glass TechniqueCRACKED GLASS TECHNIQUE 

Happy Scenes Stamp Set Happy Winter Snowman

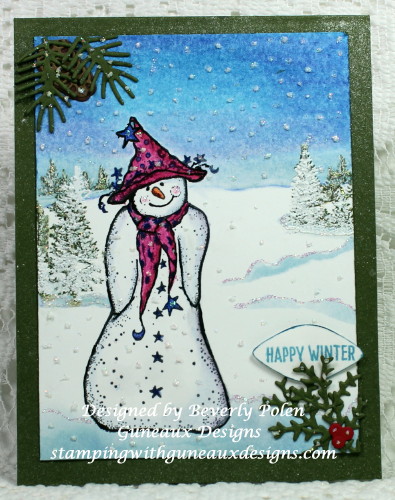
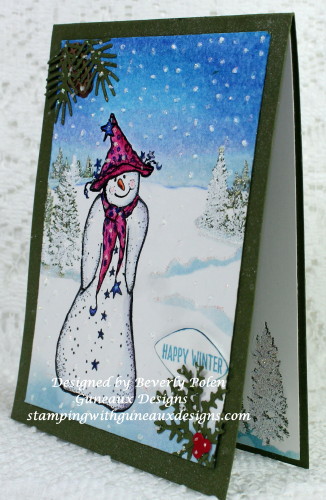
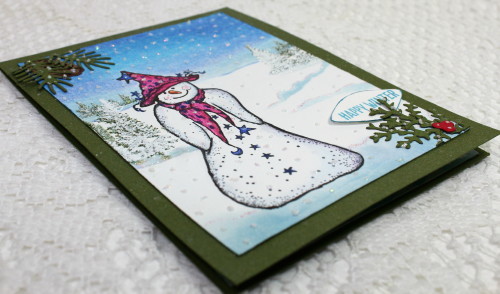
Stampers, I have for you a Happy Scenes Happy Winter Snowman!  I wanted to create a snow scene using the Stampin’ Up! Happy Scenes Stamp Set along with a snowman (or snow-girl).  The snow-girl is the primary element on my card.  She is a whimsical and delightful snow-girl and is appearing to be shrugging her shoulders.  Maybe she is just trying to keep warm.  What do you think?Happy Scenes Stamp Set Happy Winter Snowman

To create the “happy scene” for this card,  I wanted to use a technique that I’ve not used in a long time. That technique is coloring with Colored Pencils.  I used Prismacolor Colored Pencils to create the sky and snow. As for the snow-girl, the snowman stamp that I used is from the Outlines Rubber Stamps Co.  I loved the Outlines Rubber Stamp Co. stamps and was heartbroken when the Co. went out of business.  🙁

For the trees in the scene, I used Stampin’ Up! Mossy Meadow ink.  I wanted the trees covered with snow, so I used VersaMark Ink on the tree stamp and stamped it over the Mossy Meadow trees slightly off center.  I then added Stampin’ Up! White Embossing Powder.

My “Happy Winter” sentiment from the Happy Scenes Stamp Set is slightly hidden.  I intentionally adhered the sentiment just under the Mossy Meadow twigs at the bottom right corner.  In the upper left corner, I added some Mossy Meadow pine needles and a brown pine cone.  I created all three of these elements with the Our Daily Bread Designs Lovely Leaves Dies.

Happy Scenes Stamp Set

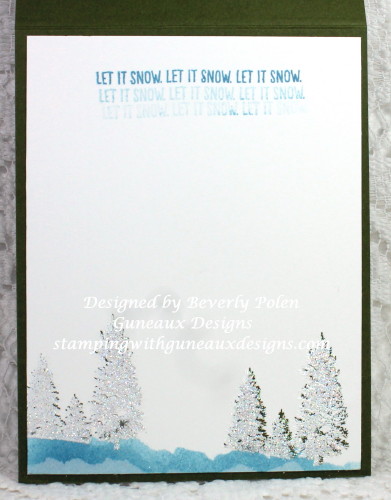
The card’s inside:

Happy Scenes Stamp Set

Stamps: Stampin’ Up! Happy Scenes, Outlines Rubber Stamp Co. Snowman

Paper: Stampin’ Up Whisper White and Mossy Meadow Card Stock

Ink: SU Mossy Meadow (trees), Marina Mist (bottom of card) and Prismacolor Colored Pencils (not really “ink”)

Accessories: Gamsol 100% Pure Odorless Mineral Spirits, Our Daily Bread Designs (ODBD) Lovely Leaves, ODBD Pinecones, Ranger White Stickles, Stampin’ Up! Embossing Powders

Enjoy and HAPPY NEW YEAR EVERYONE!


Swallowtail Butterfly

God’s Blessings!

Stamping With Guneaux Designs By Beverly Polen

Happy Scenes Stamp Set

HAPPY SCENES STAMP SET

HAPPY WINTER SNOWMAN

Partial Die-Cutting Technique TLC566

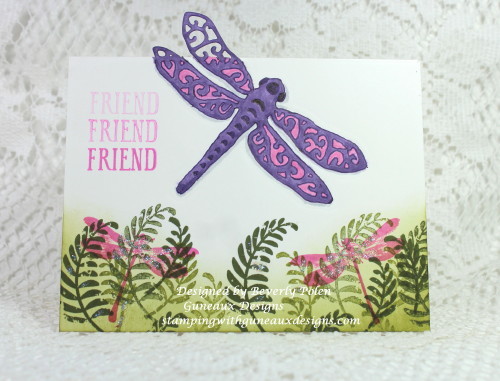
Yesterday, the Splitcoaststampers Website had a challenge to create a card using the Partial Die-Cutting Technique (TLC566). The Partial Die-Cutting Technique is somewhat self-explanatory as it is using a die, card stock, and die-cutting machine of your choice to partially cut a shape.  It can be done in different ways. My card shows one way and that is to have the partially cut portion of the die above the fold of a card base. (You will find a link to the Splitcoaststampers’ tutorial video on this technique below.)

Partial Die-Cutting Technique TLC566

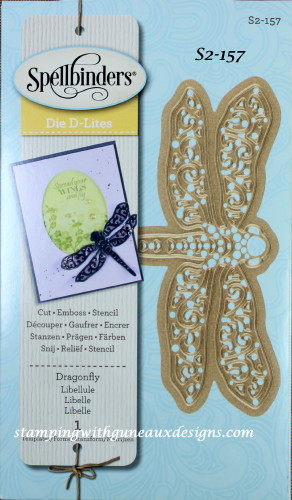
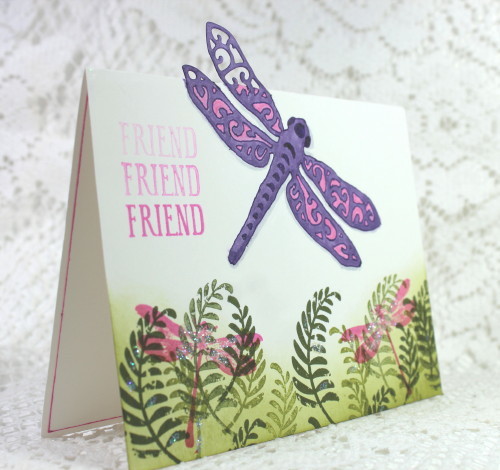
This is the first time I have used this technique, and I really enjoyed it.  The shape that I chose to partially cut is a dragonfly (Spellbinders Die).  As you can see, my dragonfly’s wings on the left side of its body were cut but not the rest of the dragonfly’s body.  After achieving the partial cut and leaving the die and card stock in the same position, I ran them back through my die-cutting machine with embossing pads to emboss the dragonfly onto my card front.

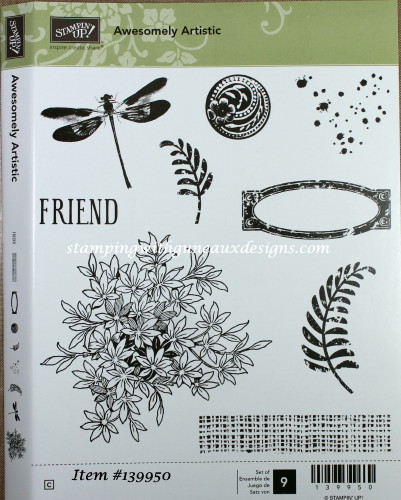
I used copic markers to color the embossed dragonfly so the rest of the body would show. To finish the card front, I used the Stampin’ Up! Awesomely Artistic Stamp Set (clear mount) to add other elements to the card.

Partial Die-Cutting Technique & Spellbinders Dragon Fly DiePartial Die-Cutting Technique & Spellbinders Dragon Fly Die


Partial Die-Cutting Technique TLC566

The above photo provides a close up of the dragonfly.  I hope you will try this technique if you have not tried it before.


SUPPLIES USED:

Spellbinders Dragonfly Die D-Lites (S2-157)
 Stampin’ Up! Sizzix Big Shot Die-Cutting Machine
Stampin’ Up! Whisper White Card Stock (item #100730)
 Stampin’ Up! Awesomely Artistic Stamp Set (item #139950) (clear mount)
Stampin’ Up! Ink Pads – Mossy Meadow (item #133645), Old Olive (item #126953), and Pink Passion (retired)
Copic Markers N2 (Neutral Gray), RV55 (Hollyhock), and V17 (Amethyst)


A video tutorial from Splitcoaststampers can be found HERE.  Once you have viewed the video, you will have a better understanding of the Partial Die-Cutting Technique.  If not, please feel free to leave a comment or ask a question about the technique by clicking on the conversation bubble to the right of this post title and leave a comment or question. Or, if viewing this post on the exact post URL, the comment section will be at the bottom of the post for comments and/or questions.

Now it’s your turn to use the Partial Die-Cutting Technique.


Swallowtail Butterfly

God’s Blessings!

Stamping With Guneaux Designs by Beverly Polen
Partial Die-Cutting Technique TLC5666PARTIAL DIE-CUTTING-TECHNIQUE