If The Shoe Fits, Wear It

IF THE SHOE FITS, WEAR IT

Have you heard the odd saying, “If the shoe fits, wear it”?   The saying is used as a way of suggesting that someone should accept a generalized remark or criticism as applying to him/herself.  It can be interrupted as sarcasm, but there is a lot of truth to the saying.  If someone is sharing information that seems to fit our behavior, we need to own it, right?  I think so!

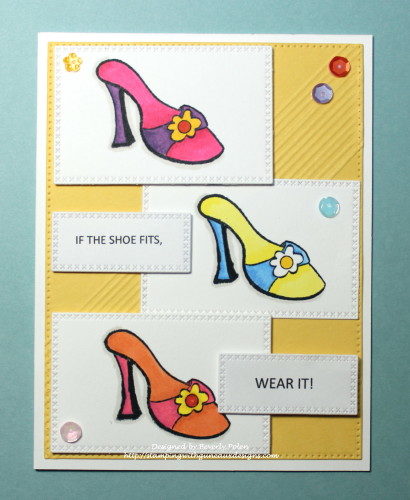
To that end, I am sharing a card I created recently for a “Free For All Challenge” hosted by Splitcoaststampers.  The challenge was to make a card that reflects an odd saying like “Happy as a clam”, “In the pink”, “Two peas in a pod”, and so on.  I decided to enter the challenge with this card representing the odd saying, “If The Shoe Fits, Wear It”.
If The Show Fits Wear It

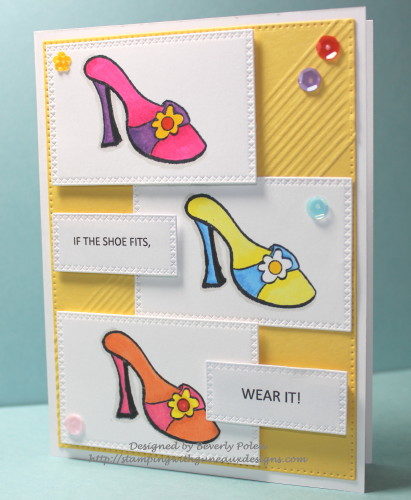
As I read the challenge, my mind started clicking off a lot of odd sayings when “If The Shoe Fits, Wear It” came to mind.  I remembered a OLD stamp I have of a shoe, and decided it would be perfect.  Therefore, I stamped it three times on white card stock, colored the shoe images with copics, and cut them out with a die.

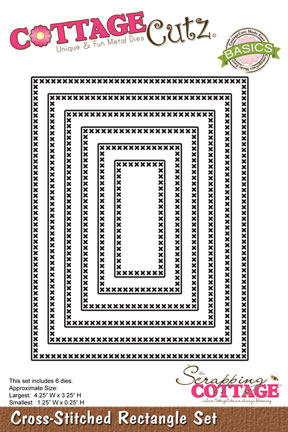
I used a die from the CottageCutz Cross-Stitched Rectangle Set to cut out each shoe. I love the die set as I used to be one who cross stitched regularly.  It is a fun craft using counted-thread embroidery.
If The Shoe Fits Wear It

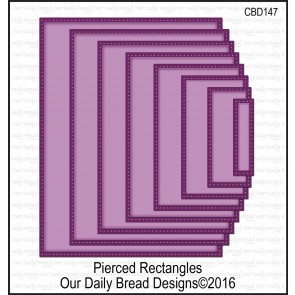
To assemble the card, I staggered the shoe frames (or boxes) on a piece of yellow card stock that I had cut out with a die from a ODBD Pierced Rectangles Dies and scored with a scoring tool.  I created the sentiment, “IF THE SHOE FITS, WEAR IT!” digitally, cut it out using the same CottageCutz Cross-Stitched Rectangle Set, and attached to the card front.  Lastly, I added a few sequins.

I hope you enjoy the card and will return for other Guneaux Designs projects!  If you are a Christian, I hope you have a wonderful Easter weekend!


Butterfly_1_1God’s Blessings!
Stamping With Guneaux Designs By Beverly Polen
Firm Reliance on Divine Providence!


 LUKE 24:45-47

“Then he opened their minds so they could understand the Scriptures.  He told them, “This is what is written:  The Christ will suffer and rise from the dead on the third day, and repentance and forgiveness of sins will be preached in his name to all nations, beginning at Jerusalem.”

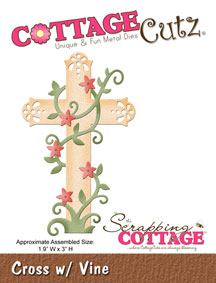
CottageCutz Cross With Vine Die

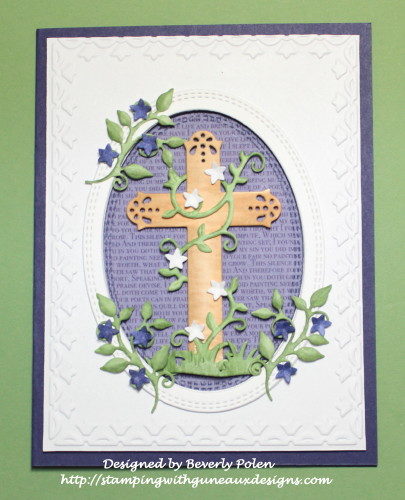
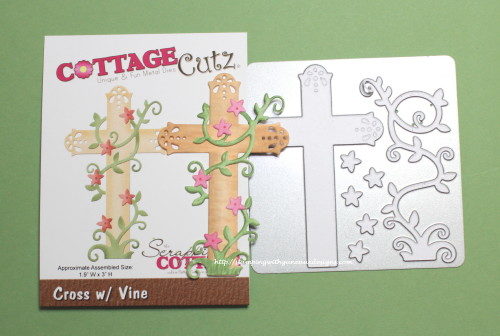
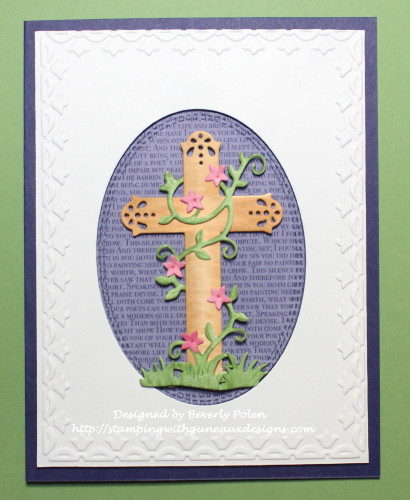
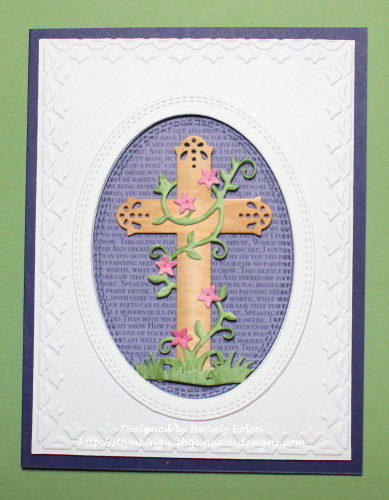
Hello, and welcome to Guneaux Designs!  Today it is my pleasure to be a guest designer again for the Scrapping Cottage Blog.  Because Sunday is the Easter holiday for Christians, I want to  share a card with you that showcases the CottageCutz Cross With Vine Die.

CottageCutz Cross With Vine

You can make this card too by following the instructions below:

  • Cut out the cross, vine, and flowers using the Cottage Cutz Cross With Vine Die.
  • Color the cross, vine, and flowers (I used Copic Sketch Markers), and attach the vine around the cross. (I started with pink flowers following the die image but changed to white.)

CottageCutz Cross With Vine

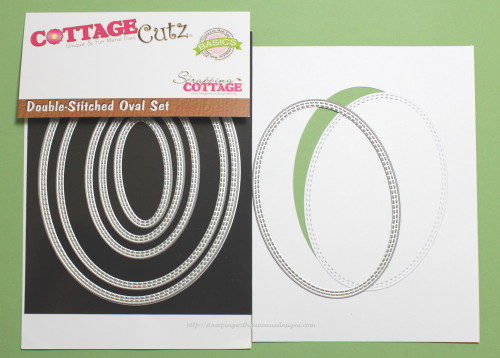
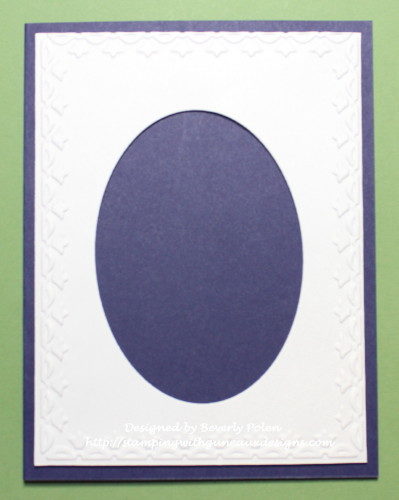
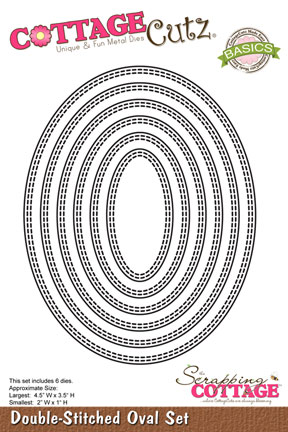
  • Cut a 4″ x 5-1/4″ piece of white card stock and use the third to the largest CottageCutz Double-Stitched Oval Die to cut out an oval in the center of the card stock.  If desired, emboss this piece.  The oval cut out will not be used.

CottageCutz Cross With Vine

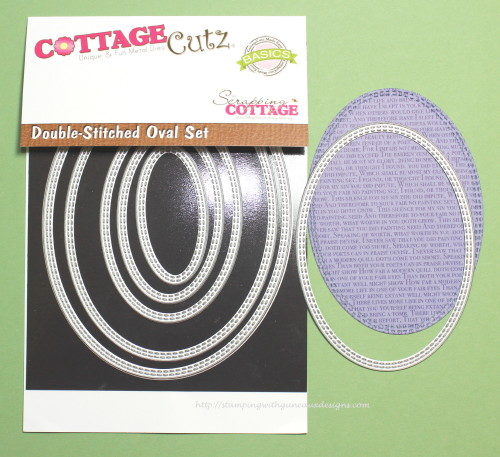
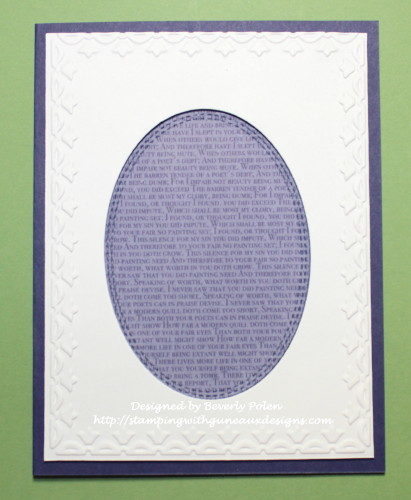
  • Cut an oval from a piece of purple designer paper using the same die.

CottageCutz Cross With Vine

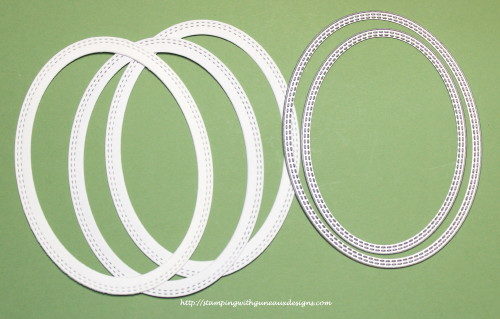
  • Cut out three ovals using the second and third largest dies from the CottageCutz Double-Stitched Oval Set.  Glue these together.

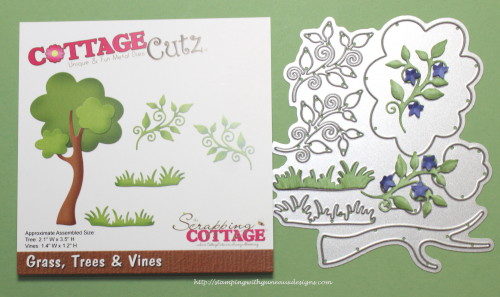
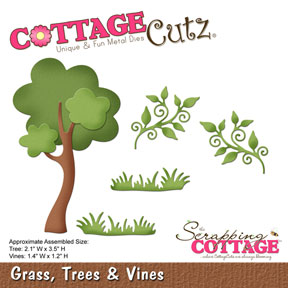
  • Cut out and color two vines and grass using the CottageCutz Grass, Trees, and Vines Die.  Cut and color purple the flowers from the CottageCutz Cross With Vine Die.  (Note:  after finishing the card, I decided to add three vines with flowers.)

CottageCutz Cross With Vine

  • Cut a 8-1/2″ x 5-1/2″ piece of purple card stock, fold in the middle for the card base, and begin assembling the card.
  • Adhere foam tape to the back of the piece of white card stock with an oval cut from the center.  Attach this to the center front of the card base.

  • Attach the purple designer paper oval inside the oval on the card front.

  • Attach foam tape to the piece of grass and adhere it to the bottom of the cross.
  • Attach foam tape to the cross and adhere it to the center of the oval on the card front.

  • Attach the three glued ovals onto the card front.

  • Attach the vines with flowers around the oval.

CottageCutz Cross With Vine

  • Add a sentiment if desired.  I added one inside the card.

COTTAGECUTZ DIES USED:


Butterfly_1_1God’s Blessings!
Stamping With Guneaux Designs By Beverly Polen
Firm Reliance on Divine Providence!


MATTHEW 28:5-7

“The angel said to the women, “Do not be afraid, for I know that you are looking for Jesus, who was crucified.  He is not here: he has risen, just as he said.  Come and see the place where he lay.  Then go quickly and tell his disciples: ‘He has risen from the dead and is going ahead of you into Galilee.  There you will see him.’  Now I have told you.” 
CottageCutz Woodlands & Woodland Animals

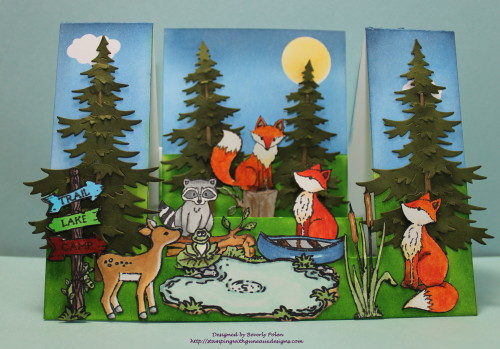
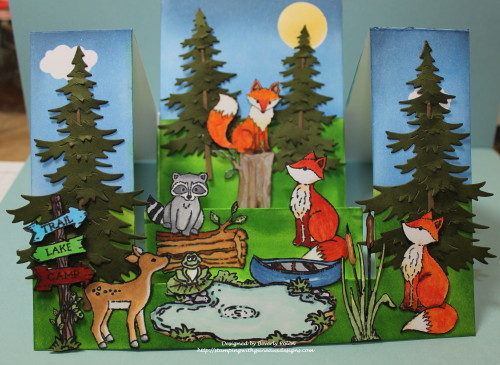
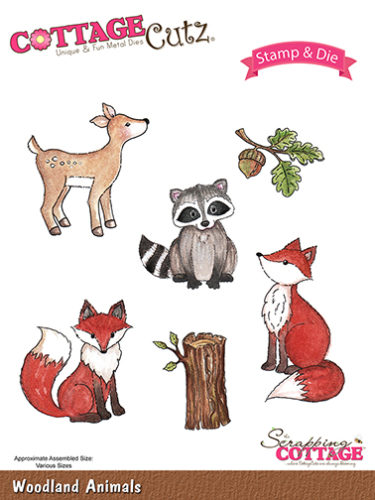
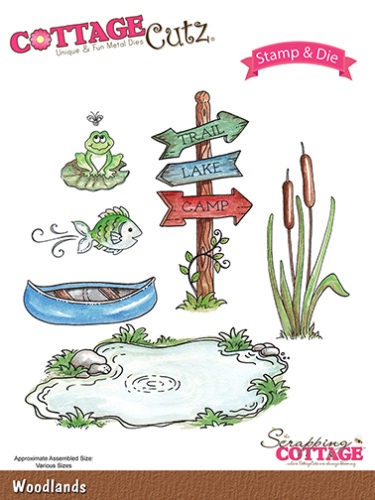
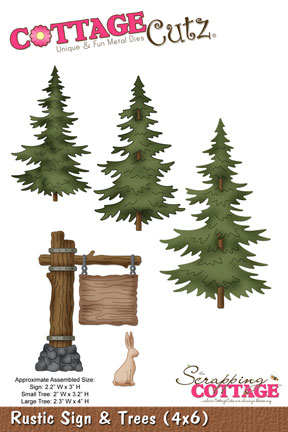
Hello, everyone!  So glad you stopped by Guneaux Designs.  Today I am a guest designer for the Scrapping Cottage blog.  The project I have created for you features the wonderful stamps and dies from the CottageCutz Woodlands & Woodland Animals, and the dies from the Rustic Sign & Trees.  I had so much fun creating this card, and I hope you enjoy it!

This photo shows the card more  open than the one above.

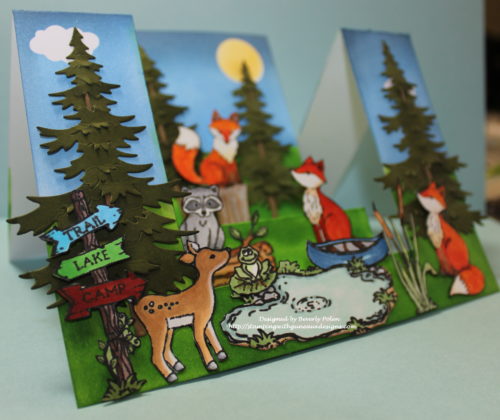
This photo shows the card at an angle

I love the gorgeous fox images and dies from the CottageCutz Woodland Animal Set; therefore, I had to add three foxes to my card.  The little raccoon is so adorable that I planned to add two but there was not room on the card.  If you have not purchased the set yet, I promise you will have so much fun creating with it and the CttageCutz Woodlands Set.

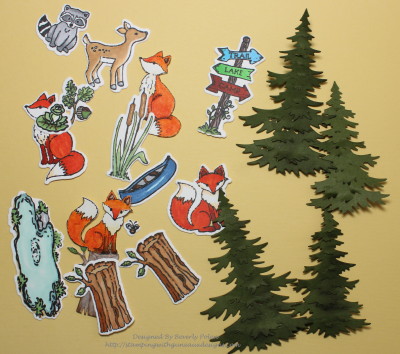
To create the card, I stamped, colored (with copics), and cut out the images I would use for the project.

After die cutting the elements, I decided I wanted to fussy cut around them, which I did. Then I created a Step Ladder Center Cut Card with white card stock and sponged on it a sky, sun, and grass.  It was then time to load up the card with the critters.  What fun!!

If you would enjoy making a similar card, select the elements you want to showcase and color and die cut them.  Then create the Step Ladder Center Cut Card by following these instructions.

  • Cut a 7″ x 10″ piece of card stock.
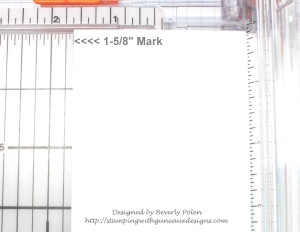
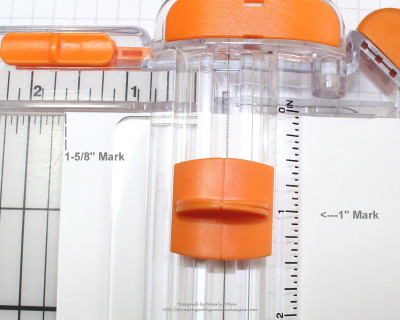
  • With the 7″ side at the top of a cutting tool (henceforth, trimmer), move the card stock to the left to the 1-5/8″ mark,

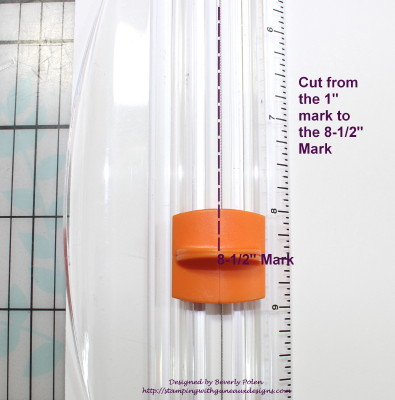
  • Move the cutting blade of your trimmer down to the 1″ mark and lower the cutting arm.

  • Cut the paper from the 1″ mark to the 8-1/2″ mark.

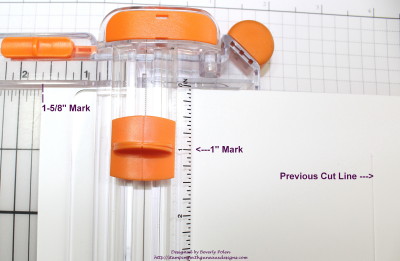
  • Turn the card stock over, (not around or the cut lines will not match), move it to the 1-5/8″ mark on the trimmer, move the cutting blade down to the 1″ mark, and lower the cutting arm.

  • Cut the card stock from the 1″ mark to the 8-1/2″ mark.

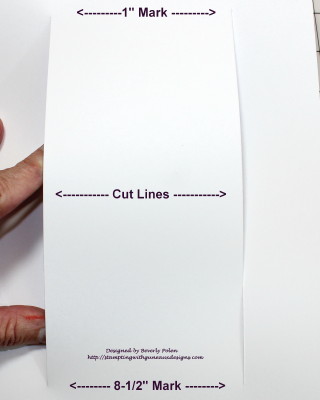
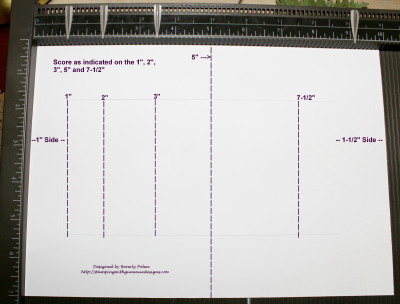
  • Remove card stock from the trimmer, and it will look like the following.  (NOTE: There is 1″ from the top of the 7″ side of the card stock to the first cut line, and 1-1/2″ from the cut line to the bottom.)

  • Place the card stock onto a scoring tool with the 10″ side at the top,  Ensure the 7″ side that is to the left on the scoring tool is the one that has cut lines 1″ from the side. Score at the 1″, 2″, and 3″ marks from the first cut line to the second cut line.  Score at the 5″ mark from the top to the bottom of the card stock.  Score at the 7-1/2″ from the first cut line to the second.

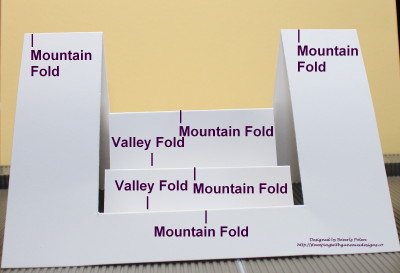
  • Now fold the card stock according to the following: a) 1″ score line is a mountain fold, b) 2″ score line is a valley fold, c) 3″ score line is a mountain fold, d) 5″ score line is a mountain fold on the two sides and a valley fold in the center, and e) 7-1/2″ score line is a mountain fold.
  • Decorate the card to your liking.  If desired and to support the elements placed on the back step (mountain fold) cut a 3-11/16″ x 4-7/8″ piece of card stock and attach it to the back step on which you can add your primary feature.  I added this piece to my card.  When the card is closed, this piece matches the two side folds at the top.

I hope you try this card fold and use the CottageCutz dies found at the Scrapping Cottage to showcase.  Have a great day!


COTTAGECUTZ STAMPS AND DIES USED ON THIS PROJECT:


Butterfly_1_1God’s Blessings!
Stamping With Guneaux Designs By Beverly Polen
Firm Reliance on Divine Providence!


JOHN 11:25-26

Jesus said to her, “I am the resurrection and the life.  He who believes in me will live, even though he dies; and whoever lives and believes in me will never die.  Do you be believe this?”

Buy CottageCutz Products On Sale

Hello, and welcome to Guneaux Designs.  Did you know that you can buy CottageCutz products on sale today?  The Scrapping Cottage, which specializes in making CottageCutz dies and stamps, is having an anniversary sale!  You only have until 9:00 PM PDT today to get wonderful deals on CottageCutz dies and stamps.  The following are examples of some of the products on sale.

The above is just three groupings of 18 that are on sale.  You don’t want to miss out on this outstanding sale, so check it out today!  Click on the photos above.


Stamping With Guneaux Designs

God’s Blessings!
Stamping With Guneaux Designs By Beverly Polen
Firm Reliance on Divine Providence!


1 JOHN 2:15-17

“Do not love the world or anything in the world.  If anyone loves the world, the love of the Father is not in him.  For everything in the world — the cravings of sinful man, the lust of his eyes and the boasting of what he has and does — comes not from the Father but from the world.  The world and its desires pass away, but the man who does the will of God lives forever.”

MB Reverse Butterfly Collage Happy Birthday

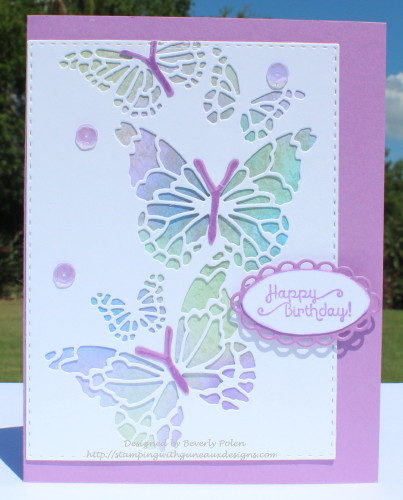
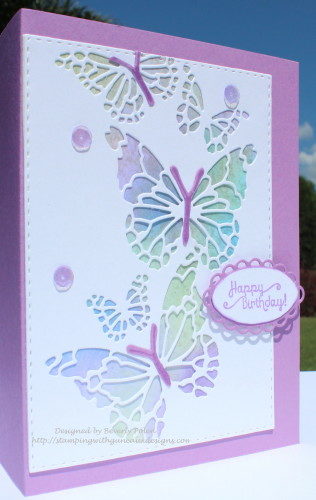
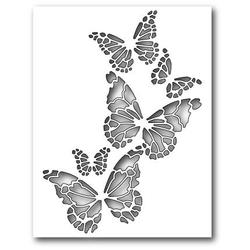
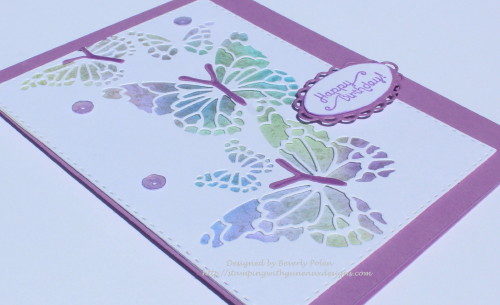
Hello, my friends, and welcome to Guneaux Designs.  I am happy that you stopped by today to see my MB Reverse Butterfly Collage Happy Birthday card.  Memory Box (MB) has wonderful dies, and this is one of my favorites.  I love butterflies, and seeing them on greeting cards always draws my attention.  I have used the MB Reverse Butterfly Collage Die  before, but as a stencil.  You can see that HERE.  For this card, I used the die to cut out a butterfly panel to attach over another panel that is sponged with various colors.

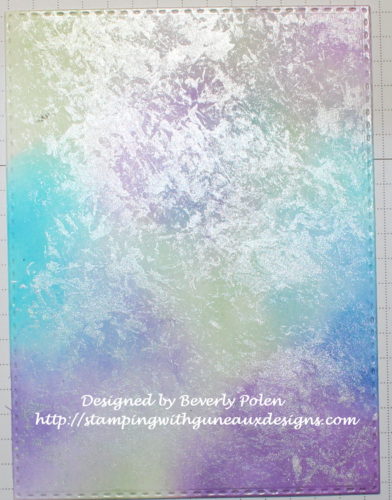
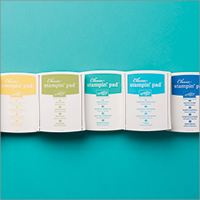
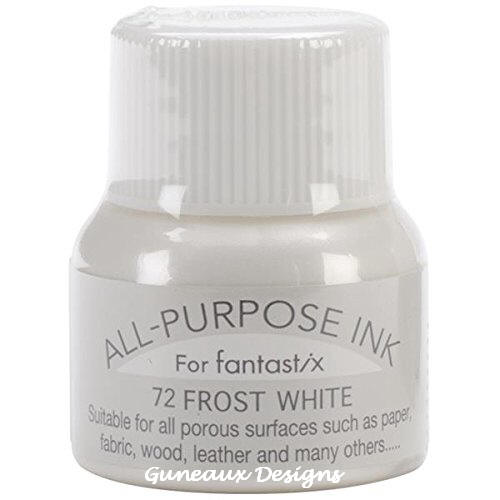
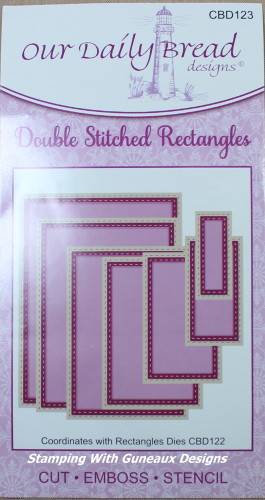
I used a piece of white card stock and an ODBD Double Stitched Rectangles die to cut out a frame.  Using the frame and Memory Box Reverse Butterfly Collage die, I cut out the butterflies.  I used the same ODBD die to cut out another piece of white card stock on which I sponged various Stampin’ Up! inks. Subsequently, I dabbed  All Purpose Ink (Frost White) over the panel with a piece of plastic wrap.  This photo shows the result.

I love the effect of using the All Purpose Frost White Ink!  I think it adds so much to a piece of sponged card stock.

I attached the sponged panel beneath the butterfly panel, and then attached both to the card base.  I think this qualifies as a Clean and Simple card.  I hope it does as I am submitting it to a Splitcoaststampers Clean and Simple Challenge.  Kathy Curry is the hostess of the challenge, and she asked for participants to “show me your favorite winged things this week”.  Butterflies are one of my favorite “winged things”.

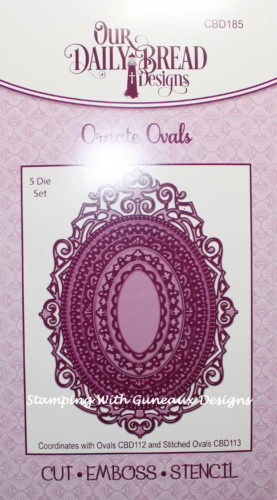
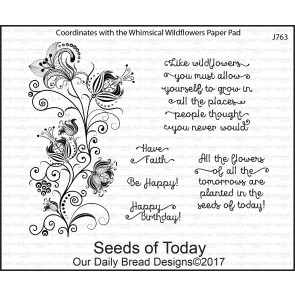
To finish the card, I added a “Happy Birthday” sentiment from the ODBD Seeds of Today stamp set.  I used the smallest of the ODBD Ornate Ovals die to create a frame for the sentiment, and added it to the card using double-sided foam tape.


SUPPLIES USED

https://www.ellenhutson.com/a-cardstock-neenah-classic-crest-solar-white-25-pk/     


Stamping With Guneaux Designs

God’s Blessings!
Stamping With Guneaux Designs By Beverly Polen
Firm Reliance on Divine Providence!


JAMES 5:13-16

“Is anyone of you in trouble?  He should pray.  Is anyone happy?  Let him sing songs of praise.  Is any one of you sick?  He should call the elders of the church to pray over him and anoint him with oil in the name of the Lord.  And the prayer offered in faith will make the sick person well; the Lord will raise him up.  If he has sinned, he will be forgiven.  Therefore confess your sins to each other and pray for each other so that you may be healed.  The prayer of a righteous man is powerful and effective.” 

CottageCutz Daffodil Flower – March

CottageCutz Daffodil Flower – March

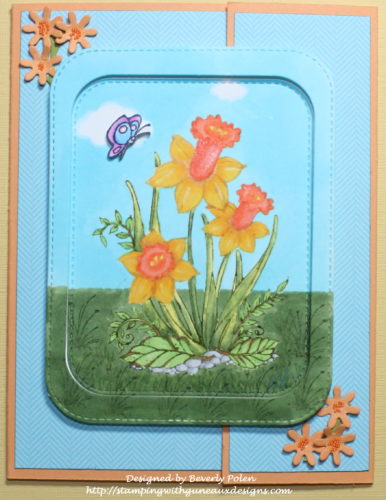
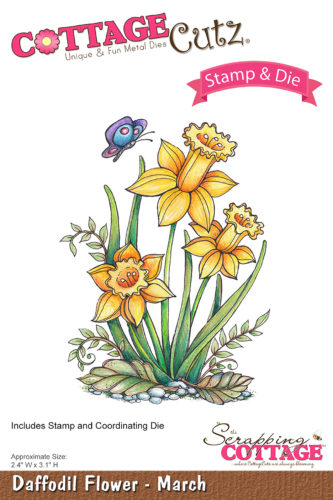
Hello, my friends!  WeIcome to Guneaux Designs.  As a  guest designer for the Scrapping Cottage, I  have for you a project featuring the CottageCutz Daffodil Flower – March stamp and coordinating die set.

Speaking of March, did you know that the  month of March is synonymous with the onset of spring in the Northern Hemisphere. Accordingly, the flower associated with the month of March is the Daffodil.  The Scrapping Cottage has a stamp and coordinating die for the flower of each month. Check out these beautiful stamps and dies HERE.

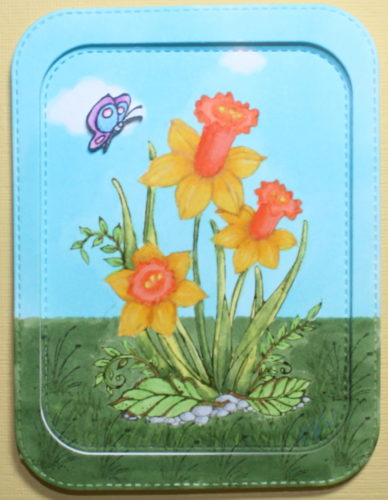
Moving on, here is the card I made with the beautiful CottageCutz Daffodil Flower – March stamp.

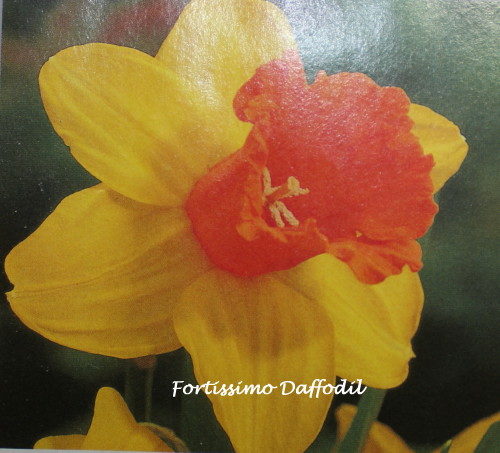
My Daffodil is designed after the Fortissimo Daffodil that has yellow petals and a cup of glowing orange to red.  Here is a picture of the flower.

I made the card as a “Big Flap” card, and you can make this card too by following these instructions:

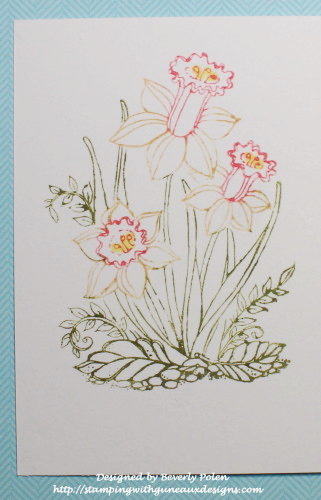
Step 1.  Stamp the CottageCutz Daffodil Flower onto a piece of white card stock.  I wanted a “no-line coloring” image; therefore, I used different colors of markers to add ink to sections of the image and stamped them separately.  I used yellow for the petals of the daffodil, peach for the cup, green for the leaves and stems, and gray for the rocks.

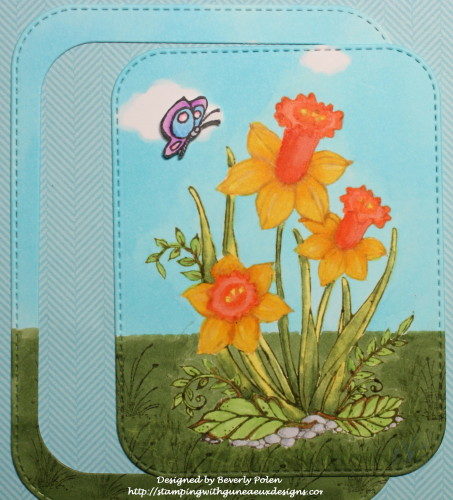
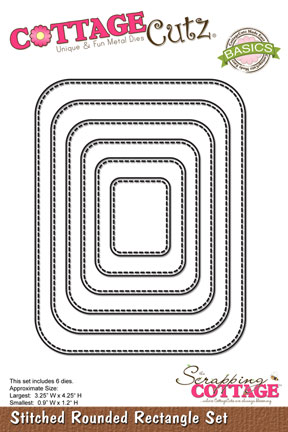
Step 2.  Color the image as desired.  I used various Copic Sketch Markers to color my image.  After coloring it, I used the two largest dies from the CottageCutz Stitched Rounded Rectangle Set to cut out the image.  Also, I stamped, colored, fussy cut, and attached the butterfly that is part of the CuttageCutz Daffodil Flower – March set using foam tape.

Step 3.  Set aside the image and start creating the card base.

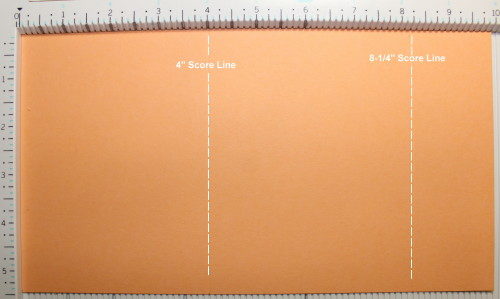
Step 4.  Cut a 5-1/2″ x 10″ piece of card stock (your choice of color).

Step 5.  Place the card stock horizontally onto a score board and score at the 4″ and 8-1/4″  marks.

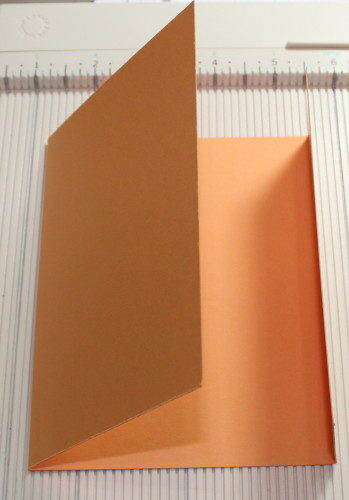
Step 6.  Fold the score lines toward each other.

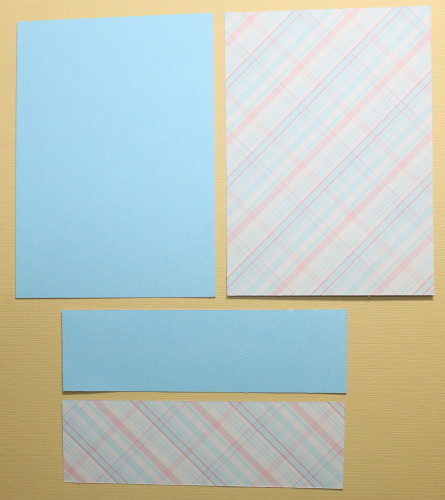
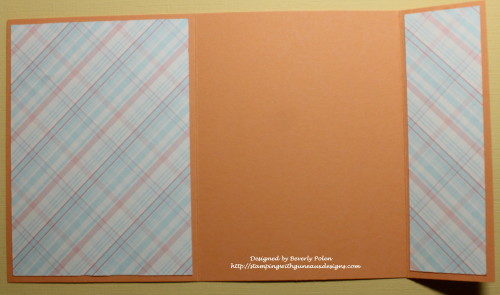
Step 7.  Select a double-sided designer paper and cut two 3-3/4″ x 5-1/4″ pieces, and two 1-1/2″ x 5-1/4″ pieces.

 Step 8.  Attach one of the 3-3/4″ x 5-1/4″  pieces of designer paper to the larger flap on the front of the card base.

Step 9.  Attach one of the 1-1/2″ x 5-1/4″ pieces of designer paper to the small flap on the front of the card base.  (I selected the same side of the designer paper for the front.)

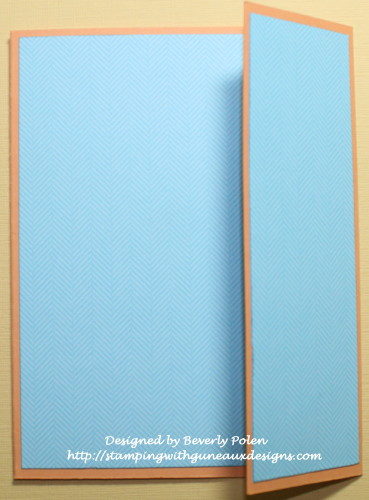
Step 10.  Attach the second 3-3/4″ x 5-1/4″ piece of designer paper onto the inside large flap.  I used the other side of the designer paper.

Step 11.  Attach the second 1-1/2″ x 5-1/4″ piece of designer paper onto the inside small flap..

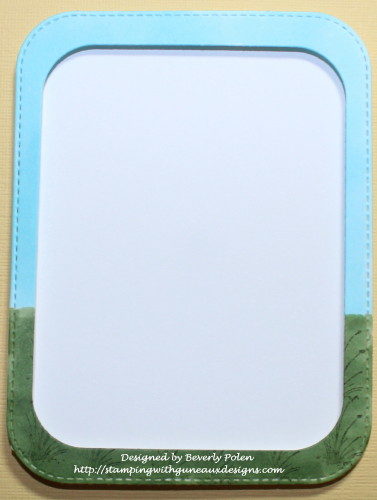
Step 12.  Cut a piece of white card stock with the largest die from the CottageCutz Stitched Rounded Rectangle Set 

Step 13.  Attach the outside frame cut from the image (see Step 2.) to the piece of white card stock using a double layer of double-sided foam tape.

Step 14.  Attach the image inside of the above frame. 

Step 15.  Apply a strong adhesive to the back left side of the above image piece.  

Step 16.  Close both flaps of the card base with the right one over the left one.  Attach the framed image to the front large flap of the card base, ensuring it is centered over the front and not attached to the right small flap of the card.  The strong adhesive is necessary to ensure the image piece will not come off as the card is opened and closed.

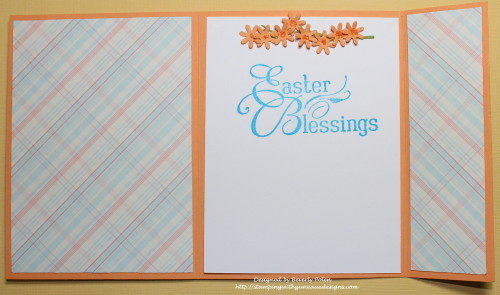
Step 17.  Cut a 4″ x 5-1/4″ piece of card stock, add a sentiment and/or an embellishment, and attach to the center of the inside of the card.

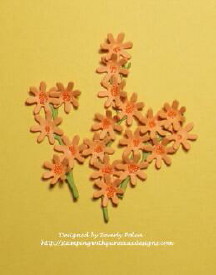
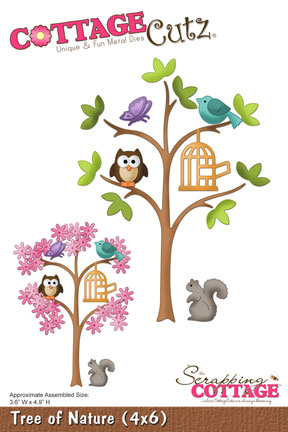
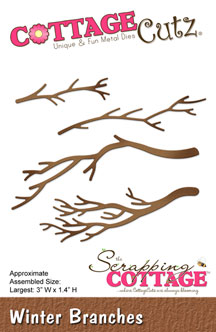
Step 18.  Embellish the card as desired.  I cut several small flowers using the   CottageCutz Tree of Nature Die.  I cupped them with a stylus and adhered micro beads to the centers.  I used the CottageCutz Winter Branches Die to cut green stems (not branches LOL) for the tiny flowers and added them to the two corners of my card front and the center piece inside the card. 

I hope you are inspired by my CottageCutz Daffodil Flower – March card.


CottageCutz Dies Used:


Butterfly_1_1God’s Blessings!
Stamping With Guneaux Designs By Beverly Polen
Firm Reliance on Divine Providence!


II Timothy 3:16 & 17

“All scripture is given by inspiration of God, and is profitable for doctrine, for reproof, for correction, for instructions in righteousness:  That the man of God may be perfect, thoroughly furnished unto all good works.”