Smackin’ Acetate Technique

Splitcoaststampers’ Try A New Technique Challenge, TLC577, Smackin’ Acetate Technique

On Monday, Splitcoaststampers’ Try A New Technique Challenge, TLC577, is to create using the “Smackin’ Acetate” Technique.  This technique is similar to that of coloring on acrylic blocks and transferring the color to paper.  Have you tried the Smackin’ Acetate Technique before?  I had not heard of it until Monday.  LOL

Splitcoaststamper’ Clean and Simple Challenge, CAS368, Spring Critters

Also on Monday, Splitcoastampers’ Clean and Simple Challenge,  CAS368, Spring Critters, is to create in celebration of spring!  Seeing more signs that spring is here and to celebrate the springing forward of our clocks, the challenge is to bring out our spring critters.

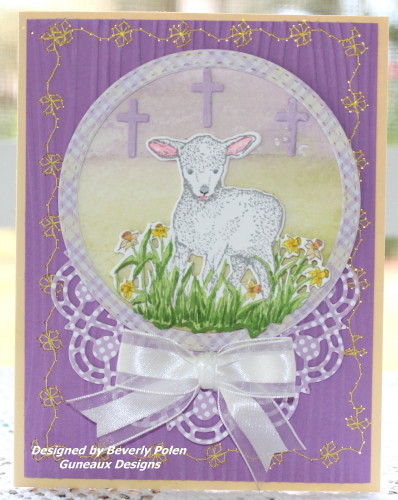
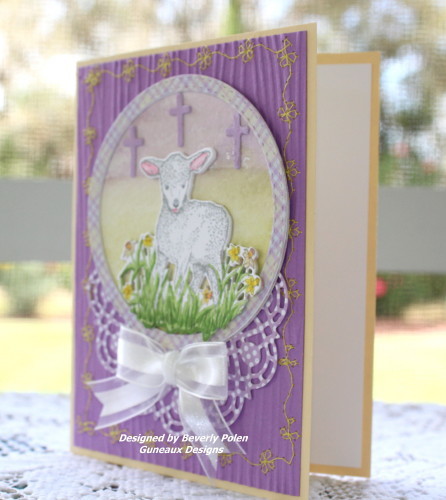
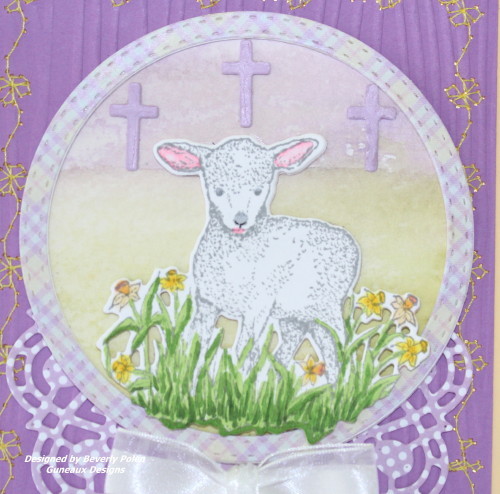
I combined the challenges and created this card.

(Update:  This card was in the Splitcoaststampers favorites for the week ending on March 20, 2016.)

(Update #2:  I am so honored that this card was picked today, March 31, 2016 as the Customer Card of the Day by Our Daily Bread Designs (ODBD)!  I am so blessed and grateful for this recognition!  You can read about it on ODBD Blog.)

Smackin' Acetate Technique

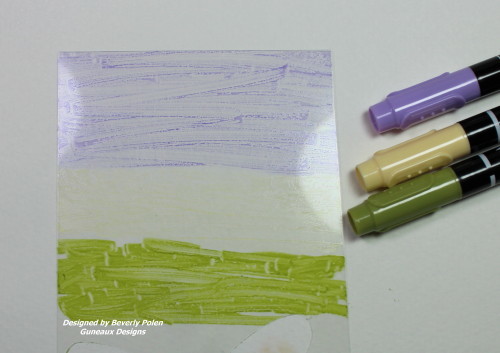
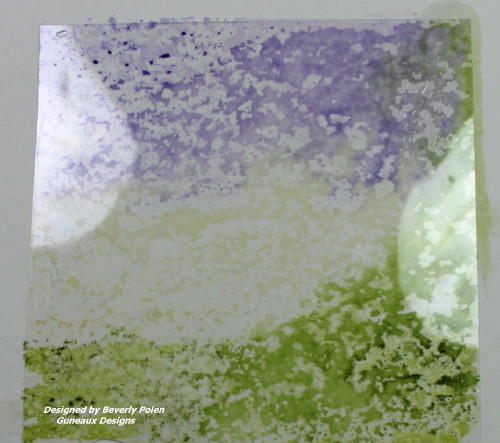
I used the Smackin’ Acetate Technique for the land behind the lamb.  The following explains the technique.

  1.  I used the Stampin’ Up! Lavender Lace Marker to color the top of the acetate, Barely Banana to color the middle, and Old Olive to color the bottom.

Smackin' Acetate Technique

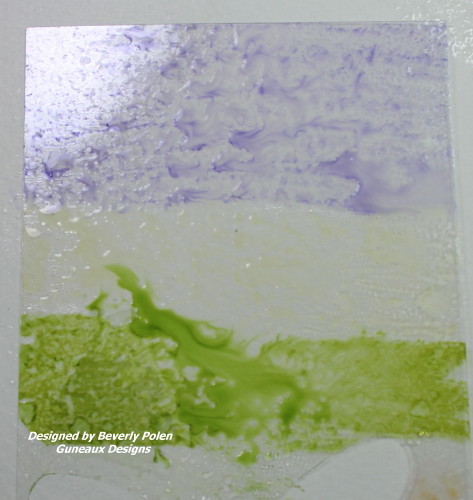
2.  I spritzed water on the acetate next.  The water moves the ink around.

Smackin' Acetate Technique

3.  I placed the inked and spritzed side of the acetate down onto watercolor paper and used my fingers to push the ink on the paper.

Smackin' Acetate Technique

4.  I removed the acetate and used a slightly wet watercolor brush to spread the inks.

Clean and Simple Challenge, CAS368, Spring Critters

The part of my card that incorporates the CAS368, Spring Critters, is the Lamb.  Having been raised on a small farm, every spring we looked forward to the births our little “spring critters”; lambs, chicks, calves, piglets, foals, etc.

Also Easter is in the spring time.  Therefore, my Lamb represents more than a critter.  It is the Lamb of God, Jesus.  The three crosses in the background represent the cross upon which Jesus was hung, and the crosses upon which the prisoners hung beside Jesus.
Smackin' Acetate Technique

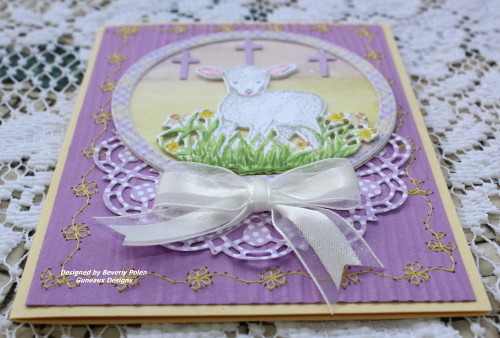
As for the rest of the design, I sewed (or tried to) yellow flowers around the border of the card to replicate the yellow flowers around the lamb, which I colored with copics.  I embossed the lavender paper with a wood grain embossing folder which represents the wooden cross upon which Jesus hung.  I added a cut out from Our Daily Bread Designs (ODBD) doily die that lies underneath the lamb and topped it off with a white bow made with Stampin’ Up! Whisper White Organza Ribbon.  The circle encompassing the lamb and the doily were made with ODBD Pastel Paper, ODBD Double Stitched Circles Dies, and ODBD Doily Die .  Here are additional photos:

Smackin Acetate Technique Smackin' Acetate Technique

I hope you try the technique and join in on the Splitcoaststampers.com challenges!

CCOD Button

BlogDivider_zpsed339ea1

SUPPLIES:

STAMPS:  ODBD Sheep

PAPER:  Watercolor Paper, ODBD Pastel Paper, and Stampin’ Up! Barely Banana and a Lavender Card Stock

INK:  Stampin’ Up! Lavender Lace, Barely Banana, and Old Olive Markers, and Copics

ACCESSORIES:  ODBD Little Lamb Die, ODBD Ornamental Crosses Dies, ODBD Doily Dies, ODBD Double Stitched Circles Dies, Stampin’ Up! Whisper White Organza Ribbonand Stampin’ Up Wood Grain Embossing Folder

CARD SIZE: A2 

TECHNIQUES: Smackin’ Acetate Technique

BlogDivider_zpsed339ea1

Swallowtail Butterfly

GOD’S BLESSINGS!

STAMPING WITH GUNEAUX DESIGNS BY BEVERLY POLEN

“Be anxious for nothing, but in everything by prayer and supplication, with thanksgiving, let your requests be made known to God; and the peace of God, which surpasses all understanding, will guard your hearts and minds through Christ Jesus”.  Philippians 4:6 

Blossoms Around the Tidal Basin

Have you ever seen the cherry blossoms around the Tidal Basin?  Every spring, nearly 1,700 cherry trees that line the Washington, D.C. Tidal Basin burst into a magnificent pink floral fireworks.  I think, it is the most beautiful site in the Washington, D.C. area. The weather determines when this great display of blossoms burst, and unfortunately, these magnificent blooms only last a few days.  The exact time this will occur is unpredictable, but what is predictable is that it will happen sometime every spring. Oh what a lovely site to behold!  If you’ve never been to the Tidal Basin when the cherry trees blossom, it is so worth the trip!

Blossoms Around The Tidal Basin

Isn’t the above photo just gorgeous?  I sure enjoyed the cherry blossoms every spring when I worked in D.C. for 30 years.  I was fortunate that one of my job sites was just across the street from the Tidal Basin.  My desk was at a window where I could stand and inhale the beauty of the scene.  Wow, what a wonderful few days that was each spring!

Thousands of people embark upon D.C. every spring to enjoy such beauty and participate in the annual Cherry Blossom Parade.  It is so crowded around the Basin, but people make room for each other.  Some people either don’t know, or choose to show a lack of respect, that climbing the trees to take great snapshots is no allowed.  It’s shameful and those who choose this behavior are damaging these gorgeous trees.  The last time I was there, the damage was quite obvious.

Blossoms Around the Tidal Basin

These beauties are not just cherry trees, they are Japanese cherry trees.  It was in 1912 that Mayor Yukio Ozaki of Tokyo, Japan, gifted 3,000 cherry trees to the city of Washington, DC. The gift and annual celebration honor the lasting friendship between the United States and Japan, and the continued close relationship between the two countries.

Did you notice that I said the United States was gifted 3,000 trees?  It’s so sad that only around 1,700 trees are left and the others have died.  Some have died as a result of the tree climbers that I described above.  But, what a pleasure to get to enjoy what is left!

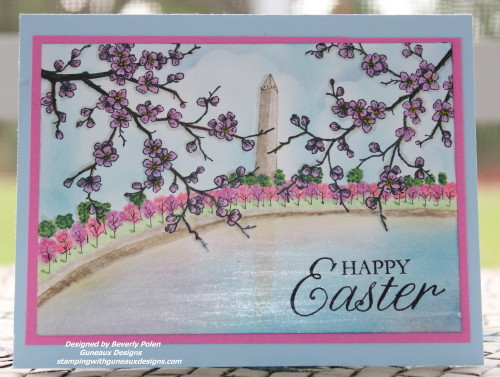
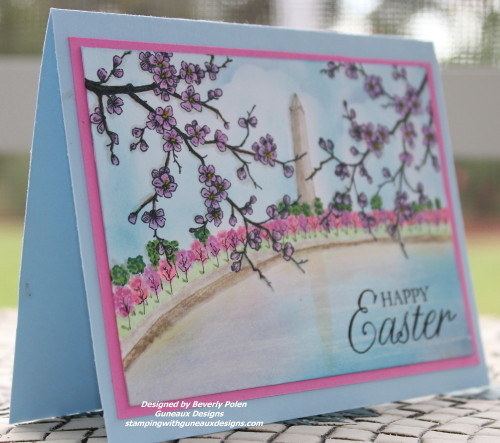
Moving on, I made the following card to honor a Featured Stamper, Geni, on Splitcoaststampers.  This challenge, FS474, involved viewing Geni’s gallery of beautiful cards and pick one to CASE (i.e., copy and share everything).  I was inspired by this card she had created.  The cherry blossoms on her card reminded me of the Japanese cherry tree blossoms in Washington, D.C. Therefore, instead of casing her card, I had to create a scene of the cherry trees blossoms around the tidal basin.

Blossoms Around the Tidal Basin

What do you think?  Is my scene a decent replica of the one near the top of this post? The Washington Monument was hand drawn and well as the cherry trees and the green trees. The only stamps used was the cherry blossoms in the foreground and the sentiment. The blossoms in the foreground were colored with copics. Here’s another photo of my card.

(UPDATE:  This cared was featured in Splitcoaststampers FAVORITES of the week ending March 13, 2016)

Blossoms Around The Tidal Basin

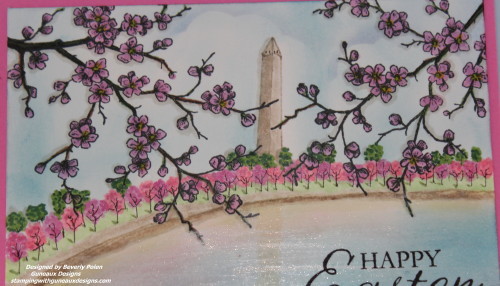
This photo is a closeup of the scene.

Blossoms Around the Tidal Basin

I hope you enjoyed learning about the blossoms around the tidal basin and my card! Thanks for stopping by!

BlogDivider_zpsed339ea1

SUPPLIES:

Stamps:  Stampin’ Up! Easter Blossoms (retired)

Paper:  Stampin’ Up! Whisper White, Pink Passion, and Bashful Blue Card Stock

Ink:  Stampin’ Up! Pretty in Pink, Pear Pizzazz, Bashful Blue, Marina Mist, Basic Black, and Copics

Card Size:  A2

Technique: Sponging and Coloring with Copics

BlogDivider_zpsed339ea1

Swallowtail Butterfly

GOD’S BLESSINGS!

STAMPING WITH GUNEAUX DESIGNS BY BEVERLY POLEN

“If God is for us, who can be against us.”  Romans 8:31

Splitcoaststampers Color Challenge

Hello, my friends!  Hope you are having a blessed day.  Tuesday’s Splitcoaststampers Color Challenge involved creating with four Stampin’ Up! Colors; Wild Wasabi, Real Red, Marina Mist, and Pacific Point. The challenge is titled, CC572 Getting Real Wild in the Mist on the Pacific.  Cool title, don’t you think?

Splitcoaststampers Color Challenge

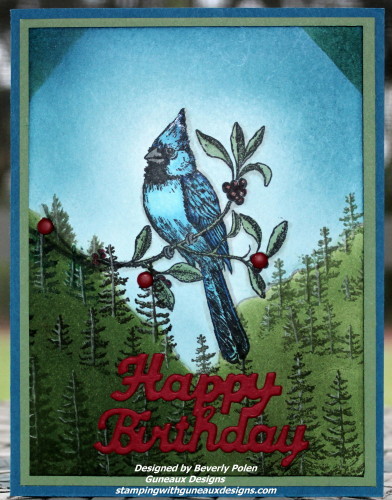
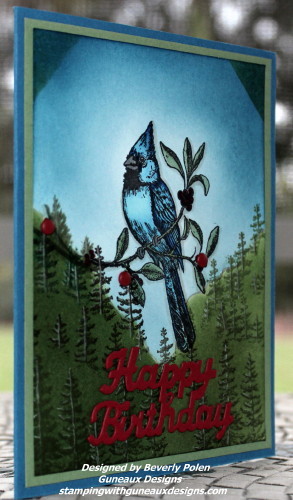
To participate in the challenge, I decided to create a scene with a blue jay as the focal point, as you can see in the photo below.

UPDATE:  This card was in the Splitcoaststampers Favorites of the Week ending March 6, 2016Splitcoaststampers Color Challenge CC572

I didn’t have a blue jay stamp; therefore, I decided to use a Stampin’ Up! Cardinal stamp to create a blue jay.  I used Copic Markers as close in color as the four above colors to color the blue jay and the twig upon which he rests.  Next, I sponged Marina Mist and Pacific Point ink to create the sky.  Then I used Wild Wasabi ink to develop the tree-filled “mountains”.  I put more of the Wild Wasabi ink onto the left side than the right side, trying to create a slight contrast.

I used the trees stamp from the Stampin’ Up! Plant Hope stamp set to randomly stamp trees. Afterward, I used a white pencil to add highlights to the trees.

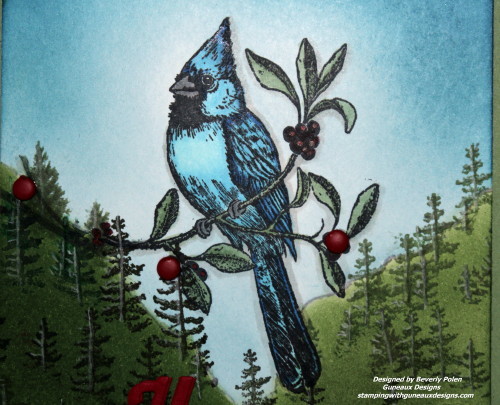
Here is a closeup of my blue jay:

Splitcoaststampers Color Challenge

The twig upon which the blue jay sits has berries. To pull in the Real Red color, I decided to use three Stampin’ Up! Real Red Candy Dots to cover most of the berries.  Additionally, I added a Real Red Happy Birthday cutout to pull in more red.

I hope you have enjoyed my blue jay!  Now it’s your turn to create a greeting card using the Stampin’ Up! Wild Wasabi, Real Red, Marina Mist, and Pacific Point colors.

Splitcoaststampers Color Challenge

BlogDivider_zpsed339ea1

SUPPLIES:

Stamps:  Stampin’ Up! A Cardinal Christmas and Plant Hope

Paper:  Stampin’ Up! Whisper White, Wild Wasabi, Real Red, and Pacific Point Card Stock

Ink:  Copics, Stampin’ Up! Wild Wasabi, Marina Mist, and Pacific Point

Card Size:  A2

Accessories:  MISTI, North Coast Creations Happy Birthday Die, and Stampin’ Up! Brights Candy Dots

Techniques:  Coloring With Copics, Sponging

BlogDivider_zpsed339ea1

Swallowtail Butterfly

STAMPING WITH GUNEAUX DESIGNS BY BEVERLY POLEN

“Wait for the Lord; be strong and take heart and wait for the Lord.”  Psalm 27:14

Splitcoaststampers Pretty In Pink, Field Flowers

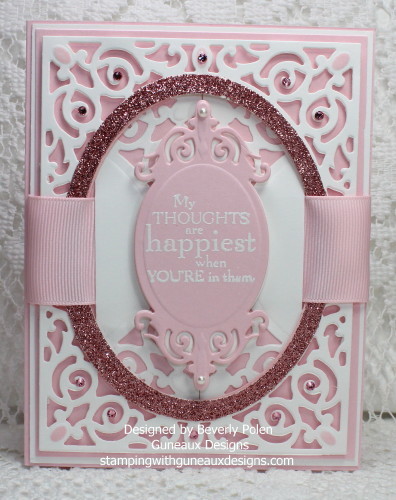
Today’s card share is a card I made in response to today’s Splitcoaststampers’ Pretty In Pink, Free For All Challenge, F4A.  The challenge is to make a card with pink in it. Pretty easy, right?  I made this Pretty In Pink card as my submission for the the challenge.

Splitcoaststampers Pretty in Pink Field Flowers


UPDATE:  Congratulations! In the General Stamping forum, you’re in the FAVORITES for the week ending February 14. (From Splitcoaststampers).


To create the card, I used a Stampin’ Up! Pink Pirouette card base, covered with a piece of Whisper White card stock.  I then added a small piece of Pink Pirouette card stock upon which I added the Whisper White die cut.  The die that I used for the die cut is from the Spellbinders A 2 Filigree Delight Dies.

You will note that there is another Whisper White die cut behind the sentiment that a Pink Pirouette ribbon weaves through.  This die cut is the same as the main one; however, I cut it into two pieces, cutting each piece to fit, and reversed them when adhering to the card (the top and bottom of the die cut are touching each other in the center of the card).

I added the sentiment from the retired Stampin’ Up! Field Flowers stamp set, “My Thoughts Are Happiest When You’re In Them.”  I think that sentiment is a very positive one and I love using it when I make cards for my children and grandchildren.  I placed the sentiment, created with VersaMark Ink and White Embossing Powder, onto a Pink Pirouette die cut.  This die is from the same Spellbinders Die set.

For embellishments, I die cut an oval from the Stampin’ Up! Pink Pirouette Glimmer Paper and placed it over the oval portion of the main die cut.  I added several Swarovski Pink Crystals and two Stampin’ Up! Basic Pearls to give the card some bling.

Enjoy and thanks for stopping by.  You may leave a comment in the comments section.  Comments are greatly appreciated!

BlogDivider_zpsed339ea1

SUPPLIES USED:

Stamps: SU Field Flowers

Paper: SU Whisper White and Pink Pirouette CS and SU Pink Pirouette Glimmer Paper

Card Size: A2

Ink: VersaMark

Accessories: Spellbinders Filigree Delight Dies, SU Pink Pirouette Ribbon, White Embossing Powder, SU Basic Pearls, Swarovski Pink Crystals

 BlogDivider_zpsed339ea1

Swallowtail Butterfly

God’s Blessings!

Stamping With Guneaux Designs By Beverly Polen

“God so loved the world that He gave His one and only Son, that whoever believes in Him shall not perish but have eternal life.”  John 3:16

SU Thoughts and Prayers

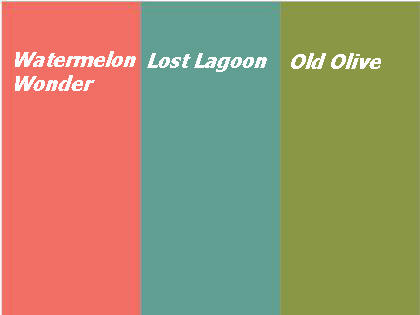
What is your opinion about a Stampin’ Up! color combination of SU Watermelon Wonder, Old Olive, and Lost Lagoon?  I think they are beautiful together.  I used the SU Thoughts and Prayers and Pendant Park to create a scene with these colors.

SCS Color Challenge 2-9-16

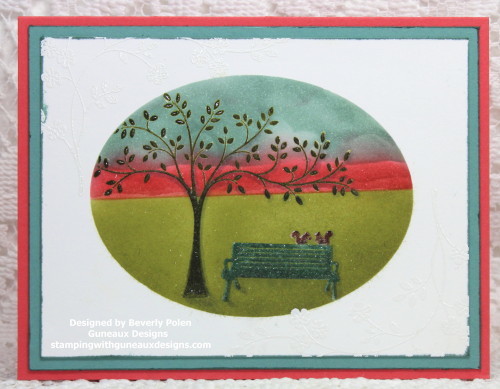
Splitcoaststampers had these colors as its Color Challenge for today (CC569).  Here is the card I submitted for the challenge.

SU Thoughts and Prayers


UPDATE:  My card was selected as one of the favorites for the week ending February 14, 2016


The scene is of squirrels enjoying the park bench (lol), and it’s in the shape of an oval (which gave one extra points if an oval was used). I added a floral image on the top left and bottom right that I embossed with white embossing powder.  It’s quite difficult to see that.

I covered the two image stamps with VersaMark and ink and embossed them with clear embossing powder. This was to prevent mixing inks while sponging for the background. I have to say that I’m disappointed with a couple of products I used as the ink I added to the Whisper White card stock edges bled onto the front of the card stock. Then forgetting about the SU ink serving as a base for embossing, I got white embossing powder on the scene while embossing the floral images on the white portion of the card. My mistake.

BlogDivider_zpsed339ea1

SUPPLIES USED:

Stamps: SU Thoughts and Prayers and Pendant Park Stamp Sets

Paper: SU Whisper White, Watermelon Wonder, and Lost Lagoon Card Stock

Card Size: A2

Ink: SU Watermelon Wonder, Old Olive, and Lost Lagoon Inks

Accessories: SU Sponges and Daubers, VersaMark, and White and Clear Embossing Powders

Techniques: Sponging BlogDivider_zpsed339ea1

Swallowtail Butterfly

God’s Blessings!

Stamping With Guneaux Designs By Beverly Polen

Gate Fold Card Using An Intricate Die Tutorial

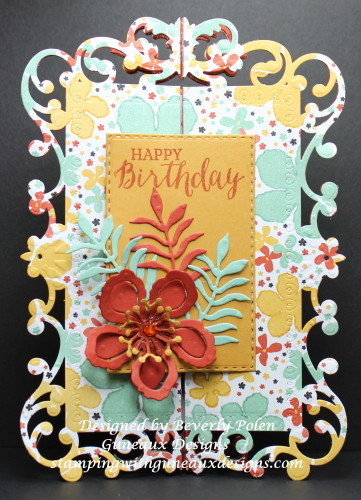
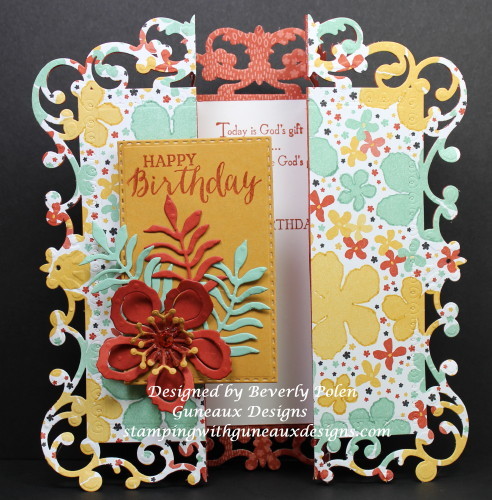
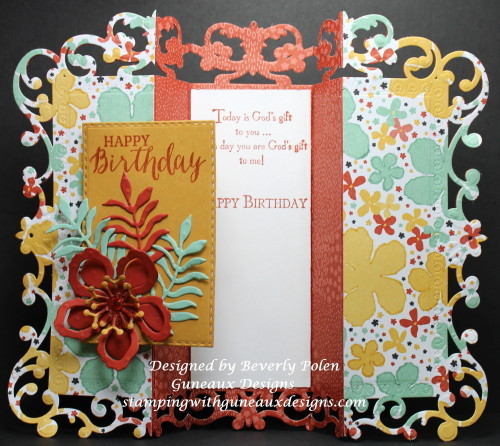
In August 2013, I posted two tutorials on how to make a Gate Fold Card using Stampin’ Up! framelits to form a card into the shape of one framelit.  One Tutorial was for using the Stampin’ Up!  Window Frames Framelits, and the Second Tutorial was for using the Stampin’ Up! Deco Frames Framelits. Today’s tutorial is for making a Gate Fold Card Using An Intricate Die.

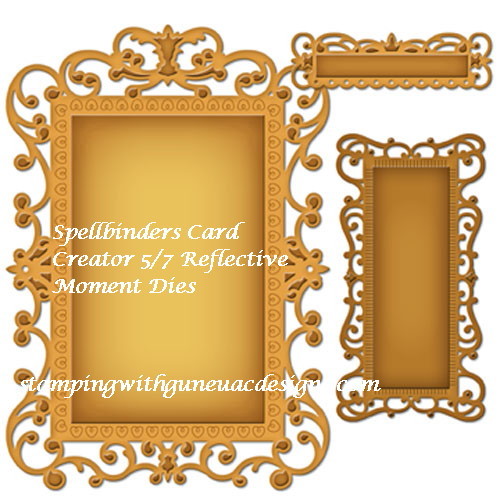
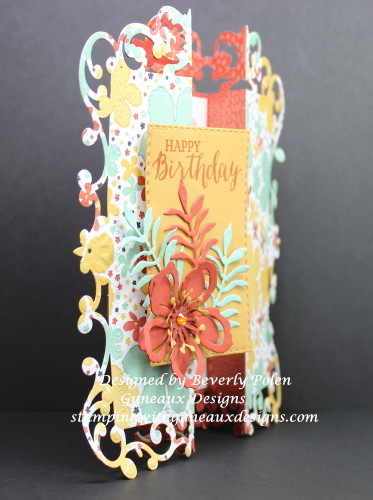
Creating a gate fold card using an intricate die to form the shape of the card can be difficult and a little rough on your die-cutting machine.  However, if you are willing to take the risk, you can create a beautiful gate fold card.  The gate fold card that is the subject of this tutorial was created with the largest die from the Spellbinders Card Creator 5/7 Reflective Moment Dies.

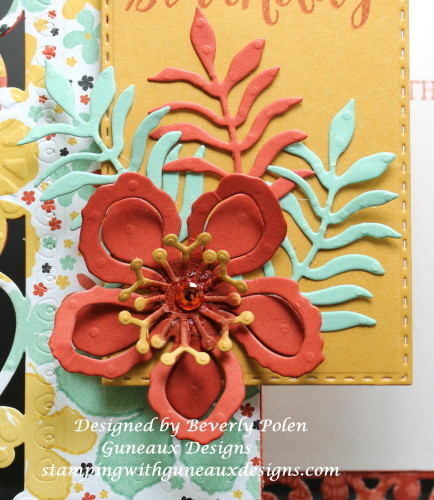
These photos are of the card I created for this tutorial.

Gate Fold Card Using An Intricate Die

Gate Fold Card Using An Intricate Die Tutorial

Gate Fold Card Using An Intricate Die Tutorial

Gate Fold Card Using An Intricate Die Tutorial

BlogDivider_zpsed339ea1

UPDATE:  This card was selected as a favorite on Splitcoaststampers for the week ending January 24, 2016.

BlogDivider_zpsed339ea1

TUTORIAL FOR MAKING A GATE FOLD CARD USING AN INTRICATE DIE

Step 1.  Select a die that you want to use to form the shape of your card (I recommend selecting one that is no wider than 5″ and longer than 7″, or you’ll need 12″ card stock).

Step 2.  Score an 8-1/2″ x 11″ piece of card stock on the 11″ side at the 3-1/2″, 4-1/2″, 6-1/2″, and 7-1/2″ measurements.

Step 3.  Fold the 3-1/2″ score line into a mountain fold, 4-1/2″ into a valley fold, 6-1/2″ into a valley fold, and 7-1/2″ into a mountain fold.

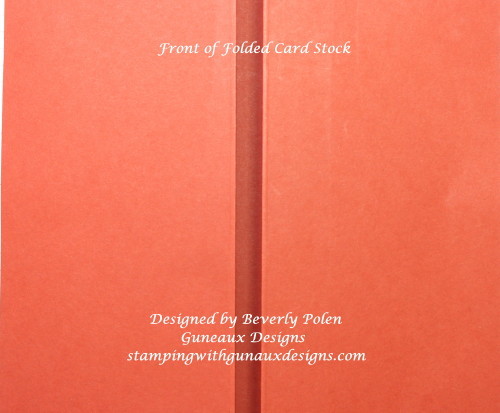
Step 4.  Crease well the score lines with a bone folder.  The two photos below show the front and back of the folded card stock.

Gate Fold Card Using An Intricate Die TutorialGate Fold Card Using An Intricate Die Tutorial

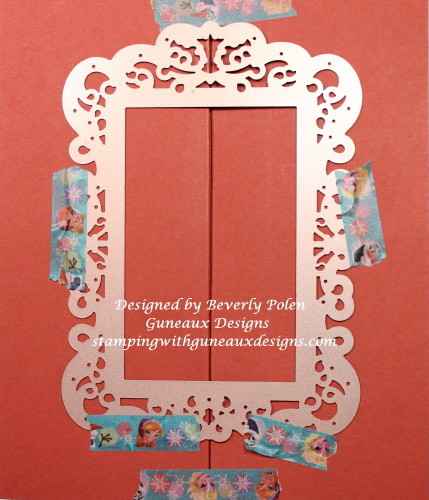
Step 5.  Lay your selected die onto the front of the folded card stock and use temporary tape to hold the folds and die in place.

(NOTE:  I selected the largest die from Spellbinders Card Creator 5″ x 7″ Reflective Moment Dies (S6-011). 

Gate Fold Card Using Dies & Framelits-3_1Step 6.  Using your die-cutting machine’s recommendation for the correct die-cutting sandwich, run the card stock and die through the machine.

(NOTE:   Because you are using an intricate die, you will need to run the sandwich through your machine at least four to five times.)

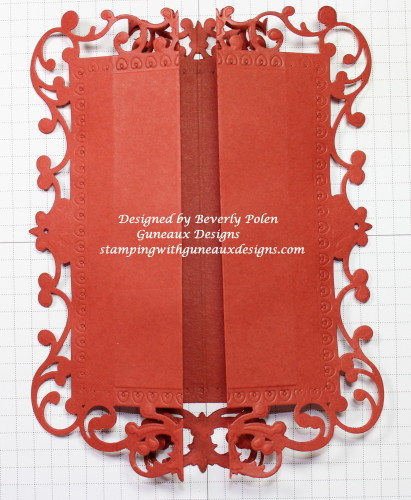
Step 7. Remove the die from the front of the cut card stock and re-position it onto the back of the cut out. Carefully line up the die with the cutout. Run though your die-cutting machine approximately three to four times.  There will be some pieces remaining in the cutout that can be removed by hand.

Gate Fold Card Using An Intricate Die Tutorial

The photo below shows the front of the cutout.

Gate Fold Card Using An Intricate Die Tutorial

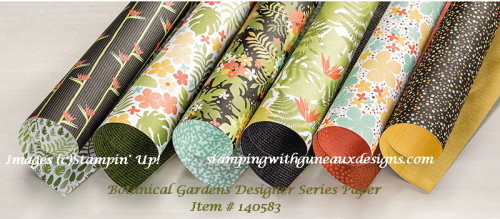
Step 8.  Decorate your card as desired.   I used Stampin’ Up! Botanical Gardens Designer Series Paper to decorate mine.

Enjoy your beautifully created gate fold card!

BlogDivider_zpsed339ea1

SUPPLIES USED

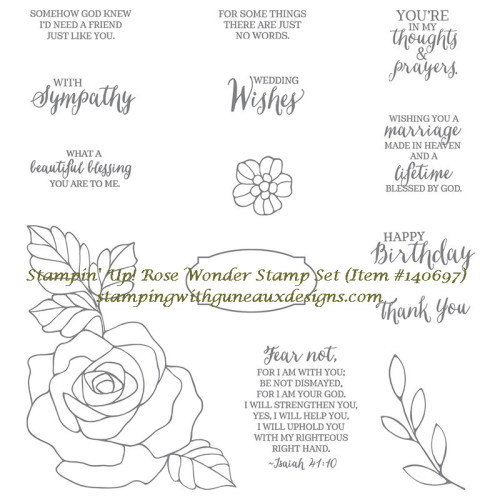
Stamps:  Stampin’ Up Rose Wonder Stamp Set (item # 140697) and God’s Blessings (retired)

Paper:  Stampin’ Up! Botonical Gardens Designer Series Paper; and Whisper White, Cajun Craze, Mint Macaron, and Hello Honey Card Stock

Ink: Stampin’ Up! Cajun Craze Classic Ink

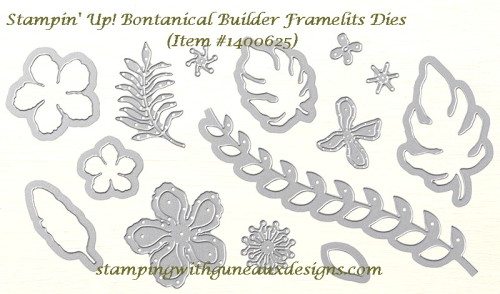
AccessoriesSpellbinders Card Creator 5/7 Reflective Moment Dies, Our Daily Bread Designs Double Stitched Rectangles Dies, Stampin’ Up! Botanical Builder Framelits Dies, Swarovski Crystal Gem (center of flower),

Gate Fold Card Using An Intricate Die TutorialGate Fold Card Using An Intricate Die Tutorial

Spellbinders Card Creator 5x7 Reflective Moment Dies_1

Gate Fold Card Using An Intricate Die Tutorial

BlogDivider_zpsed339ea1


Swallowtail Butterfly

God’s Blessings!

Stamping With Guneaux Designs By Beverly Polen

Gate Fold Card Using An Intricate Die TutorialGATE FOLD CARD USING AN INTRICATE DIE TUTORIAL