CottageCutz Mountain Lodge & Stair Step Card

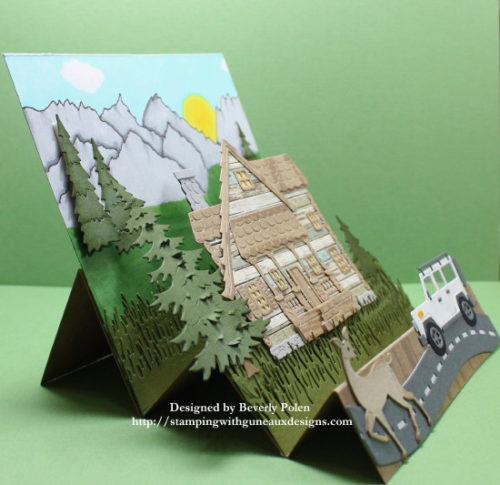
Hello and thanks for stopping by to see my CottageCutz Mountain Lodge & Stair Step Card.

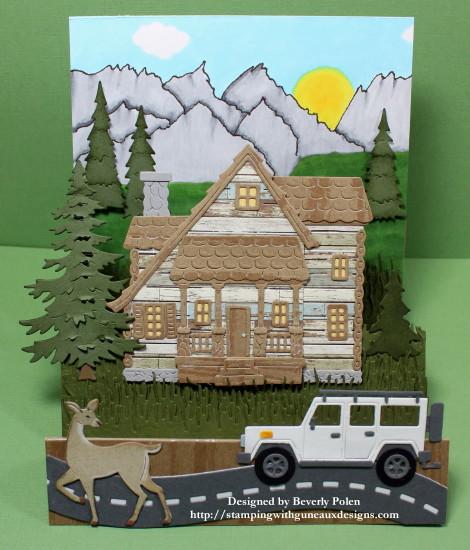
I made this card to submit to Splitcoaststampers Free For All Challenge (F4A383) last week that was hosted by the sweet Shirley (wannabcre8tive).  Her challenge was to “use something made of Old Wood”. This three, stair-step card is my submission to the challenge.

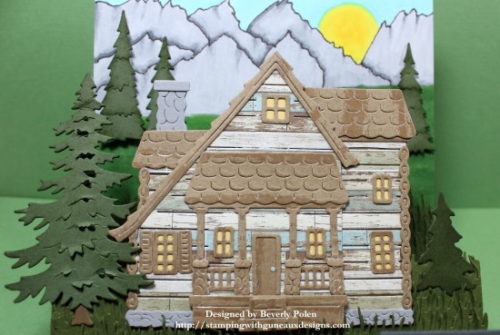
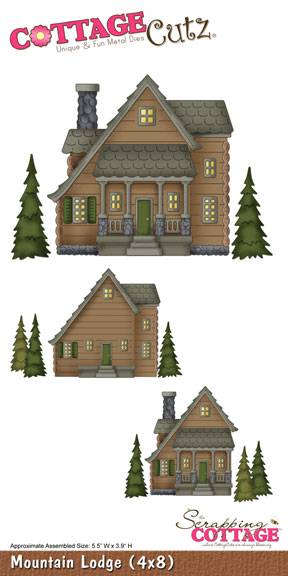
I used a 5-1/2″ x 10-1/2″ piece of SU paper that is a wood grain DSP to create the stair-step card base. The center step includes a mountain lodge made from “old wood”.  I found a photo of “old wood” on the Internet and down loaded it to modify and print onto card stock. This was used for the main pieces of the mountain lodge. The roof, porch, and steps were made with the SU wood grain DSP.

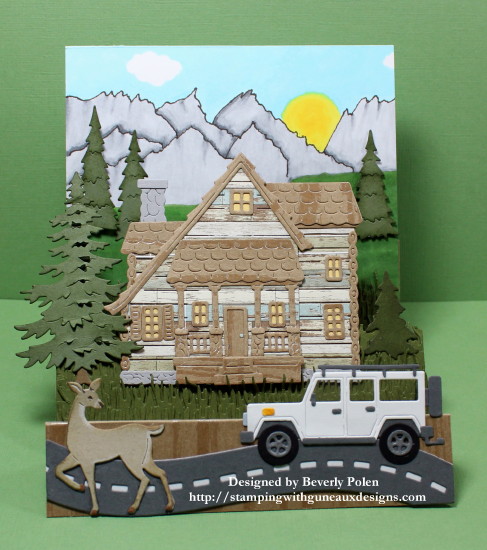
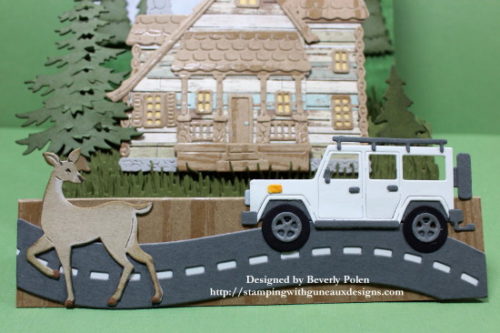
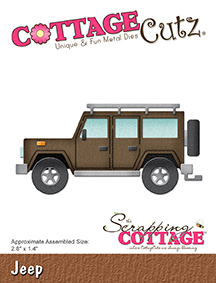
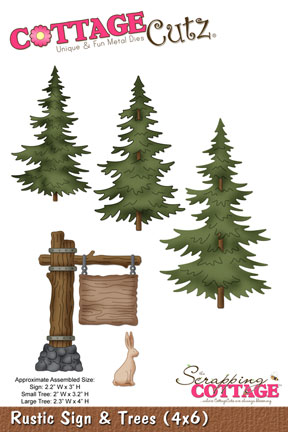
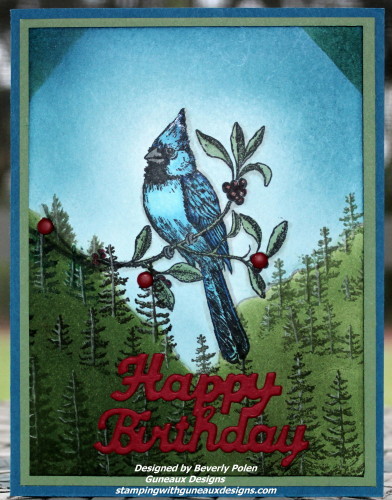
The back step includes a mountain range landscape that I drew, colored, and added to it three die cut trees. The front step obviously includes die cuts of a deer, jeep, and road.

I had so much fun creating this CottageCutz Mountain Lodge & Three Stair Step Card. The mountain lodge and Jeep took some time to assemble as there are a lot of tiny, tiny pieces to the items.  Regardless, it was worth it.

To create the stair-step card base,

  • Cut a 5-1/2″ x 10-1/2″ piece of card stock
  • Score the piece at the 1-1/4″, 2-1/2″, 4-1/4″, 6″, and 8-1/4″ marks
  • Fold according to the following:
    • 1-1/4″ score is a mountain fold
    • 2-1/2″ score is a valley fold
    • 4-1/4″ score is a mountain fold
    • 6″ score is a valley fold
    • 8-1/4″ score is a mountain fold
  • Decorate to your desire.

I hope you enjoy my CottageCutz Mountain Lodge & Stair Step Card, and will return to Guneaux Designs!


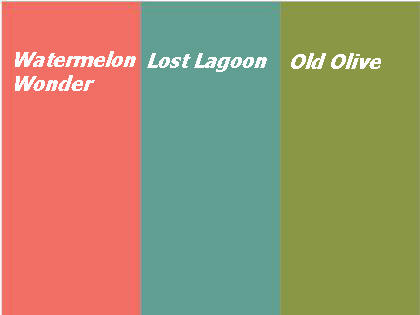
Paper:  White CS, Desert Storm CS, Old Wood CS (Digi), and SU Natural Composition Specialty DSP

Ink:  Copics

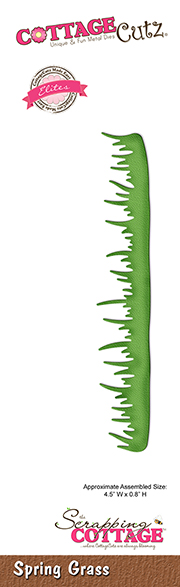
Accessories:  CottageCutz Mountain Lodge, Rustic Sign & Trees, Jeep, Spring Grass, and Deer Dies; and Lawn Fawn Road Border Dies


Butterfly_1_1

God’s Blessings!
Stamping With Guneaux Designs By Beverly Polen
Firm Reliance on Divine Providence!


Ezekiel 38:18-19

“This is what will happen in that day:  When Gog attacks the land of Israel, my hot anger will be aroused, declares the Sovereign Lord.  In my zeal and fiery wrath I declare that at that time there shall be a great earthquake in the land of Israel.” 

Guneaux Designs Strumming Guitar

What does the word, strings, bring to your mind?  For me, it is my Dad’s old Gibson Dove Custom guitar.  That thought generated this Guneaux Designs Strumming Guitar card.

Why would the word strings come to my mind?  It is because today’s Splitcoaststampers Clean and Simple Challenge was to think of strings when creating and submitting a card for the challenge.  The image showcased on this Guneaux Designs Strumming Guitar card is a digital image that I downloaded and colored.  I used Copic Sketch Markers in shade of browns and blues to color it.

I wanted to add a couple elements to the guitar that reminded me of my Dad’s guitar, which I have now because of his passing.  The two elements are the bird on the right and the white panel at the bottom right of the guitar.  I added white Crystal Drops to these elements to give them the look of mother of pearl.  My Dad’s guitar has a mother of pearl dove and other mother of pearl elements on it.  I thought the Crystal Drops would be perfect to replicate that.

After finishing with the image, I used a die from My Favorite Things to cut the white panel, and attached it to a turquoise card base.  Because the Guneaux Designs Strumming Guitar card is a clean and simple one, that’s all, folks!  Thank you for stopping by!


The primary supplies used for this card are:


Butterfly_1_1God’s Blessings!
Stamping With Guneaux Designs By Beverly Polen
Firm Reliance on Divine Providence!


MATTHEW 5:8-10

“Now when Jesus had entered Capernaum, a centurion came to Him, pleading with Him, saying, ‘Lord, my servant is lying at home paralyzed, dreadfully tormented.’ And Jesus said to him, ‘I will come and heal him.’ The centurion answered and said, ‘Lord, I am not worthy that You should come under my roof. But only speak a word, and my servant will be healed… ‘When Jesus heard it, He marveled, and said to those who followed, ‘Assuredly, I say to you, I have not found such great faith, not even in Israel!’ 

Splitcoaststampers Color Challenge

Hello, my friends!  Hope you are having a blessed day.  Tuesday’s Splitcoaststampers Color Challenge involved creating with four Stampin’ Up! Colors; Wild Wasabi, Real Red, Marina Mist, and Pacific Point. The challenge is titled, CC572 Getting Real Wild in the Mist on the Pacific.  Cool title, don’t you think?

Splitcoaststampers Color Challenge

To participate in the challenge, I decided to create a scene with a blue jay as the focal point, as you can see in the photo below.

UPDATE:  This card was in the Splitcoaststampers Favorites of the Week ending March 6, 2016Splitcoaststampers Color Challenge CC572

I didn’t have a blue jay stamp; therefore, I decided to use a Stampin’ Up! Cardinal stamp to create a blue jay.  I used Copic Markers as close in color as the four above colors to color the blue jay and the twig upon which he rests.  Next, I sponged Marina Mist and Pacific Point ink to create the sky.  Then I used Wild Wasabi ink to develop the tree-filled “mountains”.  I put more of the Wild Wasabi ink onto the left side than the right side, trying to create a slight contrast.

I used the trees stamp from the Stampin’ Up! Plant Hope stamp set to randomly stamp trees. Afterward, I used a white pencil to add highlights to the trees.

Here is a closeup of my blue jay:

Splitcoaststampers Color Challenge

The twig upon which the blue jay sits has berries. To pull in the Real Red color, I decided to use three Stampin’ Up! Real Red Candy Dots to cover most of the berries.  Additionally, I added a Real Red Happy Birthday cutout to pull in more red.

I hope you have enjoyed my blue jay!  Now it’s your turn to create a greeting card using the Stampin’ Up! Wild Wasabi, Real Red, Marina Mist, and Pacific Point colors.

Splitcoaststampers Color Challenge

BlogDivider_zpsed339ea1

SUPPLIES:

Stamps:  Stampin’ Up! A Cardinal Christmas and Plant Hope

Paper:  Stampin’ Up! Whisper White, Wild Wasabi, Real Red, and Pacific Point Card Stock

Ink:  Copics, Stampin’ Up! Wild Wasabi, Marina Mist, and Pacific Point

Card Size:  A2

Accessories:  MISTI, North Coast Creations Happy Birthday Die, and Stampin’ Up! Brights Candy Dots

Techniques:  Coloring With Copics, Sponging

BlogDivider_zpsed339ea1

Swallowtail Butterfly

STAMPING WITH GUNEAUX DESIGNS BY BEVERLY POLEN

“Wait for the Lord; be strong and take heart and wait for the Lord.”  Psalm 27:14

SU Thoughts and Prayers

What is your opinion about a Stampin’ Up! color combination of SU Watermelon Wonder, Old Olive, and Lost Lagoon?  I think they are beautiful together.  I used the SU Thoughts and Prayers and Pendant Park to create a scene with these colors.

SCS Color Challenge 2-9-16

Splitcoaststampers had these colors as its Color Challenge for today (CC569).  Here is the card I submitted for the challenge.

SU Thoughts and Prayers


UPDATE:  My card was selected as one of the favorites for the week ending February 14, 2016


The scene is of squirrels enjoying the park bench (lol), and it’s in the shape of an oval (which gave one extra points if an oval was used). I added a floral image on the top left and bottom right that I embossed with white embossing powder.  It’s quite difficult to see that.

I covered the two image stamps with VersaMark and ink and embossed them with clear embossing powder. This was to prevent mixing inks while sponging for the background. I have to say that I’m disappointed with a couple of products I used as the ink I added to the Whisper White card stock edges bled onto the front of the card stock. Then forgetting about the SU ink serving as a base for embossing, I got white embossing powder on the scene while embossing the floral images on the white portion of the card. My mistake.

BlogDivider_zpsed339ea1

SUPPLIES USED:

Stamps: SU Thoughts and Prayers and Pendant Park Stamp Sets

Paper: SU Whisper White, Watermelon Wonder, and Lost Lagoon Card Stock

Card Size: A2

Ink: SU Watermelon Wonder, Old Olive, and Lost Lagoon Inks

Accessories: SU Sponges and Daubers, VersaMark, and White and Clear Embossing Powders

Techniques: Sponging BlogDivider_zpsed339ea1

Swallowtail Butterfly

God’s Blessings!

Stamping With Guneaux Designs By Beverly Polen

Gingham Garden DSP Bird’s Nest Card

 Gingham Garden DSP Bird’s Nest Card

Gingham Garden DSP Bird's Nest Card
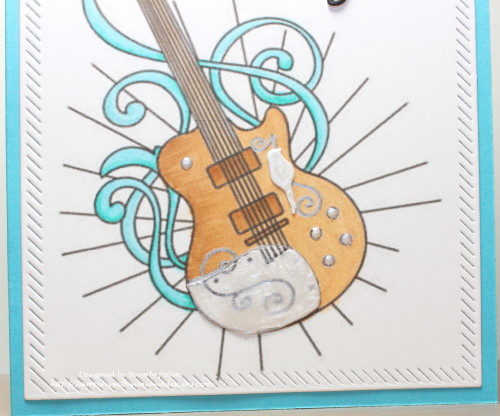
While shopping at Michaels recently, I came across this beautiful bird’s nest stamp.  I had to buy it as I love stamps featuring birds.  I created a Stampin’ Up! Gingham Garden DSP Bird’s Nest Card with the stamp.

The stamp image is called Nestled Bird.  After coloring the image with various Copic markers, I realized that the Gingham Garden DSP blue and yellow design goes perfectly with it. Therefore, I used the design for the card’s first layer.

 Gingham Garden DSP Bird's Nest Card

The picture to the right provides a closer view of the bird and nest.  The bird picture below was my inspiration for coloring the bird on the card.  I don’t know what type of bird it is but I found it to be beautiful.    


I used the Stampin’ Up! Framelits Labels Collection (125598) to cut out the colored image and to create a So Saffron mat that is behind the image.  The card base was made from the Baked Brown Sugar Card Stock (131296). 

This picture shows the embossing I use on the back of all my cards.  The circular text says Guneaux Designs and my name is in the center.

I hope you’ve enjoyed my Gingham Garden DSP Bird’s Nest Card!  I made it for my brother who has been quite sick lately and I want him to know that I am thinking of him.

God’s Blessings!
Stamping With Guneaux Designs
by
Beverly Polen 

Gingham Garden DSP Bird's Nest Card


Color On Color Emboss Resist Technique – Happy Father’s Day

I love the art of blending inks. However, I had not tried before the Color on Color Emboss Resist Technique. After trying it, I now know that I really, really like it and will be using it in future art. The card share I have for you today features this technique for a Happy Father’s Day card.

Color on Color Emboss Resist Technique

SUPPLIES USED FOR THE COLOR ON COLOR RESIST TECHNIQUE, HAPPY FATHER’S DAY CARD (I am listing the supplies I used; however, the supplies you use do not need to be the same, as it is the technique itself that is the subject of this tutorial).

Stamp Sets: Stampin’ Up! Fine Feathers (126517) and an old hostess stamp set, Something to Celebrate (for sentiment)

Paper: Baked Brown Sugar Card Stock (131296), Bermuda Bay Card Stock (131197), and Whisper White Card Stock (100730)

Ink: You will need three light colors and one darker color – Pistachio Pudding Classic Ink (131177), More Mustard Classic Ink (retired), Coastal Cabana Classic Ink (131175), and Baked Brown Sugar Classic Ink (131174)

Accessories: Embossing Buddy (103083), Ovals Collections Framelits (129381), Bitty Banners Framelits (129267), Sponge Daubers (102892), VersaMark (102283), Clear Embossing Powder (109130), Linen Thread (104199), Stampin’ Dimensionals (104430)

Color on Color Emboss Resist Technique

INSTRUCTIONS FOR THE COLOR ON COLOR EMBOSS RESIST TECHNIQUE:

1. Cut card stock accordingly:

8-1/2″ x 5-1/2″ for card base

5-1/4″ x 4″ for 1st layer

5″ x 3-3/4″ of Whisper White Card Stock

2. Select a stamp that you want to be the main feature of the card. (I used the feather stamp; however, I think it would work best with a solid stamp with few designs within).

3. Select three colors of classic ink that are light shades.

4. Using a sponge dauber, swirl your first light color onto the Whisper White Card Stock.

Color on Color Emboss Resist Technique

5. Swirl your second light color onto the Whisper White Card Stock, and don’t worry about overlapping the colors.

Color on Color Emboss Resist Technique

6. Swirl your third light color onto the Whisper White Card Stock, and then look for places where you want to blend the colors and do that with the daubers. Don’t worry about the look too much as it will completely change when you add the darker color.

Color on Color Emboss Resist Technique

7. AFTER the ink dries, rub the embossing buddy over the complete piece of card stock.

8. Cover your selected stamp with VersaMark and stamp the image randomly on the card stock.

9. Cover with the clear embossing powder and heat set. Let it cool.

10. Swirl you dark color of ink all over the piece of card stock. You may need to do this a couple times or more.

11. Using a paper towel, rub the excess dark ink from the embossed images. Isn’t it cool how the clear embossing takes on the colors?

12. After reaching the desired colors on the colored piece of card stock, use the stamp image to create a center piece for the card.

Color on Color Emboss Resist Technique

13. Adhere the pieces together and add your desired embellishments.

14. Add your sentiment to the card.

Enjoy!!

God’s Blessings!
Stamping With Guneaux Designs
by
Beverly Polen

Color on Color Emboss Resist Technique COLOR ON COLOR EMBOSS RESIST TECHNIQUE – HAPPY FATHER’S DAY