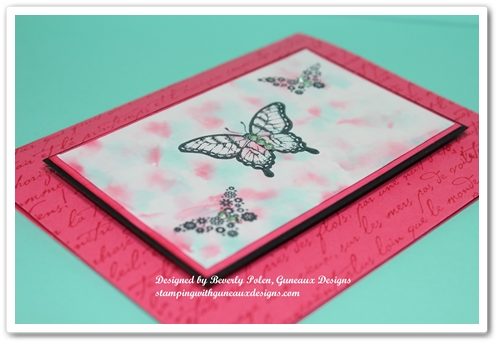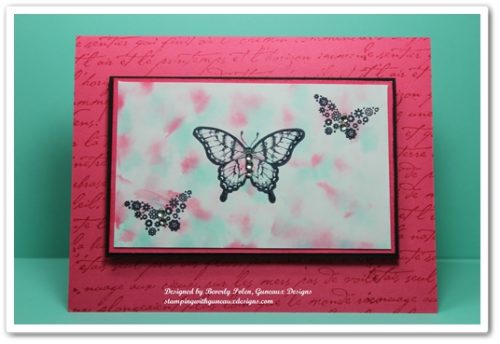
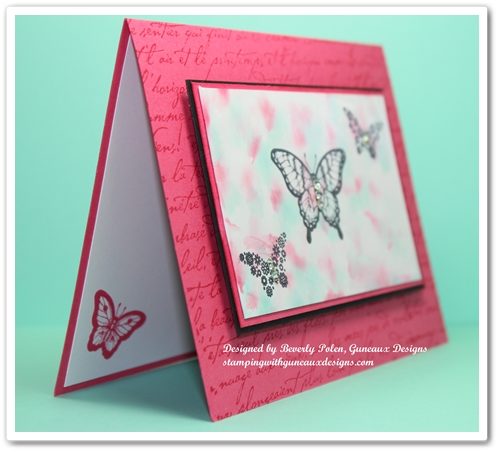
I suspect most crafters have tried the Polished Stone Technique. However, this is my first time although the technique has been around for some time. Polished Stone is a rich background technique that looks like rich marble. It is an excellent background for both feminine and masculine cards.
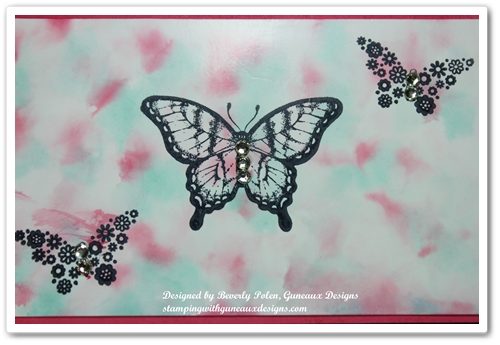
After looking closely at the above picture, can you tell that I left out one key product that most, but not all, crafters use for the Polished Stone Technique? It is the metallic ink. I have seen examples of this technique where the metallic ink was used and examples where it was not used. Well, I left it out because I did not have any metallic ink. However, I’ll provide you with the instructions that include the ink.
Accessories: Cotton Ball, Rubbing Alcohol, and Basic Rhinestones (119246)
INSTRUCTIONS FOR THE POLISHED STONE TECHNIQUE:
Add a few drops of metallic re-inker randomly onto glossy card stock.
Add rubbing alcohol onto a cotton ball.
Add two or three drops of each classic re-inker color onto the cotton ball.
Dab the cotton ball over the glossy card stock, continuing until you achieve the desired look. The rubbing alcohol will cause the re-inker colors to blend together, and the metallic re-inker will sit on top of the re-inker colors to give a marble look.
Allow the card stock to dry, and if desired, seal it with an acrylic sealer.
Stamp the desired image onto the “marbled” card stock with Stazon Ink.
Create your card!
This card can be a Happy Birthday, Happy Anniversary, Thinking of You, Thank You, or any type of card.
I am excited about both of these new products, which I have featured on my card share today. Three paper designs from the Quatrefancy Designer Series Paper (130141) and one stamp from the Mosaic Madness Stamp Set (130249) were used on the card. Also featured is the new Stampin’ Up! Modern Mosaic Embossing Folder (129984).
The colors of the designs from the Quatrefancy Designer Series Paperand Mosaic Madness Stamp Set stamp images on the card are Stampin’ Up!’s Pool Party, Island Indigo, Strawberry Slush (doesn’t that name sound yummy?), and Whisper White. The Strawberry Slush is a new “In-Color”.
I embossed the piece of Whisper White Card Stock with the new Stampin’ Up! Mosaic Madness Embossing Folder. To add color to the raised parts of the embossing, I did something different from what you will read on other websites, etc. After embossing the paper, I used a Pool Party Classic Ink Pad (the old type of pad) and gently swiped the raised embossed sections until I got the desired effect. I tried this with a new foam pad and it didn’t work at all as it was too soft (because of the foam) and inky.
After allowing the ink to dry, I stamped an image from the Mosaic Madness Stamp Set over three of the mosaic patterns. Inside these images I stamped the words “Love You” and wrote the word “I”. The “love you” words are from the Stampin’ Up! Fabulous Phrases Stamp Set (120501).
Now let’s move on to the card’s left side and the ribbon covering the top layer of the Quatrefancy Designer Series Paper. Wait, is that “ribbon”? Hummm – well, actually it is many threads that I unraveled from a piece of Island Indigo ribbon. Yes, it’s time consuming, but I enjoy the look of the shinny threads. The bow was made also with the threads.
What are your thoughts about the threads and bow?
The following is a closeup of the card’s right side, which I explained above.
However, I didn’t mention above that I pierced the top and bottom corners of the embossed Whisper White piece of card stock. I also added two Island Indigo patterned brads, which have retired. 🙁 I have so many retired Stampin’ Up! brads; therefore, I choose to use them whenever I can.
TIP: OK, so we know that the Quatrefancy Designer Series Paper and Mosaic Madness Stamp Set coordinate with the Mosaic Punch. But did you know that some designs in the Quatrefancy Designer Series Paper coordinates with the Itty Bitty Shapes Punch Pack(118309)? Look closely at the designs and you’ll see what I mean!
I wanted to give you a closeup of the bow. Now trying to tie multiple threads together was a tough task, but I managed.
I hope you enjoyed the card!
God’s Blessings!
Stamping With Guneaux Designs
by
Beverly Polen
Quatrefancy Designer Series Paper and Mosaic Madness Stamp Set
I love this card that I made! It features the Stampin’ Up! Secret Garden and Fabulous Florets Stamp Sets. This card also features the Masking Technique. I had to do a lot of masking to get the effect I wanted, especially for the floral stems.
Do you get the correlation between the card’s sentiment and the stamped images? There are multiple pinkish flowers and one turquoise flower on the card. Thus, the “There’s Only One You” sentiment is quite fitting. Don’t you agree? The sentiment is from the recent Sale-a-bration Vintage Verses Stamp Set.
As it relates to the positioning of the card stock layers, the design for this card is quite similar to the card I shared yesterday.
The card base is made with Regal Rose Card Stock. The Basic Black Card Stock and Tempting Turquoise Card Stock are the same size as the Real Red and Basic Black Card Stock on yesterday’s card.
I typically do not show the envelope I make for my cards; however, I have recently. I think a matching envelope is necessary for a complete package.
Can you see the very light gray around the flowers and stems? The purpose of this is to create shadows that would be cast if the light were coming from the top-right side. This technique also creates dimension for the objects.
Stampin’ Up! Supplies Used for the Card:
Stamp Sets: Secret Garden and Fabulous Florets (129144 and 123027 – c)
Paper: Regal Rose Card Stock, Basic Black Card Stock, Tempting Turquoise Card Stock, and Whisper White Card Stock
Ink: Various Markers
Accessories: Basics Glimmer Brad (Basic Black – 121003) and Brights Glimmer Brad (Tempting Turquoise – 121006)
Gee, the Stampin’ Up! Sycamore Street Designer Series Paper goes away on March 22 at the end of Stampin’ Up!’s Sale-a-bration – how time flies! For me, the Sale-a-bration Sycamore Street Designer Series Paper has been a paper difficult to work with. Regardless, I have used it multiple times, and today’s card project features the Sycamore Street Designer Series Paper and two techniques, Ribbon Weaving and Guneaux Designs Sliced Rock Technique. (Just an FYI, the SU Stamp Set that matches the Sycamore Street Designer Series Paper is the Madison Avenue Stamp Set which is part of the SU Sale-a-bration.)
This is a closeup of the ribbon weaving and sliced rock techniques:
I selected two designs from the Sycamore Street Designer Series Paper (DSP) to create the card. The top portion is the Rich Razzleberry design with circles, and the stems and multiple colors of leaves is the bottom portion. I used the Stampin’ Up! Blossom Punch to punch a blossom into the center of the top piece. I cut 14 pieces of the Stampin’ Up! Stitched Satin Ribbon(all colors), with each piece long enough to cover the blossom. To ribbon weave, follow the instructions below.
After completing the ribbon weaving, I used Stampin’ Write Markers around the blossom, which is the Guneaux Designs Sliced Rock Technique. If you’ve not seen this technique, there is a video with instructions at the bottom of this post.
Finally, I adhered the ribbon weaved piece of DSP to the upper portion of a Summer Starfruit card base, and the second piece of the Sycamore Street Designer Series Paper to the bottom. A piece of Summer Starfruit Stitched Satin Ribbon was added.
SUPPLIES USED FOR THE CARD FEATURING THE SYCAMORE STREET DESIGNER SERIES
Paper: Sycamore Street Designer Series Paper (127540 – Sale-a-bration Product) and Summer Starfruit Card Stock (126991)
STEP 1. Determine how many pieces of ribbon are needed to cover the primary element of your project. Your size of this element will determine the length of each piece. For my blossom, I needed 14 pieces of approximately 5″ long.
STEP 2. With the primary element facing down (i.e., in my case, the negative of the punched out blossom DSP), place adhesive (e.g., Sticky Strip) along the top, left, and right of the blossom. Begin attaching the ribbons vertically, side by side (no space between). If you use a patterned ribbon, the patterned side of the ribbon should be facing down. Ensure the top portion of the ribbon pieces are well attached to the adhesive.
STEP 3. Move every other piece of the vertical ribbon up to the top of the piece of DSP.
STEP 4. Lay a piece of ribbon horizontally across the remaining vertical ribbons (this step begins the weaving process). Adhere one end of this piece of ribbon to the left of the vertical ribbons. Ensure the very top of the punched out piece in the DSP is covered with this first piece of ribbon. Adhere the other end to the right of the vertical ribbons.
STEP 5. Bring down the vertical ribbons across the horizontal piece of ribbon.
STEP 6. Lift up the vertical ribbons that weren’t lifted the first time.
STEP 7. Lay the second piece of ribbon horizontally across the vertical ribbons (adhere both ends). Make sure that this piece of ribbon is pushed up against the first horizontal piece of ribbon.
STEP 8. Bring down the vertical ribbon pieces across the second piece of horizontal ribbon.
STEP 9: Repeat this process until you’ve completed the weaving process.
STEP 10. Place adhesive along the bottom and adhere the vertical ribbons to the DSP. If necessary, trim the ends of the vertical ribbons flush with the DSP.
Yesterday I shared a greeting card made with printed card stock that I made with My Digital Studio. Today I’m sharing a My Digital Studio Scrapbook Page that is almost the same as the card. This page was made with the same digital download as the card was made with.
What do you think? I really like the page! I featured on the page a picture of my youngest daughter, who always showers me with love, and me. Isn’t she beautiful!! She has good genes that she got from her Mother (lol)!
SUPPLIES USED TO MAKE THE MY DIGITAL STUDIO SCRAPBOOK PAGE: