Stampin Up Designer Series Paper – Stamping With Guneaux Designs

What do you do with a design from a package of Stampin Up Designer Series Paper (DSP) that you’re disappointed with?  Do you use the design from the DSP or store it away?  I’m quite certain that this has happened to most of us who use any designer paper from any vendor. 

This certainly has happened with me.  For example, there is one design within the Stampin’ Up! International Bazaar DSP (126920) that I wasn’t sure how to use as it is so bold and busy.  Don’t get me wrong, I LOVE bold colors.  But this one design is just too busy for me.  For your reference, it’s the seventh design from the top down in the following photo of the International Bazaar Stampin Up Designer Series Paper.

Stampin Up Designer Series Paper

After some thought, I decided to make a card using the design from the Stampin Up Designer Series Paper as a secondary element on the card, and the colors within that design as the primary elements for the card. The colors in this particular design are Tangerine Tango (111349), Lucky Limeade (122926), Pacific Point (111350), Daffodil Delight (119683), and Rich Razzleberry (115316).  Here’s the card I made with the design:

 Stampin Up Designer Series Paper

What about the card stands out most to you?  Is it the design from the Stampin Up Designer Series paper; the Lucky Limeade card base, Tangerine Tango, Daffodil Delight, Pacific Point, and Rich Razzleberry strips of card stock; or the Daffodil Delight leaf?  Is it the embossing on these elements with the Argyle Embossing Folder (127750) that gives texture to the card? 

For me, it’s definitely not the design from the Stampin Up Designer Series paper.  It is the latter three of the above four possibilities. When I look at the card, it’s these elements that stand out as primary elements, and the design that I dislike is in the background as a secondary element. 

The following are more pictures of the card:

 Stampin Up Designer Series Paper


Stampin Up Designer Series Paper

 The sentiment on the leaf is from the Trust God Stamp Set (126702).

Stampin Up Designer Series Paper

 These flowers were made using the art of paper quilling.

Stampin Up Designer Series Paper

If you experience what I’ve described above regarding a design within a Stampin Up Designer Series Paper package, let the colors within that piece be your guide for developing the primary element(s) of your project and the design itself be your secondary element.  Following this guidance will help you to use all of the designs within a Stampin Up Designer Series Paper package and not waste it.

The intent of this post is to provide guidance instead of instructions on how to make the card featured in the guidance.  I hope you find this helpful.

Leave a comment, please, regarding the guidance provided (positive or negative).  I love getting comments!  So make my day! (lol)

 God’s Blessings!
Stamping With Guneaux Designs
by
Beverly Polen
 Have fun creating with Stampin Up Designer Series Paper!

Candlelight Christmas Designer Series Paper

The Stampin’ Up! Candlelight Christmas Designer Series Paper is gorgeous, don’t you agree?  The design from the designer series paper that I used for this 2012 Christmas Card is especially gorgeous.

 Candelight Christmas Designer Series Paper - Christmas Card 2012

Candlelight Christmas Designer Series Paper

Candlelight Christmas Designer Series Paper (126901)

The card is folded into a Victorian Double Pocket.  Instructions for the type of fold are:

1. Cut a piece of DSP to 9″ x 12″.
2. Fold this sheet in half lengthwise and unfold.
3. Fold opposite corners in to meet the centerfold.
4. Fold the bottom edge to meet the top edge, creating a fold perpendicular to the existing centerfold.
5. Fold in half, left to right, along the original center fold, to form the card.
6. Apply adhesive on the inside edges to secure the card.
7. Decorate as desired.

(TIP:  When making a Double Pocket card, I suggest using a two-sided designer series paper.  With this type of fold, you will want the front and back of the paper to be equally beautiful, like the Candlelight Christmas Designer Series Paper.)

On the front of the card at the top of one of the pockets is a red scallop strip.  This Real Red strip is embossed with the new Lacy Brocade Textured Impressions Embossing Folder that is the same design as the design I used from the Candlelight Christmas Designer Series Paper.  I first cut the scallop strip using the Tasteful Trim Bigz SL Die, and then embossed it with the embossing folder.  The picture below provides you with a close up view.

 Candlelight Christmas Designer Series Paper

The ornament on the left side of the card was made with one of the Holiday Ornaments Framelits. The paper used for the ornament is also from the Candlelight Christmas Designer Series Paper.  The ornament is hanging with Gumball Green 3/8″ Stitched Satin Ribbon.


Candlelight Christmas Designer Seriers Paper

 The “Noel” sentiment is from the new Greetings of the Season stamp set.

Candlelight Christmas Designer Series Paper

Click on the links within the post to purchase any of the products used for this card.

God’s Blessings!
Stamping With Guneaux Designs
by
Beverly Polen

 Enjoy using the beautiful Candlelight Christmas Designer Series Paper!

Stampin Up Single Stamps

I am so excited to share with you an opportunity to buy Stampin Up single stamps!  What do I mean by Stampin Up single stamps?  I mean single stamps from Stampin’ Up! stamp sets.  That’s right – from stamp sets {jumping up and down}.  This is a new Stampin’ Up! pilot program that last from now until January 2, 2013.  

These are the THREE stamp sets from which you can buy single stamps:   

(UPDATE:  TEN NEW STAMPS HAVE BEEN ADDED {10-29} – SEE BELOW) 

  Stampin' Up! Single Stamps Word Play

Stampin' Up! Single Stamps from Word Play

Stampin’ Up! Single Stamps – Word Play

           Price                              Item Number             Stamp            Clear Block Needed

$4.95 US

$6.25 CA

132294

Sick

Block C

$4.95 US

$6.25 CA

132295

I Do

Block C

$5.95 US

$7.50 CA

132296

Laughter

Block D

$4.95 US

$6.25 CA

132297

Wish Big

Block C

$6.95 US

$8.95 CA

132298

In My Thoughts

Block H

$5.95 US

$7.50 CA

132299

You Mean the World

Block D

$4.95 US

$6.25 CA

132300

Worth the Wait

Block C

$4.95 US

$6.25 CA

132301

Imagine

Block D

$6.95 US

$8.95 CA

132302

Remember When

Block I

$4.95 US

$6.25 CA

132303

Joy

Block C

$6.95US

$8.95 CA

132304

Dreams

Block E

$4.95 US

$6.25 CA

132305

Thanks a Million

Block D

Stampin' Up! Single Stamps Perfectly Penned

Stampin' Up! Single Stamps from Perfectly Penned

Stampin’ Up! Single Stamps – Perfectly Penned

          Price                         Item Number             Stamp          Clear Block Needed

$4.95 US 

$6.25 CA

132306

Thank You

Block D

$4.95 US

$6.25 CA

132308

Get Well

Block C 

$5.95 US

$7.50CA

132307

Celebrate Today

Block H 

$5.95 US

$7.50 CA

132309

Happy Birthday

Block H

Stampin' Up! Single Stamps - Seasonal Sayings


 Stampin' Up! Single Stamps - Seasonal Sayings


$5.95 US

 $7.50 CA

132310

Christmas

Block H

 $5.95US

 $7.50CA

132311

Halloween

Block H

 $5.95US

 $7.50 CA

132312 

Thanks

Block H

 $4.95US

 $6.25CA

132313

Love

Block D

 $5.95US

 $7.50CA

132314

Celebrate

Block H

 DETAILS:

  • To be taken directly to the individual stamps, click on any of the above relative pictures.
  • This offer is available for clear-mount stamps only.These stamps are available on any order type – customer, demonstrator, workshop, or online.
  • The Stampin’ Up! single stamps will be packaged in cello bags. If you’d like a case for your stamp, you can buy the Clear-Mount Stamp Cases  (119105) that come in packs of four.
  • The stamps will NOT come with a Clear-Mount Block, and you’ll need to buy a block separately if you don’t already have one. The recommended block sizes in the above charts.
  • There is no limit on how many single stamps you can buy from the selected stamp sets.

10-29-2012 UPDATE:  TEN NEW STAMPS HAVE BEEN ADDED TO THE LIST OF SINGLE STAMPS THAT YOU CAN PURCHASE.  THREE OF THE STAMPS HAVE NEVER BEEN SEEN BEFORE (click on below links to see them)! 

Assortment 1 (includes 5 new stamps)

Assortment 2 (includes 5 stamps including the three never-been-seen-before stamps)

Click to Buy Stampin' Up! Products

 God’s Blessings!
Stamping With Guneaux Designs
by
Beverly Polen
 

Remember this is a pilot program, so take advantage of it while you can.

Stampin Up Postage Due

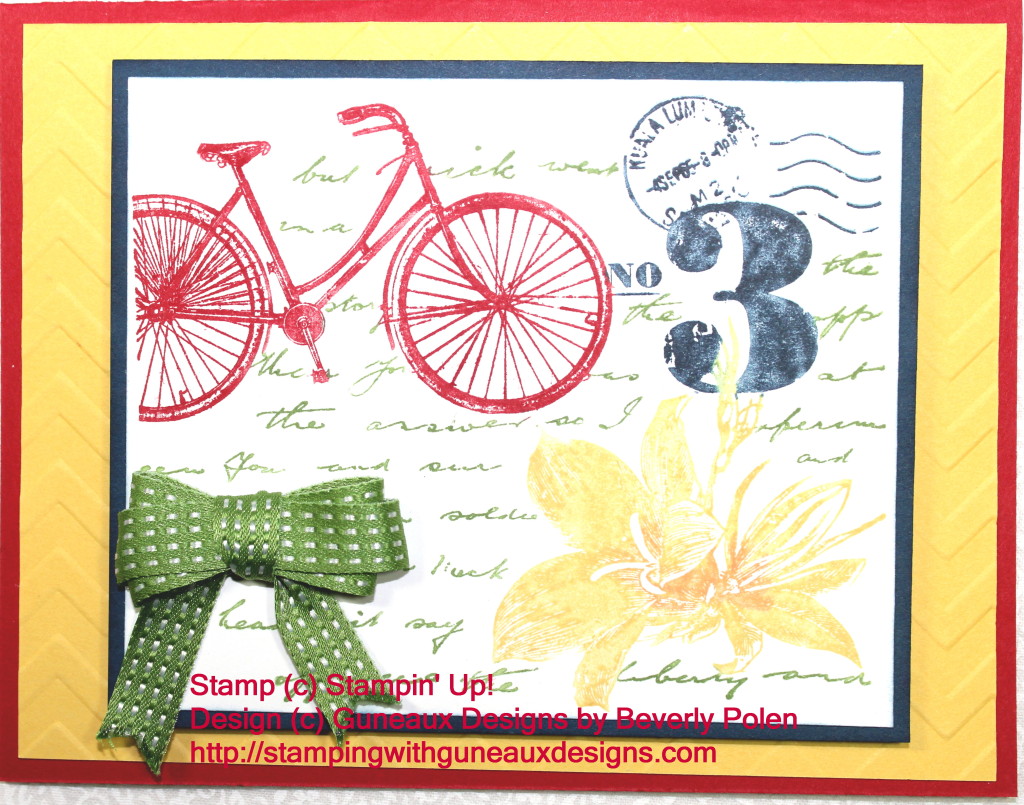
Are you enjoying my posts featuring the Stampin Up Postage Due Stamp Set (126397)?  I hope so as I am enjoying using the stamp set.

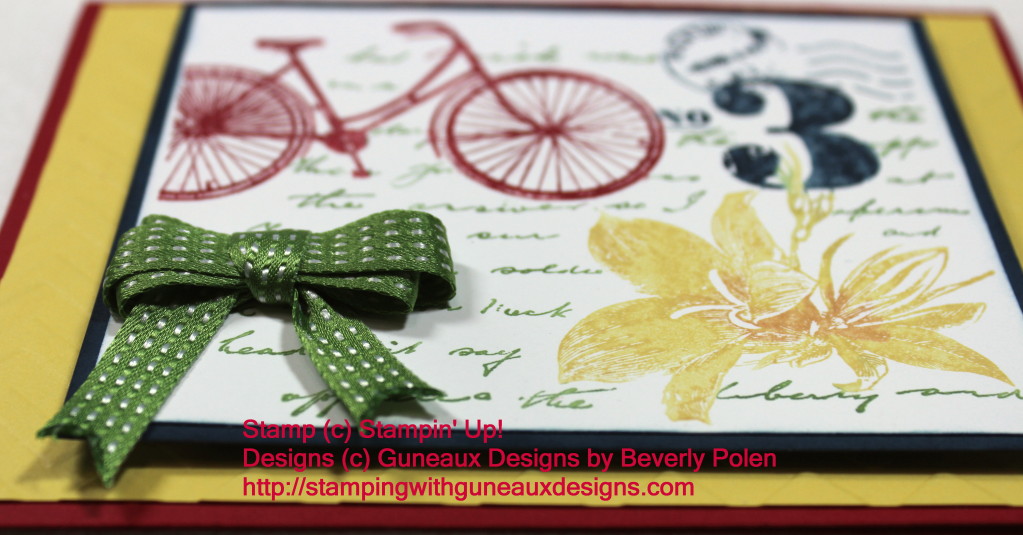
As a youngster (oh, how long ago), my first bicycle was red.  Reflecting on that, I decided to make the bicycle on the Stampin Up Postage Due stamp image red.  And, this card is different than the previous two as the stamped image is made with multiple colors.

STAMPIN UP PRODUCTS USED (includes Catalog item numbers):

Stamp Set:  Stampin Up Postage Due (126397)
Paper (Card Stock):  Real Red (102482), Daffodil Delight (119683), Midnight Muse (126843), and Whisper White (100730)
Ink (Stampin’ Write Markers):  Real Red (100052), Midnight Muse (126856), Daffodil Delight (119677), and Gumball Green (126856)
Accessories:  Big Shot Die-Cutting Machine (113439), Chevron Textured Impressions Embossing Folder (127749), Gumball Green 3/8″ Stitched Satin Ribbon (126848), and Stampin’ Dimensionals (104430)

INSTRUCTIONS:

1.  Cut card stock according to the following:

  • 8-1/2″ x 5-1/2″ piece of Real Red, folded in half to form card base,
  • 4″ x 5-1/4″ piece of Daffodil Delight,
  • 4-1/4″ x 3-9/16″ piece of Midnight Muse (this size can vary, depending on whether you want to cut the Whisper White card stock smaller or larger), and
  • 3-3/8″ x 4-1/16″ piece of Whisper White (this size can vary, depending on whether you want more white space around the stamped image).

2.  Place the Daffodil Delight Card Stock into the Chevron Textured Impression Embossing Folder, and run through the Big Shot Die-Cutting Machine.

3.  Apply ink onto the stamp using Stampin’ Write Markers — color the bicycle Real Red, postage Midnight Muse, flower Daffodil Delight, and text Gumball Green.

4.  Stamp inked image onto the Whisper White card stock.

5.  Adhere the textured Daffodil Delight card stock to the Real Read card front.

6.  Adhere the stamped Whisper White card stock to the Midnight Muse card stock.

7. Place dimensionals on the back side of the Midnight Muse Card Stock (I double them to get more height).

8.  Cut a piece of Gumball Green ribbon, tie it into a bow, and attach to the bottom-left of the Whisper White card stock.

9.  Attached the Midnight Muse and Whisper White card stock onto the Daffodil Delight card stock.

10.  Sit back and enjoy your beauty!     

God’s Blessings!
Stamping With Guneaux Designs
by
Beverly Polen

Buy the Stampin Up Postage Due stamp set.  You’ll enjoy it!

Happy Labor Day

HAPPY LABOR DAY!!  I hope you enjoy your day celebrating Labor Day with friends and family.  Do you know why we celebrate Labor Day?  It’s a day of rest for “workers”.  Below  is some history about Labor Day.

The first Labor Day was held in 1882. Its origins stem from the desire of the Central Labor Union to create a holiday for workers. It became a federal holiday in 1894. It was originally intended that the day would be filled with a street parade to allow the public to appreciate the work of the trade and labor organizations. After the parade, a festival was to be held to amuse local workers and their families. In later years, prominent men and women held speeches. This is less common now, but is sometimes seen in election years. One of the reasons for choosing to celebrate this on the first Monday in September was to add a holiday in the long gap between Independence Day and Thanksgiving.”

happy labor day

Enjoy your day!!

Stamping With Guneaux Designs


Faux Patina Technique Featuring Stampin Up Tweet Leaves

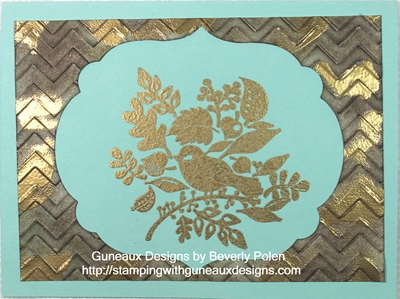
Have you created a card using the Faux Patina Technique?  Pull up a chair at your craft table, get out a few supplies (see below), and let’s make a card that uses the Faux Patina Technique and the Tweet Leaves Stamp Set from Stampin’ Up!  This is my first creation using the Faux Patina Technique, and I’m sure if I practice I’ll get better at it.  But for now, let’s try a simple card featuring the technique.  This is the card we’ll develop:

STAMPIN’ UP! SUPPLIES:

Stamp Set: Tweet Leaves (128111)

Paper:  Whisper White Card Stock (100730) and Pool Party Card Stock (122924)

Ink (Classic):  Crumb Cake (126975), Marina Mist (126962), Always Artichoke (126972), and Early Expresso (126974)

Accessories: Chevron Embossing Folder (127749), Labels Collection Framelits (125598),  Big Shot Die-Cutting Machine (113439), (Stamping Sponges (101610), VersaMark Ink (102283), Gold Embossing Powder (109129), and Heat Tool (129053)

INSTRUCTIONS:     Now let’s begin applying the Faux Patina Technique.

  • Cut a 5″ x 3-5/8″ piece of Whisper White Card Stock.
  • Center on the card stock the largest label from Labels Collection Framelits and run through the Big Shot on Tab 2.
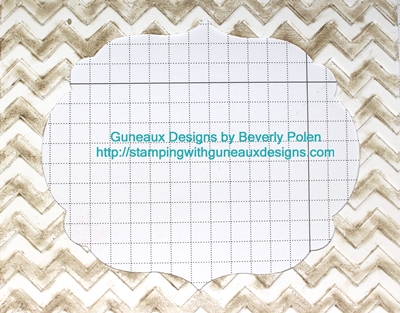
  • Lightly ink one side of the Chevron Embossing Folder with Crumb Cake ink, insert the card stock, and run it through the Big Shot on Tab 1.

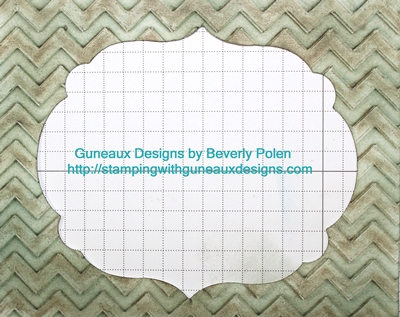
  •  Sponge Marina Mist ink over the embossed portion of the card stock.Faux Patina Technique
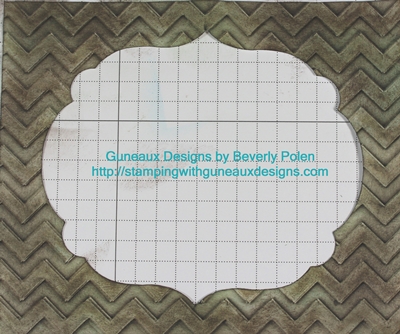
  • Sponge Always Artichoke ink over the Marina Mist ink.Sponge Early Expresso ink over the Always Artichoke ink.

  • Let the ink dry naturally or use a heat tool.
  • Randomly apply the edge of the VersaMark ink pad over the patina piece.  Do not completely cover the card stock with VersaMark.
  • Cover the patina piece with Gold Embossing Powder and heat set.

So, what do you think thus far about the Faux Patina Technique?  You can use other colors of ink of course if you desire.  Now, let’s create the card.

  • Cut an 8-1/2″ x 5-1/2″ piece of Pool Party card stock.
  • Fold the card stock in the center to form the card base.
  • Cover the Tweet Leaves stamp with VersaMark ink.
  • Stamp onto the card front, being careful to position the image on the card so the patina piece will be centered over the image.
  • Apply Gold Embossing Powder and heat set.
  • Attach the patina piece onto the card front centering it over the Tweet Leaves image.

You have just created a beautiful card using the Faux Patina Technique!  It will be interesting to try other color combinations for the technique.

God’s Blessings!

Stamping With Guneaux Designs

by

Beverly Polen

Have fun with the Faux Patina Technique!