Hello, my friends, and thanks for stopping by! It was early January that I shared the cards that I believed were the best ones I made for 2017. Today, I want to share with you the Splitcoaststampers (SCS) Best of 2017 Cards that I made. There are the 15 cards that made the list.
Category Archives: Cards – Other
Penny Black On The Lake
Penny Black On The Lake
I have for you today a card made with the Penny Black On The Lake stamp. Penny Black makes gorgeous stamps, and I have had this stamp for many months and not used it. I was not sure if I could make a nice card with it. I decided to take a chance and see what I could create with it. I think I made a beautiful card featuring the Penny Black On The Lake stamp.
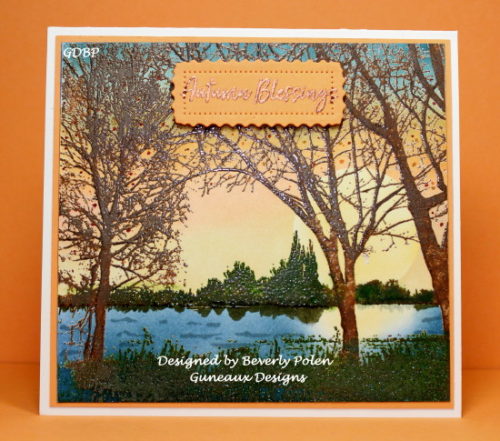
I wanted to use fall colors to create the card, so I used several Stampin’ Up!’s (SU) inks (i.e., pads and markers).
Luke 10:18-20
Jesus said: “I saw Satan fall like lightning from heaven. I have given you authority to trample on snakes and scorpions and to overcome all the power of the enemy: nothing will harm you. However, do not rejoice that the spirits submit to you, but rejoice that your names are written in heaven.”
ODBD Steampunk Gears
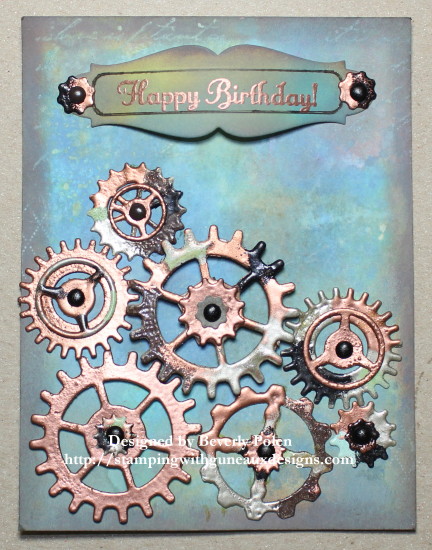
Today I have a card share for you, and it features the ODBD Steampunk Gears Dies. This card is not my typical artwork, and making it was out of my comfort zone. However, I wanted to make it for a Splitcoaststampers.com Dare To Get Dirty Challenge. Unfortunately, I cannot share the details of the Dare To Get Dirty Challenge per Splitcoaststampers.com. If you are a Club Member, you already know the details. If you are not, you can join Splitcoaststampers as a Club Member so you can participate in the challenges.
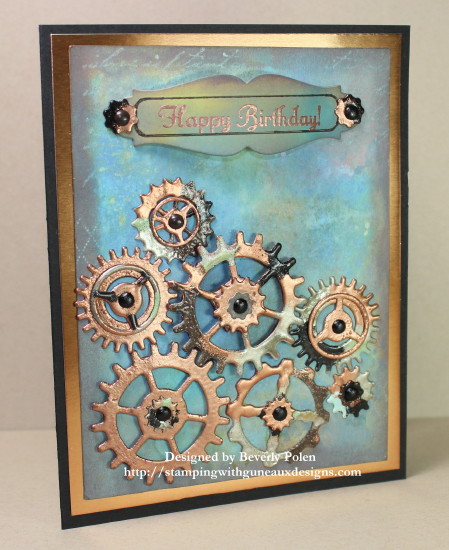
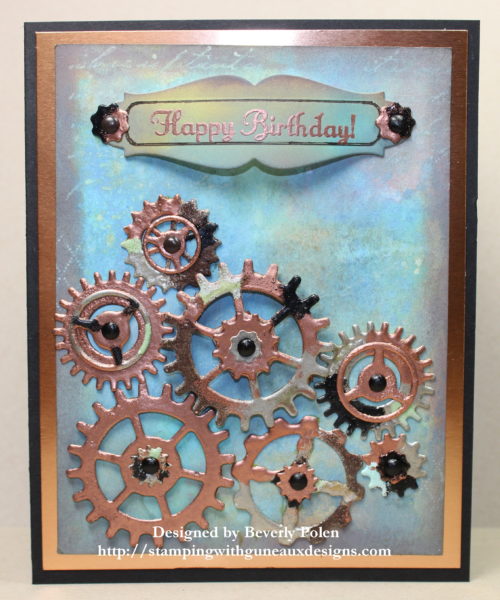
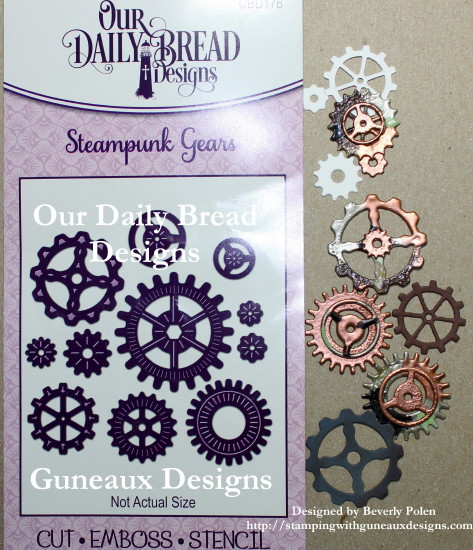
To create the card, I die cut the gears using the ODBD Steampunk Gears Dies. I covered the gears with VersaMark® Watermark Ink and embossed them with Copper, Green, Black, Pewter, and Yellow embossing powder. Then I attach two or more gears together with adhesive.
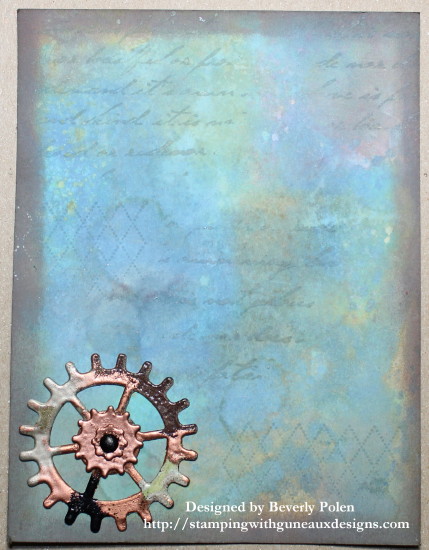
I sponged several Tim Holtz Distress Oxide Inks (e.g., blues, greens, yellow, brown, orange, etc.) onto a piece of Neenah Solar White Card Stock. I stamped over the sponged on ink some text and designs. Then I began adding the gears to the panel. On three sets of gears, I added one or two layers of foam tape. In addition to the foam tape, I attached the gear sets to the card stock with black brads.
After adding the gears, I added a sentiment. I attached it with two gears and black brads.
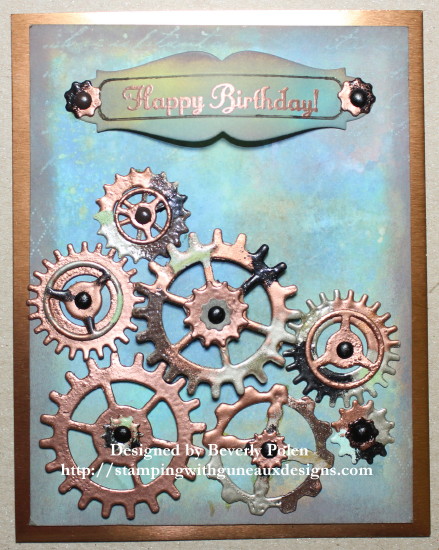
I cut a piece of copper foil and added it to the back of the above panel.
To finish the card, I cut an A2 piece of black card stock and added the above to the card base.
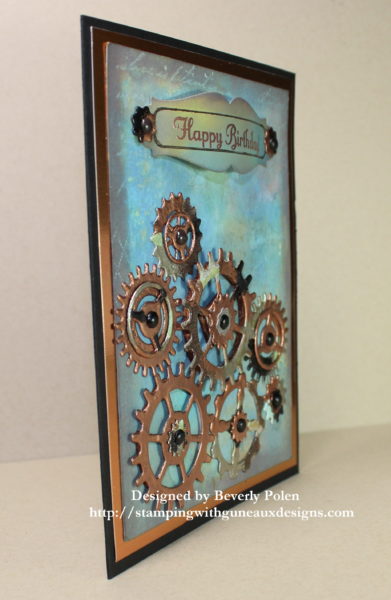
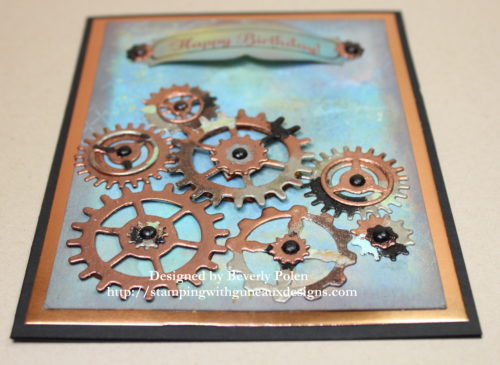
Considering I was out of my comfort zone making this card, please share how you think I did. Thanking you in advance for your comments.
Click on the links within this post to access the supplies I used.

God’s Blessings!
Stamping With Guneaux Designs By Beverly Polen
Firm Reliance on Divine Providence!
John 14:13 & 14
Jesus said, “And I will do whatever you ask in my name, so that the Son may bring glory to the Father. You may ask me for anything in my name, and I will do it.
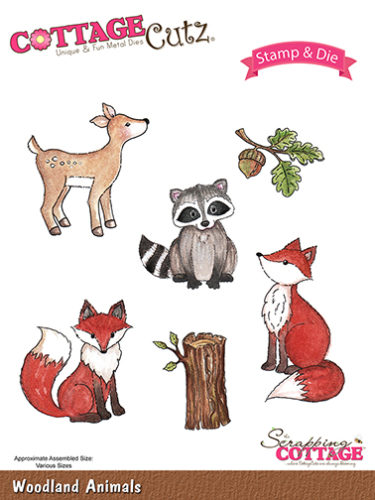
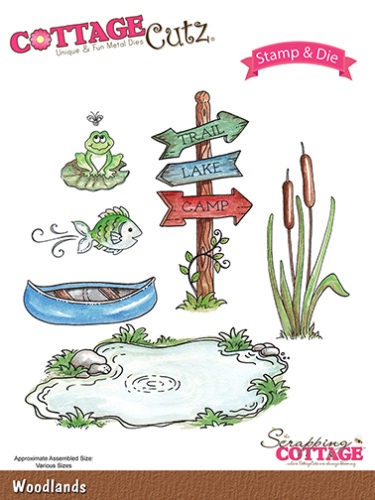
CottageCutz Woodlands & Woodland Animals
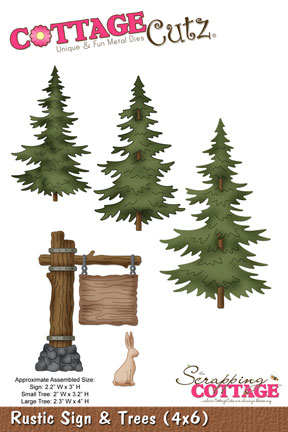
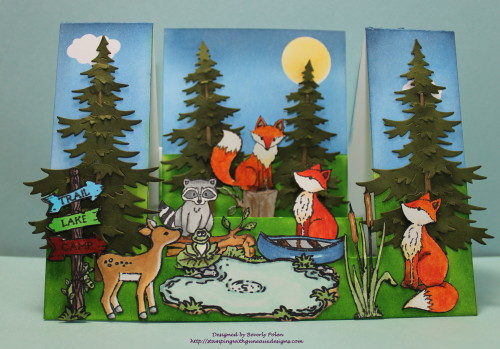
Hello, everyone! So glad you stopped by Guneaux Designs. Today I am a guest designer for the Scrapping Cottage blog. The project I have created for you features the wonderful stamps and dies from the CottageCutz Woodlands & Woodland Animals, and the dies from the Rustic Sign & Trees. I had so much fun creating this card, and I hope you enjoy it!
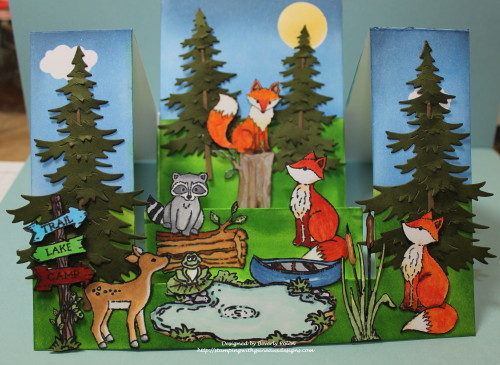
This photo shows the card more open than the one above.
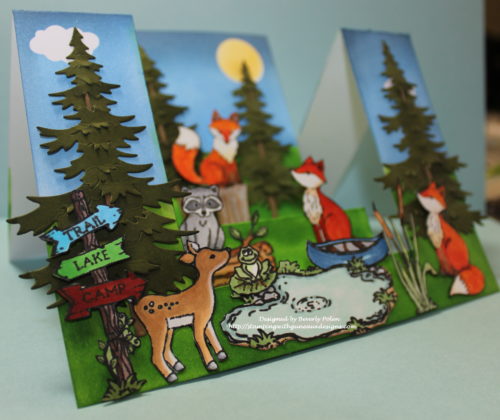
This photo shows the card at an angle
I love the gorgeous fox images and dies from the CottageCutz Woodland Animal Set; therefore, I had to add three foxes to my card. The little raccoon is so adorable that I planned to add two but there was not room on the card. If you have not purchased the set yet, I promise you will have so much fun creating with it and the CttageCutz Woodlands Set.
To create the card, I stamped, colored (with copics), and cut out the images I would use for the project.
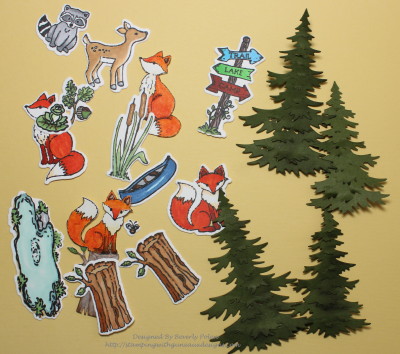
After die cutting the elements, I decided I wanted to fussy cut around them, which I did. Then I created a Step Ladder Center Cut Card with white card stock and sponged on it a sky, sun, and grass. It was then time to load up the card with the critters. What fun!!
If you would enjoy making a similar card, select the elements you want to showcase and color and die cut them. Then create the Step Ladder Center Cut Card by following these instructions.
- Cut a 7″ x 10″ piece of card stock.
- With the 7″ side at the top of a cutting tool (henceforth, trimmer), move the card stock to the left to the 1-5/8″ mark,
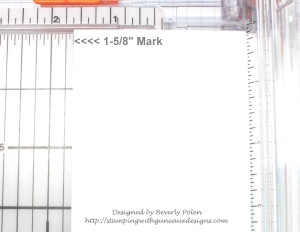
- Move the cutting blade of your trimmer down to the 1″ mark and lower the cutting arm.
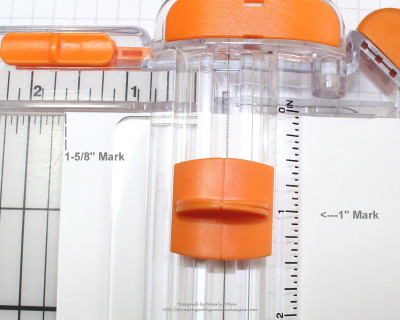
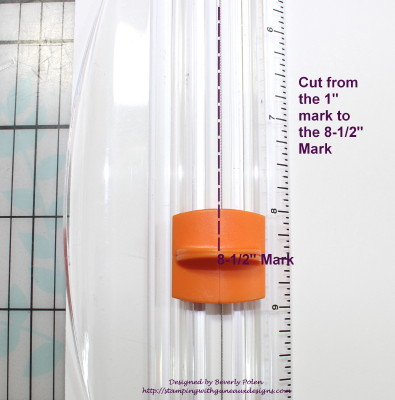
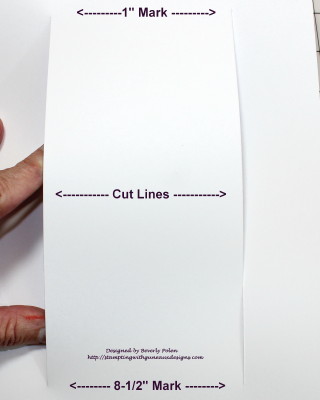
- Cut the paper from the 1″ mark to the 8-1/2″ mark.
- Turn the card stock over, (not around or the cut lines will not match), move it to the 1-5/8″ mark on the trimmer, move the cutting blade down to the 1″ mark, and lower the cutting arm.
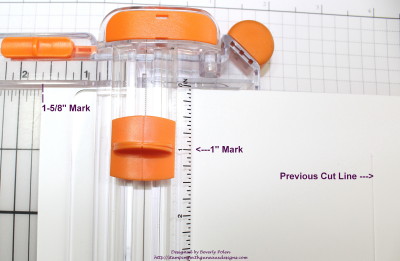
- Cut the card stock from the 1″ mark to the 8-1/2″ mark.

- Remove card stock from the trimmer, and it will look like the following. (NOTE: There is 1″ from the top of the 7″ side of the card stock to the first cut line, and 1-1/2″ from the cut line to the bottom.)
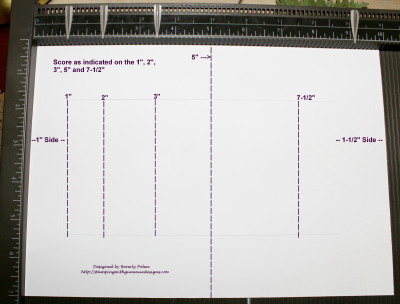
- Place the card stock onto a scoring tool with the 10″ side at the top, Ensure the 7″ side that is to the left on the scoring tool is the one that has cut lines 1″ from the side. Score at the 1″, 2″, and 3″ marks from the first cut line to the second cut line. Score at the 5″ mark from the top to the bottom of the card stock. Score at the 7-1/2″ from the first cut line to the second.
- Now fold the card stock according to the following: a) 1″ score line is a mountain fold, b) 2″ score line is a valley fold, c) 3″ score line is a mountain fold, d) 5″ score line is a mountain fold on the two sides and a valley fold in the center, and e) 7-1/2″ score line is a mountain fold.
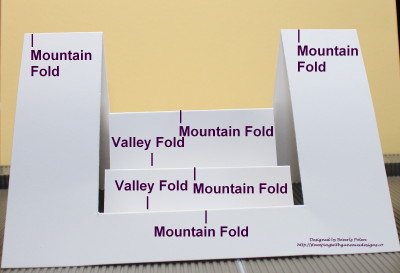
- Decorate the card to your liking. If desired and to support the elements placed on the back step (mountain fold) cut a 3-11/16″ x 4-7/8″ piece of card stock and attach it to the back step on which you can add your primary feature. I added this piece to my card. When the card is closed, this piece matches the two side folds at the top.

I hope you try this card fold and use the CottageCutz dies found at the Scrapping Cottage to showcase. Have a great day!
COTTAGECUTZ STAMPS AND DIES USED ON THIS PROJECT:
 God’s Blessings!
Stamping With Guneaux Designs By Beverly Polen
Firm Reliance on Divine Providence!
JOHN 11:25-26
Jesus said to her, “I am the resurrection and the life. He who believes in me will live, even though he dies; and whoever lives and believes in me will never die. Do you be believe this?”
Family Emergency

Unfortunately, I will be unable to post to my site for the next few weeks. As soon as possible, I’ll resume posting. Thanks for stopping by and supporting me! Your prayers are greatly appreciated!

God’s Blessings!
Stamping With Guneaux Designs By Beverly Polen
Jesus said: “But I tell you that men will have to give account on the day of judgment for ever careless word they have spoken. For by your words you will be acquitted, and by your words you will be condemned.” Mathew 12:36-37
Guneaux Designs August 2016 Gallery
Gallery
Click on a card to take you to the relative post. c

