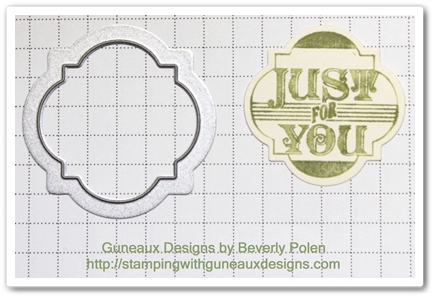
Stampin Up Tea for Two DSP and Secret Garden Stamp Set

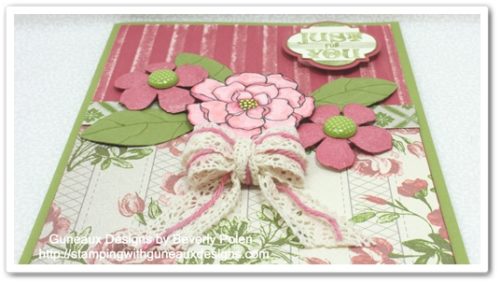
I love the floral design from the new Stampin Up Tea for Two Designer Series Paper (DSP).  Further, the Secret Garden Stamp Set is one of my favorites from the Stampin Up Spring 2013 Catalog along with the matching Secret Garden Framelits!
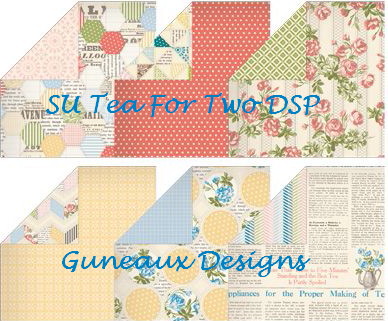
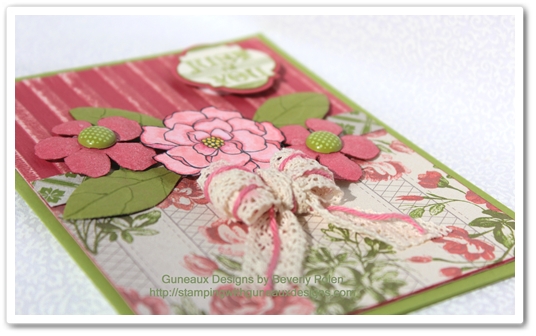
This is the card I made using the new products.  (FYI, there is a tool tip at the end of this post.)
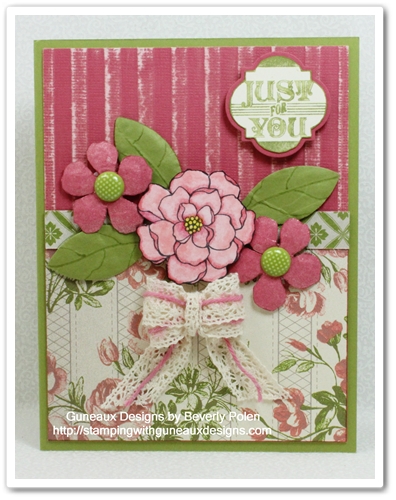
This picture is a closeup of the beautiful images from the Secret Garden Stamp Set.
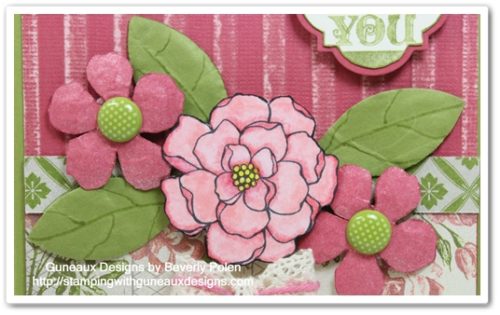
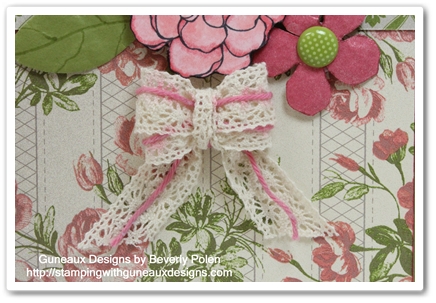
 This picture shows the bow I made while weaving in some baker’s twine.
___________________________________________________________________

SUPPLIES:

Stamp Sets:  Stampin Up Secret Garden and Friendship Preserves (for the sentiment)
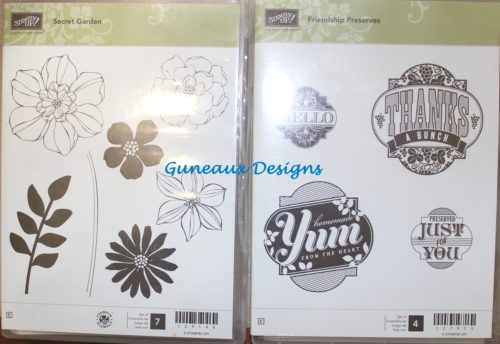
Paper:  Stampin Up Tea for Two DSP (129311), Primrose Petals Core’Dinations Card Stock (129322), Very Vanilla Card Stock (101650), Whisper White Card Stock (100730), and Lucky Limeade Card Stock (122926)

Ink:  Lucky Limeade (126984), Primrose Petals (126858), Daffodil Delight Marker (119677), Memento Tuxedo Black, and various non-Stampin Up Makers for the center flower.

Accessories:  Sanding Block (124304 – to sand the core’dinations card stock), Stripes Textured Embossing Folder (123128), Blossom Punch (125603  –  for leaves), Secret Garden Framelits (129372 or 131099 for the Secret Garden Bundle – clear mount), In Color Printed Designer Brads (122940), 5/8″ Crochet Trim (118481), Whisper White Baker’s Twine (124262 – soaked in a water and Primrose Petals Ink mixture)

TOOL TIP:  When cutting with any of the Stampin’ Up! framelits, a mat is created around the image being cut out.  The color of the mat is the same color as the card stock on which the image is stamped.  You can choose to use a framelit that is  the next size up to create a mat of a different color of card stock; however, I believe this process makes the mat too large.  To get a perfect mat of a different color of card stock that is a reasonable size, try this tip:

  • Cut out your image with a framelit,
  • Cut around the edge of the image using paper snips to leave only the outline of the stamp image,
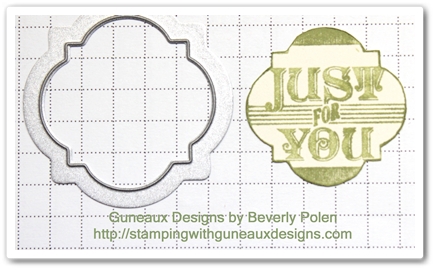
  • Cut a mat from a different color of card stock, using the same framelit.
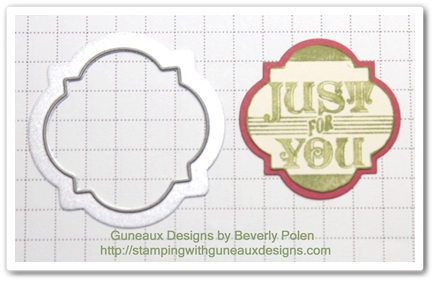
  • Now you have a perfect mat of a different color and a small size!

God’s Blessings!
Stamping With Guneaux Designs
by
Beverly polen
Stampin Up Tea for Two DSP and Secret Garden Stamp Set

Scentsational Season Stamp Set – Christmas Card

I don’t drink coffee or hot chocolate but I love the steaming cup stamp image from the Scentsational Season stamp set (121190).  And the snowflake on the cup goes perfectly with a Christmas card featuring snowflakes! 

Scentsational Season Stamp Set

The card’s snowflakes were punched out with a non-Stampin’ Up! punch.  I thought it matched so perfectly the snowflake on the stamp image.  The miniature snowflakes from the punch outs were used for the steam coming up from the cup. 

Also featured on the Christmas card is the “Merry Christmas” stamp image from the Stampin’ Up! Greetings of the Season stamp set.  The following are additional pictures of the card.

 Scentsational Season Christmas Card

 Scentsational Season Christmas Card

Supplies (and Stampin’ Up! item numbers) used to make the Scentsational Season  Christmas Card:

 Stamp Sets:  Scentsational Season (121190) and Greetings of the Season (128033)

Paper: Whisper White Card Stock (100730) and Bashful Blue Card Stock (105120)

Ink:  Bashful Blue Classic Ink (126961), Soft Suede Stampin’ Write Marker (comes in a group 8 different colors – 119703), and VersaMark Ink or Pen

Accessories:  Snow Burst Embossing Folder (retired), Crystal Effects (101055), Heat and Stick Powder (100625), Dazzling Diamonds Stampin’ Glitter (102023), VersaMark Ink Pad or Pen, Heat Tool, Dimensionals Adhesive (104430) (or other foam adhesive circles), and 3/16″ Corner Punch (119871)

The Scentsational Season Christmas card is very easy to make and you can make it too by following these instructions:

  • Cut an 8-1/2″ x 5-1/2″ piece of Whisper White Card Stock (or other white card stock) and fold in the center to form a card base.
  • Cut another piece at  2-1/4″ x 4-1/2″.
  • Cut two 4″ x 5-1/4″ pieces of Bashful Blue Card Stock.
  • Using a snowflake punch, cut out three snowflakes on the left side of both Bashful Blue Card Stock pieces.
  • On one Bashful Blue Card Stock piece, apply VersaMark Ink on the snowflakes and cover them with the Heat and Stick Powder.  Heat set.
  • Cover the snowflakes with Dazzling Diamonds Glitter and heat set.
  • Slip the right side of this piece into the Snow Burst Embossing Folder and run through a die-cutting machine.
  • Cover with Bashful Blue Classic Ink the cup image from the Scentsational Season Stamp Set and stamp it onto the lower part of the 2-1/4″ x 4-1/2″ piece of Whisper White Card Stock.  **Before stamping the image, remove the ink around the rim and cover with Soft Suede ink (Stampin’ Write Marker). 
  • Apply Crystal Effects and let dry.
  • After drying, cover with Bashful Blue ink the “Merry Christmas” sentiment from the Greetings of the Season set and stamp onto the card stock (use a Stamp-a-ma-jig for proper placement).
  • Using foam adhesive circles, adhere onto the Bashful Blue card stock (see picture).
  • Attach to the Whisper White card front.
  • Attach the second Bashful Blue snowflake punched piece of card stock to the inside of the card.
  • Finished!
God’s Blessings!
Stamping With Guneaux Designs
by
Beverly Polen 

Enjoy making your Scentsational Season Christmas Card! 

Fall Scrapbook Page

This one-page fall scrapbook page features one of my favorite designer series paper, the Autumn Spice, which retired  a while back.  However, if you have Stampin’ Up!’s My Digital Studio (MDS) and have download the Autumn Spice Digital Kit, you can create this page with no problem.

Fall Scrapbook Page

SUPPLIES:

My Digital Studio (MDS) and its Autumn Spice Digital Kit (122175)

Autumn Spice Digital Kit -- Digital Download

Stamp Sets: Day of Gratitude (121148 – c), Lovely Letters Alphabet (127796 – c)

Ink (classic and markers): Cajun Craze, More Mustard, Old Olive, and Early Espresso

Paper: More Mustard Card Stock (100946), Cajun Craze Card Stock (119684), Old Olive Card Stock (100702), and Early Espresso Card Stock (119686)

Accessories: Big Shot Die-Cutting Machine (113439), Tasteful Trim Bigz XL Die 120893), Petite Pennants Builders Punch (122361), Petite Pennants Builder Punch (122361), Early Espresso Baker’s Twine (123124), and Brads of your choice

INSTRUCTIONS FOR MAKING THE FALL SCRAPBOOK PAGE:

  • Cut an 8″ x 8″ piece of More Mustard Card Stock.
  • Print onto Very Vanilla Card Stock one copy of the following design from the MDS Autumn Spice Digital Kit:

Autumn Spice Digital Kit

  • Cut two 8″ x 1″ pieces of the design that you just printed, ensuring the cut has the leaves flowing from top to bottom. (Obviously, if you have the original card stock you won’t need MDS to print a copy.)
  • Lay one piece of the design onto the scallop side of the Tasteful Trim die and run through the Big Shot. (Insure the card stock is oriented correctly so the scallops will be on the right side.)
  • Lay the second piece of the design onto the scallop side of the Tasteful Trim die and run through the Big Shot. (Insure the card stock is oriented correctly so the scallops will be on the left side.)
  • Attach one of the scallop pieces onto the right side of the 8″ square piece of More Mustard Card Stock, and the other on the left. (Insure correct orientation.)
  • Punch a small hole in the two corners at the top of the card stock.
  • Insert a piece of Early Espresso Baker’s Twine through the holes, allowing the twine to hand down slightly. Tie knots in the ends of the twine.
  • Using the Petite Pennants Builder Punch, punch out one set of pennants each from the printed Autumn Spice Card Stock, Cajun Craze Card Stock, Old Olive Card Stock, and Early Espresso Card Stock.

Petite Pennants Builder Punch - by Stampin' Up!

  • Adhere these pieces together (see picture).
  • Using the Broadsheet Alphabet Stamp Set (or other), stamp the letters F A L Lonto Very Vanilla Card Stock using Cajun Craze, Old Olive, More Mustard, and/or Early Espresso Ink.
  • Cut out the letters and attached them in order onto the pennants.

Lovely Letters Alphabet Clear-Mount Stamp Set

  • Punch a small hole at the top-center of each pennant.
  • Insert a brad (your choice).
  • Wrap a small piece of Early Espresso Baker’s Twine around each brad and tie into a bow.
  • Adhere each pennant along the Early Espresso Baker’s Twine that was inserted at the top.
  • Cut a photo mat to fit the size of your photo and adhere to the page.
  • Cover with a matching ink the leaf stamp from the Day of Gratitude stamp set (see picture), stamp the image onto Very Vanilla Card Stock, and cut out the leaf.
  • Repeat for a second leaf.
  • Using dimensionals, adhere the leaves onto the two corners of the photo mat.
  • Cover with ink the acorn stamp from the same stamp set, stamp the image onto Very Vanilla Card Stock, and cut it out.
  • Repeat for a second acorn.
  • Adhere the acorns adjacent to the leaves.

Day of Gratitude - Clear-Mount Stamp Set - by Stampin' Up!

NOTE: This scrapbook page can very easily be expanded to a 12″ x 12″ page. You may want to give that a try as well.

Fall Scrapbook Page

Fall Scrapbook PageFall Scrapbook Page

 Fall Scrapbook Page

 Click to Buy Stampin' Up! Products

God’s Blessings!
Stamping With Guneaux Designs
by
Beverly Polen


Enjoy making your fall scrapbook page!

Stampin Up Single Stamps

I am so excited to share with you an opportunity to buy Stampin Up single stamps!  What do I mean by Stampin Up single stamps?  I mean single stamps from Stampin’ Up! stamp sets.  That’s right – from stamp sets {jumping up and down}.  This is a new Stampin’ Up! pilot program that last from now until January 2, 2013.  

These are the THREE stamp sets from which you can buy single stamps:   

(UPDATE:  TEN NEW STAMPS HAVE BEEN ADDED {10-29} – SEE BELOW) 

  Stampin' Up! Single Stamps Word Play

Stampin' Up! Single Stamps from Word Play

Stampin’ Up! Single Stamps – Word Play

           Price                              Item Number             Stamp            Clear Block Needed

$4.95 US

$6.25 CA

132294

Sick

Block C

$4.95 US

$6.25 CA

132295

I Do

Block C

$5.95 US

$7.50 CA

132296

Laughter

Block D

$4.95 US

$6.25 CA

132297

Wish Big

Block C

$6.95 US

$8.95 CA

132298

In My Thoughts

Block H

$5.95 US

$7.50 CA

132299

You Mean the World

Block D

$4.95 US

$6.25 CA

132300

Worth the Wait

Block C

$4.95 US

$6.25 CA

132301

Imagine

Block D

$6.95 US

$8.95 CA

132302

Remember When

Block I

$4.95 US

$6.25 CA

132303

Joy

Block C

$6.95US

$8.95 CA

132304

Dreams

Block E

$4.95 US

$6.25 CA

132305

Thanks a Million

Block D

Stampin' Up! Single Stamps Perfectly Penned

Stampin' Up! Single Stamps from Perfectly Penned

Stampin’ Up! Single Stamps – Perfectly Penned

          Price                         Item Number             Stamp          Clear Block Needed

$4.95 US 

$6.25 CA

132306

Thank You

Block D

$4.95 US

$6.25 CA

132308

Get Well

Block C 

$5.95 US

$7.50CA

132307

Celebrate Today

Block H 

$5.95 US

$7.50 CA

132309

Happy Birthday

Block H

Stampin' Up! Single Stamps - Seasonal Sayings


 Stampin' Up! Single Stamps - Seasonal Sayings


$5.95 US

 $7.50 CA

132310

Christmas

Block H

 $5.95US

 $7.50CA

132311

Halloween

Block H

 $5.95US

 $7.50 CA

132312 

Thanks

Block H

 $4.95US

 $6.25CA

132313

Love

Block D

 $5.95US

 $7.50CA

132314

Celebrate

Block H

 DETAILS:

  • To be taken directly to the individual stamps, click on any of the above relative pictures.
  • This offer is available for clear-mount stamps only.These stamps are available on any order type – customer, demonstrator, workshop, or online.
  • The Stampin’ Up! single stamps will be packaged in cello bags. If you’d like a case for your stamp, you can buy the Clear-Mount Stamp Cases  (119105) that come in packs of four.
  • The stamps will NOT come with a Clear-Mount Block, and you’ll need to buy a block separately if you don’t already have one. The recommended block sizes in the above charts.
  • There is no limit on how many single stamps you can buy from the selected stamp sets.

10-29-2012 UPDATE:  TEN NEW STAMPS HAVE BEEN ADDED TO THE LIST OF SINGLE STAMPS THAT YOU CAN PURCHASE.  THREE OF THE STAMPS HAVE NEVER BEEN SEEN BEFORE (click on below links to see them)! 

Assortment 1 (includes 5 new stamps)

Assortment 2 (includes 5 stamps including the three never-been-seen-before stamps)

Click to Buy Stampin' Up! Products

 God’s Blessings!
Stamping With Guneaux Designs
by
Beverly Polen
 

Remember this is a pilot program, so take advantage of it while you can.

Stampin Up Flowering Flourishes – Thank You Card

Don’t you just love the Flowering Flourishes Stamp Set on page 121 of the Stampin’ Up! Annual Catalog?  Today’s card share is a quick and easy one that features the Flowering Flourishes Stamp Set.  The large stamp from from the set was used on the upper-left corner of the card, and the smallest stamp from the set was used on the lower-right of the card.

Notice that I used a Designer Series Fabric on the left side of the card.  I encourage you to think outside of the box and put fabric on your cards and scrapbook pages. Flowering Flourishes

 Flowering Flourishes


 Flowering Flourishes


 Stampin’ Up! Products:

Stamp Sets:  Flowering Flourishes (126367 – c) and Curly Cute (120510 – c)

Paper:  Whisper White Card Stock (100730) and Tempting Turquoise (102067)

Ink:  Wisteria Wonder Classic Pad (126985), Wisteria Wonder Stampin’ Write Marker (123002), Tempting Turquoise Classic Pad (126952), and Tempting Turquoise Stampin’ Write Marker (119702)

Accessories:  Wisteria Wonder Flirtatious Designer Fabric (122335), Wisteria Wonder 3/8″ Ruffled Ribbon (122973), Tempting Turquoise Brights Designer Button (119747), White Baker’s Twine (124262), 3/16″ Corner Punch (119871), and Stamp-A-Ma-Jig (101049)

Buy Stampin Up Products

Instructions:

  • Cut an 8-1/2″ x 5-1/2″ piece of Tempting Turquoise Card Stock and fold in the middle to create the card base.
  • Cut a 5-1/4″ x 4″ piece of Whisper White Card Stock. 
  • Cover with Wisteria Wonder Ink the large floral stamp in the stamp set.
  • Stamp the image on the upper-left corner of the 5-1/4″ side of the Whisper White Card Stock.
  • Cover with Wisteria Wonder Ink the flower at the top of the smallest stamp in the stamp set.
  • Stamp the image on the lower-right corner of the Whisper White Card Stock.
  • Cut a 1″ x 4″ piece of the Wisteria Wonder Flirtatious Designer Fabric.
  • Unravel both sides of the fabric piece along the 4″ side.Flirtatious Fabric
  • Add adhesive to the fabric and adhere it to the left side of the Whisper White Card Stock.
  • Cut a 2-3/4″ piece of the Wisteria Wonder 3/8″ Ruffled Ribbon, cut a “V” at one end, and attach it down the side of the fabric.
  • Thread and knot a piece of White Baker’s Twine into the Tempting Turquoise Designer Button and attach on top of the ribbon.
  • Cover the “Thank You” stamp from the Curly Cute stamp set with Tempting Turquoise ink and stamp the image on the lower right side of the Whisper White Card Stock.
  • Reink the stamp and stamp the image onto the smooth side of the plastic that comes with the Stamp-A-Ma-Jig.
  • Turn the plastic with the image upside down, line it up with the previously “Thank You” image, and lay it onto the cardstock and rub the back side to transfer the ink.
  • Using a ruler and the Wisteria Wonder Stampin’ Write Marker, draw a line between the two “Thank You” images. (see picture)
  • At the end of the line, add three, small Tempting Turquoise circles.
  • Using the 3/16 Corner Punch, cut the top and bottom corners on the right side of the Whisper White Card Stock
  • Attach the decorated Whisper White Card Stock to the card base. 
God’s Blessings!
Stamping With Guneaux Designs
by
Beverly Polen

Enjoy your Flowering Flourishes Stamp Set!

How to Make Paper Poinsettias

I have for you today a beautiful card featuring paper poinsettias.  In this post, I’ll share how to make paper poinsettias, but first I’ll provide information on the card. 

Paper Poinsettias

The card base is a piece of 8-1/2″ x 5-1/2″ Cherry Cobbler Card Stock (119685), folded in half.  I used the snowflake design from the Be of Good Cheer Designer Series Paper (DSP) (126896) for the first layer on the card. 

Be of Good Cheer Designer Series Paper

The second and third layers were made with the Labels Collection Framelits (125598), Cherry Cobbler Card Stock, and Gumball Green Card Stock (126840).  Each “label” was embossed with the Snow Burst Embossing Folder (retired), which goes so well with the snowflake design in the DSP.

  Paper Poinsettias

paper poinsettias

 HOW TO MAKE PAPER POINSETTIAS TUTORIAL

Supplies Needed:  Blossom Petals Builder Punch (121808), Boho Blossoms Punch (119858), Cherry Cobbler Card Stock (119685), Gumball Green Card Stock (126840), Tombow Multipurpose Liquid Glue(110755), Vanilla Shimmer Smooch Spritz (118772), and Dazzling Diamonds Glitter (102023)

A.  Cutting Petals, Leaves, and Flowers

1.  Punch out six Cherry Cobbler large petals and six of the smaller petals with the Blossom Petals Builder Punch.  

2.  Punch out two Cherry Cobbler flowers from the Boho Blossoms Punch. (See the below picture for which petals and flower to punch – picture doesn’t show the second flower from the Boho Blossoms Punch). 

Paper Poinsettias

3.  Punch out three Gumball Green large petals and three of the smaller petal from the Blossom Petals Builder Punch, and two of the flower (same as above) from the Boho Blossoms Punch.

Paper Poinsettias

4.  Cut out two Summer Starfruit flowers (see picture) with the Boho Blossoms Punch.

Paper Poinsettias

5.  Use a stylus to create veins in the leaves and petals.  

B.  Shaping the Petals, Leaves, and Flowers

1.  Use a rounded top tool (e.g., tip of an artist paint brush handle, top of a piercing tool, etc.) and a  piercing mat or mouse pad to create “cupping” of the leaves, petals, and flowers.  To do this, place a leaf, petal, or flower (henceforth, cutout(s)) onto the mat/pad, press down on the cutout with the rounded top tool while moving the tool in a circular motion around the cutout.  This will cause the cutout to cup upwards.  Repeat this for all pieces.  (See the two pictures below).

paper poinsettias

 Paper Poinsettias

Paper Poinsettias

2.  Use a small paint brush handle or other small round tool to turn down the two sides of each petal and leaf and turn up the pointed end of each.  Pinch the bottom together of each.  (I really like how these items get a shine to them from this process.)

Paper Poinsettias

3.  Leave the flowers cupped upward.  The Summer Starfruit flowers need to be cupped more so than the others.

Paper Poinsettias

Paper Poinsettias


C.  Assemble the Paper Poinsettia Leaves

1.  Apply Tombow glue to one petal of the Boho Blossoms flower and attach one poinsettia petal.

Paper Poinsettias

2.  Turn the glued cutouts over and ensure the petal is lined up with the tip of the flower’s petal. Paper Poinsettias

3. Add glue to another petal of the Boho Blossoms flower and attach the smaller poinsettia petal.

4.  Continue Step 3, alternating the sizes of the poinsettia petals, until there are three large and three small petals adhered to the Boho Blossoms flower.

5.  Follow Steps 3 and 4 until you have two Cherry Cobbler flowers and one Gumball Green leaves. Paper Poinsettias

 6.  Using Tombow glue, adhere one Cherry Cobbler flower on top of the Gumball Green leaves, aligning a large petal over a small leaf.

Paper Poinsettias

7.  Adhere on top of the Cherry Cobbler flower the second Cherry Cobbler flower.

8.  Adhere the second Gumball Green Boho Blossom flower on top of the Cherry Cobbler flower.

Paper Poinsettias

9.  Spritz the paper poinsettia with Vanilla Shimmer Smooch Spritz.

10.  Squeez the two Summer Starfruit flowers together and glue one on top of the other.

11.  Glue the Summer Starfruit flowers on top of the Gumball Green flower.

12. Touch the petals of the Summer Starfruit flowers with glue and sprinkle on Dazzling Diamonds Glitter.

Paper Poinsettias

Enjoy making paper poinsettias!

Buy Stampin Up Products

 
God’s Blessings!
Stamping With Guneaux Designs
by
Beverly Polen