Label Love Stamp Set

Hi, my friends.  I am really enjoying my time with my special friend, Melody, who is visiting from N. Virginia.  We are having fun and eating a lot (lol)!  I decided I needed to take time to share a card I made that spotlights the Stampin’ Up! Label Love Stamp Set.

Label Love Stamp Set

I love the new Coastal Cabana Card Stock from Stampin’ Up!.  It goes well with so many colors, such as Crushed Curry, which is the second color for this card.

Label of Love Stamp Set

What do you think of the new Stampin’ Up! Deco Labels Framelits?  I love them.  I used the largest framelit (4-1/8″ x 3-5/8″) to create the primary element for the card.  This label is made with Coastal Cabana Card Stock, Coastal Cabana Designer Series Paper, and Crushed Curry Designer Series Paper.

Also on the Deco Label are two cutouts made with one of the Stampin’ Up! Finishing Touches Edgelits.  Additional embellishments are the basic pearls that rest upon the framelit and the two butterflies.  The Polka Dot Crushed Curry Ribbon is an old Stampin’ Up! ribbon that matches perfectly with the polka dot elements on the card.  Resting on the ribbon is the “Just for You” sentiment from the Stampin’ Up! Label Love Stamp Set.  After cutting out the label with the Artisan Label Punch, I cut off the top and bottom.

 Label Love Stamp Set

TOGETHER WITH THE STAMPIN’ UP! LABEL LOVE STAMP SET, OTHER SUPPLIES USED ARE: 

Stamps:  Stampin’ Up! Label Love Stamp Set (130622)

Paper:  Coastal Cabana Card Stock (131297), Crush Curry Card Stock (131199), Coastal Cabana Designer Series Paper (2013-2015 In-Color Designer Seris Paper Stack – 130136), and Crushed Curry Designer Series Paper (Regals Designer Series Paper – 130139)

Ink:  Costal Cabana Classic Ink (131175)

Accessories:  Stampin’ Up! Deco Labels Framelits (130102), Finishing Touches Edgelits (127010), Elegant Butterfly Punch (127526), Bitty Butterfly Punch (129406), Artisan Label Punch (130920) Basic Pearls (119247), and a matching Crushed Curry Polka Dot Ribbon (retired)

Label Love Stamp Set

 I hope you enjoy the card, and have a wonderful weekend.  I know I sure will!


 God’s Blessings!
Stamping With Guneaux Desings
By
Beverly Polen 

Label Love Stamp Set

STAMPIN’ UP! LABEL LOVE STAMP SET

Envelope Punch Board Stampin’ Up!

Envelope Punch Board - Stampin' Up!

I know you must have heard about it, and now it is available to order!  What is it?  It is Stampin’ Up!’s new Envelope Punch Board

STAMPIN’ UP! ENVELOPE PUNCH BOARD FEATURES:

  • It creates totally customizable envelopes in up to 66 different sizes (not to mention a million different color and pattern options depending on the paper you want to use). Even tried and true envelope sizes will only take you moments to create!
  • It’s super easy to use: It looks intimidating at first glance, but when you see all you have to do is measure for the first punch and from there you just turn and score.
  • It’s small and lightweight:  This makes it easy for you to take it with you when attending classes and club meetings. It is super portable and easy to store. It is small and light enough that you could use it while watching a soccer match, at a park, at a friend’s for craft night-anywhere.
  • It even has a slick scoring tool as well as a punch that lets you create rounded corners on your envelopes.
  • It’s easy to keep it all together:   The stylus storage compartment and two punches are designed into the tool so you don’t have a bunch of little pieces to keep track of (even the instructions are printed right on the tool so you won’t lose them!).
  • The price is terrific-especially for a tool that does so much!  It costs $19.95 (item number 133774)
  • It will be in next year’s annual catalog, so it’s here to stay.
 

Check out this Stampin’ Up! video about the Envelope Punch Board

I cannot wait to get mine!

God’s Blessings!
Stamping With Guneaux Designs
By
Beverly Polen

STAMPIN’ UP! ENVELOPE PUNCH BOARD

Loving Thoughts Sympathy Card

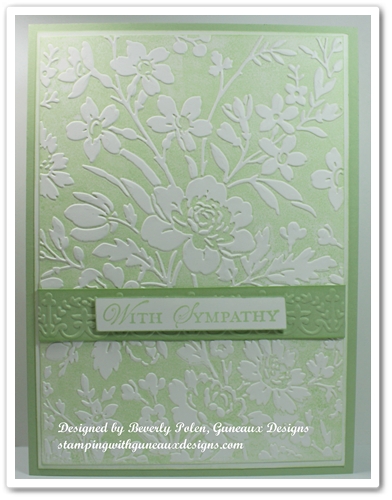
This Loving Thoughts Sympathy Card is a quick and easy handmade card.  It is simply made with card stock and ink.

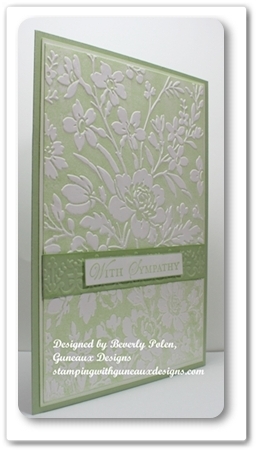
The card base is made from Stampin’ Up!’s new Pistachio Pudding Card Stock (131294).  The first layer is made with dry embossing on a piece of Whisper White Card Stock.  The embossing folder is an Anna Griffin Cuttlebug folder named, Wildflower Gate.  I used a brayer to roll Pistachio Pudding Classic Ink onto the negative side of the embossing folder, placed the piece of Whisper White Card Stock inside the folder, and ran it through the Big Shot Die Cutting Machine.

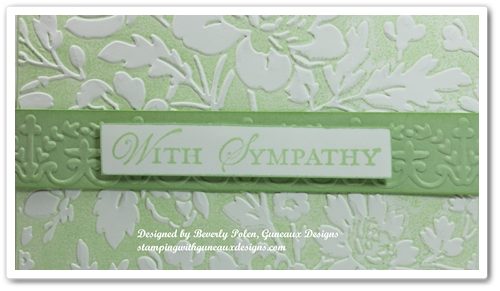
The embossing folder has a matching embossing banner.  It was used on the small piece of Pistachio Pudding Card Stock upon which the sentiment rests.  The sentiment is from the Stampin’ Up! Loving Thoughts stamp set.

Enjoy your day!

God’s Blessings!
Stamping With Guneaux Designs
by
Beverly Polen

LOVING THOUGHTS SYMPATHY CARD

Stampin Up 4th of July Card – Courage

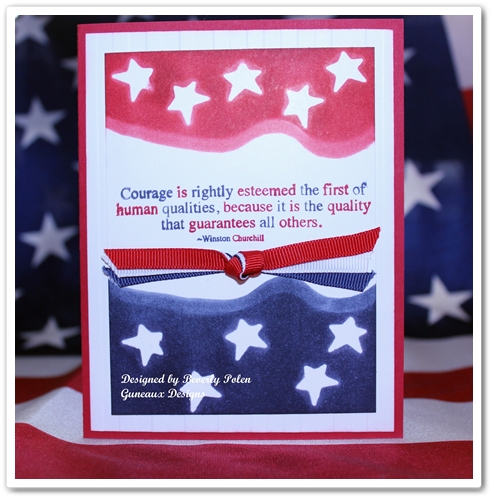
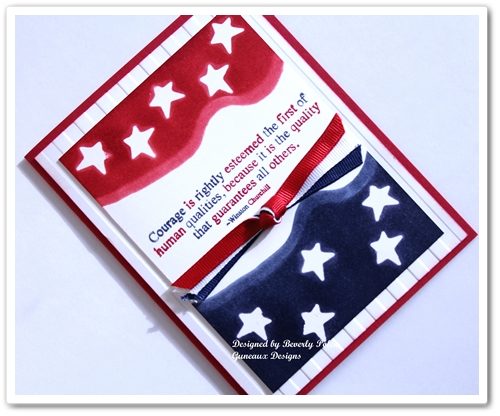
Hey, Stampers!  I have for you today a Stampin Up 4th of July card.  I love the meaning of July 4th and the “Stars and Strips”.  My card is based on my love of our American Flag, therefore, I call it Stars and Strips.

This Stampin Up 4th of July card is so easy to make.  For the top layer, I used an old Sizzix die to cut out stars.  I temporarily adhered them to the top and bottom of a 3-3/4″ x 5″ piece of Whisper White card stock.  I left a white space in the center for the sentiment.  I then used a brayer to add Real Red and Night of Navy Classic Ink over the stars and on the card’s top and bottom.  After the ink dried, I removed the temporary stars and I had white stars remaining in the red and blue areas.

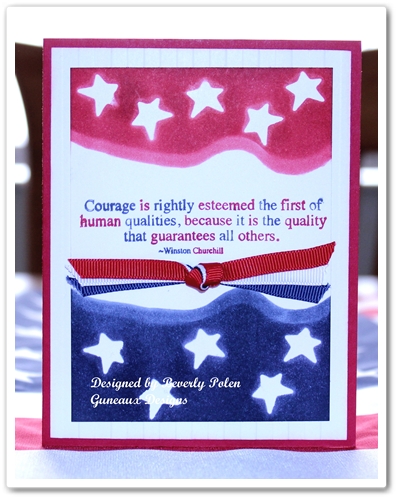
The picture below shows the “strips”, which were created with the Stampin’ Up! Stripes Embossing Folder.

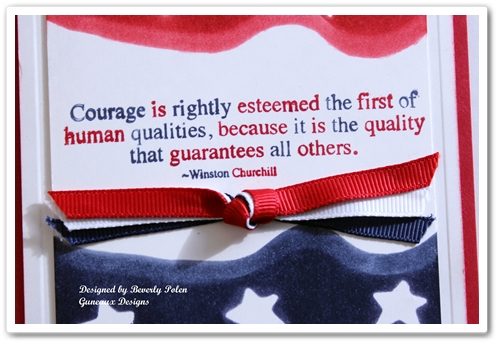
The sentiment in the center of the card front is from the retired Stampin’ Up! Courage stamp set.  I was so disappointed that this stamp set was retired!  The following picture provides a closeup of the sentiment.

Also in the center of the card is ribbon tied into a knot.  It was made with old Stampin’ Up! Real Red, Night of Navy, and Whisper White grosgrain ribbon.


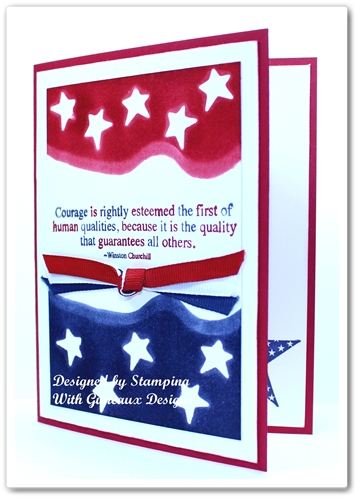
In the picture to the left, you can barely see a Night of Navy star at the bottom, right of the card’s inside.  I used a stamp from the retired Stampin’ Up! July Fourth stamp set for the star.

I hope you enjoy the card.  The 4th of July is right around the corner and I wish you a blessed July 4th.


 God’s Blessings!
Stamping With Guneaux Designs
by
Beverly Polen

STAMPIN UP 4TH OF JULY CARD – COURAGE

Stampin Up Morning Meadow Hostess Stamp Set

I have for you a quick and simple Thank You card that you can create in about ten minutes. The card features the new Stampin’ Up! Morning Meadow Hostess Stamp Set that can be purchased for $10 with a qualifying order.

Stampin Up Morning Meadow Hostess Stamp Set

Supplies for the Stampin Up Morning Meadow Hostess Stamp Set Thank You Card:

Stamp Set: Stampin Up Morning Meadow Hostess Stamp Set (129678)

Stampin Up Morning Meadow Hostess Stamp Set

Paper: Crisp Cantaloupe Card Stock (131298), Baked Brown Sugar Card Stock (131296), and Whisper White Card Stock (100730)

Ink: Crisp Cantaloupe Classic Ink (131176) and Baked Brown Sugar Classic Ink (131174)

Accessories: Apothecary Accents Framelits (127003), Pearl Basic Jewels (119247), Stamping Sponges (101610), and Adhesive of your choice

Stampin Up Morning Meadow Hostess Stamp Set

Instructions for the Stampin Up Morning Meadow Hostess Stamp Set Thank You Card:

1. Cut an 8-1/2″ x 5-1/2″ piece of Crisp Cantaloupe card stock and fold in the middle for the card base.

2. Cut a 5-1/4″ x 4″ piece of Baked Brown Sugar card stock and sponge the edges with matching ink.

3. With the small rectangle accent from the Apothecary Accents Framelits, cut an accent from Crisp Cantaloupe Card Stock. Sponge the edges with matching ink.

4. Lay the rectangle accent on a small piece of Whisper White Card Stock and trace along the INSIDE of the accent. Cut out the accent and stamp on it the sentiment, “Thank You”, in Baked Brown Sugar Classic Ink (the sentiment is also from the Morning Meadow Hostess Stamp Set). Sponge the edges with Crisp Cantaloupe Classic Ink.

5. Lay the rectangle accent onto a small piece of Baked Brown Sugar Card Stock and trace along the OUTSIDE of the accent. Cut out the accent and sponge it with matching ink.

6. Cut a 5″ x 3-3/4″ piece of Whisper White Card Stock. Ink the floral stamp from the Morning Meadow Hostess Stamp Set with Crisp Cantaloupe Classic Ink. Randomly stamp the image around the edges of the card stock (I stamped the image twice before re-inking). Sponge the edges with Crisp Cantaloupe Classic Ink.

7. Adhere the Baked Brown Sugar Card Stock to the card base.

8. Adhere the Whisper White Card Stock to the Baked Brown Sugar Card Stock.

9. Adhere the Baked Brown Sugar Card Stock accent onto the center of the Whisper White stamped card stock.

10. Adhere the Whisper White accent with the sentiment onto the Crisp Cantaloupe accent.

11. Add foam adhesive to the back of the of the sentiment and mat, and adhere it to the Baked Brown Sugar accent.

12. Use a permanent peach marker to color two pearls and add them to the sentiment.

13. Randomly adhere the smallest pearls in the center of some of the flowers.

There is so much more that could be added to this card, and the colors certainly can be substituted. You may want to change the center piece with the sentiment by using other framelits and sentiments. Regardless, ENJOY!

God’s Blessings!
Stamping With Guneaux Designs
by
Beverly Polen 

Morning Meadow Hostess Stamp Set

STAMPIN UP MORNING MEADOW HOSTESS STAMP SET

Papillon Potpourri Stamp Set – Stampin’ Up!

Papillon Potpourri Stamp Set – Stampin’ Up!

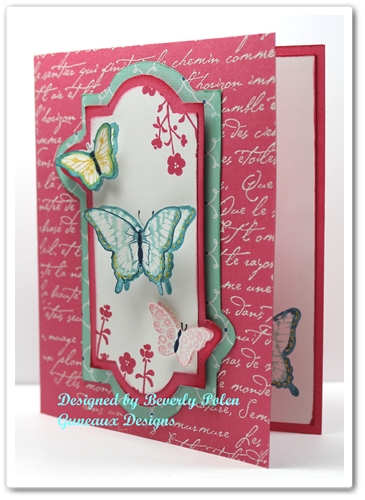
Today’s greeting card features the Papillon Potpourri Stamp Set – Stampin’ Up!(123759 – catalog item number – clear mount).  I love butterflies, so the Papillon Potpourri is one of my favorite stamp sets.

The card base is made with a piece of the new In-Color Strawberry Slush Card Stock.  Using VersaMark Ink (102283), I stamped a background stamp onto the card front.  It was  covered with White Embossing Powder  (109132 – catalog item number) and heat set. (I love any kind of embossing).
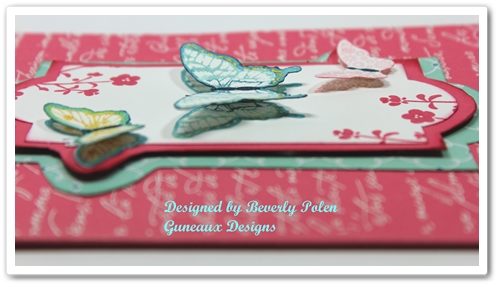
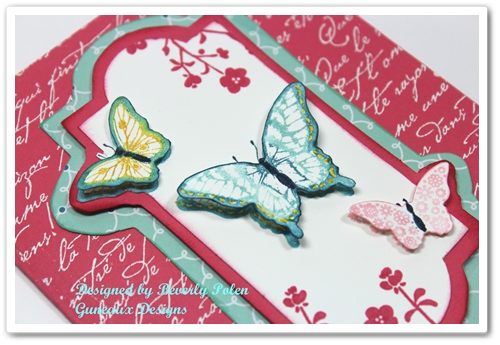
I think the butterflies in the above picture of the card appear to be hovering over the card with their shadow showing underneath.  I have to give the credit for the effect to my camera (lol).  Oh, wait….maybe it was the person behind the camera creating the effect.  Regardless, I think those wonderful Stampin’  Dimensionals (104430 – catalog item number) played a role as well!  Don’t you just love the 3-D effect on greeting cards?

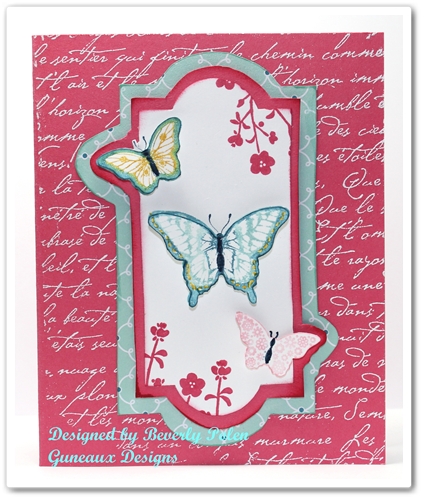
Look closely at the layers on the card.  You also may want to look at the card front in the picture below.  It appears as though I cut out the pieces using a framelit from the Apothecary Accents Framelits (127003 – catalog item number).  Well, my framelit doesn’t have the two “bump outs” on it, does yours?

I did use the framelit from the Apothecary Accents, but I did not use it to cut out the paper that forms the layers.

How often do you start making a card with one intent and then the card ends up being completely different?  That’s what happened on my card.

I first stamped the butterflies from the Papillon Potpourri Stamp Set onto a 3-1/2″ x 4-3/4″ piece of Whisper White Card Stock.  I had planned to add some other elements to that piece of card stock, but then I wasn’t happy with it.

I wondered if I had a framelit that would fit around the butterflies, and if so, I would use that to cut out the piece.  Well, the framelits that I have are either too big or small.  As usual, I didn’t let that defeat me.  I wanted to use the Apothecary Accents framelit, so I decided to lay it around the butterflies and trace around the inside with a pencil.  I couldn’t trace across the two small butterflies, so I decided to go around them.  I “fussy cut” out the framelit, which resulted in the two bump outs.  You needed to know all of this, right?

I then traced the outside of the framelit onto a piece of Strawberry Slush Card Stock, allowing for the bump outs.  As for the bottom layer that is the Pool Party design from the Quatrefancy Specialty Designer Series Paper (130141), I free-handed it.

Notice the little flowers at the top right and bottom left of the Whisper White Card Stock.  They are from a stamp in the Hostess Morning Meadow Stamp Set.

I hope you enjoyed the card and my rambling.  You can leave a comment by clicking on the “chat bubble” at the right of the post’s title.  I love to get comments! 


God’s Blessings!
Stamping With Guneaux Designs
by
Beverly Polen

 PAPILLON POTPOURRI STAMP SET – STAMPIN’ UP!