Scripture and Prayer for the Connecticut Families

Deuteronomy 31:6 NIV

… Do not be afraid or terrified because of them, for the Lord your God goes with you; He will never leave you nor forsake you.”

Luke 23:43 NIV

Jesus answered him, “Truly I tell you, today you will be with Me in paradise.”


Be strong and be assured that these courageous teachers in Connecticut and the precious little ones are now with Him and discovering all that is newly theirs. As the father of one of the little ones we lost said – “They beat us to paradise”.


Prayer

Lord, thank You for lives of these teachers and students. We pray for your healing hand on these families, school staff and students. Help the first responders to cope with the images that will surely stay with them forever. Heal our broken hearts. Help us find forgiveness and the right words to explain this to our children so that You are glorified even in this unspeakable and miserable tragedy. We pray this in the name of Jesus, who is the Christ. Amen.

God bless all involved with this horrific crime!

Be of Good Cheer DSP – Christmas Card

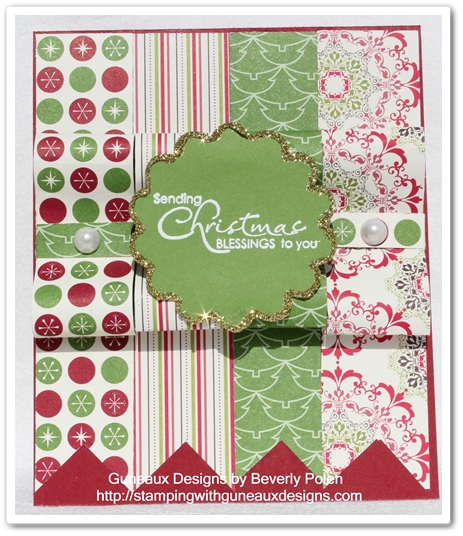
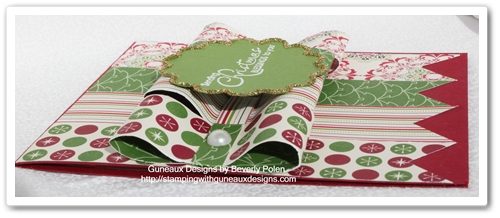
There are so many cute designs within the Stampin’ Up! Be of Good Cheer DSP, and I’ve used four of the designs to create this Christmas card that I am sharing today.

(Can you see the sparkle of glitter at the bottom left of the scallop?  I love how that caught the light.)

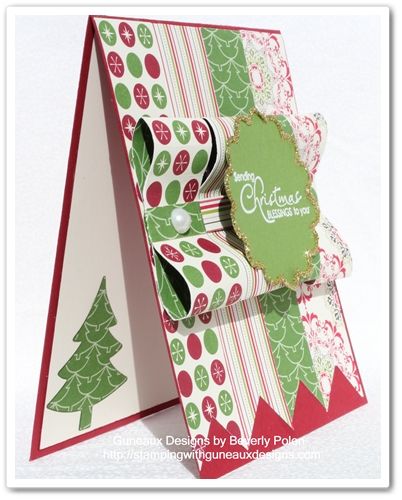
Here are additional pictures of the card.  The following one is a side view that also shows the card’s inside.

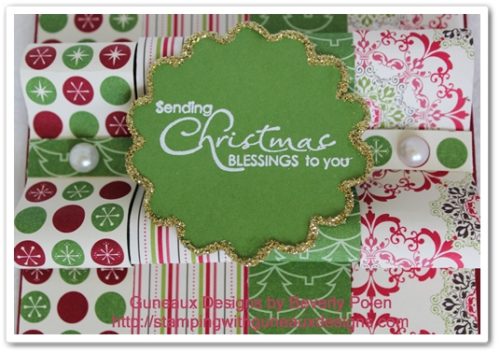
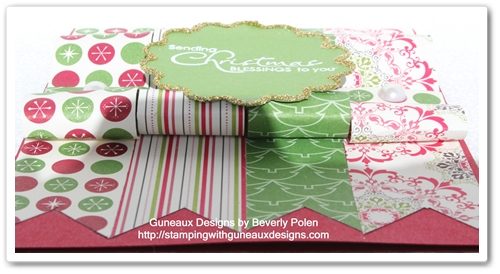
This picture is a closeup of the center piece of the card.

This picture provides a better view of the DSP that is rolled up in the center of the card.

This card seems to me to not need a tutorial as it is obvious how to create it.  Do you disagree?  If so, let me know!

Stampin’ Up! supplies used to create this card featuring the Be of Good Cheer DSP:

Stamp Set:  Christmas Blessings (123809)

Paper:  Be of Good Cheer Designer Series Paper (126896) and Cherry Cobbler Card Stock (119685)

Ink:  VersaMark Ink

Accessories: 1-3/4″ Scallop Circle Punch (119854), Multipurpose Liquid Glue (110755), Gold Glitter, White Embossing Powder (109132), Heat Gun, Large Basic Pearls (119247) and Holiday Ornaments Framelits (127816 – for the tree on the card’s inside)

God’s Blessings!
Stamping With Guneaux Designs
by
Beverly Polen

 My camera shadow is showing on this picture – got to be more careful!

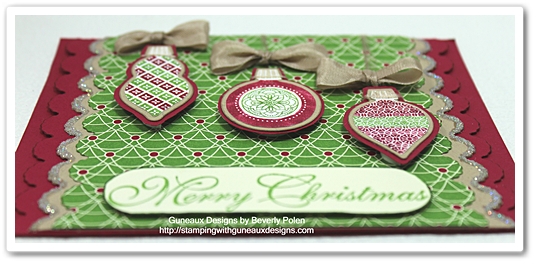
Ornament Keepsakes Stamp Set and Be of Good Cheer DSP Christmas Card

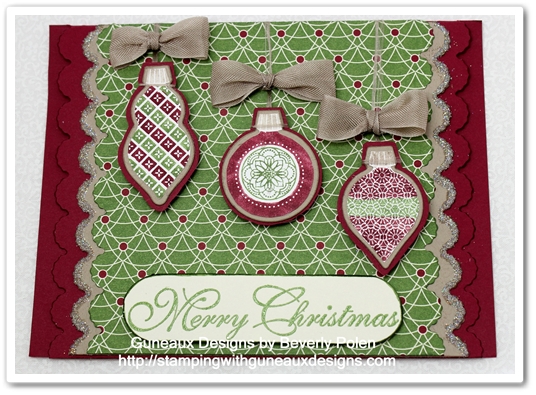
I cannot get enough of making cards with the Ornament Keepsakes Stamp Set (128051) from Stampin’ Up! (SU)!  My opinion is that this set is one of SU’s best sets for the season.  For today’s card share, I have coupled the Ornament Keepsakes Stamp Set with the Stampin’ Up! Be of Good Cheer DSP (126896).
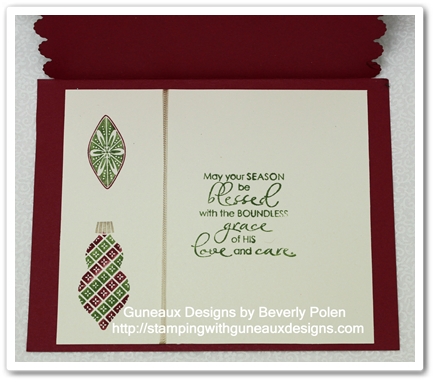
The picture below provides a side view, including the inside, of the card.
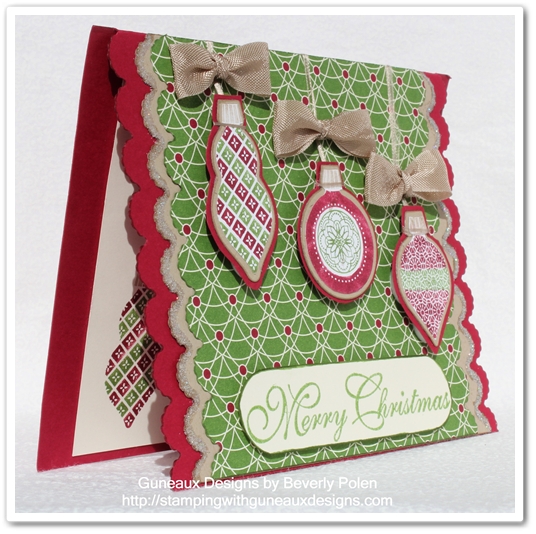
This picture shows the dimensions of the card.
This picture is of the card’s inside.
Stampin’ Up! Supplies (including catalog item numbers) Used to Create the Ornament Keepsakes Christmas Card:

Stamp Sets:  Ornament Keepsakes Stamp Set (128051), Greetings of the Season (128033), and Christmas Blessings (123809)

Paper:  Raspberry Ripple Card Stock (126842), Crumb Cake Card Stock (120953), Whisper White Card Stock (100730), and Be of Good Cheer Designer Series Paper(126896)

Ink (Stampin’ Write Markers): Raspberry Ripple (126856 – comes in a pack of 5 different colors),  Gumball Green (same as above), Crumb Cake (120967), and a VersaMark Ink Pen

Accessories:  Adorning Accents Edgelits (125595), Holiday Ornaments Framelits (127816), Crumb Cake  1/2″ Seam Binding Ribbon (122332), Heat Tool, Heat and Stick Powder (100625), Dazzling Diamonds Glitter (102023), and Foam Adhesive Circles

Instructions for Creating the Ornament Keepsakes Christmas Card:

You will:

  • Cut an 8-1/2″ x 5-1/2″ piece of Raspberry Ripple Card Stock and fold it in the middle to form the card base.
  • Cut along both 5-1/2″ sides of the card front using the scalloped Adorning Accents Edgelit.
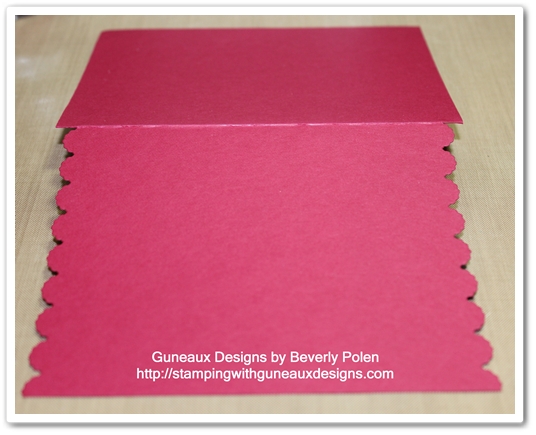
  • Cut a 4-1/4″ x 4-7/8″ piece of Crumb Cake Card Stock and a 4-1/4″ x 4-5/8″ piece of the Be of Good Cheer Designer Series Paper.
  • Cut along both 4-7/8″ sides of the Crumb Cake Card Stock and the 4-5/8″ sides of the piece of Be of Good Cheer DSP using the scalloped Adorning Accents Edgelit.
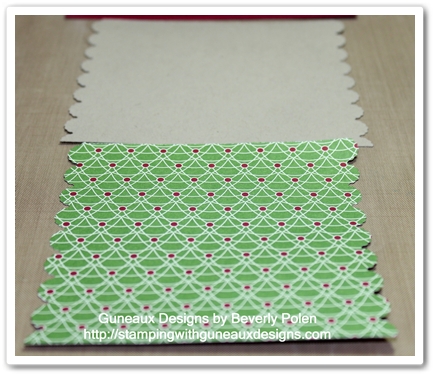
  •  Apply VersaMark Ink around the scalloped edges of the Crumb Cake Card Stock, cover with Heat and Stick Powder, heat set, cover with Dazzling Diamonds Glitter, and heat set.
  • Attach to the front of the card front.
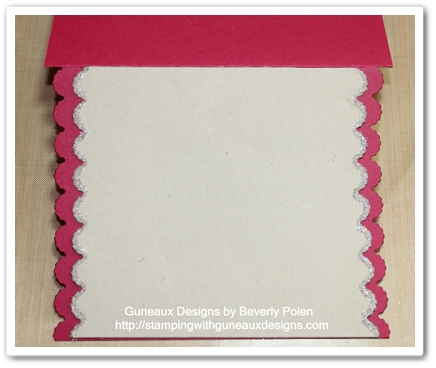
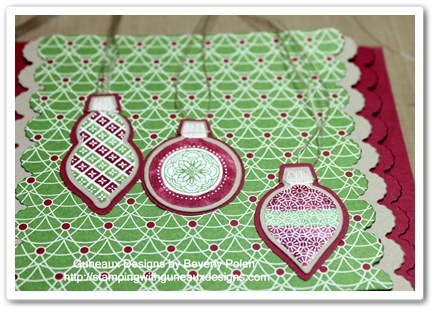
  • Cover the three Ornament Keepsakes stamps with Gumball Green, Raspberry Ripple, and Crumb Cake ink using the Stampin’ Write Markers (see first picture).
  • Stamp the images onto Whisper White or Very Vanilla Card Stock.
  • Cut the images out with the appropriate Holiday Ornaments Framelits.
  • OPTIONAL ORNAMENT MATS:
    • Cut off the white border of each ornament.
    • Cut out the same ornaments using the framelits and Crumb Cake Card Stock.
    • Trace around each Crumb Cake ornament onto Raspberry Ripple Card Stock and cut them out about 1/16″ outside the tracings.
    • Adhere the Crumb Cake ornaments to the stamped ornaments, and the Raspberry Ripple ornaments to the Crumb Cake ornaments.
  • Attach thread, twine, cord, etc., around the top of each ornament…Attach foam adhesive circles onto the back of each ornament.
  • Attach each ornament onto the piece of the Be of Good Cheer DSP.  Wrap the thread (or whatever you choose to use) over the top of the DSP and adhere to the back side.
  • Tie three bows using the Crumb Cake1/2″ Seam Binding Ribbon and attach them to the card front (see first picture).
  • Cover with Gumball Green Ink the “Merry Christmas” stamp from the Christmas Blessings stamp set and stamp the image onto a piece of Very Vanilla Card Stock.
  • Cut out the sentiment and adhere to the bottom of the piece of DSP.
  • Adhere the DSP over the Crumb Cake Card Stock that was previously adhered to the card front.
  • Decorate the card’s inside as desired.
God’s Blessings!
Stamping With Guneaux Designs
by
Beverly Polen

 Enjoy making Christmas cards with your Ornament Keepsakes Stamp Set!

Scentsational Season Stamp Set – Christmas Card

I don’t drink coffee or hot chocolate but I love the steaming cup stamp image from the Scentsational Season stamp set (121190).  And the snowflake on the cup goes perfectly with a Christmas card featuring snowflakes! 

Scentsational Season Stamp Set

The card’s snowflakes were punched out with a non-Stampin’ Up! punch.  I thought it matched so perfectly the snowflake on the stamp image.  The miniature snowflakes from the punch outs were used for the steam coming up from the cup. 

Also featured on the Christmas card is the “Merry Christmas” stamp image from the Stampin’ Up! Greetings of the Season stamp set.  The following are additional pictures of the card.

 Scentsational Season Christmas Card

 Scentsational Season Christmas Card

Supplies (and Stampin’ Up! item numbers) used to make the Scentsational Season  Christmas Card:

 Stamp Sets:  Scentsational Season (121190) and Greetings of the Season (128033)

Paper: Whisper White Card Stock (100730) and Bashful Blue Card Stock (105120)

Ink:  Bashful Blue Classic Ink (126961), Soft Suede Stampin’ Write Marker (comes in a group 8 different colors – 119703), and VersaMark Ink or Pen

Accessories:  Snow Burst Embossing Folder (retired), Crystal Effects (101055), Heat and Stick Powder (100625), Dazzling Diamonds Stampin’ Glitter (102023), VersaMark Ink Pad or Pen, Heat Tool, Dimensionals Adhesive (104430) (or other foam adhesive circles), and 3/16″ Corner Punch (119871)

The Scentsational Season Christmas card is very easy to make and you can make it too by following these instructions:

  • Cut an 8-1/2″ x 5-1/2″ piece of Whisper White Card Stock (or other white card stock) and fold in the center to form a card base.
  • Cut another piece at  2-1/4″ x 4-1/2″.
  • Cut two 4″ x 5-1/4″ pieces of Bashful Blue Card Stock.
  • Using a snowflake punch, cut out three snowflakes on the left side of both Bashful Blue Card Stock pieces.
  • On one Bashful Blue Card Stock piece, apply VersaMark Ink on the snowflakes and cover them with the Heat and Stick Powder.  Heat set.
  • Cover the snowflakes with Dazzling Diamonds Glitter and heat set.
  • Slip the right side of this piece into the Snow Burst Embossing Folder and run through a die-cutting machine.
  • Cover with Bashful Blue Classic Ink the cup image from the Scentsational Season Stamp Set and stamp it onto the lower part of the 2-1/4″ x 4-1/2″ piece of Whisper White Card Stock.  **Before stamping the image, remove the ink around the rim and cover with Soft Suede ink (Stampin’ Write Marker). 
  • Apply Crystal Effects and let dry.
  • After drying, cover with Bashful Blue ink the “Merry Christmas” sentiment from the Greetings of the Season set and stamp onto the card stock (use a Stamp-a-ma-jig for proper placement).
  • Using foam adhesive circles, adhere onto the Bashful Blue card stock (see picture).
  • Attach to the Whisper White card front.
  • Attach the second Bashful Blue snowflake punched piece of card stock to the inside of the card.
  • Finished!
God’s Blessings!
Stamping With Guneaux Designs
by
Beverly Polen 

Enjoy making your Scentsational Season Christmas Card! 

Stampin Up Christmas Scrapbook Pages

It is that time of the year when we need to get our Stampin Up Christmas Scrapbook pages ready to slip in our photos from our Christmas celebrations.  To help you with that task, I’ve created for you a page featuring the very cute Snow Festival Designer Series Paper (126908).  Using this DSP makes it so easy to make a scrapbook page as there are so many pictures on the paper that all one needs to do is cut out and glue the pictures to a page.

Snow Festival DSP

Below is the Stampin Up Christmas scrapbook page I made for you.  It is easy, uses multiple embellishments, and has various dimensions.

I hope this page will assist those who shared with me their struggles related to being new to scrapbooking and creating dimensions and layers to your pages.  If not, I would greatly appreciate your letting me know!  I an in the process of composing a related article, Scrapbooking 101.  You will be informed when published.

The following picture for the Stampin Up Christmas Scrapbook Page is intentionally large so you can better see the details.

Stampin Up Christmas Scrapbook Pages

SUPPLIES NEEDED TO MAKE THIS STAMPIN UP CHRISTMAS SCRAPBOOK PAGE:

Stamp Sets:  NONE

 Paper:

  1. Snow Festival Designer Series Paper (126908),

  2. Cherry Cobbler (12″ x 12″ – 124272),

  3. Whisper White Card Stock (100730),

  4. Baja Breeze Card Stock (111352),

  5. Gumball Green Card Stock (122924), and

  6. Soft Suede Card Stock (115318).

Ink:

  1. Gumball Green Stampin Write Marker (comes in a pack – 126856),

  2. Baja Breeze Stampin Write Marker (comes in a pack – 119700), and

  3. Soft Suede Stampin Write Marker (comes in a pack – 119703).

Accessories:

  1. Scallop Edge Border Punch (119882),

  2. Ex. L. 2-3/8″ Scallop Circle Punch (118874),

  3. 1-3/4″ Scallop Circle Punch (119854),

  4. 2-1/2″ Circle Punch (120906),

  5. Decorative Label Punch (120907),

  6. 3/16″ Corner Punch (119871),

  7. Bigz Clear Large Scallop Square Die (115950),

  8. White Embossing Powder (109132),

  9. Crystal Effects (101055),

  10. Baja Breeze 1/2″ Seam Binding Ribbon (122331),

  11. Gumball Green 3/8″ Stitched Satin Ribbon (126848),

  12. Whisper White Ribbon (your choice),

  13. Dimensionals (194430) and Sticky Strip (104294 – or other forms of adhesive),

  14. Cherry Cobbler Dazzling Details (125585),

  15. Whisper White Embossing Powder (109132),

  16. VersaMarker Watermark Pen,

  17. Heat Gun of your choice, and

  18. Paper Trimmer (your choice).

INSTRUCTIONS FOR MAKING THIS STAMPIN UP CHRISTMAS SCRAPBOOK PAGE (on the 12″ x 12″ Cherry Cobbler Card Stock):

  •  Cut a 12″ x 2-1/8″ piece of the Christmas tree design from the Snow Festival DSP (the Baja Breeze and Whisper White snowflake design is on the other side of the paper).
  • Using the Scallop Edge Border Punch, cut scallops down both of the 12″ sides of the paper.
  • Attach Sticky Strip (or other adhesive) to the scalloped strip and adhere it 7/16″ from the left side of the 12″ x 12″ Cherry Cobbler Card Stock.
  • Using the Bigz Clear Large Scallop Square Die, cut a large scallop from 1) the ornament design , 2) the Gumball Green stars design, and 3) the Cherry Cobbler floral design from  the Snow Festival DSP.
  • Cut one 3-1/2″ square from Baja Breeze Card Stock, and two from Whisper White Card Stock.
  • Adhere the Baja Breeze square to the ornament design large scallop and a Whisper White square to the Gumball Green stars large scallop and Cherry Cobbler floral design large scallop.  These form the mats for your photos.
  • Adhere the photo mats to the 12″ x 12″ Cherry Cobbler Card Stock as shown in the above picture.
  • Cut out the following owl from the DSP (on the paper with 16 3″ squares of pictures) with the  Ex. L. 2-3/8″ Scallop Circle Punch.  Using the Soft Suede Stampin Write Marker, apply ink around the edge of the scallop.  Add Crystal Effects to the owl’s eyes and let dry.  After drying, attach the scallop to the upper left of the card stock with dimensionals (see picture above).

Snow Festival DSP

  • Tie a double bow with the Baja Breeze Seam Binding Ribbon and attach it to the top of the 12″ x 12″ card stock (see above large picture for placement).

Stampin Up Christmas Scrapbook Page

  • Using the 2-1/2″ Large Circle Punch, cut out the “Merry Christmas” sentiment from the page with the 16 3″ squares (see below picture).  Using the Gumball Green Stampin Write Marker, apply ink around the edges of the circle.  Apply Crystal Effects to the owl’s eyes and let dry.  After drying, adhere this piece with dimensionals onto the card stock (see large picture above for placement).

Snow Festival DSP

  • Cut out a Baja Breeze decorative label using the Decorative Label Punch.  Apply Baja Breeze ink around the label with the Stampin Write Marker.  Using a VersaMarker Watermark Pen, write 2012 onto the label.  Cover with White Embossing Powder and set with a heat gun. Attach a double bow made from Whisper White ribbon and attach to the top of the label.  Use dimensionals to attach to the Cherry Cobbler card stock (see above large picture for placement.

Stampin Up Christmas Scrapbook Pages

  • From the little houses design of the Snow Festival DSP, cut out a Soft Suede house with the 1-3/4″ Scallop Circle Punch.  Apply Soft Suede around the edge of the scallop circle with the Stampin Write Marker.  Add Crystal Effects tot he windows of the house and set aside to dry.
  • Cut a Soft Suede scallop circle with the 2-3/8″ Scallop Circle Punch.  Apply the Cherry Cobbler Dazzling Details around the edge of the scallop circle and let dry.
  • After drying, attach the “house” small scallop circle with dimensionals onto the Sofe Suede scallop circle.  Use Sticky Strip to attach to the Cherry Cobbler card stock (see large picture for placement).

Snow Festival DSP

  • Cut a Gumball Green circle with the 2-1/2″ Circle Punch.  Apply Gumball Green ink around the edge of the circle with the Stampin Write Marker.
  • Cut a 2-3/8″ scallop from the Snow Festival DSP design with multiple owls using the 2-3/8″ Ex. L. Scallop Circle Punch.  Punch two holes near the center of the scallop (depends on how the owls are located in your scallop as to where you punch the holes) and thread through the holes a small piece of Gumball Green Satin Stitched Ribbon.  Tie into a knot.  Add Crystal Effects to the owls’ eyes and let dry.
  • After drying, use dimensionals to attach the owls scallop to the Gumball Green large circle.  Attach it with Sticky Strip to the bottom left of the Cherry Cobbler card stock (see large picture for placement).

Snow Festival DSP

  •  Cut a Whisper White circle with the 2-1/2″ Large Circle punch.  Draw lines on this piece for journaling.  Attach with Sticky Strip onto the Cherry Cobbler Card Stock.

You are finished making your Stampin Up Christmas Scrapbook Page and it is now ready for you to attach your photos!

I would love feedback from all of you, especially those who shared with me their struggle with scrapbooking.

God’s Blessings!
Stamping With Guneaux Designs
by
Beverly Polen