Stampin Up Best of Flowers Stamp Set – Best of 25 Years

What a great set the Stampin Up Best of Flowers Stamp Set is!  As shared in my last post, this stamp set is the March release for the Stampin’ Up! Best of 25 Years Anniversary celebration.   Stampin Up Best of Flowers Stamp Set

 (Click on the above picture to see better the PDF.)

Stampin Up Best of Flowers Stamp Set

For my project today, I used a similar  Hydrangea  flower stamp from Stampin’ Up! to create this Happy Birthday card for my youngest daughter who loves pink.

Look at this Hydrangea stamped image and tell me what the differences are between this image and the Hydrangea stamp in the Stampin Up Best of Flowers Stamp Set.

Notice the diagonal score lines on the card front.  I created them to appear as sun rays shinning onto the Hydrangea.  I used the Stampin’ Up! Simply Scored Scoring Tool to create the rays.

Stampin Up Best of Flowers Stamp Set

I used the Pretty in Pink Stampin Write’ Marker to color the floral part of the stamp, and the Lucky Limeade Stampin’ Write Marker to color the stem and leaves.  I stamped the image onto Whisper White Card Stock.

After stamping the image, I again covered the floral portion of it, but this time with the Melon Mambo Stampin’ Write Marker.  Using the Stamp-a-ma-jig, I positioned the stamp over the first stamped image and re-stamped it.  I like the way it turned out.  You can see the results better in the following picture.

Stampin Up Best of Flowers Stamp Set


Stampin Up Best of Flowers Stamp Set

I had to share this picture with you.  I took it while looking down at the card, which was standing up.  Therefore, it is rather distorted.  It looks like I am holding the top right corner of the card and am stretching it (LOL).  Well, it does give you a good view of the diagonal lines {laughing}!

 SUPPLIES USED FOR THE STAMPIN UP BEST OF FLOWERS STAMP SET CARD:

Stamp Set:  Tell me what was the previous Stampin’ Up! stamp set that included the Hydrangea stamp that I used?

Paper:  Pretty in Pink Card Stock, Lucky Limeade Card Stock, and Whisper White Card Stock

Ink (Stampin’ Write Markers):  Pretty in Pink, Melon Mambo, and non-SU markers.

Accessories:  Ovals Collection Framelits (129381), Stampin’ Up! Simply Scored Scoring Tool (122334),and Stampin’ Up! Stamp-a-ma-jig (101049)

 God’s Blessings!
Stamping With Guneaux Designs
by
Beverly Polen

 Stampin Up Best of Flowers Stamp Set

 STAMPIN UP BEST OF FLOWERS STAMP SET

Stampin Up Photopolymer Stamp Sets

Stampin Up Photopolymer Stamp SetsI am excited to announce that Stampin Up has added a new product to its line of stamps – Stampin Up Photopolymer Stamp Sets.   The release of these stamps is on a trial basis, and today Stampin Up made its first set available for purchase.  Any future-released stamp sets will depend on popularity of the photopolymer stamps.  So if you want to see more, give this first set a try.

The first stamp set released today is:

Stampin Up Photopolymer Stamp Set

Designer Typeset Photopolymer Stamp Set that includes 57 PIECES!  It costs only $13.95 and the item number is 132956.  You will need the Stampin’ Up! clear blocks A, B, G, F, and I for the stamps in this set.

The Stampin Up Photopolymer Stamp Sets are transparent and provide perfect placement every time!  Other great things about them:

  • They are durable; the photopolymer material is designed to last.
  • They stick amazingly well to our clear blocks.
  • They’re age tested; they won’t yellow or cloud up over time.
  • They use FDA, food-safe material.

This picture provides a better view of the first Stampin Up Photopolymer Stamp Set:

Stampin Up Photopolymer Stamp Sets

After you’ve tried the Stampin Up Photopolymer stamp sets, let me know what you think of them! Stampin With Guneaux Designs

 God’s Blessings!
Stamping With Guneaux Designs
by
Beverly Polen

STAMPIN UP PHOTOPOLYMER STAMP SETS

Stampin Up Secret Garden & Tea for Two DSP

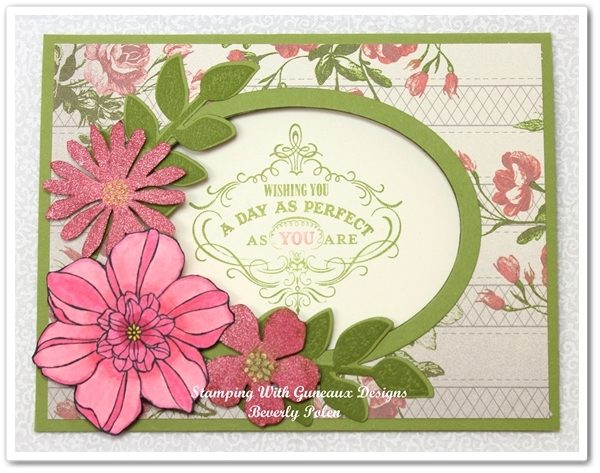
What thoughts does your mind conjure up when you think of a Secret Garden?  I think of drifting through paths of beautiful flowers and floral trees and bushes as I daydream and push the stresses of life into the background.  I hear Irish music that carries me from Stampin Up Secret Gardenplace to place within the Secret Garden.  I enjoy beautiful butterflies, hummingbirds, bees, and other forms of nature as the aroma of many floral scents rush past my nostrils.  I sit on a bench, laying my head back and watching the sunshine peeking down through the tree branches as I drift off into a dream of floating from flower to flower.

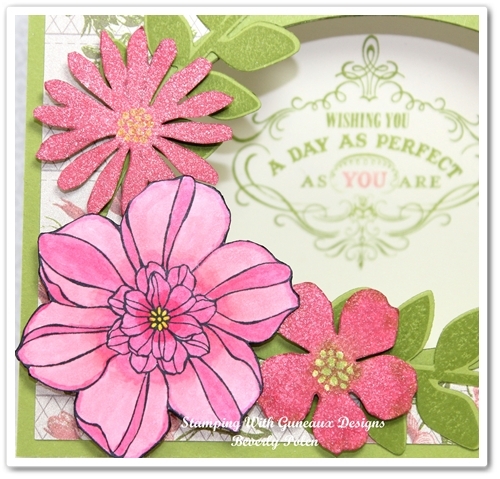
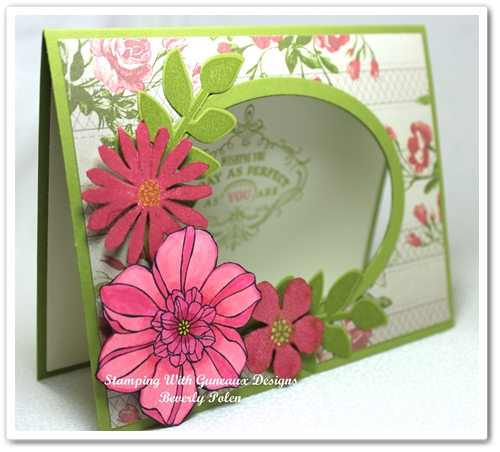
Stampin Up Secret GardenThen I hear, “Bevvverrrly”!  I quickly awake and realize I’m in my crafting room creating a beautiful card with the Stampin Up Secret Garden Stamp Set.  Gee, I like my daydream! (LOL)  Here is the card I developed during this daydream.

I tend to be attracted to pink or pinkish flowers.  My gardens have basically floral bushes of various sorts that bloom in shades of pink.  I venture to guess that is what controlled my creation as I developed this card with pinkish flowers.

Yes, I know that the floral design I used from the Tea for Two DSP is supposed to be Calypso Coral in color.  However, I just don’t see it.  When I place a piece of Calypso Carol Card Stock next to the flowers in this floral design, I am NOT convinced that the color is Calypso Coral.  It lends itself more toward a pinkish color.  If you disagree, please feel free to set me straight!

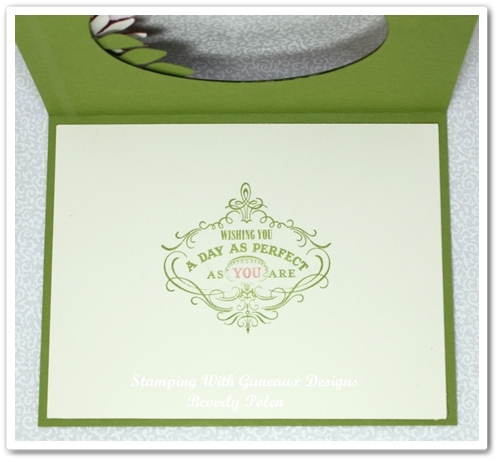
This picture is the inside of the card. The sentiment, Wishing You A Day As Perfect As YOU Are, is from the Stampin Up Vintage Verses Stamp Set.

SUPPLIES USED TO CREATE THIS STAMPIN UP SECRET GARDEN CARD:

Stamps:  Stampin Up Secret Garden Stamp Set (129144 – c) and Vintage Verses (129636 – c – Sale-a-bration stamp set)

Paper:  Tea for Two Designer Series Paper (129311), Lucky Limeade Card Stock, Very Vanilla Card Stock, and Primrose Card Stock

Ink:  Lucky Limeade Classic Ink, Primrose Petals Classic Ink, and non-Stampin Up Markers

Accessories:  Ovals Collection Framelits (129381) and Secret Garden Framelits (129372)


God’s Blessings!
Stamping With Guneaux Designs
by
Beverly Polen

Stampin Up Secret Garden

Stampin Up Framelits – Use Differently – Part 2

Yesterday, I shared an alternative method for using Stampin Up Framelits to create a debossed frame from a negative cutout.  Today, I am sharing another alternative method for using the Stampin Up Framelits.  This method provides a framelit size that is different from the usual.

If you have used any of the Stampin Up Framelits that are of the same design (i.e., Hearts Collection, Floral Frames, Window Frame Collection, and Labels Collection),  I’m sure you’ve noticed the size between each framelit is no less than 1/4″. 
 
 Hearts Collection Framelits DiesFloral Frames Framelits DiesWindow Frames Collection Framelits DiesLabels Collection Framelits Dies
 

Personally, I prefer the size between the Stampin Up Framelits to be smaller (i.e., 1/8″).  To that end, here is an alternative for you to acquire a smaller size.


ALTERNATIVE 2:  CREATE A STAMPIN UP FRAMELIT CUTOUT THAT IS ONLY 1/8″ LARGER THAN THE NEXT SMALLEST FRAMELIT (NOT THE USUAL 1/4″)

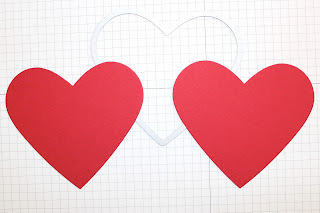
STEP 1. Select one framelit and desired card stock and cut out two framelits using the Big Shot. (Refer to yesterday’s post for the Big Shot sandwich.)

Stampin Up Framelits

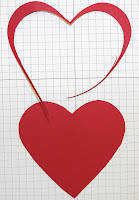
STEP 2.  Lay the next smallest framelit onto one of the cutouts with the cutting edge facing upward.

STEP 3.  With a pencil, trace around the framelit.

Stampin Up Framelits

STEP 4. Using paper snips, cut along your tracing.

Stampin Up FramelitsStampin Up Framelits


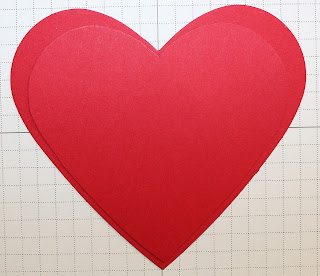
Now you have a cutout that is 1/8″ smaller, except at the very top. I like the look better, don’t you?

Stampin Up Framelits


 Using this tool tip, your top framelit will provide more room on which to stamp.

 Stamping With Guneaux Designs

God’s Blessings!
Stamping With Guneaux Designs
by
Beverly Polen


STAMPIN UP FRAMELITS – HOW TO USE THEM DIFFERENTLY – PART 2

Stampin Up Framelits – Use Differently – Part 1

Would you like to know how to use your Stampin Up Framelits in a manner that is different from the standard method?   Would you like to create a FRAME around the negatives resulting from using the Stampin Up Framelits?

Today I will share one alternative, and tomorrow I will share another one.  For this demonstration, I am using the Hearts Collection Framlits; however, this applies to any of the Stampin Up Framelits. 

ALTERNATIVE 1:   HOW TO USE YOUR STAMPIN UP FRAMELITS TO CREATE A FRAME AROUND THE NEGATIVE CARD STOCK PIECES

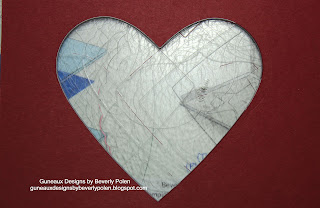
STEP 1. Cut a piece of card stock to the size you need as is determined by the size of the Stampin Up Framelit you plan to use for your project.

STEP 2. Place your selected framelit onto the center of this piece of card stock ( from step 1) for cutting out the framelit using the Big Shot. 

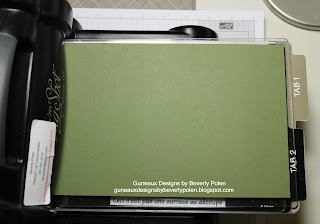
STEP 3. Prepare a Big Shot sandwich with the card stock and framelit in the following order, and run the sandwich through the Big Shot:

  • Multipurpose Platform, Tab 2
  • Standard Cutting Plate (Acrylic)
  • Piece of Card Stock
  • Framelit
  • Standard Cutting Plate (Acrylic)

STEP 4. Remove the cutout from the framelit and stash it away, keeping the negative piece of card stock.

Stampin Up Framelits

STEP 5. Place the framelit into the back side of the negative with the framelit cutting side facing up.

Stampin Up Framelits

(You can see the metal cutting part of the framelit sticking through the cardstock.)

STEP 6. Create another Big Shot sandwich according to the following:

  • Multipurpose Platform, Tab 2
  • Standard Cutting Plate (Acrylic)
  • Framelit (according to step 5)
  • Negative Piece of Card Stock (framelit inserted inside according to step 5)
  • Standard Cutting Plate (Acrylic)
  • Paper Shim
Stampin Up Framelits

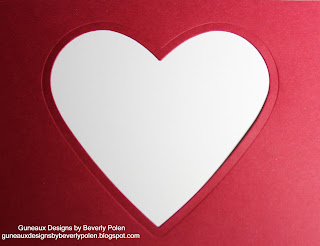
STEP 7.  Run the sandwich through the Big Shot two or three times. This is the result:

Stampin Up Framelits

Can you see the 1/8″ frame that has been created around the heart?

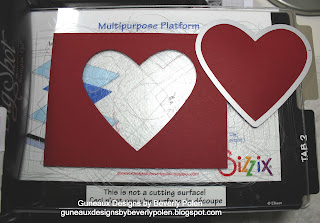
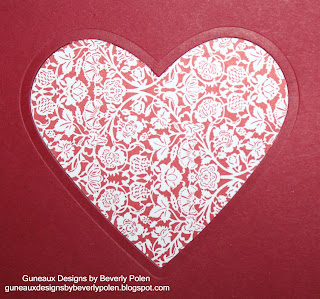
STEP 8. You can insert into the negative another framelit cutout (in this case, a heart shape from the Stampin’ Up! Twitterpated DSP). Now you have a heart cutout from a framelit with a heart-shaped frame created around the inserted heart.

Stampin Up FramelitsHow cool is that?

STEP 9:  You may choose to accentuate the frame around the heart by adding Crystal Effects as I did on a previous card share. Here’s the card.

 Stamping With Guneaux Designs

God’s Blessings!
Stamping With Guneaux Designs
by
Beverly Polen


COME BACK TOMORROW FOR THE SECOND ALTERNATIVE FOR USING STAMPIN UP FRAMELITS !

The Bible Series Coming on March 3, 2013

Friends, I want to use my crafting website today to draw your attention to a new mini TV series that brings the Bible to life. “The Bible” is an epic five-week, 10 hour television miniseries premiering March 3, 2013 on the History Channel from Emmy Award winning husband and wife team, Mark Burnett and Roma Downey. For two hours each Sunday night millions of viewers will see the Bible from Genesis to Revelation come to life in a way never before seen. The final episode of the series will air on Easter Sunday and will feature the death and resurrection of Jesus.  Below is the schedule for the series.

Week 1, Episode 1 The Beginning – Noah, Abraham thru Jacob, Israel begins
Week 1, Episode 2 The Exodus – Pharaoh, Moses, Red Sea and Ten Commandments
Week 2, Episode 1 The Homeland – Joshua, Samson, Judges, David & Goliath
Week 2, Episode 2 The Kingdom – David, Saul, Solomon
Week 3, Episode 1 The Survival – Zedekiah, Nebuchadnezzar, Daniel, Jews return to Jerusalem
Week 3, Episode 2 The Revolution – Roman, birth of Christ, John the Baptist, Jesus and Peter
Week 4, Episode 1 The Mission – Pharisees, Jesus, miracles, Disciples
Week 4, Episode 2 The Betrayal – Last supper, Judas, Peter’s Denial
Week 5, Episode 1 The Passion – Nicodemus, Caiaphas, Pilate, Crucifixion, Resurrection
Week 5, Episode 2 The Courage – Jesus returns, Holy Spirit comes, Disciples die, John survives death, exiled to Patmos, Revelation

 Below is the official trailer for “The Bible”.


I hope you will find time to watch The Bible series as it is a very spiritual event that will provide you with a visual of stories in The Bible that we Christians have read and heard about for most of our lives.

Further information on The Bible series can be found here!

God’s Blessings!
Stamping With Guneaux Designs
by
Beverly Polen