How to Make a Center Step Card – Happy Birthday

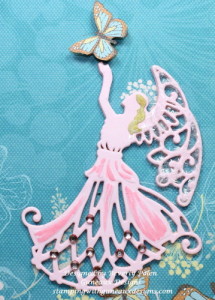
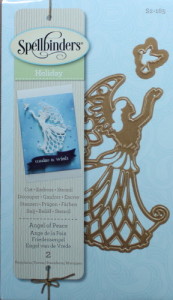
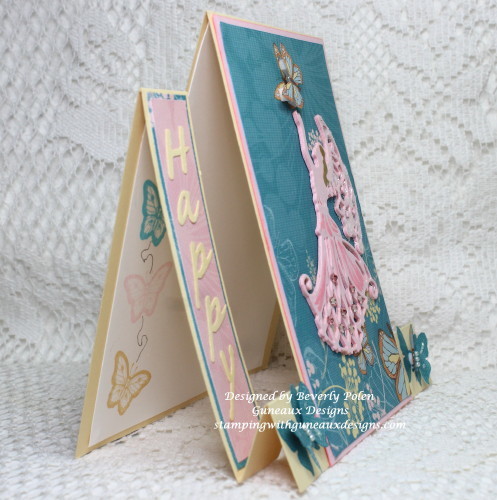
The purpose of this post is to provide a tutorial on how to make a center step card. The card shown in the post is a Happy Birthday card that I made for my little angel granddaughter.  I refer to her as my angel, thus I thought the Spellbinders Holiday Angel of Peace Dies would work perfectly for my center step card.
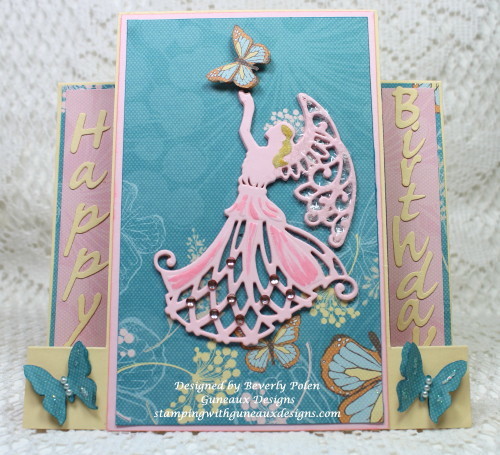
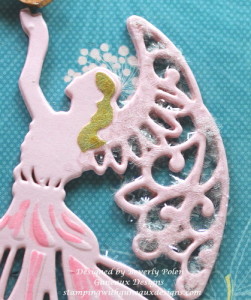
How to make a Center Step CardThe following pictures are closeups of card sections.  You will note that the angel’s wings are covered with a tinsel glitter, which is Martha Stewart’s Crystal Tinsel Glitter (discontinued).

How to make a Center Step CardHow to make a Center Step Card

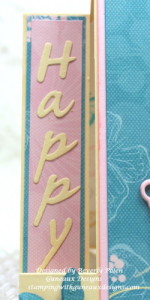
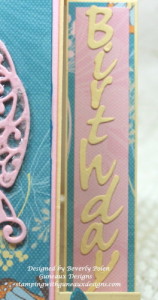
These pictures are closeups of the Happy Birthday sentiment on the left and right sides of the card and the Spellbinders Angel of Peace Dies.

How to make a Center Step CardHow to make a Center Step CardSpellbinders Holiday Angel of Peace


TUTORIAL ON HOW TO MAKE A CENTER STEP CARD
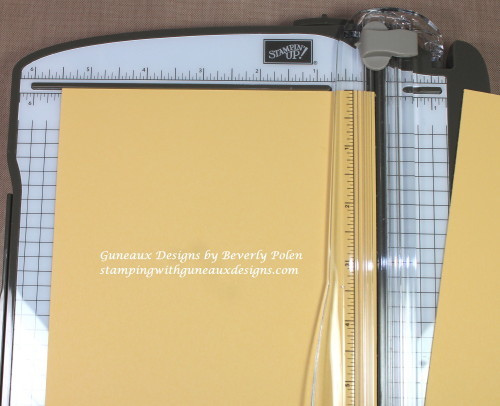
STEP 1: Using a paper trimmer/cutter, cut an 11″ x 5-1/2″ piece of card stock.

How to Make a Center Step Card

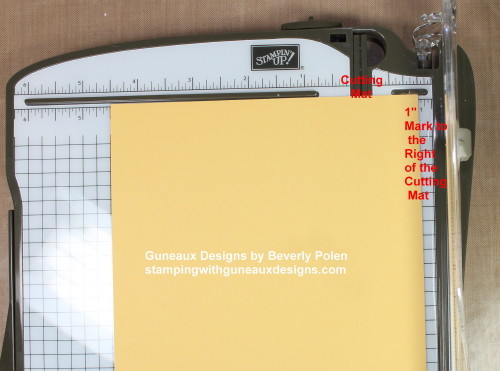
STEP 2:  Leave the 11″ x 5-1/2″ cut piece of card stock on the trimmer, moving the right side to the 1″ mark on the right side of the cutting mat (i.e., the rubber channel that the blade slides through when cutting).

NOTE:  The terms used for a trimmer depends on the type of trimmer used (e.g., Guillotine cutter, Bypass trimmer, etc.).  Thus, in this tutorial,  I have used terms that are applicable to my paper trimmer. Follow the directions for use of your type of trimmer.

How to Make a Center Cut Card

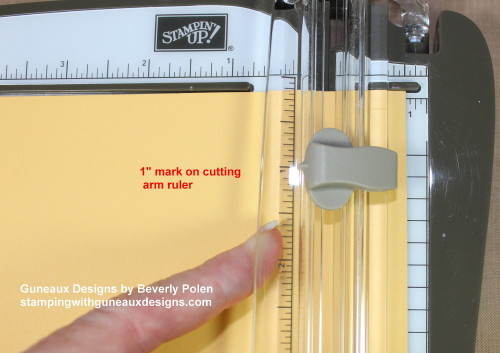
STEP 3:  Using the ruler on the cutting arm, move the cutting blade down to the 1″ mark. Lay the cutting arm down on the paper.

How to Make a Center Step Card Happy Birthday

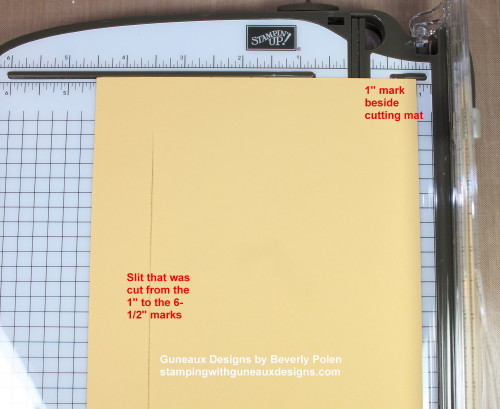
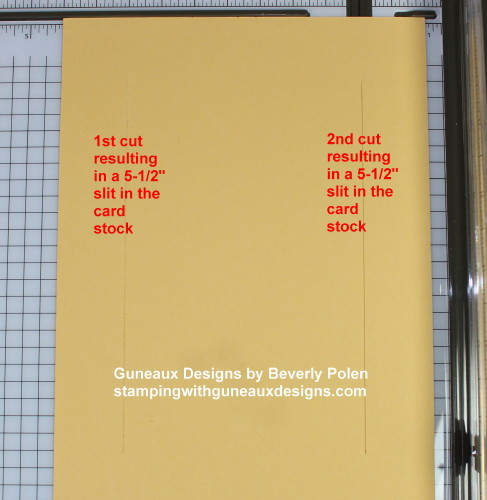
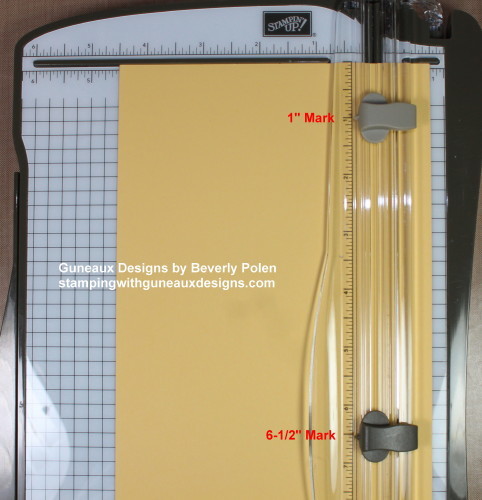
STEP 4:  Cut from the 1″ mark on the cutting arm ruler down to the 6-1/2″ mark.  This provides a 5-1/2″ slit on the card stock.

how-to-make-a-center-step-card-happy-birthday/

STEP 5:  Turn the card stock over with the 5-1/2″ slit on the left side.  Place the card stock at the 1″ mark that is to the right of the cutting mat.

http://stampingwithguneauxdesigns.com/how-to-make-a-center-step-card-happy-birthday/

STEP 6:  Before cutting, move the cutting blade on the cutting arm down to the 1″ mark (same as STEP 3).

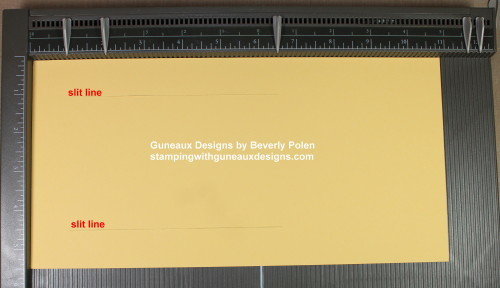
STEP 7:  Cut from the 1″ mark down to the 6-1/2″ mark.  This provides a second 5-1/2″ slit on the card stock.

http://stampingwithguneauxdesigns.com/how-to-make-a-center-step-card-happy-birthday/

STEP 8:  Put the trimmer away and get out your paper scoring tool to score the piece of card stock.

STEP 9:  Place the card stock onto the scoring tool with the 5-1/2″ side and slits to the far left on the tool.

http://stampingwithguneauxdesigns.com/how-to-make-a-center-step-card-happy-birthday/

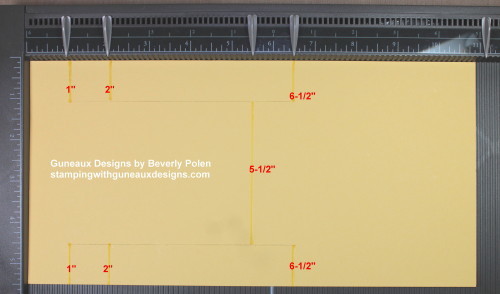
STEP 10:  Score at the 1″, 2″, and 6-1/2″ marks, but ONLY from the top of the card stock down to the slit at the top, and from the slit at the bottom to the edge of the card stock. Your score lines will be 1″ long at the top and bottom, avoiding the area where the two slits are located (see picture below STEP 11).

STEP 11.  Score at the 5-1/2″ mark beginning at the first slit down to the second slit.

http://stampingwithguneauxdesigns.com/how-to-make-a-center-step-card-happy-birthday/

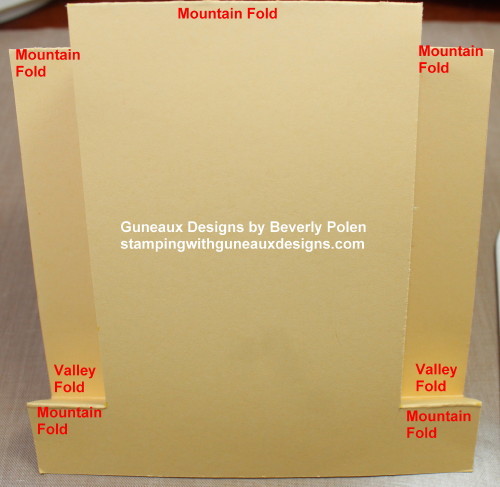
STEP 13:  Remove your card stock from the scoring tool and fold it according to the following:

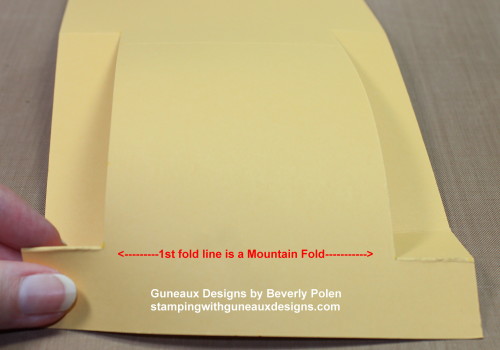
  • Fold at the first score marks (i.e., the 1″ score line on both sides) into a mountain fold (i.e. the folded crease is facing up).

How to Make a Center Step Card

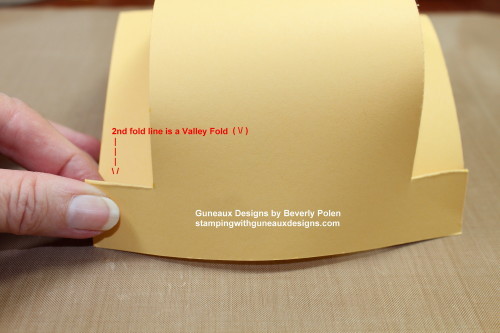
  • Fold at the second score line (i.e., the 2″ score line on both sides) into a valley fold (i.e., the folded crease is facing down).

How to Make a Center Step Card

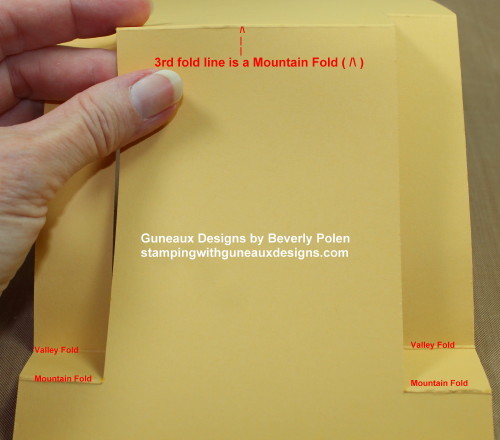
  • Fold  the 5-1/2″ score line into a mountain fold.

How to Make a Center Step Card

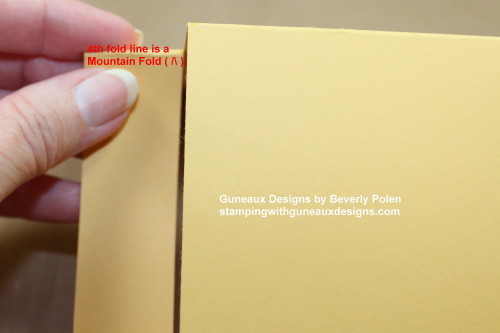
  • Fold the 6″ score line into a mountain fold.

How to Make a Center Step Card

How to Make a Center Step Card

STEP 14:  Now you can create a center step card base and decorate it according to your desires.

Hopefully my tutorial is easy to follow.  If you have any questions or comments, please feel free to leave them in the comment area (i.e., either at the end of this post or at the conversation bubble to the right of this post title).


Swallowtail Butterfly

God’s Blessings!

Stamping With Guneaux Designs by Beverly Polen

How to make a Center Step Card

HOW TO MAKE A CENTER STEP CARD
Hearth & Home Framelits Dies & Happy Scenes

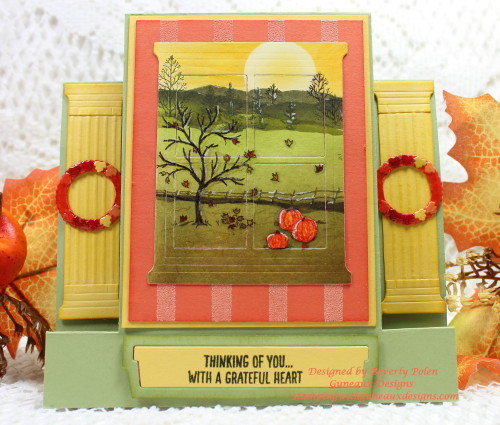
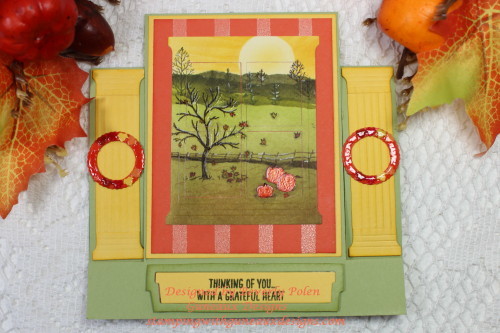
Thanks for stopping by!  🙂  My share for you today is a Center Step Card that features Stampin’ Up!’s Hearth & Home Framelits Dies and Happy Scenes Stamp Set.  I refer to my card as a Window Frame Wall Mural.  The reason for that is the complete window and frame are a scene instead of a scene outside the window.

Hearth & Home Framelits Dies & Happy Scenes

This card is the first one that I created with the Stampin’ Up! Hearth & Home Framelits Dies.  I ordered the dies many weeks ago and just received them recently.  BTW, if you have this set of dies, notice on the package they arrive in that the dies are called Framelits. However, in the on-line store and the mini catalog the dies are called Thinlits. I don’t know which they are, and it really doesn’t matter to me.  Just a tidbit!

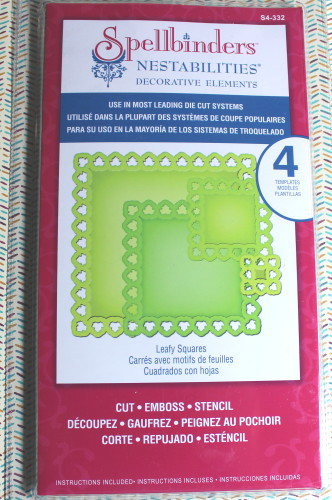
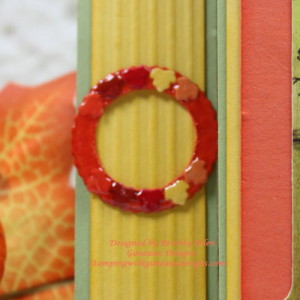
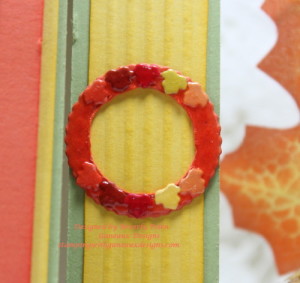
The two columns on the sides of the Center Step Card are enhanced by a wreath that is covered with tiny leaves.  I made the leaves with the Spellbinders Leafy Squares Dies (S4-332). Stampin Up Happy Scenes-Bohemian DSP5 and Spellbinders Leafy Squares  The pictures below give you a closeup of the wreaths which I covered with Stampin’ Up! Crystal Effects.

Hearth & Home Framelits Dies & Happy ScenesHearth & Home framelits Dies & Happy Scenes

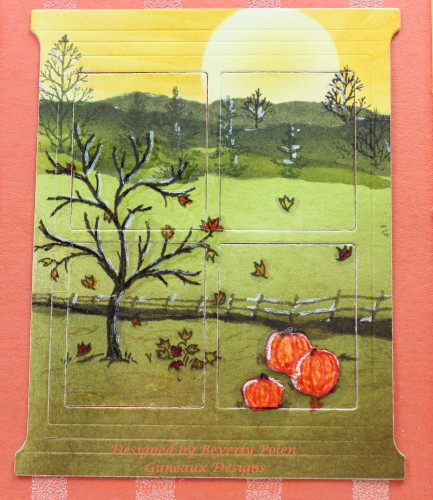
The picture below is a closeup of the window that I created with the Stampin’ Up! Hearth & Home Framelits Dies and Happy Scenes Stamp Set. It gives you a better idea why I call the card, Window Frame Wall Mural.  🙂
Hearth & Home Framelits Dies & Happy Scenes Stamp Set

 Hearth & Home Framelits Dies & Happy Scenes Stamp Set

 I hope you enjoyed the card.  Have a wonderful, blessed week.


Swallowtail Butterfly

God’s Blessings!

Stamping With Guneaux Designs by Beverly Polen

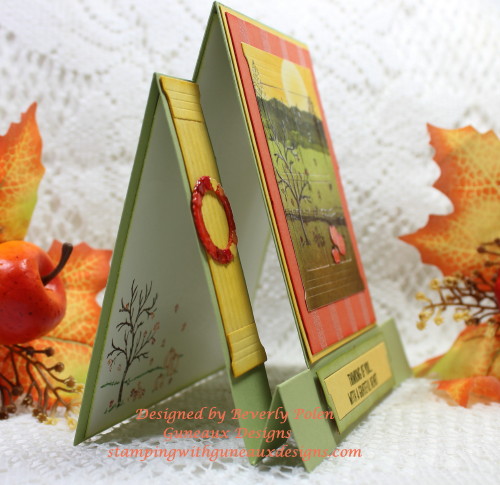
Hearth & Home Framelits Dies & Happy Scenes Stamp Set You can see in the above picture the inside of the card.  It includes a stamped image from the Stampin’ Up! Happy Scenes Stamp Set.

HEARTH & HOME FRAMELITS DIES & HAPPY SCENES STAMP SET

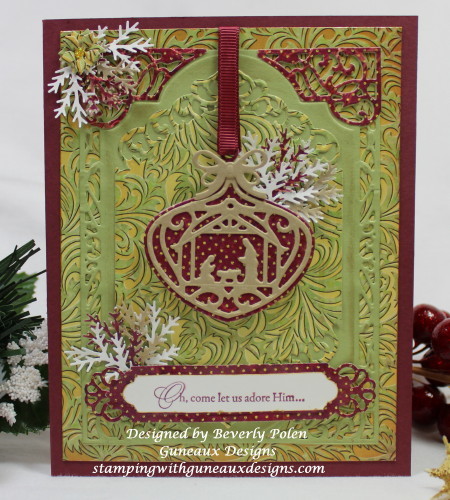
ODBD Delightful Decorations Dies Christmas Card

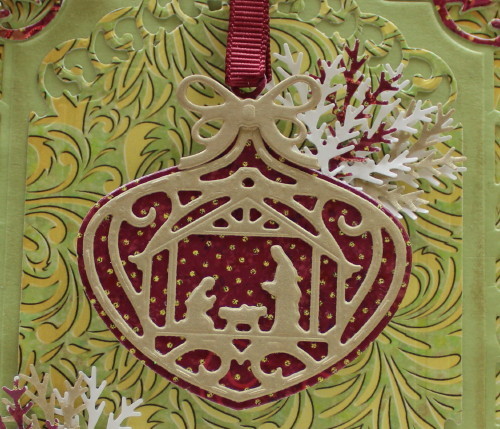
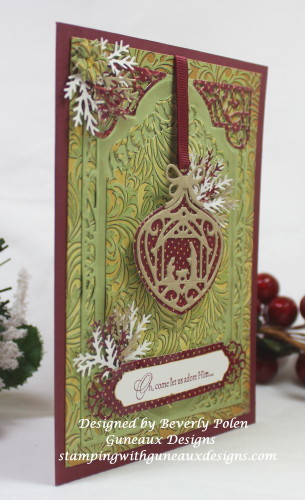
I am in love! 🙂  I love the ODBD Delightful Decorations dies, especially the one that is a nativity scene.  I have never seen a die like this, and I’m so glad I found it on Our Daily Bread Designs.  Here is my card that features the die.

ODBD Delightful Decorations Dies

This is my first card using Our Daily Bread Designs (ODBD) products.  I am so impressed with this business’ focus, which is a religious and spiritual focus for the crafting world.  I am a child of God’s and ODBD’s products certainly will enhance my crafting. Thank you ODBD!

The following is a better picture of the ornament die cut featuring the nativity scene.

ODBD Delightful Decorations Dies Christmas Card

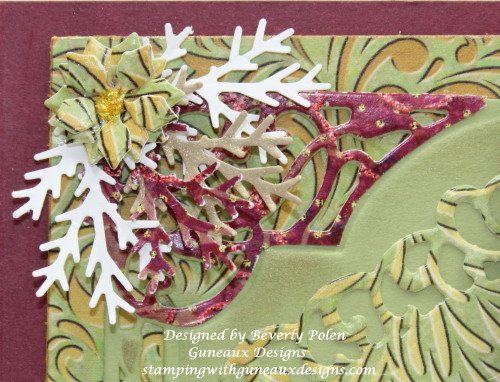
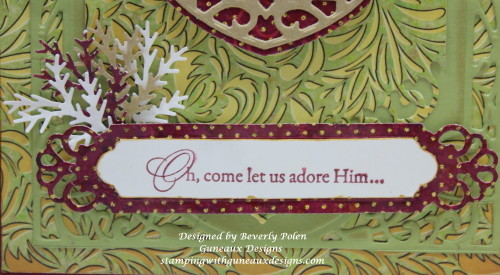
These pictures are closeups of the upper-left corner and sentiment on the card. The sentiment is from the retired Stampin’ Up! Come to Bethlehem stamp set.  I embellished these with “branches” created with the Martha Stewart Medium Branch Punch.

ODBD Delightful Decorations Dies
ODBD Delightful Decorations Dies Christmas Card

Martha Stewart Medium Punch, Branch

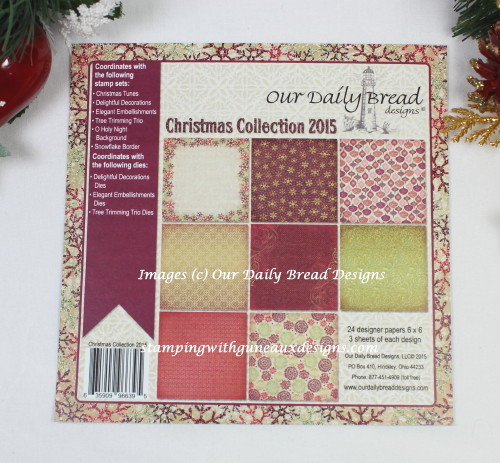
I made this card using ODBD Christmas Collection 2015 paper.  The paper has a shine to it and I really like it with its beautiful designs.  It’s slightly heavier than the Stampin’ Up! Designer Series Papers.  Here’s a picture of the designs.

ODBD Christmas Colection 2015 Paper Pad

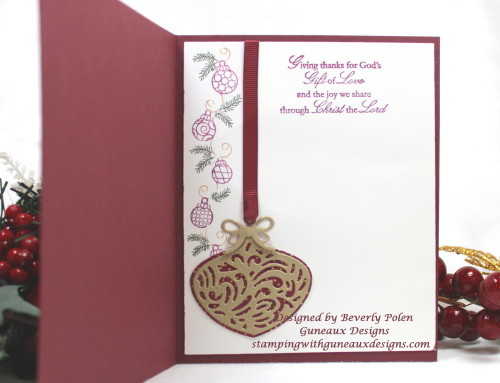
The inside of my card features another ornament die cut from the ODBD Delightful Decorations Dies.

ODBD Delightful Decorations Dies Christmas Card

Thank you for stopping by.  Don’t forget to leave a comment or a question.  Click on the conversation bubble to the right of this post’s title.


ButterflyGod’s Blessings!

Stamping With Guneaux Designs by Beverly Polen

ODBD Delightful Decorations Dies Christmas Card

ODBD DELIGHTFUL DECORATIONS DIES

SU Happy Scenes Let it Snow, Let it Snow, Let it Snow

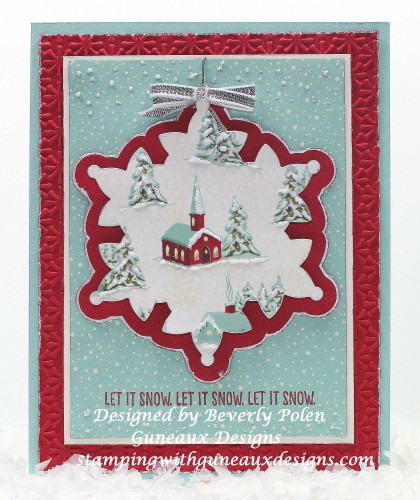
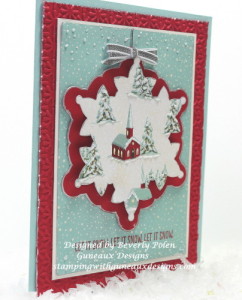
Hi, there!  Thanks for stopping by.  My greeting card share for you today is a simple Christmas card made with the SU Happy Scenes Stamp Set – Let it Snow, Let it Snow, Let it Snow sentiment and the SU Home for Christmas DSP .

SU Happy Scenes Stamp Set, Let it Snow, Let it Snow, Let it Snow

“Oh the weather outside is frightful, but the fire is so delightful, and since we have no place to go, LET IT SNOW, LET IT SNOW, LET IT SNOW!”  Can’t you hear Dean Martin singing this song from his A Winter Romance album?  Oh, sorry!  I’ll get back to the purpose of this post. 🙂

This Christmas card made with the SU Happy Scenes Stamp Set and Home for Christmas DSP is an easy card to make.  I have to admit, it’s difficult for me to make simple cards.  I have a tendency to make more complex cards and paper crafts. If you’ve scrolled through my site, you’ll understand what I mean.


HOW TO MAKE A CHRISTMAS CARD WITH THE SU HAPPY SCENES STAMP SET AND HOME FOR CHRISTMAS DSP:
  • Cut an 8-1/2″ x 5-1/2″ piece of Stampin’ Up! Pool Party Card Stock (item # 122924) and fold it in the middle.  This creates an A2 card.
  • Cut a 4″ x 5-1/4″ piece of Stampin’ Up! Real Red Card Stock (item # 102482) for your first card layer.  I used my Stampin’ Up! Big Shot (item # 113439) and the retired Stampin’ Up! Snow Burst Embossing Folder to add a textured snow impression onto the card stock.  Adhere to the front of the Pool Party card.
  • Cut a 3-3/8″ x 4-5/8″ piece of Stampin’ Up! Very Vanilla Card Stock (item # 101650), and adhere it onto the Real Red Card Stock.
  • Cut a 3-3/16″ x 4-3/8″ piece of the following design from the Stampin’ Up! Home for Christmas DSP and adhere it to the Very Vanilla Card Stock.
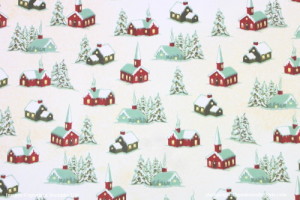
Home for Christmas DSP

Stampin’ Up! Home for Christmas DSP (item # 139592

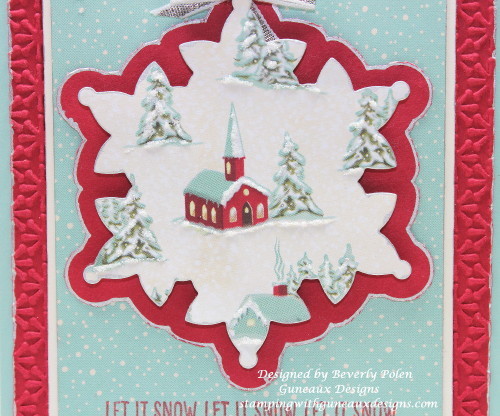
  • Using the retired Stampin’ Up! Festive Flurry Framelits (i.e., the next to the largest framelit), cut out a snowflake from the following design from the Stampin’ Up! Home for Christmas DSP (139592). (I chose a church to be the center of my snowflake).
Home for Christmas DSP

Stampin’ Up! Home for Christmas DSP (item # 139592)

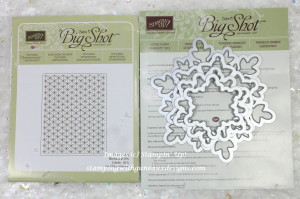
Stampin' Up! Embossing Folder and Festive Flurry Framelits

Stampin’ Up! Snow Burst Embossing Folder and Festive Flurry Framelits

  • Embellish the snow on the design scene with white glitter glue (I used Stickles – Frosted Lace).
  • With a pencil, trace around the second to the largest snow flake die (the same one used above) onto Real Red Card Stock.  Fussy cut it for a mat to go behind the Home for Christmas DSP snowflake cutout.  If desired, run a Silver Gel Pen around the edges of these two pieces, as I did.
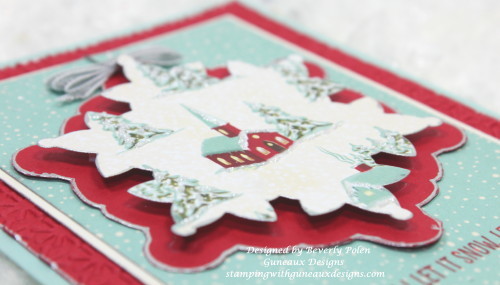
  • Use foam dots to adhere the two snow flake cutouts together.  If desired, add a ribbon and/or cord.

SU Happy Scenes and Home for Christmas DSP

SU Happy Scenes and Home for Christmas DSP

  • Stamp the sentiment, “LET IT SNOW LET IT SNOW LET IT SNOW”, from the SU Happy Scenes Stamp Set in Real Red Ink below the snowflakes.
  • That’s all, folks! Have a blessed day!

Butterfly

God’s Blessings!

Stamping With Guneaux Designs

By

Beverly Polen

SU Happy Scenes Stamp Set and Home for Christmas DSP Side View

SU HAPPY SCENES LET IT SNOW, LET IT SNOW, LET IT SNOW

Home for Christmas DSP – Stamping With Guneaux Designs

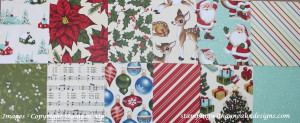
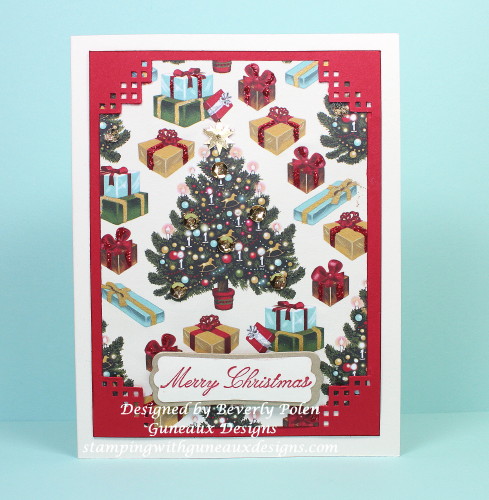
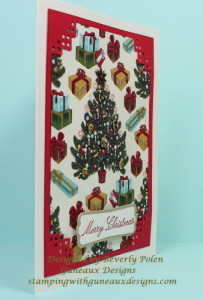
Are you searching for an easy and fast handmade card featuring the Home for Christmas DSP from Stampin’ Up!?  If you are, you have come to the right place! 🙂 But first, to make sure we are referring to the same DSP, let me show you a picture of the Home for Christmas DSP.  This Home for Christmas DSP card features the Christmas Tree design.

Home for Christmas DSP, Home for Christmas Designer Series Paper Blue Poinsettia

Home for Christmas Designer Series Paper (#139592)

Home for Christmas DSP

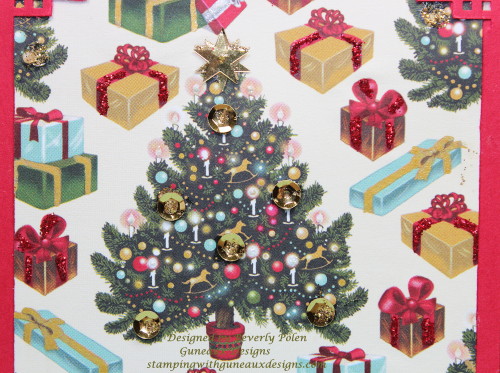
Here’s a closeup of the decorated tree and packages:

Home for Christmas DSP

Don’t you want to pick those little gold rocking horses off the tree?  They are so cute!

How to create the Home for Christmas DSP Christmas Card:

  • Cut an 8-1/2″ x 5-1/2″ piece of Stampin’ Up! Very Vanilla Card Stock (*#101650) and fold it in the middle.  This creates an A2 card.
  • Cut a 4″ x 5-1/4″ piece of Stampin’ Up! Real Red Card Stock (*#102482) for your first card layer.  I used an EK Success corner punch and punched the four corners on mine.  (This, of course, is optional.)
  • Cut a 3-1/2″ x 4-3/4″ piece of the Christmas Tree design from the Stampin’ Up! Home for Christmas DSP for your top card layer.  Try to ensure a Christmas Tree is in the center of your cut.  (Mine is off a little and I did not notice it until I had the card finished.  Oh well, that’s life!)
  • If you want to add a little dazzle to the Christmas Tree design, do as I did:  1) add glitter glue (e.g., red Stickles) on the packages with red ribbons, 2) add gold gel ink on the packages with gold ribbons, and 3) add sequins strategically on the tree.
    • TIP:  If you add sequins, please use a strong adhesive or they will fall off your paper.  I used gold sequins from Stampin’ Up! Metallic Sequin Assortment (*#138390) and Stampin’ Up! Crystal Effects (*#101055) to adhere mine to the card.  I know, Crystal Effects is a lacquer, not an adhesive!  Well, let me tell you, it is a great adhesive; it just takes some time to dry.
  • Adhere your card pieces together and add a sentiment.
  • You are finished and you have a simple and easy Home for Christmas DSP Christmas card!!

Now, wasn’t that easy?  Have a blessed and wonderful day!

CLICK HERE to see another Home for Christmas DSP Christmas Card!

*When you see this symbol “#” in my post, it means the item number of the Stampin’ Up! product that is listed before the number.


Click on the bubble to the right of this post title to leave a comment and/or ask a question.  I would love to hear from you!

Butterfly

God’s Blessings!

Stamping With Guneaux Designs

By

Beverly Polen

Home for Christmas DSP

HOME FOR CHRISTMAS DSP CHRISTMAS CARD
Reason For The Season Christmas Card

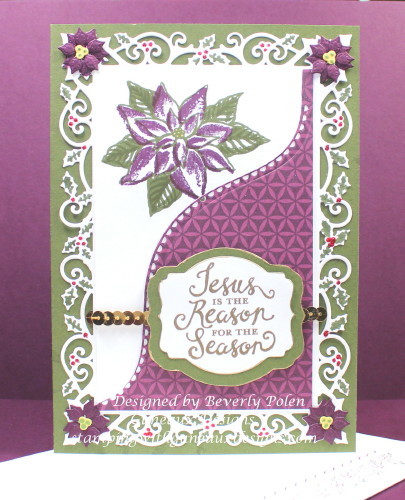
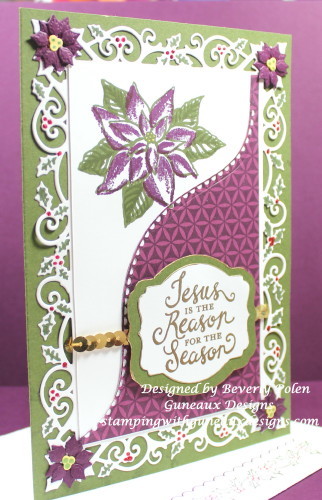
Presenting to you today is a Reason for the Season Christmas Card made with Bohemian Designer Series Paper and the Stampin’ Up! Reason for the Season Stamp Set.  I used the color combination of Mossy Meadow and Blackberry Bliss  to create the card. I think the color combination is gorgeous. What do you think?  (After viewing the card, leave a comment or question in the “bubble” to the right of the post title.)

Reason for the Season Christmas Card

Stampin' Up! Bohemian DSP

Stampin’ Up! Bohemian Designer Series Paper (#138446)

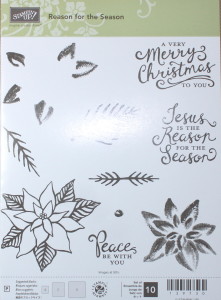
Reason for the Season Stamp Set

Stampin’ Up! Reason for the Season Stamp Set (#139730)

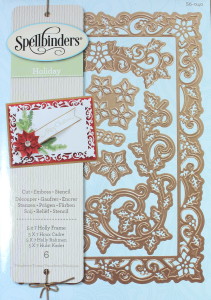
Spellbinders 5x7 Holly Frame


How did I create this Reason for the Season Christmas Card?  Here are my steps:

  • To create the Reason for the Season Christmas Card, I used my Big Shot Die Cutting Machine to cut out the holly border for the first layer of the card.  The holly border is a die cut from Spellbinders Holiday 5 x 7 Holly Frame Dies (S6-040). While the holly border die cut remained in the die, I used Mossy Meadow and Real Red markers (Stampin’ Up!’s) to color the holly leaves and berries. (Later I used Red Stickles glitter glue on the berries.)  
  • Notice the Blackberry Bliss poinsettias on the four corners of the holly frame (see above pic). They were created also with the Spellbinders Holiday 5 x 7 Holly Frame Dies.  If you have been visiting my site, you have noticed that I am using these dies a lot lately. They are so intricate, cut so well, and create gorgeous die cuts.

Reason for the Season Christmas Card

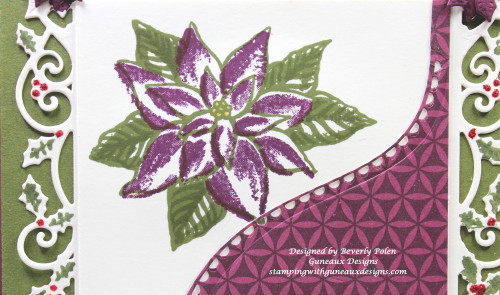
  • At the top-left of the card, I stamped a Blackberry Bliss poinsettia with Mossy Meadow leaves.  These stamps are from the Stampin’ Up! Reason for the Season Stamp Set.  After stamping the poinsettia, I used a Spellbinders Curved Borders Two die and the Blackberry Bliss design from the Stampin’ Up! Bohemian Designer Series Paper to create the curved border that separates the Blackberry Bliss poinsettia from the sentiment.
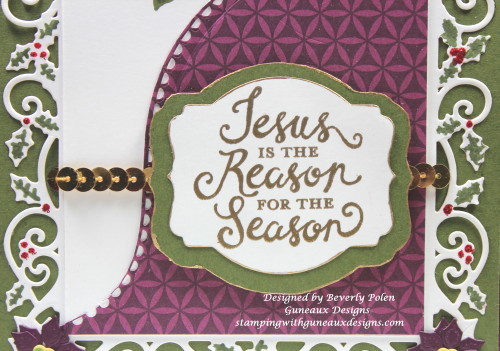
  • The Jesus is the Reason for the Season sentiment, which is also a stamp from the Stampin’ Up! Reason for Season Stamp Set, was stamped on a piece of Whisper White Card Stock.  I embossed the sentiment with Gold Embossing Powder and added a touch of gold (from a Uni-Ball Gel Pen) around the rim of the sentiment. I used the retired Stampin’ Up! Deco Labels Framelits to cut out the sentiment and a Mossy Meadow mat. Behind the sentiment is a row of Stampin’ Up! Gold Sequin Trim (#132983).

Reason for the Season Christmas Card

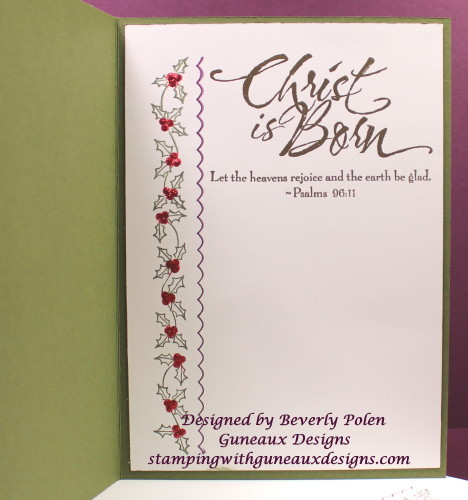
  • On the card’s inside, I used a holly and berry stamp from the OutlinesRubberStamp.com (gone out of business), to stamp a border.  I used a sentiment from the retired Stampin’ Up! stamp set, Christ is Born.  Because the card is 5 x 7, there is plenty of white space for a personal note despite the stamp images that I added.

Reason for the Season Christmas Card

Thank you for stopping by, and have a wonderful week!


Butterfly

God’s Blessings!

Stamping with Guneaux Designs

By

Beverly Polen

Reason for the Season Christmas Card

REASON FOR THE SEASON CHRISTMAS CARD