Heartfelt Creations Winter’s Eve Card

Heartfelt Creations Winter’s Eve Card

Hello!  Today I am sharing my Heartfelt Creations Winter’s Eve Card  that I made for a challenge on Splitcoaststampers.com.  The hostess of the challenge wanted to “See the Light”.  The impetus for her challenge was related to the days getting shorter and having less light each day.  Therefore, my Heartfelt Creations Winter’s Eve Card shows much light from a window.

I used several of the products in this collection to create the card.   I used the Window Frame Stamp Set and Window Frame Dies to create the window.   The gorgeous designer paper I used is from the Heartfelt Creations Winter’s Eve Collection paper pad. The paper pad includes so many gorgeous designs.

Here are additional photos of my card:

Enjoy!!


Butterfly_1_1

God’s Blessings!
Stamping With Guneaux Designs By Beverly Polen
Firm Reliance on Divine Providence!


Luke 23:44-46

“It was now about the sixth hour, and darkness came over the whole land until the ninth hour, for the sun stopped shining.  And the curtain of the temple was torn in two.  Jesus called out with a loud voice, “Father, into your hands I commit my spirit.”  When he had said this, he breathed his last.

CottageCutz Jolly Snowman Heads Up

COTTAGECUTZ JOLLY SNOWMAN HEADS UP

Welcome!!  I have a card share for you today that should bring laughter for you!  My card is a CottageCutz Jolly Snowman Heads Up card.  This week on Splitcoaststampers.com, there is a Clean and Simple Challenge that is titled, “Head in the Clouds”.  The challenge hostess wanted to see creations around this theme.  I decided to take the challenge literally.  So my card features the CottageCutz Jolly Snowman with his head in the clouds attached by black thread to the snowman’s arm.  I thought a “Heads Up” sentiment would be appropriate.

I wanted a cloudy background for a snowy scene, thus I cut some card stock in scallops of various sizes and used that as a cloud template.  Using the template, I sponged on some blue Hero Arts Distress Oxide inks and spritzed the clouds with water to get the appearance of it snowing.

Subsequently, I cut some snowbanks, covered them with sparkly crystal granules, and attached them to the card base.

Enjoy the card, and let me know if it made you laugh!


Butterfly_1_1

God’s Blessings!
Stamping With Guneaux Designs By Beverly Polen
Firm Reliance on Divine Providence!


1 John 1:7

“But if we walk in the light, as he is in the light, we have fellowship with one another, and the blood of Jesus, his Son, purifies us from all sin.”


Guneaux Designs Heartfelt Creations Festive Holly Cardinal

Have you seen the Heartfelt Creations Festive Holly designer paper?  It is so gorgeous!  It is featured on this Guneaux Designs Heartfelt Creations Festive Holly Cardinal card.

The Heartfelt Creations Festive Holly Collection designer paper features cardinals, deer, snowflakes, poinsettias, wagon wheels, fence, holly, and much more.  If you want to get an early start on making Christmas cards for 2017, this beautiful paper is great to use and it won’t disappoint you!

To create this card, I cut a 6″ x 12″ piece of Stampin’ Up! (SU) Cherry Cobbler card stock and scored it at the 3″ and 6″ measurements to form my card base.  I used one of the 12″ x 12″ pieces of Heartfelt Creations Festive Holly Collection designer paper and cut it into sections that fit onto the card base.

The second and third panel eventually will include a personal message for the recipient of the card.  The beautiful cardinal on the first panel is from the Hero Arts Color Layering Cardinal stamp set.  This cardinal goes perfectly with the Healtfelt Creations Festive Holly Collection Designer Paper as it features lots of cardinals.  I stamped the cardinal onto a circular piece of Neenah Solar White Card Stock with SU Rose Red and Cherry Cobbler Classic Ink and Memento Tuxedo Black ink.  I added some pine needles, holly, and crystal clear glitter.  I used the  Heartfelt Creations Festive Holiday Die to cut two SU Wild Wasabi lacy die cuts, which I glued together.  I attached the cardinal piece to this and then to the front panel of the card.  I also added crystal glitter onto the lacy die cuts.

I submitted this card to the Splitcoaststampers.com Color Challenge to use SU Cherry Cobbler, Whisper White, and Garden Green colors on a card, and a Free For All Challenge to create a “Winter in July” card.

To provide you with an idea about the designs on the Heartfelt Creations Festive Holly Collection paper, the following are photos of it.


Butterfly_1_1

God’s Blessings!
Stamping With Guneaux Designs By Beverly Polen
Firm Reliance on Divine Providence!


John 14:21

Jesus said, “Peace I leave with you; my peace I give you.  I do not give to you as the world gives.  Do not let your hearts be troubled and do not be afraid.”

Glue Stick Resist Technique

GLUE STICK RESIST TECHNIQUE

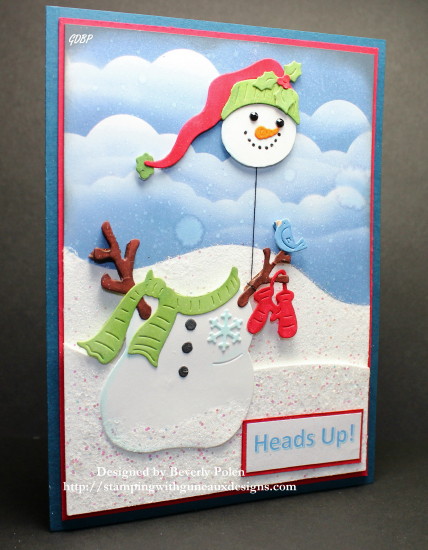
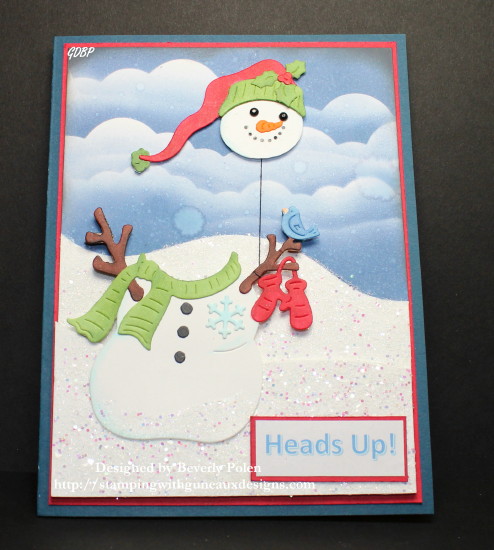
Another day and another card share!!  Hello, my friends.  Today’s card share features two items: the Glue Stick Resist Technique, and the ODBD Snowflake Sky Die.

I had never heard of or try the Glue Stick Resist Technique until a challenge on Splitcoaststampers involved using it.  It actually is a fun technique.  It is quite similar to the Color Resist Technique, but using a glue stick instead of VersaMark stamped images covered with clear embossing powder.

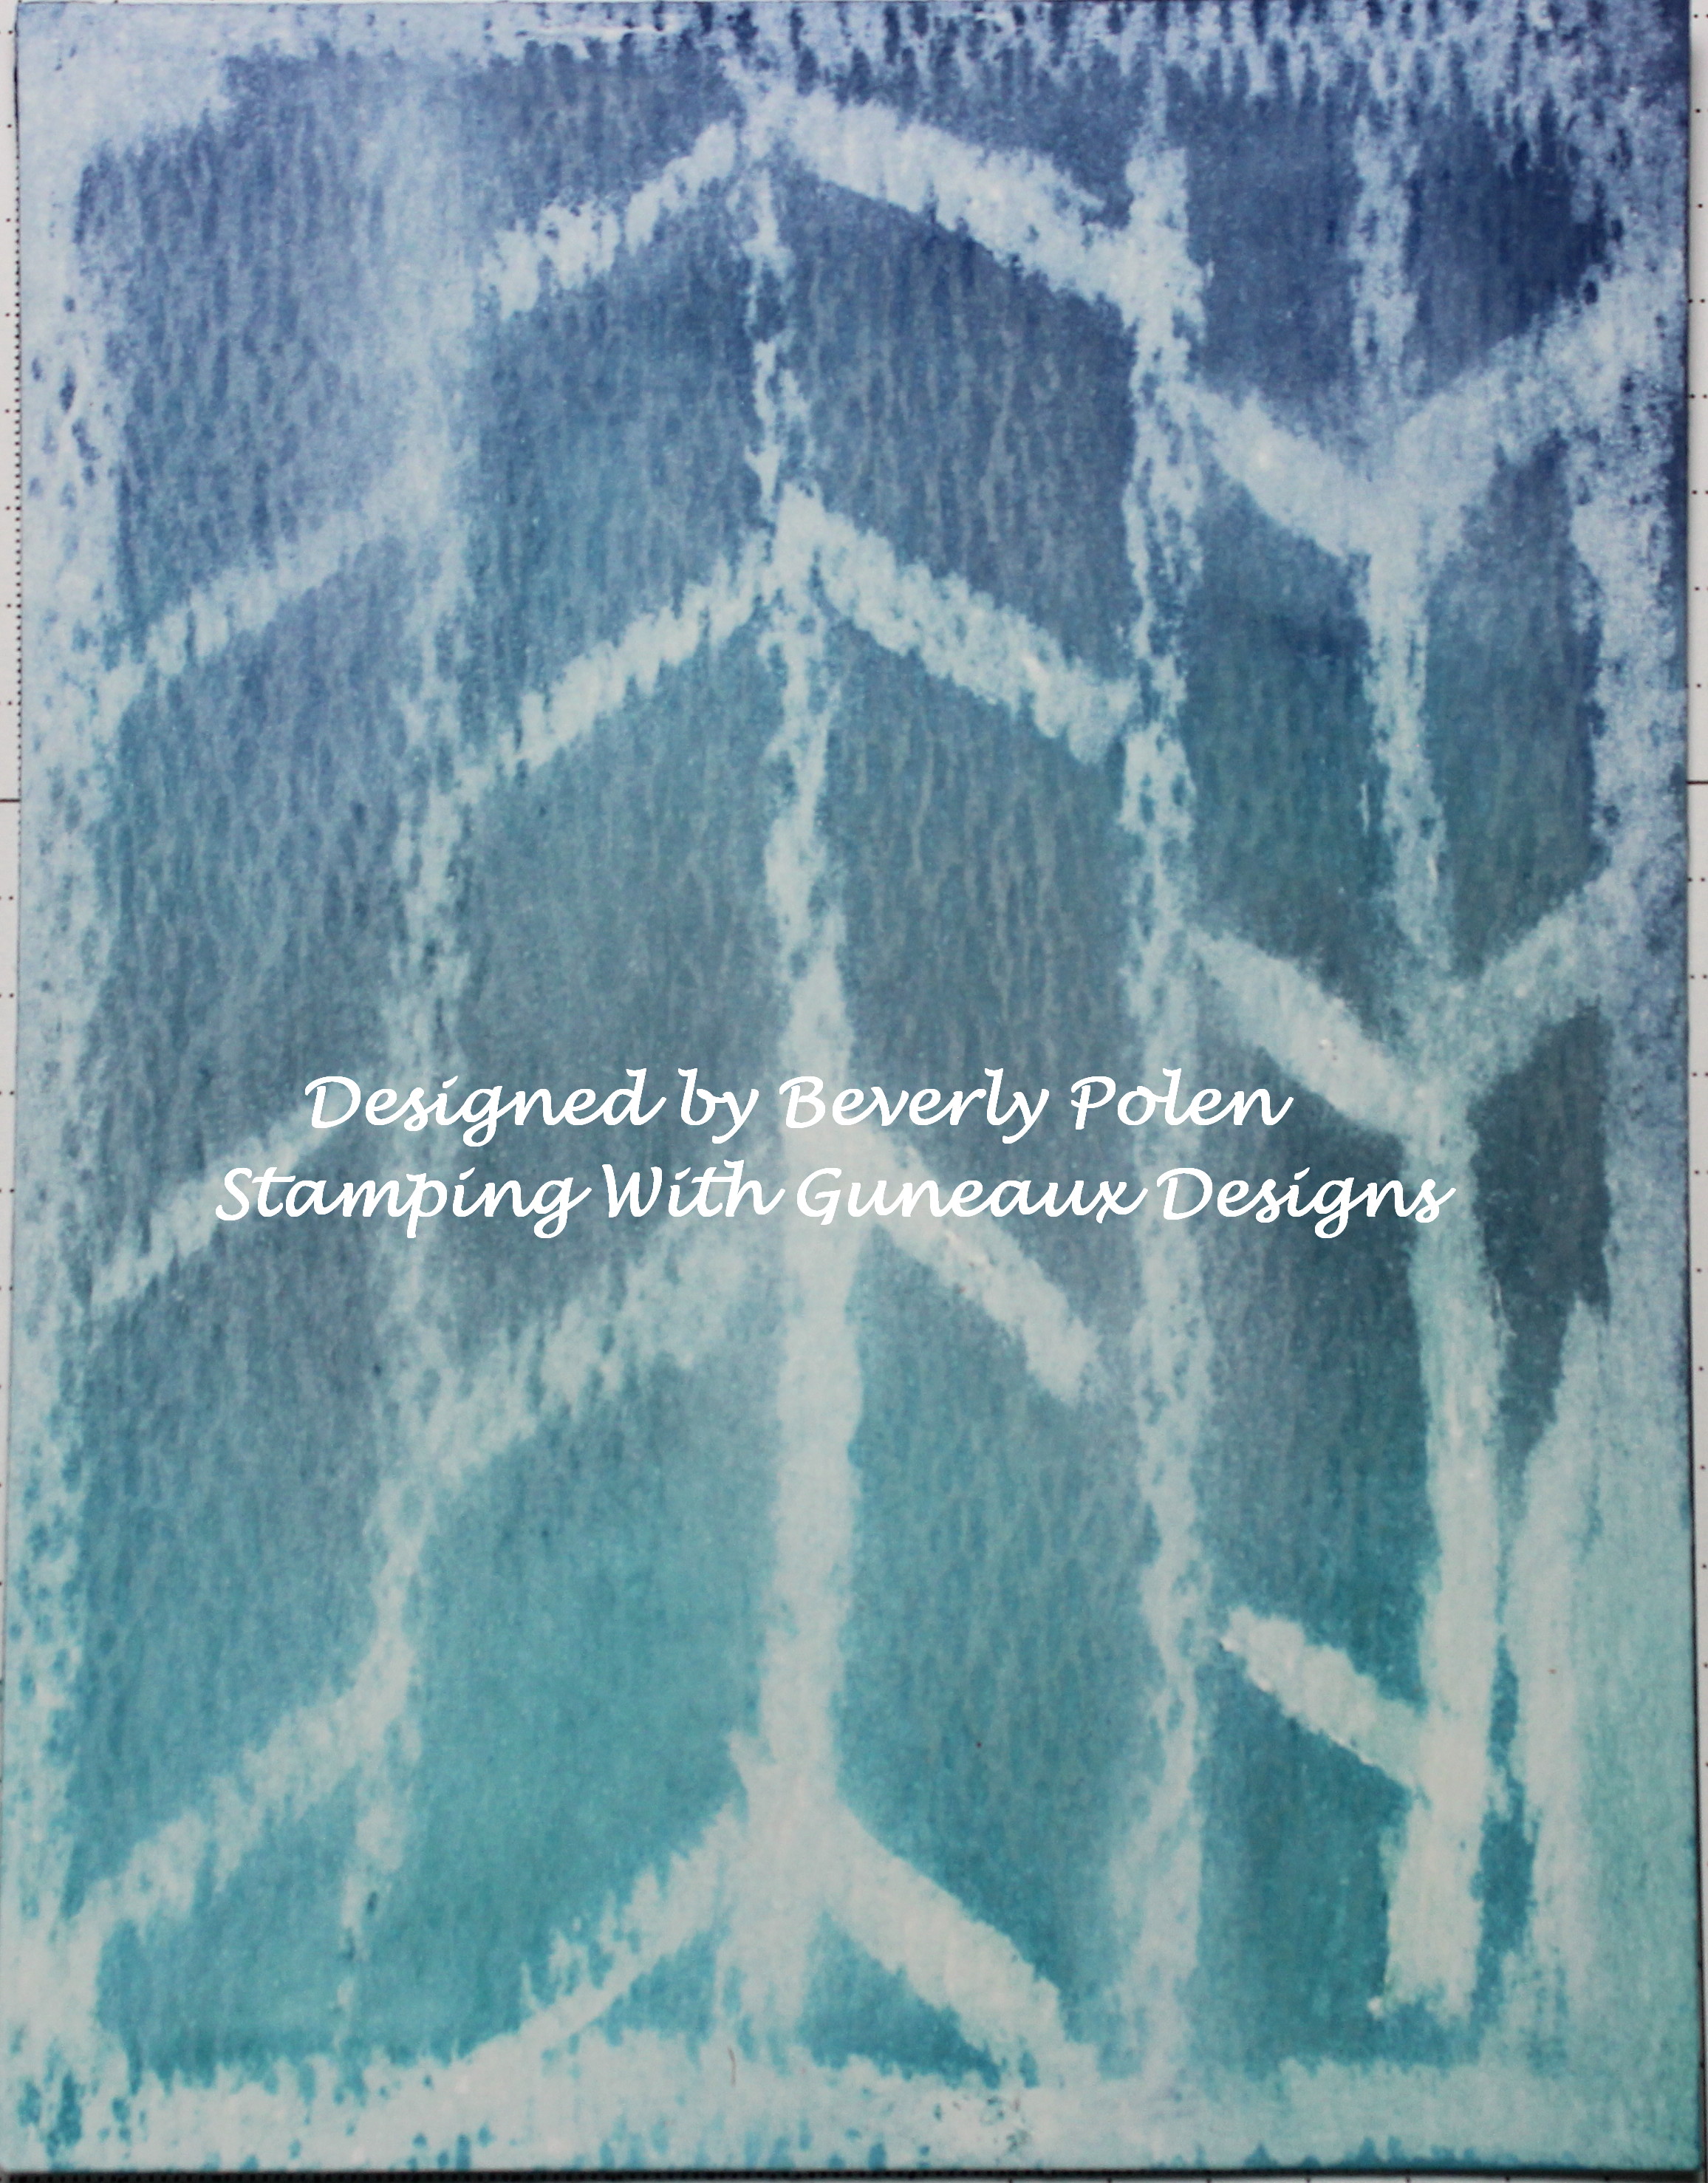
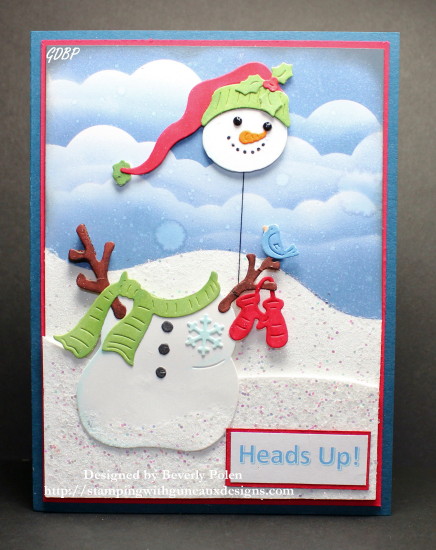
To create the card, I applied a SU Glue Stick in a chevron pattern over a piece of water color paper. After the glue dried, I sponged three different colors of blue distress ink onto the panel. Then I removed the glue from the panel with a baby wipe.  If you do not have a baby wipe, a wet paper towel will work.  This photo shows the results, and it is just that simple.

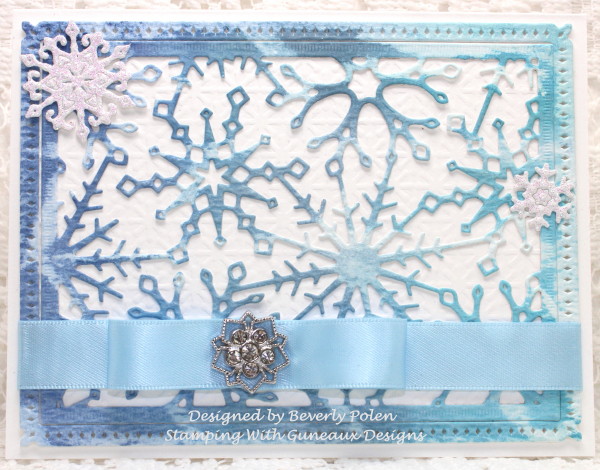
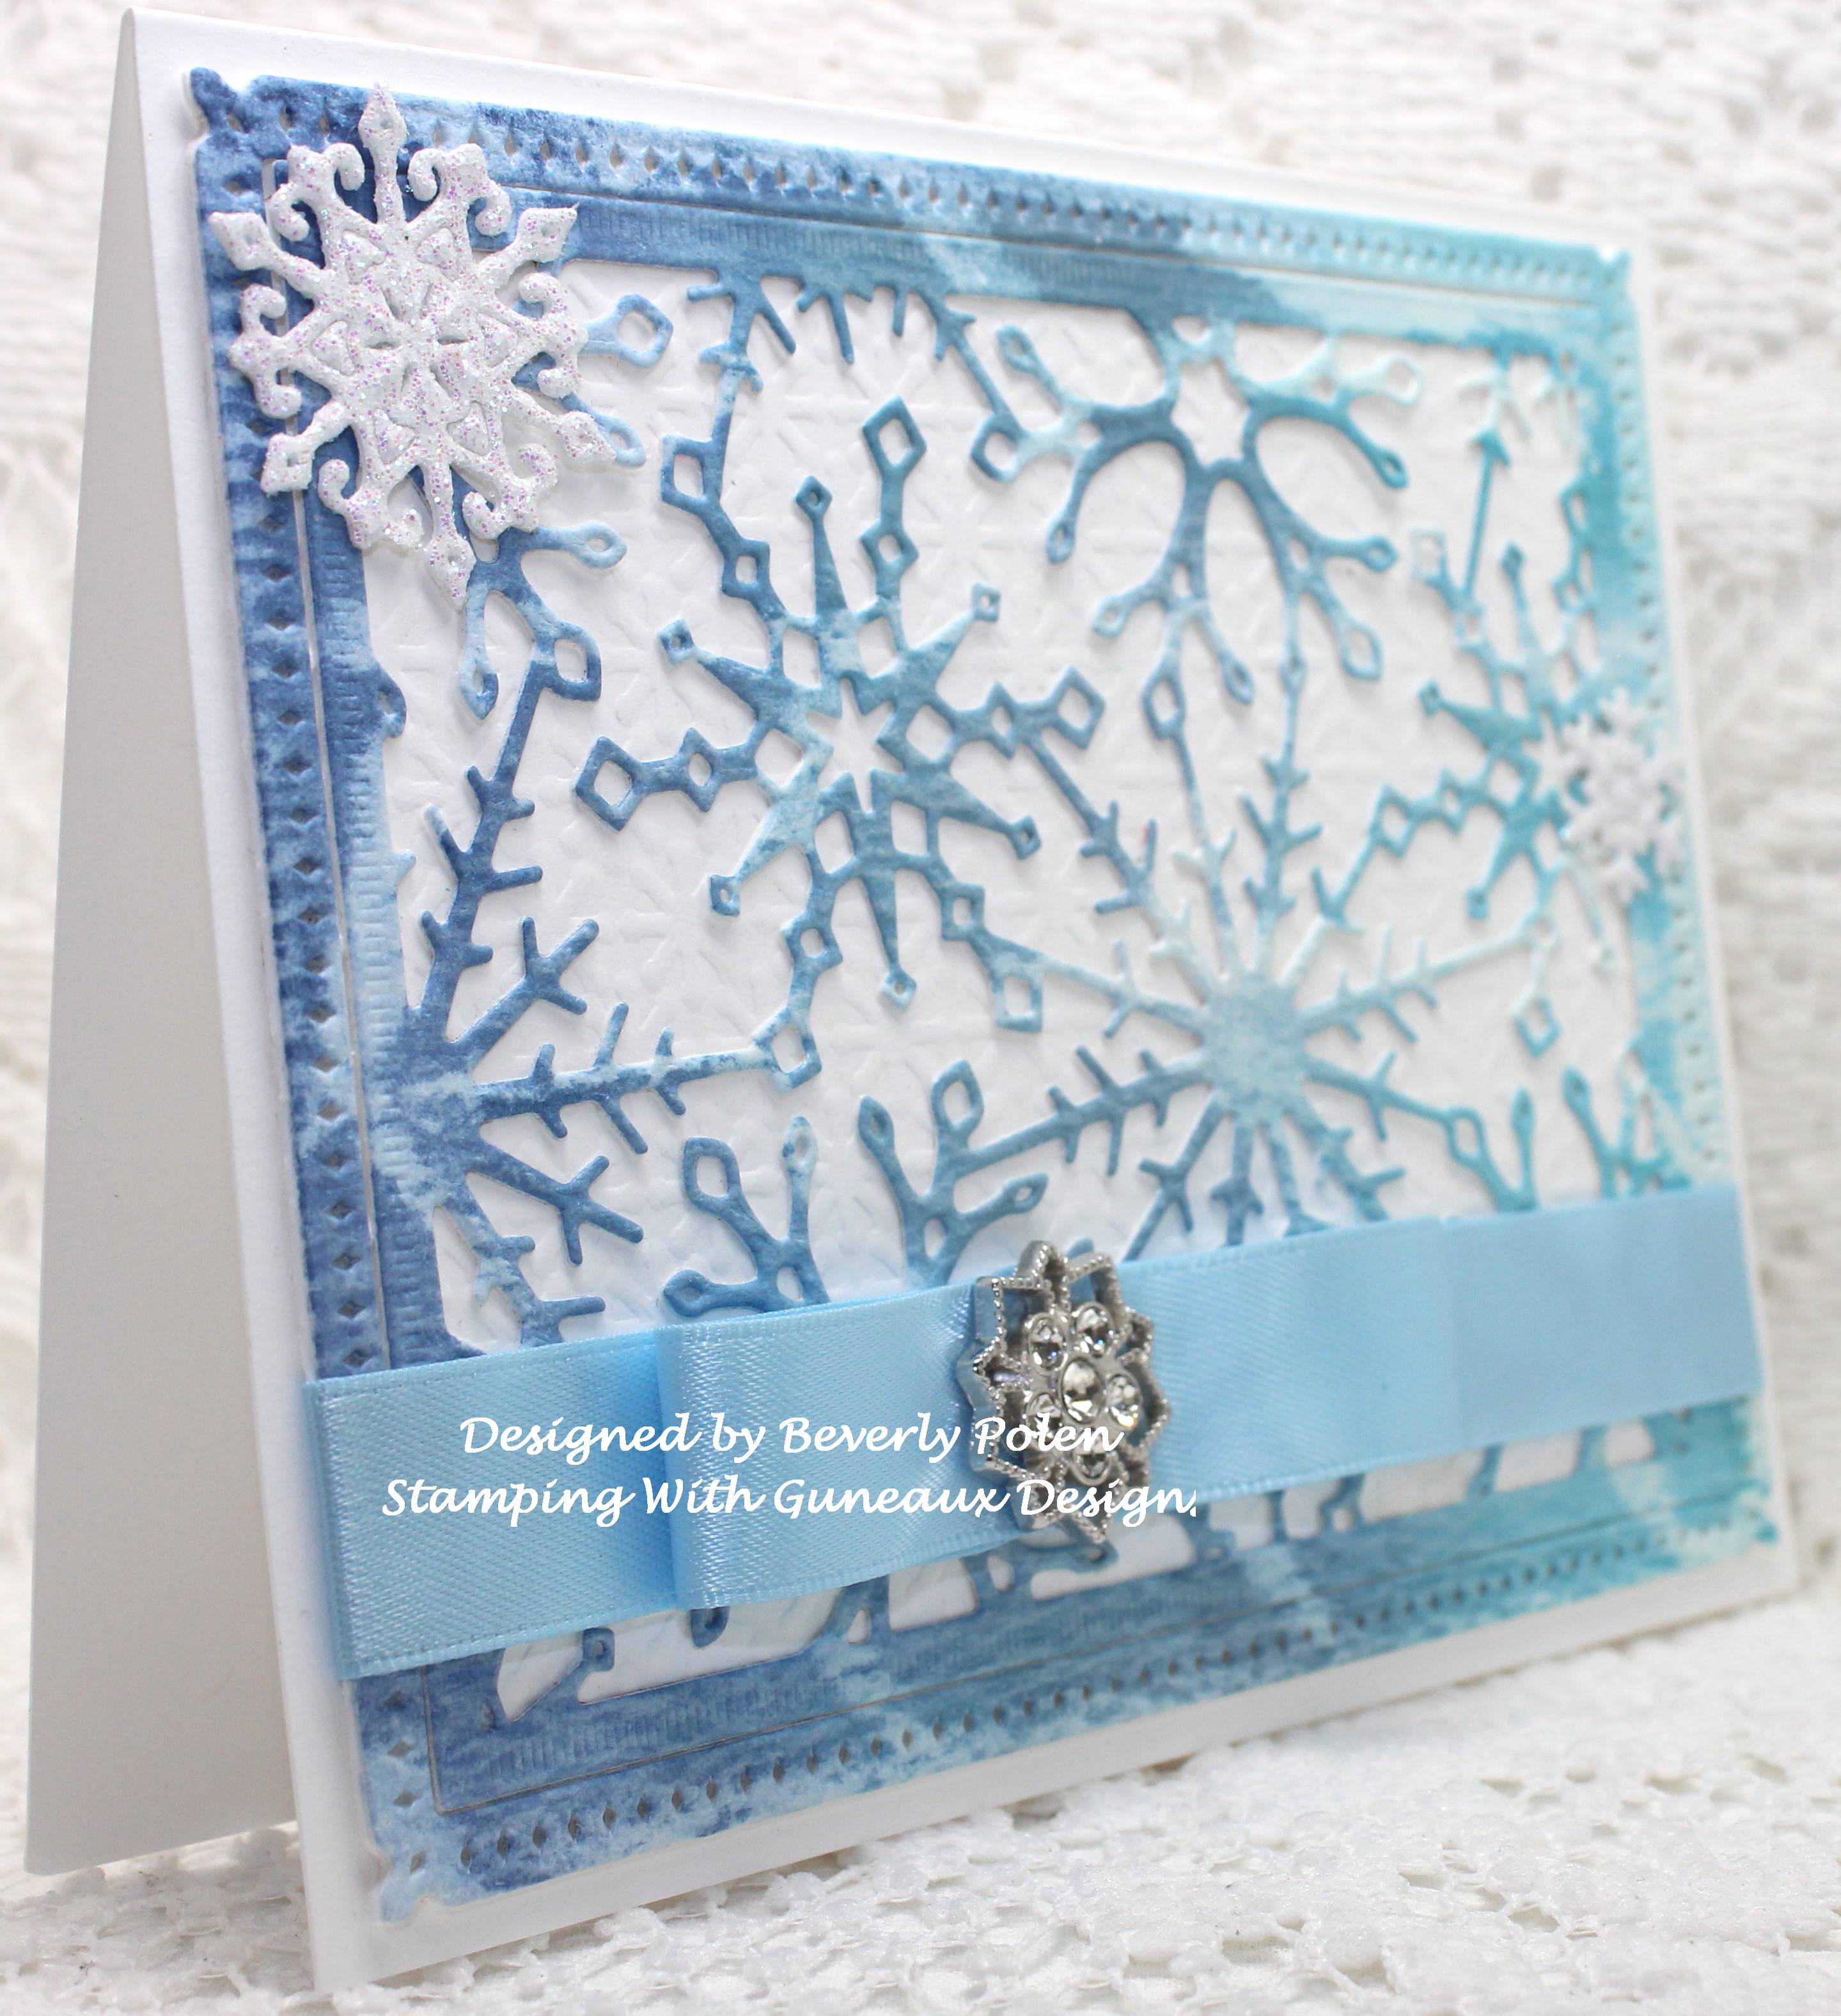
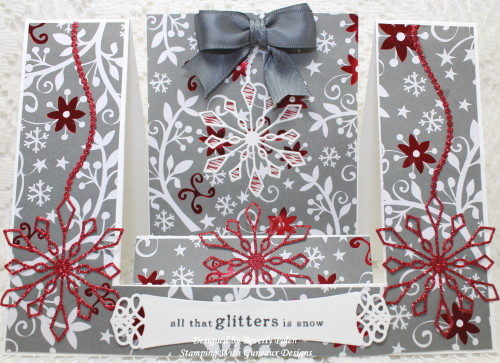
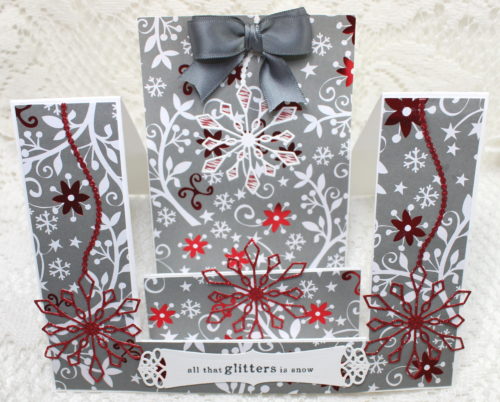
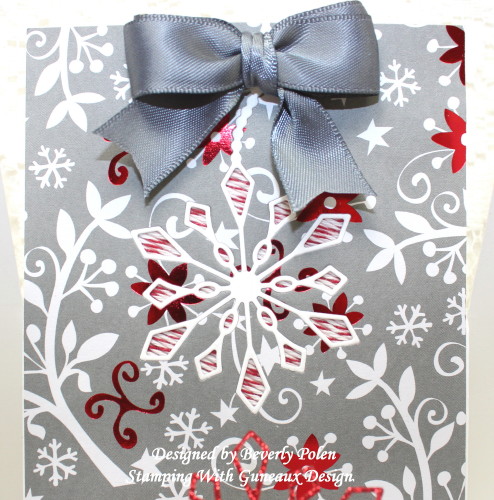
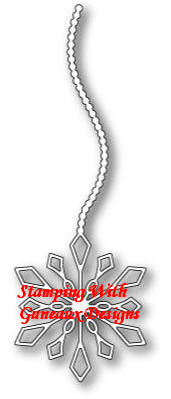
I decided to use the piece of water color paper (i.e., above photo) to cut out a snowflake panel with the ODBD Snowflake Sky Dies.  I really like the outcome.  I also used the ODBD Snow Crystals Dies, which coordinate with the Snowflake Sky Dies, to add two white glitter snowflakes. Then I wrapped this panel with blue ribbon and a bow with a SU Frosted Finishes Embellishment in the center, offsetting the bow.


Paper: Solar White, American Crafts, Water Color Paper

Ink:  Tim Holtz Distress Inks

Accessories: SU Glue Stick, ODBD Snowflake Sky Dies, ODBD Snow Crystals Dies, SU Ribbon, SU Frosted Finishes Embellishment

Techniques: Glue Stick Resist Technique


Butterfly_1_1God’s Blessings!
Stamping With Guneaux Designs By Beverly Polen
Firm Reliance on Divine Providence!


1 JOHN 4:7-11

“Dear friends, let us love one another, for love comes from God.  Everyone who loves has been born of God and knows God.  Whoever does not love does not know God, because God is love.  This is how God showed his love among us:  He sent his one and only Son into the world that we might live through him.  This is love: not that we loved God, but that he loves us and sent his Son as an atoning sacrifice for our sins.  Dear friends, since God so loved us, we also ought to love one another.”

Step Ladder Center Cut Card Fold

Have you searched for instructions on how to make a Step Ladder Center Cut Card Fold?  I have searched and searched for a tutorial or video for this card fold, and I have found so many different measurements and names given for the fold.  I do not know what is correct.  However, I wanted to make a card with the fold, thus, I did a lot of guessing.  Here is my creation, and I will share a tutorial below about the card fold.

Step Ladder Center Cut Card

But first, I want to share a little information about the card.  There are three “steps” in the center of the card with each one higher than the other.  The third step in the back is the highest and includes an additional piece of card stock for the main feature of the card.

Step Ladder Center Cut Card Fold

The measurements I used for the card resulted in a 5″ x 7″ card, or an A7 size card.  I want to draw your attention to the third step that I mentioned includes an additional piece of card stock.  Look closely, and you will see an inlaid snowflake in white.  Look even closer and you will see twine behind the snowflake.  This technique is called the Twine Inlay Technique.  Here is a tutorial for this technique.  The following photo is a closeup of the results of using the technique.

I prepared this card for submission to a Splitcoaststampers “Technique Lovers Challenge”, which involved using the Twine Inlay Technique. I created this main feature of the card with the Memory Box Alpine Snowflake Die.

Enjoy the card, and leave a comment about it!


STEP LADDER CENTER CUT CARD FOLD TUTORIAL

  • Cut a 7″ x 10″ piece of card stock,
  • With the 7″ side at the top of a cutting tool (henceforth, trimmer) move the card stock to the left to the 1-5/8″ mark,
  • Move the cutting blade of your trimmer down to the 1″ mark,

  • Cut the card stock from the 1″ mark down to the 8-1/2″ mark,

  • The result is a 7-1/2″ cut,

  • Flip the card stock over, not around, so that the BACK that was face down is now face up (if you turn the card stock around 90 degrees instead, the cuts will not line up),
  • With the 7″ side at the top of the trimmer, move the card stock to the left to the 1-5/8″ mark,

  • Move the cutting blade of your trimmer down to the 1″ mark,

  • Cut the card stock from the 1″ mark down to the 8-1/2″ mark, resulting in the cuts on both sides lining up evenly,

  • Place the card stock onto a scoring tool with the 10″ side at the top and the cuts beginning at the 1″ mark against the left of the tool,

  • Beginning at the 1″ mark and at the first cut line, score down to the second cut line,

  • Score at the 2″ and 3-1/2″ within the two cut lines,

  • Score at the 5″ mark from the top of the card stock to the bottom,

  • Score at the 7-1/2″ mark within the two cut lines,

  • With the card stock cut and scored, begin folding the score lines as shown in this photo,

  • The Step Ladder Center Cut Card Fold will look like the following after folding.

  • With the card stock standing after the folding, it will look like this:

  • Decorate the card as desired.  If a piece of card stock with the main feature is added to the third step of the step ladder card, cut the piece at 3-11/16″ x 4-7/8″ so it will fit horizontally and vertically.   Of course die cuts or other elements can be added on the third step as a main feature.  Enjoy your creation.

Butterfly_1_1God’s Blessings!
Stamping With Guneaux Designs By Beverly Polen
Firm Reliance on Divine Providence!


 1 PETER 3:12-15 (NIV)

“For the eyes of the Lord are on the righteous and his ears are attentive to their prayer, but the face of the Lord is against those who do evil.  Who is going to harm you if you are eager to do good?  But even if you should suffer for what is right, you are blessed. Do not fear what they fear; do not be frightened.  But in your hearts set apart Christ as Lord.  Always be prepared to give an answer to everyone who asks you to give the reason for the hope that you have.”

CottageCutz Party Puppy

Welcome to Guneaux Designs!!  Today I have a quick post regarding a cute card I made several weeks ago and sent to the Tri-County Humane Society in Minnesota.  The card features the CottageCutz Party Puppy die, and it is a “Thank You” card for those who care for homeless animals and provide other great services for the area.

CottageCutz Puppy Party

I also submitted the card for a Splitcoaststampers challenge to make this type of card with a holiday theme.  I actually do not own a pet, but I sure get a lot of love from my daughters’ pets. They are very special to our family.

This photo is a closeup of the cute little puppy!  I added a bell on a piece of bakers twine around his neck.

CottageCutz Party Puppy

CottageCutz Party PuppyEnjoy, and I hope you are having a wonderful week!


PRODUCTS USED:

Stamps:  CP Butterfly Notes (sentiment)
Paper:  SU Baked Brown Sugar, Crumb Cake, Whisper White, and Pink Pirouette Card Stock; Reflections Card Stock
Ink:  SU Read Red
Accessories:  CottageCutz Party Puppy Die, Martha Stewart Punch, Spellbinders Conversation Bubble Three Dies, SU Jingle Bell, SU Cherry Cobbler Baker’s Twine, Black Gems, Foam Tape

Cottage Cutz Party Puppy


Butterfly_1_1

God’s Blessings!

Stamping With Guneaux Designs By Beverly Polen

Firm Reliance on Divine Providence!

The birth of Jesus (cont’d):  “When he [King Herod] had called together all the people’s chief priests and teachers of the law, he asked them where the Christ was to be born.  “In Bethlehem in Judea,” they replied, “for this is what the prophet has written:  ” ‘But you, Bethlehem, in the land of Judah, are by no means least among the rulers of Judah; for our of you will come a ruler who will be the shepherd of my people Israel.’ ”  Matthew 2:3-6