Happy Scenes Snowy Scenes

I think that one of the most beautiful scenes in the Northern United States is a beautiful snowy scene that is untouched by tire tracks, foot prints, animal hoof/paw prints, road slush, and more.  The quietness of a landscape with trees that are covered with freshly fallen white snow is a gift from heaven and it certainly is a happy scene.  You can see things in the landscape that you have not noticed before.  If there is a red cardinal in the landscape, that pop of red upon the glistening white snow is breathtaking.

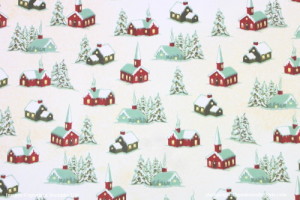
Last week I created a similar scene for my card that I am sharing today.  I created the card in response to a Splitcoastampers.com  Inspirational Challenge, IC527.  The challenge involved picking a picture from a particular Pinterest board that inspired you, and then creating a card based on that inspiration.  This is the beautiful picture I chose as my inspiration:

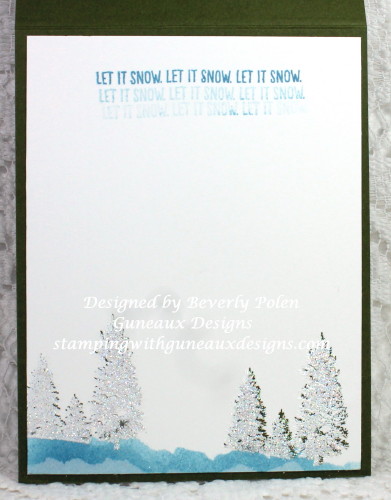
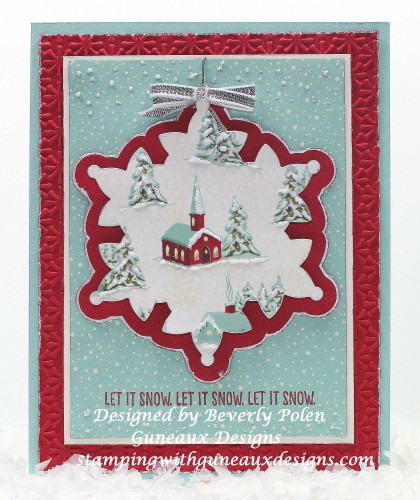
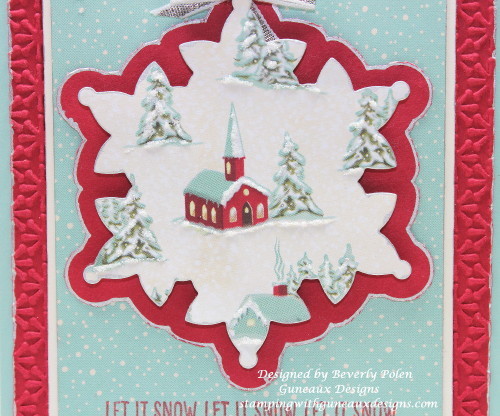
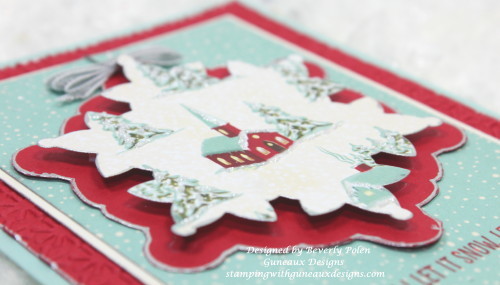
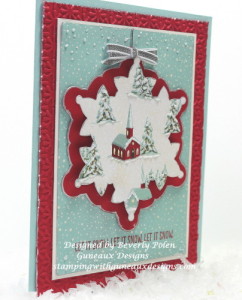
 And this is my inspirational card that I created

Happy Scene Snowy Scene

I was excited to hear that my card was selected for one of the Splitcoaststampers FAVORITES for the week ending January 10.  

To create the scene, I used Stampin’ Up! stamp sets that included trees and one that included the bench in the scene.  The stamp sets are:

  1. Lovely as a Tree (Item #128655)
  2. Happy Scenes (retired)
  3. Branch Out (retired)
  4. Plant Hope (retired)
  5. Pendant Park (retired)

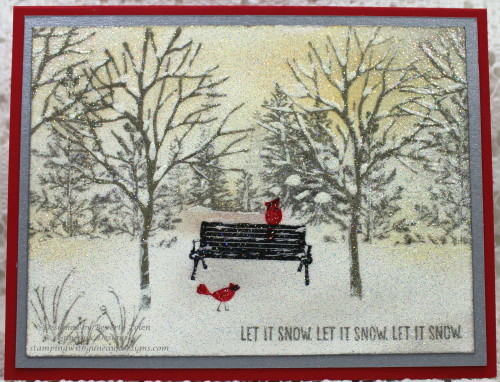
I began by stamping the large tree from the Branch Out Stamp Set into VersaMark Ink and stamping it in four places on the Whisper White Card Stock.  I then embossed these trees (including the branches at the top left and right) with Stampin’ Up! Pewter Embossing Powder (retired).

Using light gray inks, I stamped the remaining trees in the background.  Because the inspirational picture has yellow and orange in the sky portion of the background, I sponged Stampin’ Up! So Saffron and Peach Parfait Ink onto the snowy scene background.  I added a bench into the foreground with red birds (from other stamp sets) on and around the bench.  I added the sentiment from the Happy Scenes Stamp Set.

Once I was satisfied with the scene, I added white acrylic paint to place “snow” within the trees.  I covered the complete scene with VersaMark Ink and heat embossed with Stampin’ Up! Iridescent Ice Embossing Powder.

I attached the scene to a piece of Brushed Silver Card Stock which was attached to the Real Red card base.

Enjoy my snowy scene greeting card!


Swallowtail Butterfly

God’s Blessings!

Stamping With Guneaux Designs

Happy Scenes Stamp Set Happy Winter Snowman

Stampers, I have for you a Happy Scenes Happy Winter Snowman!  I wanted to create a snow scene using the Stampin’ Up! Happy Scenes Stamp Set along with a snowman (or snow-girl).  The snow-girl is the primary element on my card.  She is a whimsical and delightful snow-girl and is appearing to be shrugging her shoulders.  Maybe she is just trying to keep warm.  What do you think?Happy Scenes Stamp Set Happy Winter Snowman

To create the “happy scene” for this card,  I wanted to use a technique that I’ve not used in a long time. That technique is coloring with Colored Pencils.  I used Prismacolor Colored Pencils to create the sky and snow. As for the snow-girl, the snowman stamp that I used is from the Outlines Rubber Stamps Co.  I loved the Outlines Rubber Stamp Co. stamps and was heartbroken when the Co. went out of business.  🙁

For the trees in the scene, I used Stampin’ Up! Mossy Meadow ink.  I wanted the trees covered with snow, so I used VersaMark Ink on the tree stamp and stamped it over the Mossy Meadow trees slightly off center.  I then added Stampin’ Up! White Embossing Powder.

My “Happy Winter” sentiment from the Happy Scenes Stamp Set is slightly hidden.  I intentionally adhered the sentiment just under the Mossy Meadow twigs at the bottom right corner.  In the upper left corner, I added some Mossy Meadow pine needles and a brown pine cone.  I created all three of these elements with the Our Daily Bread Designs Lovely Leaves Dies.

Happy Scenes Stamp Set

The card’s inside:

Happy Scenes Stamp Set

Stamps: Stampin’ Up! Happy Scenes, Outlines Rubber Stamp Co. Snowman

Paper: Stampin’ Up Whisper White and Mossy Meadow Card Stock

Ink: SU Mossy Meadow (trees), Marina Mist (bottom of card) and Prismacolor Colored Pencils (not really “ink”)

Accessories: Gamsol 100% Pure Odorless Mineral Spirits, Our Daily Bread Designs (ODBD) Lovely Leaves, ODBD Pinecones, Ranger White Stickles, Stampin’ Up! Embossing Powders

Enjoy and HAPPY NEW YEAR EVERYONE!


Swallowtail Butterfly

God’s Blessings!

Stamping With Guneaux Designs By Beverly Polen


Happy Scenes Stamp Set

HAPPY SCENES STAMP SET

HAPPY WINTER SNOWMAN

SU Happy Scenes Let it Snow, Let it Snow, Let it Snow

Hi, there!  Thanks for stopping by.  My greeting card share for you today is a simple Christmas card made with the SU Happy Scenes Stamp Set – Let it Snow, Let it Snow, Let it Snow sentiment and the SU Home for Christmas DSP .

SU Happy Scenes Stamp Set, Let it Snow, Let it Snow, Let it Snow

“Oh the weather outside is frightful, but the fire is so delightful, and since we have no place to go, LET IT SNOW, LET IT SNOW, LET IT SNOW!”  Can’t you hear Dean Martin singing this song from his A Winter Romance album?  Oh, sorry!  I’ll get back to the purpose of this post. 🙂

This Christmas card made with the SU Happy Scenes Stamp Set and Home for Christmas DSP is an easy card to make.  I have to admit, it’s difficult for me to make simple cards.  I have a tendency to make more complex cards and paper crafts. If you’ve scrolled through my site, you’ll understand what I mean.


HOW TO MAKE A CHRISTMAS CARD WITH THE SU HAPPY SCENES STAMP SET AND HOME FOR CHRISTMAS DSP:

  • Cut an 8-1/2″ x 5-1/2″ piece of Stampin’ Up! Pool Party Card Stock (item # 122924) and fold it in the middle.  This creates an A2 card.
  • Cut a 4″ x 5-1/4″ piece of Stampin’ Up! Real Red Card Stock (item # 102482) for your first card layer.  I used my Stampin’ Up! Big Shot (item # 113439) and the retired Stampin’ Up! Snow Burst Embossing Folder to add a textured snow impression onto the card stock.  Adhere to the front of the Pool Party card.
  • Cut a 3-3/8″ x 4-5/8″ piece of Stampin’ Up! Very Vanilla Card Stock (item # 101650), and adhere it onto the Real Red Card Stock.
  • Cut a 3-3/16″ x 4-3/8″ piece of the following design from the Stampin’ Up! Home for Christmas DSP and adhere it to the Very Vanilla Card Stock.
Home for Christmas DSP

Stampin’ Up! Home for Christmas DSP (item # 139592

  • Using the retired Stampin’ Up! Festive Flurry Framelits (i.e., the next to the largest framelit), cut out a snowflake from the following design from the Stampin’ Up! Home for Christmas DSP (139592). (I chose a church to be the center of my snowflake).
Home for Christmas DSP

Stampin’ Up! Home for Christmas DSP (item # 139592)

Stampin' Up! Embossing Folder and Festive Flurry Framelits

Stampin’ Up! Snow Burst Embossing Folder and Festive Flurry Framelits

  • Embellish the snow on the design scene with white glitter glue (I used Stickles – Frosted Lace).
  • With a pencil, trace around the second to the largest snow flake die (the same one used above) onto Real Red Card Stock.  Fussy cut it for a mat to go behind the Home for Christmas DSP snowflake cutout.  If desired, run a Silver Gel Pen around the edges of these two pieces, as I did.
  • Use foam dots to adhere the two snow flake cutouts together.  If desired, add a ribbon and/or cord.

SU Happy Scenes and Home for Christmas DSP

SU Happy Scenes and Home for Christmas DSP

  • Stamp the sentiment, “LET IT SNOW LET IT SNOW LET IT SNOW”, from the SU Happy Scenes Stamp Set in Real Red Ink below the snowflakes.
  • That’s all, folks! Have a blessed day!

Butterfly

God’s Blessings!

Stamping With Guneaux Designs

By

Beverly Polen

SU Happy Scenes Stamp Set and Home for Christmas DSP Side View

SU HAPPY SCENES LET IT SNOW, LET IT SNOW, LET IT SNOW